Zwiebelkuchen or onion pie is an ultra-delicious dish that is very much loved in Germany. Try this and you won’t be disappointed!

This post contains affiliate links, which means I make a small commission at no extra cost to you if you click through and make a purchase. See my full disclosure here.
Learn how to make a southern German specialty. This is a fall favorite that tastes and smells so very delicious! Taste it once and you’ll be hooked. This is made with a yeast bread crust traditionally. I’ve included instructions on making this with a sourdough crust as well. Let’s make some Zwiebelkuchen!
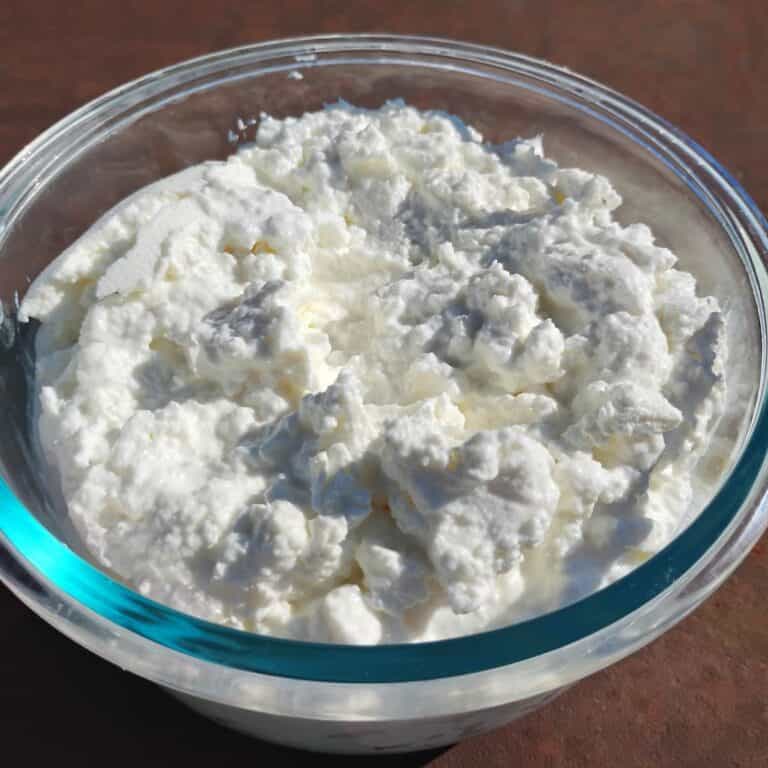
If you like German recipes, you’ll love my easy Homemade Quark Cheese Recipe! And once you make quark, you must try the most delicious Classic German Cheesecake (Käsekuchen). And a fresh Creamy Orange Quark Dessert or this awesome Strawberry Quark Cheese Mousse. Try my easy Kamut And Einkorn Sourdough Bread loaf, or a Rustic Sourdough Rye Bread for a hearty, German style dinner and sandwich bread! And if you’re looking for delicious party-worthy pies, check out my Jalapeño Cheese Pie, a long-time favorite appetizer, and Jalapeño Popper Quiche Cups, perfect for game-days and potluck parties!
Zwiebelkuchen, a German Specialty
When growing up in Germany, my favorite time of the year was autumn. I still am in awe, when the trees showcase their spectacular color display, as the nights get a bit chilly but the days are still sunny and warm. And then there is that comforting earthy, mushroomy scent in the air, mixed with the faint aroma of wood fire smoke escaping from a chimney here and there.
During those crisp autumn days, our family’s garden was slowing down and the harvest had been put up in boxes and jars the cellar. Our apples had been taken to the Mosterei (the town’s cider press) to be returned as delicious fresh cider and much of it got put away in barrels to make hard cider. This also marked the time when the enticing aroma of baked Zwiebelkuchen was returning to German kitchens.
I grew up in Schwaben, a south western German province, and fall could not be without Zwiebelkuchen! It smells so delicious while it’s baking in the oven, which makes it hard to wait for it to be done. Take a taste and be wowed! You’ll know what I mean then. Traditionally it is served with Apfelmost (sweet or hard cider) or a Federweisser Wein, a new, cloudy, un-aged wine made of white grapes. But it goes great with beer too.
And if you’re hosting an Octoberfest party, you’ll definitely want to include this Zwiebelkuchen as part of your spread. It will lend an authentic flair to your feast!
How to make Zwiebelkuchen

There are several ways to make Zwiebelkuchen, but the way I know it is with the traditional yeast pastry and bacon on top! I think it’s best this way, but then, I might be partial, because that is what I ate when growing up. But if you think you’ll prefer a pie crust, I’ve got a really great recipe that makes a super-flaky piecrust and it always works for me. Check out my flaky pie crust recipe.
So lets get started:
Equipment
Cutting board and knife – I prefer hand chopped onions. But you can also use a food processor. Don’t be afraid to cry. It’ll turn into joy once you taste your creation.
A heavy, thick bottom pan – The perfect vessel for cooking those onions to perfection is a thick cast iron dutch oven.
A baking dish – Here you can do several things: My favorite for all savory pies is a large 10 inch cast iron frying pan. But use a quiche pan if that is what you have. In Germany most people use either a spring form of 26-28 inches diameter, or a baking sheet that measures approximately 16 x 12 inches. This makes a flatter Zwiebelkuchen, almost like a pizza that works great cut into small pieces and served as finger food or appetizer at parties. You could substitute with a deep cookie sheet (17×11) for a thin sheet cake. Or you could use a standard 9×13 or 10×15 casserole dish, and your Zwiebelkuchen will be a little thicker then. Adjust your baking time for these sizes accordingly. (30 minutes is probably enough for a sheet cake)
Fork or wire whisk – You’ll be mixing the eggs and cream with this. You could use your mixer too, but don’t create foam.
A large bowl – for mixing your custard.
A mixer – If you have it, use a Hand mixer or Stand mixer with dough hook.
Ingredients
Flour – You can use all-purpose white, whole wheat or whole einkorn flour. I have always eaten Zwiebelkuchen made with yeast leavened white flour dough, and this is how I made one of my pies today. I made a smaller second one too with einkorn and sourdough. Both works, but the sourdough will give your pie a tangy flavor, which I found really quite good, though it was different from what I am accustomed to. I will make it that way again. So use what flour you like, and as always, I recommend an organic flour for health reasons, and if you grind your own, I would grind your whole wheat on a fine setting for this dish. Find the sourdough instructions in “variations” below.
Butter, softened – Use any butter, but the best butter comes from pastured animals and even better if it is organic. It won’t be full of hormones and antibiotics and the milk and fat from them is much healthier to eat and tastes better. I used unsalted Kerrygold butter in this recipe, it’s not organic, but it is from pastured animals.
Active dry yeast – For healthy yeast, try to find GMO free yeast. A lot of yeast is grown on GMO material.
Sugar – Any sugar will work, but I use natural organic evaporated cane juice to avoid GMOs and pesticides.
Milk, warmed – I used fresh goat milk, but any milk will work fine. If you’re concerned about pesticides, GMOs, antibiotics and growth hormones, try to find organic milk, preferrably from pastured animals.
Onions – regular yellow onions are perfect for this dish. I have not tested it with other onions, so if you do, let me know in the comments how it turned out!
Eggs – If your eggs are small, use an extra egg. I used frozen eggs because my chickens quit laying for the season and frozen eggs work great for baking. You can also use water glass eggs in this recipe.
Heavy cream – A lot of people use sour cream instead of heavy cream. That works great too and you’ll get a bit of tanginess in your pie. Use what you have.
Salt – While any salt will work, I prefer Redmond’s Real Salt, Himalayan pink salt, or Celtic sea salt, for their mineral content.
Pepper – Use a few turns of fresh ground pepper from the peppermill. Otherwise about half a teaspoon or so of any pepper is fine.
Nutmeg (optional) – Germans like nutmeg in most of their baking and egg dishes. I think it’s as commonly used as salt and pepper. It gives your pie a nice, deeper flavor.

Bacon – While Onion is the Queen in this recipe, Bacon is the King. That is if it’s good bacon. You could use any bacon, but if you want this to be a killer Zwiebelkuchen, then you’ll need to put the best bacon on the throne. This will elevate the pie from great to excellent. Use a smoked, traditionally cured bacon for this from a butcher who knows how to make good bacon, or make it yourself. I’ll be posting instructions soon. Get on my mailing list if you don’t want to miss it! I used my home cured and cold-smoked bacon from my American guinea hog x Kunekune crosses. They make super rich bacon on the fatty side and it tastes excellent!
Caraway seeds (optional) – While it is essential in my book, not everyone cares for caraway seeds. So I made it optional, lol. You can leave it out if you wish, although it will lack a key flavor. If you just don’t care for the hard seeds on your pie, but like the flavor, try grinding it before sprinkling it on. If you can’t get them in the store, here is an online source for caraway seeds.
How to make Zwiebelkuchen:
Prepare your pie shell

Mix flour, yeast, salt and sugar and add most of the warm milk. With a hand blender, outfitted with dough hook, knead this to make a slightly firm but pliable dough. If it’s too firm, add more milk if necessary. In case that it’s too soft, add a little more flour. If you don’t need all the milk, just drink the rest. Yum!


After your dough has a good consistency, add in the softened butter and keep kneading until you have a nice pliable, smooth dough, about 5 minutes or a bit longer if necessary.
Butter or oil your dough lightly, put a cover on your bowl and place it in a warm place to rise. I put mine under the hot wood stove, but you can put it in an oven with the pilot light on, or warm your oven, turn it off and put your bowl with the dough in it.

Let the dough double (½ hour to an hour depending on how warm it is)
In the meantime, prepare the filling

01. Dice your onions

I recommend you do this outside and it’s especially helpful when its windy out. I do most of my cooking outside and never cry over onions there. It’s when I chop them inside that I have a problem with burning eyes.
I also heard that chopping them near running water helps with the tears, but I hate to think how much water gets wasted that way, maybe catch it in a bowl and water the plants with it?
You can also cut them into quarters and process them in your food processor. I prefer hand-chopped onions, the processor chops them too small for my liking.
Some recipes call for sliced onions, but I don’t recommend it. It will make the pie hard to slice and harder to eat. Plus it tends to fall apart that way as soon as you stick a fork in it. Definitely avoid it if you want to make a sheet pie for finger-food appetizers.
02. Cook the onions

Melt the butter in a heavy pot. My favorite is a cast iron dutch oven. It’s perfect for cooking these onions. After the butter is melted and hot, add the onions. You don’t want to brown them, but saute them on a low-med heat till they are all translucent and soft, and stop just before they turn golden. You can add a splash of water if necessary to keep them from sticking to the pan.

Cooking the onions is a crucial step. You’ll want to get those onions right! If they are underdone, they will not make a good pie. Likewise, if they are overdone. So keep an eye on them and let them take their time. It can take from 10 minutes to 20 minutes. Mine actually took 30 minutes, because it was windy out and the flame was not consistent. If it’s done right, the onions will develop a bit of sweetness and are nice and soft.

03. Mix in the flour

Turn off the heat and sprinkle with the flour, then mix well. You can keep them in the pot and mix in the custard or put the onions into the custard. Choose what works best. I transfered the onions to a bowl because I needed to use the dutch oven to cook my surplus home-grown mushrooms for the freezer.
04. Prepare crust

Once your onions are done, set them aside to cool a little. While they cool, take your doubled in size, risen yeast dough and press it into a greased and floured baking pan. If you’re using a seasoned cast iron pan, you wont actually need to flour it, just lightly grease with butter (I use the butter wrapper for this).

Cover the pie crust with a cloth and let it rise in a warm place for about 10 minutes, till slightly puffy, while you finish working on the filling.
Preheat your oven to 390 degrees F.
06. Prepare the topping
Dice the bacon into small squares. Fatty bacon is the best! Set it aside. Don’t cook it.
07. Make the custard

Crack the eggs and drop them into a large bowl. Add the cream and whisk it all together till it’s well combined, with a fork or wire whisk.
08. Combine the filling ingredients

Add the custard to the slightly cooled onions or the onions to the custard. Mix to combine.

Add the spices. Use salt somewhat generously. I taste mine. Add some pepper and the optional nutmeg if you like it and mix it all well.

09. Fill the crust
To proceed, make sure that your crust has become puffy, if it’s not, let it rise another few minutes. Poke a few holes into the bottom with a fork, then pour the filling into the crust.

10. Add the toppings

Sprinkle the bacon over it evenly. It will toast and get crispy during the baking and add a bit of rendered lard to your crust, giving it a nice golden color and delicious flavor.

Sprinkle with caraway seed if you’re using them. I grew up eating it with caraway seeds, and to me they are not optional. But if you don’t like them, leave them out. Caraway will do two things: Add flavor and help with digestion.
11. Put the pie into the oven and bake it

Place your pan into the center of the oven or on the shelf rack in your grill. A piece of aluminum foil with the shiny side down, placed on the rack below the pie, helps to keep the bottom from getting too dark.
Bake for 45 minutes. It should be golden on top and the center should be firm when pressed.
When it’s finished, take it out and let it cool slightly before cutting into it. I know that’s hard, I struggle with patience every time, but it will cut better and stay nice and moist if you wait a few moments, and you won’t burn your mouth!
Ok, now you can go ahead. Cut a piece and taste it. If you’ve never had Zwiebelkuchen, you’re in for a treat. Close your eyes and get a whiff of the scent before you put it in your mouth. It’s divine. In fact, my mouth is watering just now writing about it and I just put a slice in the oven to heat for breakfast. Yummm!
Notes:
If you notice that your edges are getting dark before the pie is done, you can cover the rim with strips of aluminum foil.
You can store this in the refrigerator for several days if you have any leftovers. It also freezes well if you’re the only one eating it. Or you could share some with a friend who will love you forever and probably want the recipe. So feel free to share it!
Enjoy this dish hot or cold. It makes a great cold lunch, but I prefer it heated. Don’t heat it in the microwave! Horror! Use a convection oven or regular oven and just heat for 10 minutes or so. I heat it in my grill up on the shelf.
Variations and Substitutions:
- Mini Pies: Make this into mini tarts using a muffin tin! Then you can take it to a potluck party or serve it as an appetizer. Just roll out the dough or flatten it with your hands to be fairly thin, use a large round cookie cutter or empty can, to make little round pie crusts and line the greased and floured muffin tins, fill, sprinkle with bacon and caraway seeds and bake till the top is golden and the filling is firmly set. If you have extra, make a mini pie with it.
- Substitutions: In place of the cream in the filling, you can use one of the following for a more tangy flavor: Sourcream, creme fraiche, strained bonnyclabber, or greek yogurt. Lots of recipes use the sour cream and I like it that way too if I have it.
- Can I use a no-yeast pastry crust? – Many recipes use a regular butter or lard pie shell. While the traditional recipes call for the yeast dough, a pastry crust will taste awesome too if it’s easier for you to make or if you don’t have yeast on hand. I’ve got a great recipe for a lard pie crust that I use in a yummie savory pie recipe that I’ll share with you soon. You can sign up to get my notifications here.
- Sourdough option: If you like, and maybe you have a wheat intolerance, you can make this with a sourdough leavened dough. Make the same dough, but instead of the yeast, add a half cup of active sourdough. You can use whole einkorn flour, which is tolerated by many people who cannot have gluten. Let it rise about 4 hours after kneading, refrigerate for at least 24 hours for a long ferment, this will break down phytic acids, which also cause wheat intolerance. Take it out of the fridge and let it come to room temperature (so its easier to work with). Spread it out in your greased pan and let it rise, covered with a cloth, for about 2 hours in a warm spot before filling. This will lend tanginess and it tastes quite good although a bit different from what I am accustomed to.
En Guada! Enjoy!

Well, whether you’re German or not, I think you will love this onion pie. It smells amazing, tastes utterly delicious and will turn you into a foodie, just warning you! You’ll get a taste of German tradition and if you pair it with a new white wine or a hard cider, you’ll take part of an old ritual that is lovingly practiced each fall in my home land.
If you like this recipe, let me know in the comments and give me a thumbs up! To get more recipes in the future and practical tips for homesteading, gardening, preserving foods and more, sign up to receive my food for life garden newsletter!
For a limited time, get some FREE garden wall art. Get your downloads here:
More recipes for you to try
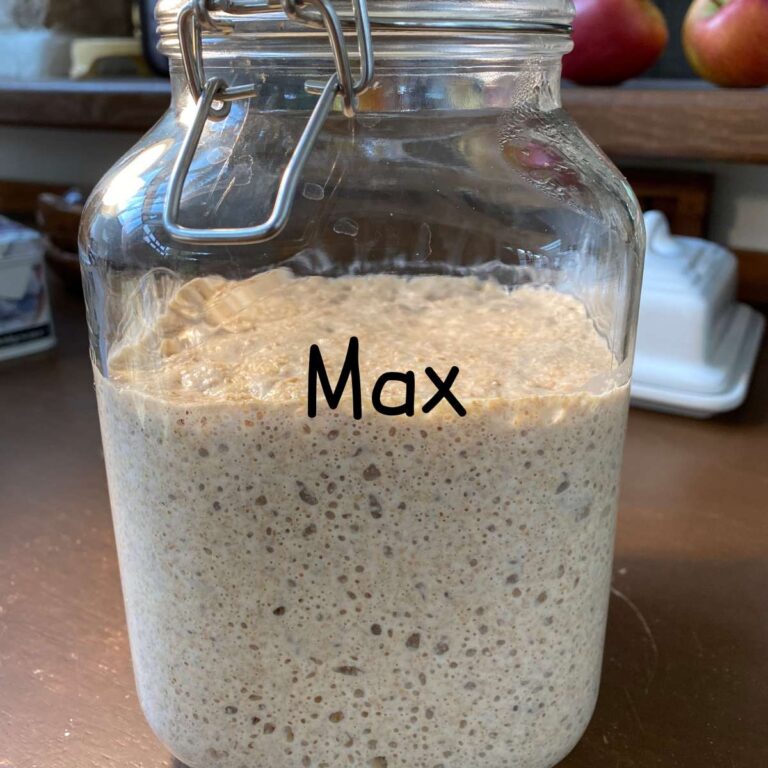
Sourdough Starter – Sourdough starter from scratch using just flour and water. Learn how sourdough works and how you can use it to bake delicious breads without yeast!
The best Sourdough Rye Bread – Easy, lazy method that makes super delicious, moist, chewy rye bread to partner with your favorite cheese.
Sourdough Seeded Rye Bread With Spelt – If you are a fan of rye bread, you need to try this awesome seeded rye. Loaded with whole grain berries and seeds, awesome with cheese.
Ancient Grain Sourdough Bread – The easiest sourdough sandwich style bread you can imagine. No kneading required and it bakes up with a great dense but airy crumb that’s chewy and tastes amazing.
Jalapeño Cheese Pie – A long-time favorite dish of mine that I make each year when my jalapenos put out fruit in the garden. It’s an old recipe that makes an awesome appetizer, potluck dish, or game-day treat.
Best Flaky Pie Crust – Check out my best flaky pie crust recipe. Perfect for all your harvest and holiday pies! Lost of options for customizing.
Jalapeño Popper Quiche Cups – Jalapeño popper quiche cups are little creamy savories in a flaky pie crust for parties, potlucks, holiday spreads, game day treats, snacks, or lunch. Great to make ahead and freeze!
Ham Jambalaya – A perfect recipe for using leftover meat and veggies. I love it for leftover Christmas or Easter ham!
Preserve Eggs In Lime Water – Store fresh eggs for a year or longer in a lime water solution and use them like fresh eggs even after a year.
Healthy Stuffed Peppers With Vegetable Gravy – These healthy stuffed peppers are easy, gluten-free, and delicious, but they become extraordinary with my fantastic garden vegetable sauce!
Classic German Cheesecake (Käsekuchen) – How to make an incredibly delicious German cheesecake using Quark or an alternative cheese. Must try this!
Fermented Onions – You’ll love these tasty, tangy onions. Try them plain or spiff up any sandwiches, salads and burgers with a ready supply of these onions sitting in your fridge.
Hearty Mushroom Chowder – A delicious, rich and flavorful chowder that can easily be adapted to any ingredients you have in your pantry!
Mushroom Risotto – delicious gourmet flavored rice dish that’s easy to make and it’s a perfect way to highlight the flavor of mushrooms.
Dutch Babies Recipe – Here is a great breakfast recipe for any time! A simple oven pancake with so many serving possibilities, from sweet to savory

Zwiebelkuchen – A German Tradition (Onion Pie Recipe)
Equipment
- Cutting board and knife – You could use a food processor
- A heavy, thick bottomed pan – I recommend a cast iron dutch oven
- A 10 inch, deep baking dish – Use a quiche or deep pie dish or you can use a large 10" cast iron frying pan, my preference. In Germany we mostly used either a 10" springform pan or a baking sheet, roughly equivalent to our 13×18" half sheets, which will yield a flatter pie, that would be easier for use as finger-food or for an appetizer tray.
- Fork or wire whisk
- A large bowl
- Blender with dough hook – While you can knead with your hands, a hand blender or stand mixer will make it quicker and less messy.
Ingredients
For the Pastry Shell:
- 2 cups all-purpose flour (250g) – You can use unbleached white flour, whole wheat flour or einkorn flour.
- ¼ cup butter, softened (50g)
- 1 tsp active dry yeast (½ cube fresh yeast)
- 1 tsp sugar
- 1 tsp salt
- ¾ cup warm milk (150 ml) use the amount given and add a little more if needed.
For the Onion Filling:
- 2½-3 lb yellow onions, diced (1250g or about 6-8 medium onions)
- ½ cup butter (100g)
- 2 tbsp flour
- 4 large eggs
- 7 fl oz heavy cream (¾ cup + 2 tbsp) (200ml)
- 2 tsp salt or to taste
- Pepper – I like to use freshly ground
- 2 Pinches of nutmeg
Topping:
- 1 cup quality bacon, diced
- 1 tbsp whole caraway seed – optional
Instructions
Prepare your pie dough
- Mix flour, yeast, salt and sugar and add most of the warm milk. With a blender, outfitted with a dough hook, knead this to make a slightly firm but pliable dough. If it seems too firm, add more milk. if you don't need all the milk, just drink the rest. Yum!
- After your dough has a good consistency, add in the softened butter and keep kneading until you have a nice pliable, smooth dough, about 5 minutes or a bit longer if necessary.
- Butter or oil your dough lightly, put a cover on your bowl and place it in a warm place to rise. I put mine under the hot wood stove, but you can put it in an oven with the pilot light on, or warm your oven, turn it off and put your bowl with the dough in it.
- Let the dough double (½ hour to an hour depending on how warm it is)
In the meantime, prepare the filling
- Dice your onions. I prefer to hand chop and for that, I recommend you do this outside and it's especially helpful when its windy out. I do most of my cooking outside and never cry over onions there. It's when I chop them inside that I have a problem with burning eyes.You can also cut them into quarters and process them in your food processor.
- Melt the butter in a heavy pot. My favorite is a cast iron dutch oven. It's perfect for cooking these onions. After the butter is melted and hot, add the onions. You don't want to brown them, but saute them on a low-med heat till they are all translucent and soft. Stop just before turn color. You can add a splash of water if necessary to keep them from sticking to the pan.
- Cooking the onions is a crucial step. You'll want to get your onions right! If the onions are underdone, they will not make a good pie. Likewise, if they are overdone. So keep an eye on them and let them take their time. It can take from 10 to 20 minutes. Mine actually took 30 minutes, because it was windy out and the flame was not consistent.
- Turn off the heat and sprinkle the 2 tbsp of flour over the onions, then mix well. Set them aside to cool a little.
Line your pan with the dough
- While the onions cool, take your risen yeast dough and press it into a greased and floured baking pan or sheet. If you're using a seasoned cast iron pan, you wont need to flour it, just lightly grease with butter (I use the butter wrapper for this). Now cover with a cloth and let it rise in a warm place for about 10 minutes, till slightly puffy, while you finish working on the filling.
- Preheat your oven to 390 ℉ before you proceed.
- Chop the bacon into small squares. Fatty bacon is the best! Set it aside. Don’t cook it.
Make the custard
- Crack the eggs and drop them into a large bowl. Using a fork or wire whisk, blend them well. Add the cream and whisk till it's combined.
- Add the custard to the slightly cooled onions or the onions to the custard. Whatever works best for you. Mix to combine. Add the spices. Use salt somewhat generously. Add some pepper and the optional nutmeg if you like it and mix well.
Assemble your pie
- To proceed, make sure that your crust has become puffy, if it’s not, let it rise another few minutes. Poke a few holes into the bottom with a fork, then pour the filling into the crust.
- Sprinkle the bacon over the filling evenly. It will toast and get crispy during baking and add a bit of rendered lard to your crust, giving it a nice golden color and delicious flavor.
- Sprinkle with caraway seed if you're using them. I grew up eating it with caraway seeds, and to me they are not optional. But if you don't like them, leave them out. Caraway will do two things: Add flavor and help with digestion. If you like the flavor but not the whole seeds, just grind them and sprinkle the powder over your pie.
Bake the pie at 390℉
- Place the pan into the center of the oven or on the shelf rack in your grill. A piece of aluminum foil with the shiny side down, placed on the rack below the pie, helps to keep the bottom from getting too dark.
- Bake for 45 minutes. It should be golden on top and the center should be firm when pressed. If you're making the sheet cake, check on it after 30 min. It's flatter and will be done sooner.
- Now take it out and let it cool slightly before cutting into it. It will cut cleaner and stay nice and moist if you wait.
- Cut a piece and taste it. If you've never had Zwiebelkuchen, you're in for a treat. Close your eyes and get a whiff of the scent before you put it in your mouth. It's divine. In fact, my mouth is watering just now writing about it and I just put a piece in the oven to reheat for breakfast. Yummm!
Notes
Variations:
Many recipes use a regular butter or lard pie crust. I’m sure that will taste awesome too, and if you might prefer that, or if you don’t have yeast on hand, give it a go with my delicious super flaky pie crust. Make this into mini tarts using a muffin tin! Then you can take it to a potluck party or serve it as an appetizer. Just roll out the dough or flatten it with your hands to be fairly thin. Use a large round cookie cutter to make little pie crusts and line the greased and floured muffin tins, fill, sprinkle with bacon and caraway seeds and bake till the top is golden and the filling is firmly set. If you have extra, make a mini pie with it. In place of the cream in the filling, you can use one of the following for a more tangy flavor: Sourcream, creme fraiche, strained bonnyclabber, or greek yogurt. If you like, you can make this with a sourdough leavened dough. Make the same dough, but instead of the yeast, add a half cup of active sourdough. You can use whole einkorn flour in place of the white flour. Let it rise about 4 hours after kneading, refrigerate for at least 24 hours, take it out and let it come to room temperature (so its easier to work with). Spread it in your greased pan and let it rise, covered with a cloth, for about 2 hours in a warm spot before filling. This will lend tanginess and it tastes quite good although a bit different from what I am accustomed to.Enjoy your Zwiebelkuchen!
Well, whether you’re German or not, I think you will love this onion pie. It smells amazing, tastes utterly delicious and will turn you into a foodie, just warning you! You’ll get a taste of German tradition and if you pair it with a new white wine or a hard cider, you’ll take part of an old ritual that is lovingly practiced each fall in my home land.Pin this post

Shop this post
Food processor
Cast iron dutch oven
Cast iron frying pan
Einkorn flour
All-purpose white organic flour, get organic bulk foods from Azure Standard
All-purpose white organic flour, Amazon Brand
Hand mixer
Stand mixer
Redmond’s Real Salt
Himalayan pink salt,
Celtic sea salt


I’ve been craving Zwiebelkuchen so much lately! Can’t wait to make this recipe.
Hello Chris! Enjoy it or as we’d say in southern Germany, En Guada!
I’ve never heard of this before, but now I’m itching to try it! Thanks for sharing this recipe!
It’s delicious! I loved eating it at our annual church thanksgivings back in Germany and I don’t think I make it often enough! I hope you get to try it!