How does sourdough starter work? Make a bubbly, active sourdough starter the easy way using just flour and water.

This post contains affiliate links, which means I make a small commission at no extra cost to you if you click through and make a purchase. See my full disclosure here.
Here you’ll learn how to make a sourdough starter from scratch. How to use it in a recipe and how to maintain and store it.
Sourdough Bread is a staple in many countries. It was the original way to make bread, before modern style yeast bread, which is made with freeze-dried, lab-cultured yeast. Sour dough is very easy to make at home. You can make it with just flour and water. It takes about a week to make a strong sour dough and then you can make bread with it from scratch.
Jump to Sourdough Starter Recipe
Jump to How Does Sourdough Starter Work
Jump to Sourdough Maintenance
This post has been updated on Oct 14, 2024
Do check out my lazy recipe for Kamut Sourdough Bread! It’s so easy and no kneading or stretch and folds, just mix, proof in the fridge for a few days and bake. Easy Peasy! And if you’re a Rye fan, try making No-Knead Rye Bread! And don’t miss this delicious and cozy Sourdough Pumpkin Cake with Apple, Ginger and Pecan Streusel a breakfast cake, coffee cake or teatime cake. Or a great snack for any time. For a wonderful blackberry treat, try my sourdough blackberry cobbler. And did you know that you can make your own cheese with sourdough starter? Give it a try and make Cheese Culture From Sourough Starter!
How does Sourdough Starter work and how to make it from scratch
I am obsessed with Bread. Sourdough bread that is. And I have been my whole life. Growing up in Germany, sourdough bread was everyday, all-day fare. We had it for breakfast, for “Vesper” which is a mid morning snack, for lunch and for dinner. And I was in love with it then and never under appreciated it just because it was common fare.

After moving to America and finding nothing but rows and rows of white fluff in plastic bags, which was called bread here, I realized that I needed to start making my own, if I wanted real sourdough bread. So that is when I set out to learn about sourdough. At the time, there was little internet and most of what you would want to learn, could be found in printed books. Here is the story about Max, my first sourdough.
Adventures with Max
And, I still have my first sourdough and have kept him going throughout the last 30 years. His name is Max. Back then, I started him with flour, water, and yes, organic grapes!

I mashed those grapes and mixed them with the flour and water. The theory behind it was that the beneficial yeasts that are present on grape skin, would act as an inoculant for the sourdough, to steer it into the right direction. I realized later that this step is not necessary, there are plenty of yeasts and bacteria in the flour and the environment to get a sourdough started. But it was how I learned to make it from a really cool book by Nancy Silverton, Breads from the LaBrea bakery. I made all my first sourdough breads, bagels and pretzels following her instructions, but once I understood the concept, I quickly ventured into creating my own variations.
So when I first created Max, some of the micro critters came from those grapes. Miss Silverton’s instructions for starting a sourdough required huge amounts of flour and water and several feedings a day. It was a big affair.
Learning how sourdough starter works points to an easier way!
Now when I make a sourdough from scratch, I’m choosing the easier route with just flour and water, I keep the volume much smaller, and I only feed once a day. I don’t like having a quart of discard to deal with every day.
Starting a sourdough is not complicated science, and it makes a lot more sense now that I actually understand how sourdough works and what kind of animal it is. Your attempt will more likely succeed than not just because you’re dialing into a process that nature has already set out to accomplish, even without our help.
How Does Sourdough Starter Work?
The process of making sourdough starter is borrowed from a natural process of decomposition. It is a predigestion of material by yeasts, fungi and bacteria. This same phenomenon happens with Kimchi, Cheese, and even compost. It involves nature’s allies pre-digesting material to turn it into a more digestible form for the next in line to partake of. With sourdough that happens to be you and me. With compost, I prefer to leave that step to the earthworms, centipedes and pill bugs.
When mixing flour and water an enzyme converts starch into simple sugars that are available to the first on the scene yeasts, fungi and bacteria. When you leave flour and water sitting in a warm spot for a few days, all sorts of micro-critters come along to enjoy those various sugars and break down that flour paste.
Meet your team of specialist microbial workers

Yeasts and lactic acid bacteria are the most active in an established sourdough. Wild yeasts are the leavening agent which produces carbon dioxide. This creates the bubbles that will make the bread rise and help it to become light and fluffy.
The lactic acid bacteria on the other hand will start to sour the dough till it is sour enough so that other ‘bad’ bacteria can’t survive and will die off. This will ensure that there are primarily the lactic acid bacteria (LAB) and a few acid-tolerant yeasts in the mix. Exactly what we want in a sourdough starter.
As in all lacto-fermentation, the objective is to create an acidic environment that will become inhospitable for the bad guys. This helps your sourdough to stay healthy just like it does with fermented pickles, vinegar and cheese.
The lactic acid and acetic acid that are produced will give your bread that signature tangy flavor and aid in the preservation of the sourdough. The acidity of the dough will assure that the good bacteria prevail. And it is the reason that your sourdough starter doesn’t turn into a putrid stinky pathogen infected mess, as long as you keep the microbes fed and give them the proper environment to thrive.
If you care for your sourdough starter, it can remain viable for generations. Just be sure to feed it regularly with fresh flour and water. Look up sourdough maintenance for the proper care of your new starter.
All about the idiosyncrasy of your starter
What is really cool about your sourdough is that it is never the same from one place to the next or from one day to the next. And it will always be different from any other sourdough out there. Through the years, I thought of my Max as being a specific sourdough strain, a copy of the sourdough at the LaBrae bakery, since I followed their recipe.
But when you learn more about microbes and how it all works, you’ll soon realize what I figured out eventually too. My Max is its own animal. And he is not the same that he was back in Barnstead, NH 30 years ago, when I first started him. He’s evolving continuously and adjusting to all the new environments that I introduce him to.
There is no equality in nature!
You and I could start a sourdough on the same day with the same flour, take it home and feed it at prescribed intervals and, well, you guessed it, end up with two whole different end products. Sourdough gets its character and types of bacteria from many influences. The major players here are yeasts and lactic acid bacteria. Exactly which ones they are and in what capacity they operate however, is determined by several factors.
There are bacteria in your environment, like in your kitchen, on your hands, and in the water you use. All these are opportunists and will jump into a nice looking flour paste when they see one. They will all compete for the top spot and try to produce offspring. Who will prevail?
You need to factor in the temperature inside the room where your starter resides, the ‘wetness’ of the starter, and the flour certainly makes a difference. Microbes respond to what they are fed. If you use white flour, you’ll have a much different set of bacteria and yeasts from that, which likes to inhabit whole Wheat, Spelt, Rye, Emmer or Einkorn. And of course, a mix of flours creates an even more diverse “micro-herd” of critters, eating away at the various sugars in your flour paste.
The microbial community in sourdough affects flavor
Each microbial community produces its own flavor and scent too. I once smelled a friend’s sourdough and it had a vinegary smell to it. Mine at home smelled more winey. We both used whole wheat flour to feed the creatures. Your bread will have a specific flavor and makeup that’s all its own, and which is location specific too. Environmental conditions determine much of the character of the starter and who is dominant from one day to the next.
That’s because the temperature in your room could be higher, or your flour was less fine or you added a tad more water to the feeding than yesterday. If it just came out of the fridge, it may have less active microbes than if you kept it on the counter. If you always keep it on the counter and feed it every day, you’re promoting faster growing bacteria and yeasts versus having the slower growing ones dominate when you keep it in the refrigerator most of the time.
There is a whole lot of scientific data coming out about such processes and while I find it fascinating and I do like to read about it, I come away with the same simple takeaway each time. That no micro-biome is the same from the next and that diversity is always better.
There is definitely a ‘terroir’ aspect to making your own sourdough bread. And we can’t copy our neighbor’s recipe exactly, ever. Not in sourdough, not in cheese, not in wine and not in fermented kraut. It is always our own specific brew that will change even in the same home from day to day and that can change even more if we move from one place to another.
Temperature
How fast sourdough rises and what bacteria or yeasts are most active depends much on the ambient temperature in the room. Yeasts and lactic acid bacteria have different requirements as far as their happy place goes, but they will both work in cooler and warmer conditions than their ideal.
The sweet spot for the best synergetic interaction of these main players is 72-78 degrees F. This is the temperature where both, the yeasts and the lactic acid bacteria are able to put out a great performance. Lower temperatures work, but your bread won’t rise as quickly as it will at the ideal temperature.
If the temperature is much above this sweet spot, you’ll get very high activity and an overly sour loaf. So while a wide range of temperatures work, your best breads are going to come out of a kitchen with the ideal working temperature for your microbial friends.
Lactic Acid Bacteria Make Nutrients in the Grain Bio-available
When making natural starters and fermentation based foods, we’re employing live microorganisms that work to make our food more digestible. At the same time they make the minerals and vitamins, which exist in our food, bio-available for our bodies. These would otherwise pass through us largely unused. How cool is that?
One beneficial side effect from the action of lactic acid bacteria is that they activate the enzyme phytase. This enzyme acts on phytic acid, an anti-nutrient of ‘leaky gut’ fame, that is present in the grain and all plants for that matter. Phytic acid serves to protect the nutrients in the grain from leaching out, and causes reduced absorption of such nutrients when we eat it. It can also chelate minerals, which makes them unavailable to our digestive system.
In nature, this is meant to ensure a good germination rate and the availability of all these nutrients to the new seedling when it is ready to germinate. Enter phytase, our ally, which makes these minerals and other nutrients in the grain more available to us by neutralizing the “enemy”, phytic acid.
Ok, let’s set the record straight. Phytic acid is not all bad. It contains antioxidants that can fight cancer, and we do need some of that too. But we likely get plenty of it with the vegetables that we eat. Most American diets include too much phytic acid, because of how we prepare our foods and that can be one reason that we lack nutrients in our diets.
The trouble with phytic acid and modern food processing

When grains are eaten without neutralizing the phytic acid, we cannot properly digest the grains and many of the nutrients that are in them, will not be accessible to us. This is one factor that can contribute to wheat intolerance. And this is why our ancestors used to soak grains, rice and beans before cooking them.
In the old days, grains were left in the field for a few weeks after harvest, in grain shocks. The grain would start to go into germination phase while sitting out and getting damp in the morning dew. This neutralized the phytic acids, which now made the grain fit for consumption. The grain was then stored when dry. Then it was ground into flour and fermented with sourdough before baking, to increase digestibility and nutrient content.
Modern practice is to use pesticides to desiccate (quickly dry) the wheat while it’s still growing in the field. Once dry, it gets combined, threshed, and put into storage right away. No sitting out in shocks and germinating in the field as before. It’s a hurried, mass-applicable approach to harvesting to the detriment of healthy nutrition.
Corn in Mexico was routinely nixtamalized to render it more digestible and to make nutrients accessible for humans to uptake. Nixtamalization is the soaking of corn kernels in lime water. You can still find nixtamalized corn in hominy, tamale flour and some tortillas, but Conquistadors, who introduced corn to the rest of the world, failed to adopt this practice.
As a result, people who started to rely on mostly corn for food, ended up sick from nutrient deficiencies. Our modern cornbread, which uses ground untreated corn flour, will not be as digestible and nutritious as flour from nixtamalized corn such as in the Mexican nixtamal. Here is a great article on nixtamalized corn if you’re interested in learning more.
Recognizing the importance of pre-digestion
I think most people don’t realize how the pre-treatment and pre-digestion of grains is so important. I don’t know how our ancestors knew all this without having the science that we have available now. But I like to take all these anecdotal suggestions into consideration when I research topics.
Having gotten away from these practices is why we lack proper nutrition even if we eat a fairly healthy diet. Of course there is much more to it, such as modern production techniques and the brew of chemicals and pesticide our food is doused with before it hits our plates. But that is for another day to discuss.
Gluten becomes more tolerable
In bread-making, another benefit in sourdough, due to the presence of lactic acid bacteria is that its protease enzymes break down gluten during proofing time, which results in a bread that is better tolerated by humans. Sourdough bread can be tolerated by many people who have a sensitivity to modern wheat gluten.
If you use ancient grains, this is even more true. Gluten in ancient grains is more fragile and our gut bacteria can break it down easily. Using sourdough to pre-digest it will make it even easier to digest in our guts.
Funny that with all the science we now have access to, we are just now recognizing what our ancestors knew all along without it. Science is just now grudgingly allowing that Gram and Gramps were right after all, even without labs and petri-dishes. In our modern society we turned away from much of this ancient wisdom and are now looking to science to guide us instead. I think that is a big mistake. Science can explain some of the why’s but it can’t replace intuition and generational experience and it is surely not up to speed on much of what our ancestors, and nature for that matter, knew since long ago.
Meanwhile, we are silly enough to insist that science validate these things before we believe them. We also must recognize the fact that they are withholding beneficial information and tweaking findings, due to certain influential people who lobby them to say what they pay them off for. Shoot, I’m going off on a rant here, I’ll stop.
THE best way to start a sourdough starter
So how does sourdough starter work when making it from scratch? How do we go about making a strong sourdough starter that will give great flavor to our bread dough and make it rise? It’s really pretty simple, but there are a few rules to follow if you want your project to be successful. Give the whole process at least 7 days, better yet, a month for a mature strong sourdough starter.
Materials:
A clean 1 quart glass jar with a lid. A regular canning jar with a wide mouth works perfectly.
Ingredients:
Flour:

The type of flour is not so important. It can be any flour, but it should not be bleached. I like to grind whole grain into flour and use that. But you can use white flour, all purpose flour, whole Wheat flour, Rye flour, Spelt, Einkorn, Emmer, or Khorasan flour. Or use any mix of these. Find sources for ancient grain berries and flours below.
I prefer to use the kind of flour that I will be baking with, so the bacteria and yeast that are attracted will know what to do and be ready to act, when they are introduced to the bread dough at baking time later. This will matter less with a mature starter, but it’s not bad advice to follow.
The amount of flour you use depends on how much starter you are working with. If you have ½ cup of starter, feed it ½ cup of flour and ¼ cup of water. Starter:Flour ratio is 1:1.
Water:
This can be any filtered water, bottled water, well, rain, or even tap water if you leave it on the counter for 24 hours to get rid of the chlorine in it. Chlorine is an antibacterial substance and can affect and possibly kill the bacteria you’re trying to nurture. Use room temperature warm water, 70-90 degrees is good.
Days 1-2:

First step is to place ½ cup of flour and ¼ cup of water in a quart canning jar. Stir it well. Cover and let it sit on the counter in a warm place. You’ll have the best results at 75-80 deg F. Keep it fairly warm so the lactic acid bacteria (LAB) can multiply quickly to get rid of pathogens in your starter. You can use a regular canning jar lid to cover it. There will be plenty of available bacteria and yeasts already present to get started. The lid does not need to be permeable.
You’ll see the fermentation process start in your flour paste as the natural yeast begins to develop carbon dioxide to form bubbles and your lactic acid bacteria will begin to sour the starter. Leave it to do its thing for 2 days.
I had an unsuccessful starter once, a few years ago, when my room temperature was below 65 deg F for much of the time during winter. It turned putrid and I suspect the reason for the failure was that it was too cold for the LAB, who love warm temperatures, to multiply. Instead other organisms started to dominate and crowd out everything else before the starter was sour enough to kill them off. That attempt went to feed the compost pile.
Day 3:

By now you should have had a nice bubbly fermentation and at this point, it is most likely getting deflated. That’s because the yeasts have run out of food and will need more to wake up again. Take about half of the starter out of the jar and use it to feed the pigs, chickens, or compost. Or place it in a jar that you can keep in the fridge where you can collect the discards over the next few days or weeks to use in recipes. Tip: You can use it as a starter to ferment my pig or chicken grains to increase the nutritional value.
Feed your starter again ½ cup of flour and ¼ cup of water. Replace the lid and let it ferment in a warm place for another 24 hours. By then it should start to smell slightly sour. It will probably still have a bit of an unpleasant smell to it, but that is ok, those lactic acid bacteria are working and it will be just a matter of time before they get the starter sour enough to get rid of any unpleasant inhabitants.
Day 4-5:
Proceed each day the same as on day 3. Discard half of the sourdough and then give your starter ½ cup of flour and ¼ cup of water. The next day do the same.
I recommend that you keep this procedure going for at least 2 weeks, better 4 weeks, to build a strong, healthy starter. But you can use it in baking after just a week. It might not be as good yet as it will be eventually, but it’ll do the job.
You can keep this exact same regimen going for as long as you like, however if you’re planning to bake with it, you will want to start increasing your amount of starter.
So if you’re going to bake with it on day 7, then, on Day 6, there will be special instructions to prepare for baking. Otherwise, just continue on with the same feeding as today until you decide it’s time to bake.
Day 6:
If you have a very active sourdough, you can consider baking with it tomorrow.
Decide if you want to bake with the new sourdough tomorrow, on day 7. And if so, don’t discard any. Just feed it twice as much today: 1 c of flour and ½ c water.
If you aren’t going to bake yet, then do as you did on day 5. Discard half and feed ½ c flour and ¼ cup of water.
Day 7:
By day 7 you will have a pretty good sourdough. It should smell pleasantly tart and have a nice bubbly presence.
Do not discard any sourdough if you want to bake today, you’ll need a cup of it at least to bake with and then some to keep the sourdough starter going until your next baking day.
If on Day 6 you fed it 1 cup of flour and ½ cup of water, then today feed it 1 ½ cups of flour and ¾ cups of water in the morning and by afternoon you can bake with it. Your sourdough needs 4-6 hours to get active for baking.

If you’re ready for that next step, try my easy Kamut sourdough bread recipe. It’s simple and will be a great recipe to start with. It will have a super pleasant light tang and taste amazing. Or, if you’re a fan of rye bread, you must try my Rye Sandwich Bread or this awesome Sourdough Seeded Rye Bread.

Day 8 onward:
You are now the proud owner of a nice, bubbly new sourdough starter that can be used for baking. You can give the little beasty a name if you like, since you’ll be using and referring to it a lot I hope. Sourdough starter is essential in making natural and traditional foods.
After baking keep ½ cup of the starter and discard the rest. Then feed it ½ cup of flour and ¼ cup of water. Keep doing that for at least another week to create a strong, mature, pleasantly tart sourdough starter. You can keep more if you want to have a bigger batch going, of course, just adjust the feedings to keep the right ratio.
After 2 weeks, you will have a more mature starter, that is fairly stable and has a good amount of lactic and acetic acid bacteria population, with strong yeasts to give a good rise to your bread.
If you can stand it, keep it on the counter and feed it daily for another 2 weeks and you’ll end up with a most robust starter. Otherwise, you can move on to the ‘maintenance’ stage of your starter.
Sourdough Maintenance:

If you bake a lot, you can just keep the sourdough on the counter and give it daily feedings the same as when you started it. But whenever you want to bake with it, increase your amount of sourdough for a day. How much starter will depend on how much bread you want to bake. You’ll need about 1½ cups for my Kamut sourdough bread recipe and another ½ cup to keep the sourdough going. Follow the feeding instructions on Day 6 and 7 above. You’ll have an active sourdough starter ready to go anytime, about 6 hours after a feeding.
Keeping your sourdough dormant
If you won’t bake with it for a while, then give it a feeding, let it eat for a few hours on the counter and then place your starter into the refrigerator, where the cold temperatures put your little microbes to sleep. Feed once every week or two for best results. Feed it and keep it out at room temperature for about 4-6 hours or overnight, then refrigerate again. You can keep doing that, until it’s time to bake. Take it out of the fridge a day before baking or 4-6 hours before and give it 1 cup of flour and 1/2 cup of water. Leave it in a warm spot for 4-6 hours till it gets very active.
Now you can use it in my Sourdough Kamut Bread Recipe or make a hearty, rustic Sourdough Rye Bread with my easy, lazy method. There you will also find a lot more sourdough bread baking tips and ideas.
Each time you bake, save as much of your sourdough as you wish and feed it about the same amount of flour and half again that of water. Keep it warm for a few hours and then refrigerate till next time.
Your feeding ratio is basically 2:2:1 two parts sourdough, 2 parts flour, 1 part water, no matter how much you keep going. To not waste a lot of flour, I keep just a small amount of sourdough when I don’t need it, and increase it only to bake with for a couple of feedings.
If your sourdough gets too watery, you can deviate from the recipe and add a little less water or a little more flour. You’ll learn the ratios that work for you pretty quickly and measuring will likely become a thing of the past eventually.
Common Questions:
What if my sourdough develops a dark gray liquid on top
This is completely normal. If you keep the sourdough in the fridge and don’t feed it for an extended time, it will separate out a liquid that will turn dark grey with oxidation. This is called the hooch. You can just stir it back in, give it a good feeding and it will be back to its normal self again.
Is my starter active enough for baking?
You will know with experience when the sourdough starter is good and active. Until you gain experience, there are a couple of different ways that can help you determine the state of your sourdough starter.
Generally, you will want to feed the sourdough starter at least 4-6 hours before you will bake with it. It should be ready to go after 6 hours of rise time, if your room temperature is around 75-80 degrees. If it’s warmer, it might be ready in 4 hours. If it’s cooler, it could take as long as 12 hours. In the case that your room is too cold, you can put the sourdough starter in a warm water bath or in a cooler filled with some warm water, to get it ready quicker. You might try the inside of your oven with the light on.
How to know if my sourdough is ready for baking:

Watch for it to double and to be full of bubbles. That’s when it’s ready to bake with. If you use a canning jar with volume markers, you can use those to determine when the dough is doubled. If it starts to sink down after it has doubled, it’s not prime anymore, but in my experience it will still work just fine. It just needs some food and you’ll provide that if you put it in your bread recipe full of more flour and water.
Some people do what’s called a float test to determine if a starter is ready for baking. You drop a spoonful of the starter in a glass of room temperature water. If it floats, it’s ready. This is not foolproof though. If you accidentally compress your starter during the transfer, it might not float even though it’s ready. But it’s something you can try if you’re not sure. I’ve never tried it, and sourdough is not that technical of a guy, so he’ll work with you as long as you don’t neglect him.
How do I control sourness
Your sourdough can be more or less sour depending on what and how you feed it and the ambient temperature. Warmer temperatures will cause it to sour more and faster, cooler temperatures can be used to regulate sourness. If you keep the sourdough at 70 degrees it will be less active and less sour. If you keep it at 85 degrees, it will get bubbly fast and sour faster.
When you take your sourdough starter out of the refrigerator to bake with and it has become very sour, you can give it two feedings over a day’s time at room temperature to mellow it a little before you bake. If you like especially sour taste, then give your starter and your bread dough warm temperatures and then let the sourdough bread dough proof in the refrigerator for several days (at least 3) before baking.
If you use rye or einkorn flour, your sourdough starter may sour faster than if you use red winter wheat. It seems to excite the lactic acid bacteria quite a bit to get fed with rye or einkorn flour.
You’ll get a good feel for your starter after a while and can adjust by your intuition. I never measure out my sourdough starter. I’ve been using it for a long time and just go by my experience of what has worked for years. I look at it to see if it’s active or if it needs a while longer or I put it in a warmer spot if it’s not bubbling much. Much of this is just like raising kids and keeping livestock. You observe and act on what you see and all of the above get more intuitive with time.
What to do with the sourdough starter discard
You can use it in any baked recipe, just adjust for the addition of the flour and water in your recipe instructions. Use in pancakes, pizza dough, cookies, etc.
You can also make cheese with your sourdough from pasteurized milk!
I’ll be posting some recipes especially for sourdough discards soon. Stay tuned and sign up for my newsletter to get notification of any new content.
I hope you will go ahead and make your own sourdough starter. It is a great way to move in the direction of improved health. And it is so amazing how just flour, water, and a little salt can make the best bread you ever tasted.

Top it with some cheese made with just milk and you’ll find yourself in minimalist heaven! These simple pleasures are what make life amazing and I hope you give them a try. If only to become familiar with the process. You never know when you might have to rely on such knowledge. I wish you great success with making your own sourdough starter!
And do let us all know how it goes in the comments below! I look forward to reading about your success stories!
What to read next:


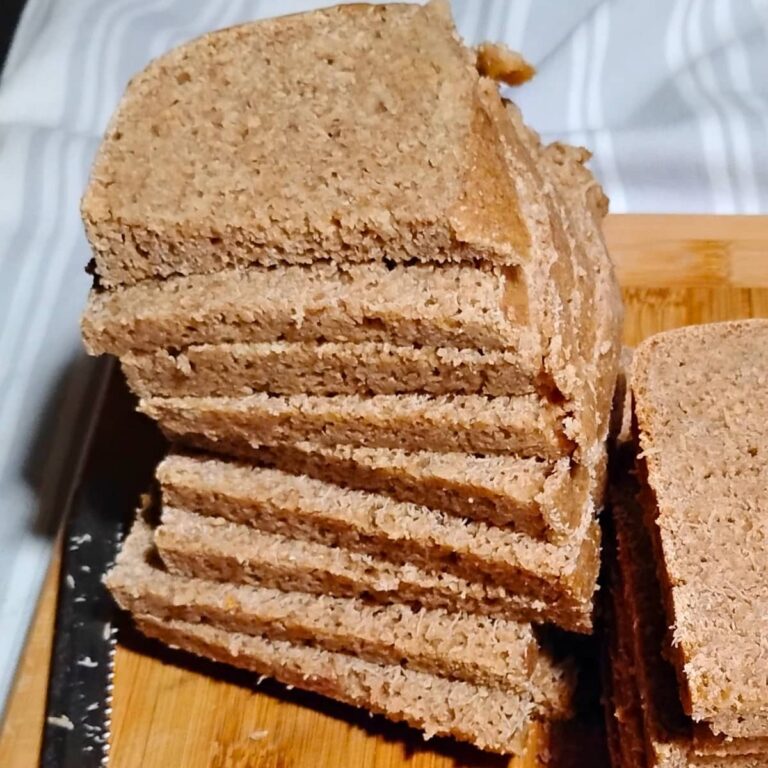
Kamut sourdough bread recipe Make your own delicious ancient grain sourdough bread. Tolerated by most, even many people with wheat sensitivity. Incredibly good toasted and with cheese!
The best Sourdough Rye Bread – Easy, lazy method that makes super delicious, moist, chewy rye bread to partner with your favorite cheese.
Sourdough Seeded Rye Bread With Spelt – If you are a fan of rye bread, you need to try this awesome seeded rye. Loaded with whole grain berries and seeds, awesome with cheese.
Make Cheese With Sourdough Starter from scratch. No raw milk required!
Soft Feta Cheese – An easy soft white brined cheese that does not need to get pressed. Great for salads and sandwiches! You can make this delicious cheese with sourdough starter!
Sourdough Pumpkin Cake with Apple, Ginger and Pecan Streusel – Super delicious breakfast cake, coffee cake or teatime cake. Or a great snack for any time. Cozy fall flavor!
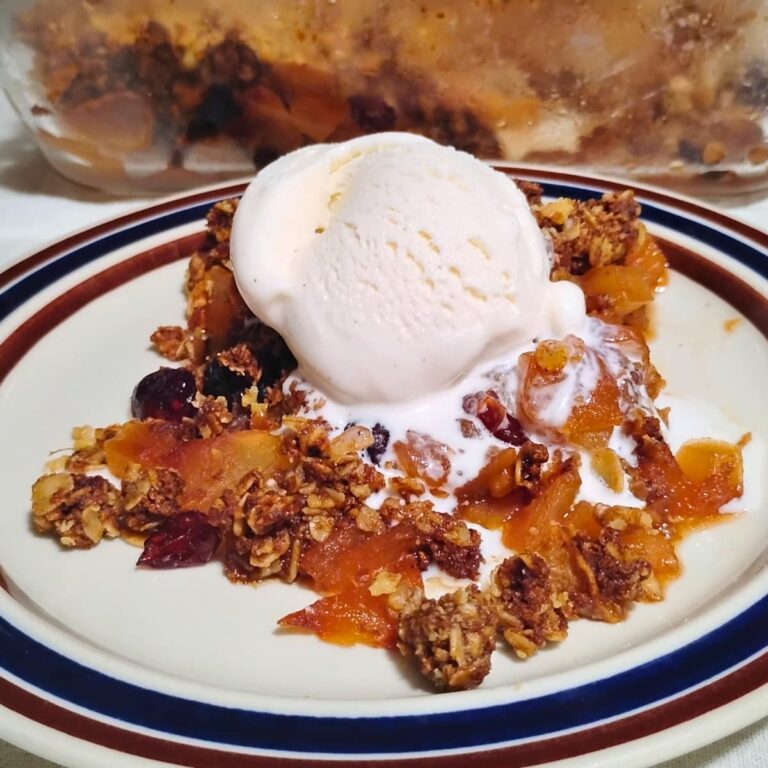
Sourdough Discard Blackberry Cobbler – A must for summer and blackberry season. Don’t have your vanilla ice cream without it. Super delicious and healthier than traditional versions too!
Zwiebelkuchen a German onion pie – Delicious German fall tradition. Make some today, you won’t regret it!
Make your own chevre cheese from scratch How to make super versatile, creamy, spreadable cheese that can be used as a dip, or spread, for baking, for savory or sweet shakes, fresh or aged. Replace store bought cream cheese with this healthy version, which is loaded with probiotics and nutrition!
Natural cheese making process Make your own mesophilic and thermophilic cheese starter and use it to make cheese the natural way. Make yogurt and buttermilk from scratch with your own homemade starter too.
Fermented Foods Try making fermented kraut and other vegetables, eggs, herbs, and more.
Pin this post

Shop this post
Breads from the LaBrea bakery. Nancy Silverton
Mockmill – my favorite electric grain mill.
Sources of grain or flour:
- Bulk 25 lb organic Kamut® berries at Amazon
- 10 lb organic Kamut® berries or Kamut® flour at Amazon
- 10 lb organic einkorn berries or einkorn flour at Amazon
- 25 lb organic rye berries or 3 lb rye flour at Amazon
- Bulk organic einkorn berries or einkorn flour at Azure Standard
- Bulk organic einkorn berries (best price) at Mockmill (add shipping!)
- Bulk organic khorasan berries or khorasan flour at Azure Standard
- Bulk organic rye berries or rye flour at Azure Standard

Sourdough Starter From Scratch
Equipment
- 1 quart canning jar or similar container with lid
- 1 wooden, stainless steel or plastic long-handled spoon
- 1 ¼ cup measure
- 1 ½ cup measure
Ingredients
- 1/2 cup flour any non-bleached flour will work.
- 1/4 cup water chlorine free!
Instructions
- Day 1: Take your jar and stir ¼ cup of water into ½ cup of flour in your jar. Cover with a lid.
- Day 2: No action necessery, just observe how the sourdough develops.
- Day 3-5: Take half of the sourdough starter and discard. Feed ½ cup of flour and ¼ cup of water. Stir well, cover and let rise for 24 hours. Repeat each day.
- Day 6: Continue as before unless you want to bake tomorrow. This is fine if you have grown a very active starter. Otherwise continue for another week or up to 4 weeks to create a strong, robust, mature starter.To bake the next day, don't discard any sourdough, but feed it 1 cup flour and ½ cup water.
- Day 7: Feed the sourdough in the morning. Don't discard any sourdough. Feed it 1½ cups of flour and ¾ cups of water and let it get active for 4-6 hours. When the sourdough has about doubled, it is ready to use for your bread recipe. Use what you need to make your recipe. Keep about ½ cup of starter and feed it ½ cup flour and ¼ cup of water. For the next few weeks continue this sourdough starter strength building regimen.
- Maintenance: Feed as in Day 3-5. Continue for another 1-3 weeks. Longer is better if you want a really robust, strong starter. After that, if you don't bake every few days, it can be refrigerated. Give it a feeding about once every week or two to keep it ready to go for baking. When you want to bake, take it out of the refrigerator and give it a feeding. If you need to build up volume, plan extra time for that. I keep about a cup and a half in the fridge ready to go and give a feeding of 1½ cups of flour and ¾ cup of warm water. After 6 hours at room temperature it should be ready to bake with. When it is full of bubbles and about double its original size, it's active and can be used for baking bread. Do try my super delicious, no knead Kamut sourdough bread recipe.There you will also find lots of great tips on baking with sourdough and basic information that you can use for any sourdough bread baking.