Chevre recipe for making homemade cheese using raw or pasteurized goat’s milk. Delicious as fresh cheese or aged. And it’s gut healthy too!
This post contains affiliate links. As an Amazon affiliate, I make a small commission at no extra cost to you if you make a qualifying purchase. See my full disclosure here.
Goat’s Milk Is Delicious, Goat’s Cheese Is Awesome!
Milk from goats is creamy, slightly sweet and super tasty. And it can be used fresh just the same as cow’s milk or it can be turned into the most amazing cheeses that rival or, in my opinion, surpass any cow’s milk cheese in flavor. Many people have never tasted fresh raw goat’s milk, and let me assure you, it is not at all like the strongly flavored products sold in cartons in the cooler case of your grocery store.
If you like homemade cheese recipes, you’ll love my recipe for Quark cheese. Check out my guide to Natural Cheese Making to learn how cheese happens. Try Sirene (Bulgarian Feta), or Soft Feta and make your own feta-style brined cheeses. Here is are some great desserts to make with unsalted chevre or quark cheese: Delicious Classic German Cheesecake (Käsekuchen), the ultimate dessert, Lemon Blueberry Cheesecake Bars, Lemon Cheesecake Mousse with honey & lemon curd, awesome Strawberry Quark Cheese Mousse and a creamy Quark Dessert With Oranges.
Are You New To Cheese Making?
If you have never made cheese, then welcome to the world of cheese making. It might seem like it’s a difficult process. But fear not! You can make homemade goat cheese or cow cheese very easily by following nature’s example and don’t listen to anyone who makes it look hard.
Soft bagged cheeses are especially easy cheeses to make and are a good starting point on your cheese making journey. They require little equipment, none of it specialized, and follow a simple recipe that can be created in just a few steps. Read on for details.
Cheese Is Not Constant
One word of warning. Cheese making is not an exact science even if you work in a sterilized laboratory and all your ingredients are constant. My cheeses turn out different every single time I make them, even when I follow the same recipe. There are many factors that come into play and you’re working with live cultures who are changeable, reactive organisms that have to be respected. And then there are nature’s deviations in weather, temperature, humidity, and season. And then there is the goat’s cycle of milk production coupled with variations in their browse.
So many factors can affect the direction your cheese takes, and that is why it’s never boring and always an adventure. And the result is almost always delicious. On the rare occation, where things turn too far away from a desirable product, it still can be a delicacy to pigs, chickens or the microbes in your compost.
To make cheese using this chevre recipe, start with the freshest milk you can find. Preferably raw from a small-scale goat keeper who free-ranges his or her goats. If you prefer a barney taste, an aged milk will work, but if it was previously pasteurized, and is not super fresh, it might have started to grow undesirable bacteria and should be re-pasteurized.
Chevre Characteristics
Chèvre is a traditional french cheese, fromage de chèvre. Chèvre means goat or goat cheese. It varies in taste depending on the region where it is produced. The diet of the goats has a big influence on the taste of the cheese, also what nutrients are in the ground and thus in the plants that the goats ingest. Your own backyard flock will produce its own region-specific chevre cheese. In Germany we call chevre ‘Ziegenkäse’. The Spanish call their’s queso de cabra. But here in America, it is most commonly referred to as goat’s cheese or by its french name chèvre. The è is often spelled as just e in American texts.
Chevre is a non-melting cheese that has been cultured by mesophilic bacteria. These are bacteria that love a medium temperature environment. Which is around 70 – 85 degrees. In this Chevre recipe you’ll work with room temperature to turn your milk into cheese. Mesophilic bacteria are responsible for the acid production in your milk and the thickening of it.
If the Temperature is under 70 degrees, your microbes tend to get sluggish and slow down quite a bit.Then it can take several days to get your cheese curd to form. They are put to sleep if you set the cheese in a refrigerator, where the bacteria will stay dormant till you take it back out into a warm spot.
If the temperature rises above 90 degrees, it’ll become too hot for the mesophilic organisms and instead you’ll activate thermophilic bacteria. Not a detrimental thing, but you’ll just end up with something more like yogurt when your temperatures are too high. I make chevre when it’s under 90°F in my place, and yogurt in the hottest heat of summer.
Do I need Rennet In A Chevre Recipe?
Rennet is a key ingredient in many cheese recipes. But rennet is not actually necessary for making fresh goat cheese, however there is a good reason for using it. Rennet binds the milk particles into a more stable curd, that will be easier to separate the whey from. Without rennet, you’ll have a less set, somewhat runny curd that will take a long time to drain. And you might have to scrape it several times during the hanging period to release more whey. In the end it will be a moister cheese that will stay very soft and spreadable and will have a nice, creamy texture. This kind of cheese is usually referred to as lactic cheese or clabber cheese or
If you add rennet, your curd (the coagulated milk) will be more firm and the whey will start to drain out instantly. Your cheese will be usable sooner and will be more dry, less tangy, and more firm when finished.
If you use too much rennet, you’ll end up with a very dry, crumbly end product. Not my favorite! So I prefer to use just a little rennet, enough to get my curd to lightly set but to still have a nice, creamy, spreadable end product.
What is Rennet
Cheese naturally forms when goat kids drink the milk from mom. It ends up in the stomach and the lactic acid bacteria turns it into a fermented product. Then the natural rennet that is present in the stomach, turns it into curds. Now it is somewhat solidified and doesn’t pass too quickly through the digestive tract. It can be processed and utilized by the microbes in the kid’s gut and nutrients can be extracted to nourish the little critter. This same rennet can be extracted, made into a paste or liquid and sold for cheese making. And that is what we’ll use here.
Choosing and sourcing Rennet
Making rennet from scratch is really a somewhat complicated process and basically, you need a goat baby that has died to produce rennet. Now, goat babies can die for various reasons, and I at least would never butcher one just to get rennet. But if you have an unfortunate little kid that just can’t make it in this world, then by all means, explore making your own rennet from scratch!
I have played with that idea, but decided that it’s just too much trouble and so I purchase it. Don’t use the junket rennet that is sold in grocery stores to make a pudding, you’ll want to purchase this from a cheese making supply store or maybe a health food store, if yours carries it.
Be careful when purchasing rennet though, much of it, especially vegetable rennet is made with genetically modified organisms. Some is synthetic and some contain undesirable additives. So try to find organic or at least non-GMO rennet that’s free from additives!
My favorite rennet is Walcoren organic kid rennet paste, which is sold by the New England Cheesemaking Company. This is made of goat kid stomach in the traditional way and is non-GMO and organic. You can get Walcoren tablets at Amazon. NE Cheese making company also sells non-GMO calf rennet and organic vegetable based rennet. I prefer the kid rennet because it makes better goat cheese in my opinion, and it is the most naturally created rennet using traditional methods.
I have also tried making a strong tea from stinging nettles, which supposedly can act as rennet in milk. But it didn’t work for me. Maybe it wasn’t strong enough, or maybe I didn’t use enough of it. In any case, after that I went ahead and purchased rennet. Check out Homesteaders of America if you’re interested in making your own rennet from calf or kid stomach.
What Equipment Is Necessary

To make this chevre recipe, you really don’t need anything that you don’t already have in your household besides the milk.
- You’ll need a couple of 8 qt stainless steel pots, large enough to hold your batch of milk. A stainless steel or glass bowl is alright too for your 2nd vessel.
- A thermometer. I have used this one for many years and love it!
- Fine-woven cheesecloth, flour sack towel, organic flour sack towel, or muslin
- A skimmer or similar, or just a large spoon
- A place where you can hang the cheese bag
- ⅓ measuring cup, a tablespoon, and a ⅛ teaspoon measure (or you can guess)
- A gallon of raw or pasteurized goats milk
- If you don’t have raw milk, you’ll also need some cultured buttermilk as a starter
- Optional: some fine pure salt, such as sea salt, Himalayan pink salt, or Redmond’s real salt. Be sure it has no additives.
- Optional: kid rennet, calf rennet, or vegetable rennet
Some cheese makers tell you to use calcium chloride, but you never need to add that to any goat’s milk based cheese recipes.
Chevre Recipe Intro: Using Fresh Raw Milk
The best way to make a chevre is to start with raw milk. If you are new to raw milk or you doubt that it is safe, please also refer to my post about bonny clabber. You’ll find more information on the benefits of raw milk, why it is best for you, and why it is best for cheese.
There are several reasons you want to use raw milk. One being that the cultures you need to make cheese are already in the milk and ready to go to work. You can observe this if you leave raw milk sitting out in a warm room for a day or two. It will turn thick and start to smell a little tart. This is the lactic acid bacteria at work. They eat the lactose sugars in your milk and the lactic acid thickens the milk. For that reason, if you are lactose sensitive, you might just be able to tolerate drinking cultured raw goats milk and eating culture based cheese.
Raw Milk Has All The Ingredients Needed For Making Cheese
You never need to buy any cultures from a cheese making supply if you want to make cheese from raw milk. The best cultures are the native ones that live in your milk and in your specific location and environment. They also make the healthiest cheese for you. Imported foreign cultures are often created in labs and may contain genetically modified material. For this chevre recipe from raw milk, we’ll create our own starter culture.
Commercially produced cultures can have their place if you’re going for a certain type of cheese. However, realize that a special cheese is often special because of its origin location. In this way, what ever cheese you create with your local microorganisms, will be special to your location and can only approximate the kind cheese you’re trying to copy. So you can use your own cultures to make some very amazing cheeses that can be as good or better than any famous cheese. It will be special not because it’s an exact match, but owing to its uniqueness.
Chevre Recipe: Make A Mesophilic Chevre Starter

So how can you get those native cultures to work in your milk? Simply put a quart of it in a non-reactive container, such as a glass canning jar or a stainless steel pot. Let it sit for a day or two in a warm room. But be sure to keep a lid on it to keep flies out. Keep your eye on it and notice when it starts to thicken. This is when the lactic acid bacteria kicks in and thickens the milk.
Now you have a starter culture. Save about a quarter cup of it for your cheese making. You can also save the extra and freeze it for future cheese making.
Or you can strain the extra starter batch and use it like cream cheese, or just drink it like buttermilk. You can also make a healthy cultured milk shake with it, either sweet or savory. Get my email newsletter where I will notify you of my upcoming post on Cultured Milk Shakes and any other new posts.
Take the quarter cup of starter that you saved from the above step. This is the culture you use to start your chevre cheese batch. Whenever you make cheese thereafter, you can just save a few spoonfuls of your new cheese curds for next time and keep it going forever if you like.
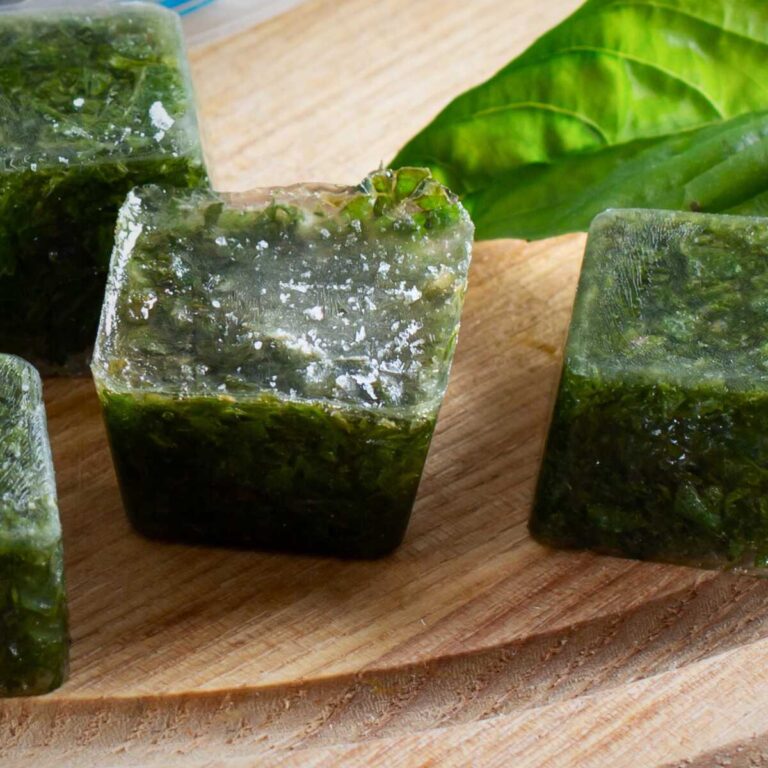
You can also save some of the whey and use up to a quarter cup as a starter for each gallon of milk. Whey keeps for months in the fridge and can also be frozen in ice cube trays if you wait a long time between cheese makings or if you just want to keep some in reserve.

How To Create A Strong, Healthy, Mesophilic Signature Starter to make the chevre recipe
The best starters are made like sourdough starter for bread making. You start with the first jar of milk and let it sour for a few days till it’s thick. Take a spoonful and put it in a fresh jar of milk and repeat. Although it will take less time this time to form clabber (thickened milk). Now just repeat the process several times to create an ever stronger starter.
After half a dozen times of adding a spoonful of your culture to a new batch of milk, it will become fairly stable and become your signature starter. That is the one I’d safe for all your future cheese making. But Chevre or fresh cheese does not need a super strong starter, you can use the first batch to make chevre and then save a bit of the new cheese and add to a fresh batch of milk and so on. This will also create a strong starter worth saving.
Check out my post on Natural Cheese Making Process, where I get into more detail about the properties of raw milk. It explains why it’s important to understand milk, in order to understand cheese making. And it provides an intro into the properties of milk.
Chevre Recipe Intro: Using Pasteurized Milk
Pasteurization kills all the bacteria in milk, so the good guys never have a chance to turn the milk into cheese or provide gut healing benefits. This is why you need to add a starter. However, some pathogens may get in or some may survive pasteurization. And the milk will start to deteriorate as soon as it comes out of the pasteurization vat. It is not at all the same as raw milk anymore.
Why You Have To Add Starter To Pasteurized Milk
It is important that the milk is very fresh when you buy it. And if it’s been on the shelf for a while, it is a good idea to re-pasteurize it again, since a few pathogens could easily take over in that sterilized environment and this is not good for your health and may interfere with the work of your good bacteria.
When using pasteurized milk, you will need to add a culture to repopulate the milk with beneficial bacteria. If you have access to a little raw milk, goat or cow, you can create your own starter by following the steps above in Chevre Recipe: Make A Mesophilic Chevre Starter. Otherwise you can buy some cultured buttermilk in the grocery store and use that as your starter.
If you don’t have access to raw milk, Make Cheese Starter Culture With Sourdough Starter from scratch. This can utilize pasteurized milk for making the culture you need for chevre.
You can also purchase mesophilic culture or chevre culture from cheese making supply companies. My favorite for cheese making supplies is the New England Cheese Making Company. I’ve been a customer of theirs for 30 years and they have good quality products. However, I have gotten away from purchasing their cultures for my cheese recipes, because I think that it is better to use home-grown cultures, where you know what’s in it. Just pure milk and the special microbes that exist in your milk and in your environment. I go over some of my cheese ideology in the Natural Cheese Making Process post.
Next learn how to make a nice creamy goat cheese, by following these step-by-step instructions for my chevre recipe.
Chevre Recipe Step-By-Step
Step 1: Warm The Milk

You can just use raw milk while it’s still warm, straight from the goat and freshly strained. Otherwise, if you refrigerate it to save up for a bigger batch, or you use refrigerated store bought milk, you’ll have to heat it. Put the milk in a nonreactive pot and warm the milk slowly on low heat to about 85 degrees.
Step 2: Add Your Starter Culture

Pour your homemade starter culture or buttermilk into the milk in the pot and mix by making an up and down motion with our skimmer or large spoon, to distribute it well throughout the milk. If you purchased a direct-set starter, you’d sprinkle the correct amount over the milk, let it re-hydrate for a couple of minutes and then incorporate it into the milk in the same fashion.
Step 3: Add The Rennet If You’re Using It

The amount of rennet you use will determine the firmness of the resulting cheese. If you like a very soft, spreadable cheese, or if you don’t have any, then add no rennet. If you prefer a cheese that is a little on the firm side, you need to add rennet. However be careful not to use too much or you’ll end up with tasty, but very dry crumbs, that are not spreadable and have not much use other than sprinkled on your salad.
The amount I like to use produces a soft, spreadable but firm chevre cheese. If you use liquid calf rennet, put about three drops in a ⅓ cup of non-chlorinated water. When using kid rennet paste, mix ⅛ teaspoon into a ⅓ cup of non-chlorinated water. If you have rennet tablets, use just ⅛ of a tablet and dissolve in ⅓ cup of water.
In all cases, use no more than 1 tablespoon of the diluted mix per gallon of milk and add it to the milk in the pot. Immediately incorporate it by using about 10-15 up and down strokes with a stainless steel skimmer or similar. Just move your utensil from the bottom of the pot to just under the surface of the milk and back down again. When done, use your skimmer or spoon to stop the milk from moving.
Then cover the pot and leave it undisturbed for about 24 hours. Do not move the pot or stir once the rennet is incorporated. It will start setting immediately and any disturbance can ruin your curd formation. Keep it at a room temperature of 70 or higher. If it’s lower, it might take longer. I also like to wrap a thick towel around the pot to keep the temperature more stable.
Step 4: Check For Curd Formation

After 24 hours, check your pot. Or sooner, if it’s super hot in your house. If you see a thin layer of whey at the tops that has a velvety white surface, tilt the pot just slightly to see if a curd has formed. You’ll know, when you see the solid part of milk separate from the side of the pot as a whole mass.
What If I See No Curd After 24 Hours?
If curd formation is not happening, your room temperature was likely on the low side and you may have to wait for a while longer. Check again after another 12 hours. After 48 hours it will be a curd in almost all cases as long as your room temperature was above 65 degrees. The amount of time it takes is related to the ambient temperature.
If your room is too cold, consider putting the pot in the oven with the pilot light on or into a sink of warm water that you can add hot water to when it cools too much. Start with 90 degree water and add hot water when it goes below 70 degrees, to bring it back up to 90 degrees.
You can also change the flavor of the cheese by letting it sit out longer. If you like a tangier cheese, let it culture for 48 hours instead of 24.
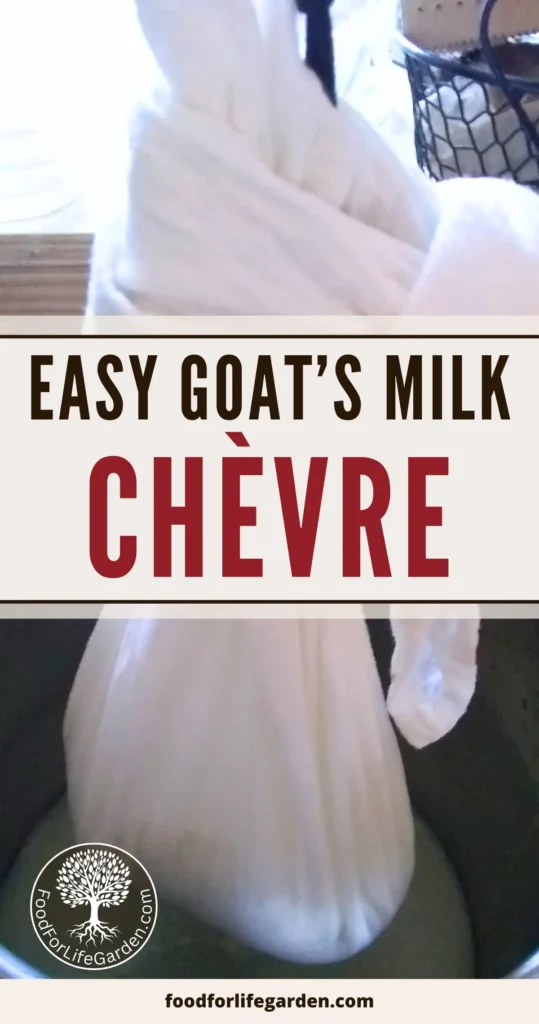
Step 5: Transferring The Curd Into A Cheesecloth

When your curd has formed, take a second pot or a bowl, that is of similar size and line it with a cheesecloth. Cheese cloths can be purchased in most stores, but I’d stay away from those cheap loosely woven ones, they are not tight enough to hold the curd and you’ll lose a lot of precious solids through those large holes.
Instead, either purchase some butter muslin or similar, or you can also buy flour sack towels for pretty cheap, especially in bulk. These are what I use and they hold about 2 gallons worth of curds. You could also go to a fabric store and get unbleached muslin for this. Old cotton sheets work too if they are really clean, or a doo-rag. You can sterilize by boiling it to be sure it’s really clean or wash it and hang it in the sun for a day.
Now take your skimmer and carefully scoop the curds from your cheese pot into the cheese cloth lined empty pot or large bowl. You could also pour the whole curd mass into the cloth, but I find it tends to result in a less clear whey and I hate the mess it makes!
Step 6: Tying The Towel With Cheese Curds

Gather three of the corners of your cheesecloth and wrap the fourth around the other ends. Now tuck the end under itself and make a knot to close it up tight. This is where you slip your hook into to hang. Test it carefully to make sure it holds before you hang it.
Step 7: Draining The Whey

Then hang the bag from a hook on a rope, that you suspend from a cupboard knob (or the rafters if you live in a yurt ;-0). You could also hang it from your kitchen sink faucet. But don’t let the whey drain down the sink, it is much too valuable. Then just let it drip for about 24 hours. Try to keep the temperature at or above 75 degrees Fahrenheit.This it is best temperature to release the whey.
If you have a fly problem, I’d wrap another cloth around the bag, or some kind of screening. I like to use a piece of plyban, which is sold for lining a cheese press. I think flies can deposit eggs into your cheese through the pores of the cheese cloth bag. After I had a few problems with maggots, I started to double wrap and had no more problems since.
Step 8: Salting The Chevre Cheese Curd

If it’s very firm, take the contents and mix with pure sea salt or pink salt. The salt should be a fine consistency and if it’s not, you can grind it in a coffee mill or blender. You can buy special cheese salt, but it is not necessary and I never use that anymore. It has a flaky consistency that works well for hard cheeses.
Use only non-iodized, no-additive salt. Do not use any regular table salt, it will have added undesirable ingredients which can interfere with the culturing process and the taste of your cheese. Kosher or canning salt would work, but it will not have all the great minerals that you find in unrefined sea salts.
If it’s still soft after 24 hours, let it hang longer till it’s fairly firm. Pour off the whey to use otherwise. Then mix in some sea salt, rehang and let it drip another day or so. It should firm up by then. The resulting salted whey will be too salty for use in the garden or for animals. You can use it in baking or cooking. Just remember to adjust the salt amount for your recipe.
Step 9: Eat Your Delicious Chevre Cheese!

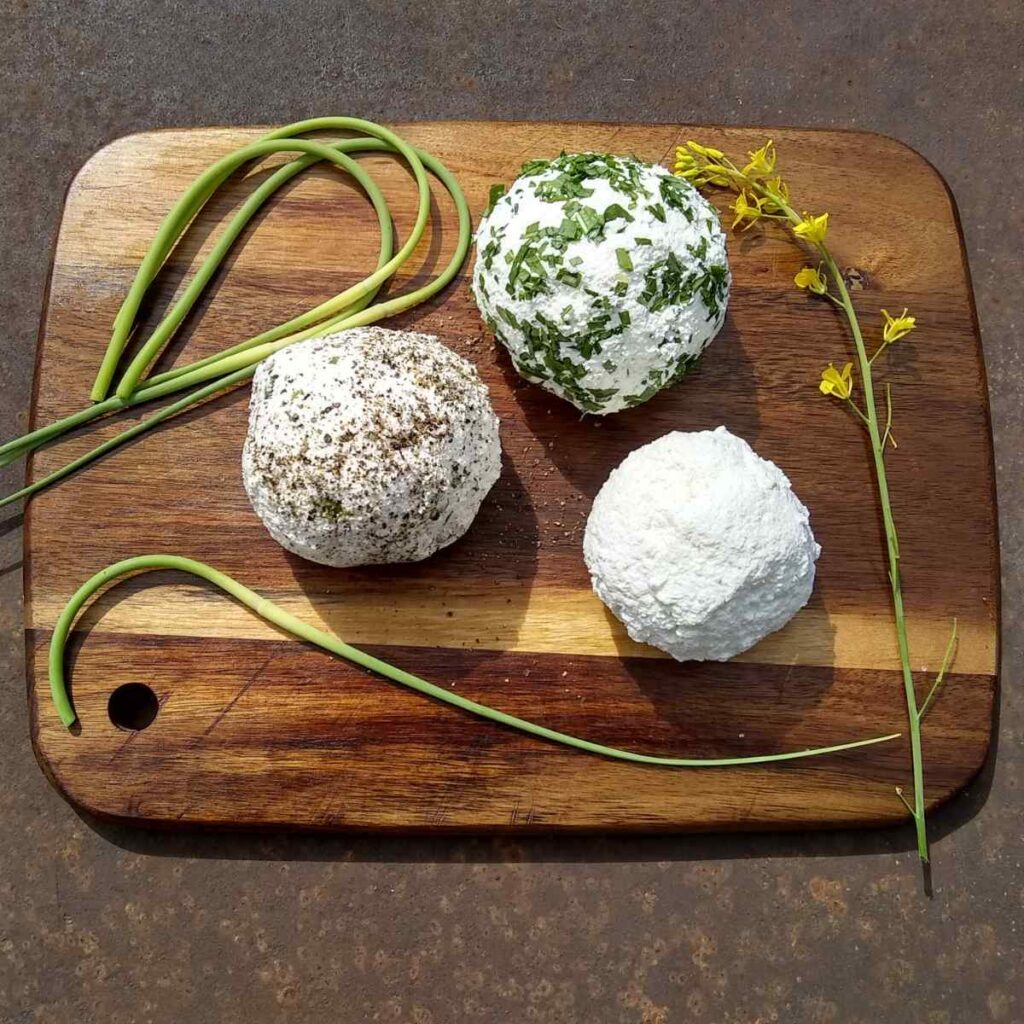
You can use the cheese right away while it is fresh, just plain, or mix with some fresh herbs such as parsley, dill, scallions, and garlic and enjoy it on some nice fresh-baked slices of Sourdough Rye Bread, Kamut and Einkorn Sourdough Bread, Sourdough Seeded Rye Bread, or crackers. Enjoy your delicious cheese. It can’t get better than that.
You can store it in a bowl in the fridge or in your cellar. If the temperature is over 55 degrees, it will turn very tart in storage, the cooler the temperature, the more stable the taste will be. But it won’t go bad if it’s left out for a while, it’ll just keep fermenting till all the lactose has been used up. After that it might go bad.
Use the whey for baking, cooking, drinking, in smoothies, or well diluted as fertilizer or foliar spray on plant leaves. Treat your chickens, dogs or pigs with this gut-healthy, nutrient-rich elixir.
Do check out my post Awesome Uses For Whey. You’ll find dozens of great ideas for using whey, cooking with it and improving your health. One of my favorites is making carbonated lemonade, using whey to infuse it with lactobacilli and creating the carbonation in the process. Super tasty and healthy!
Step 9 – Making Aged Chevre Cheese

Most of us associate aging cheeses with hard cheeses. But you can age your Chevre if you like. Just press it tightly into a pint canning jar, to remove as much air as possible. Seal with a lid and put it in your basement. 55 degrees is best for aging cheese. You can also keep it in the fridge, but it will become dormant there. Brief aging won’t change it too much, but I’ve had some of my Chevre for almost 2 years in the root cellar and it tasted more bold and differently delicious.
Other Chevre Recipe Ideas:
This chevre recipe can be adapted for so many uses. Here are some examples of other uses for your wonderful fresh Chevre.
- Make a cheese ball and roll in some fresh dill or parsley
- Mix with a generous amount of wild greens pesto for a delicious spread for sourdough bread or crackers!
- Make a cheese log and roll in some fresh ground pepper (careful, don’t overdo the pepper!)
- Mix with cayenne pepper to make a spicy cheese
- Blend in some chopped fermented jalapenos for a great spicy dip for crackers
- Mix or roll in different dried spice mixes such as za’atar, Mrs. Dash, Italian or Mediterranean blends or what else you can think of.
- One of my favorites: make small cheese balls and roll in dried herb mix such as za’atar or Mediterranean herbs. Place in a canning jar and fill with olive oil. Let it age for about 6 months. Drizzle that richly flavored olive oil over a piece of Grainy Sourdough Rye Bread and press the cheese ball on it. Out of this world. Top with some canned sardines, heavenly! Serve with crackers at a party and use the olive oil for salad dressings..
- I’ve also mixed the cheese with some dried herbs and layered it, without forming balls, with olive oil in a jar. Let it age and use it as a spread on toast or crackers.
- Make a creamy salad dressing.
- Put some chevre on toast, top with fried eggs for a yummy breakfast sandwich. It’s especially good on a slice of hearty, rustic no-knead Sourdough Rye Bread.
- You could also omit the salt and mix some honey with your chevre and serve it on berries for a wonderful sweet treat.
- Use as a filling for crepes, add a drizzle of honey and fruit (omit the salt in step 7)
- Bake with it like you would with cream cheese. Make a cheesecake or blinis. It makes a really good German cheesecake! or Lemon Blueberry Cheesecake Bars.
- Make a tasty German dessert using unsalted chevre in place of quark. Creamy Quark Dessert With Oranges and Strawberry Quark Cheese Mousse.
How Many Uses For This Chevre Recipe Can You Think Of?
I can come up with a million ideas, just sitting here typing. So maybe I better stop and give you a chance to come up with some too. This post will get way too long otherwise. I’d love to hear some of your ideas for using chevre in sweet and savory recipes. Post them in the comments below!
I hope you will try making your own Chevre. And I hope you get to love making and eating it as much as I do. It’s so incredibly versatile and it’s just soo delicious! And just ask in the comments, if you have any questions about making this chevre recipe. I’d be glad to answer them for you.
Chevre Recipe FAQ
Is goat cheese a healthier cheese?
Yes, it is a healthier cheese. Goat’s milk has fat molecules that are shorter than those in cow’s milk, which makes it easier to digest. When fermented, it contains less lactose than regular milk or fresh goats milk.
What does goat cheese taste like?
There are many kinds of goat’s cheese. Chevre is a fresh cheese that tastes very mild, creamy, as salty as you like and somewhat tangy.
Does goat cheese melt well?
It depends on what kind of cheese it is. Some don’t melt at all, like feta, chevre and paneer. But others melt very nicely, like mozzarella, farmhouse cheddar or bel paese style cheeses.
How long does chevre cheese last in the fridge?
Homemade goat cheese made from raw goat’s milk can last for years in the fridge. It doesn’t really go bad, it just ages. After a time, the lactose content in the cheese gets used up and then the good bacteria won’t have anything to eat and will die off. This is when the cheese can go bad. But it takes a long time. Cheese from the store should be used within about 3 weeks, but if it smells good, tastes good, and doesn’t have mold growing on it, it is still good to eat.
What to read next
Make Cheese With Sourdough Starter from scratch. No raw milk required!
Soft Feta Cheese – An easy soft white brined cheese that does not need to get pressed. Great for salads and sandwiches!
Awesome Uses For Whey – Save the whey! And use it in dozens of ways. You’ll find something to do with whey for every single drop. It’s nutritious, versatile, healthy, and makes great fizzy sodas!
How To Make Sirene (Bulgarian Feta) -Try making your own feta-style cheese. Learn all about this wonderful and easy to make cheese and get the recipe!
Classic German Cheesecake (Käsekuchen) – How to make an incredibly delicious German cheesecake using Chevre. Must try this!
Lemon Cheesecake Mousse – A decadent, delicious, super healthy lemon dessert made with honey & lemon curd.
Creamy Quark Dessert With Oranges – Use unsalted chevre as substitute for quark cheese in a delicious German dessert. A creamy, luxurious mousse, healthy enough for every day desserts, but fancy enough for special occasions.
Awesome Strawberry Quark Cheese Mousse – A delicious German quark dessert with pureed strawberries.
Lemon Blueberry Cheesecake Bars – Creamy, with a buttery crust, this cheesecake dessert is bright, tangy, easy, and perfect for summer gatherings, or any sweet cravings!
Natural cheese making Process – Make your own mesophilic and thermophilic cheese starter and use it to make cheese the natural way. Make yogurt from scratch with your own homemade starter too.
Bonnyclabber – What is clabber milk and its uses Learn to make bonnyclabber, the original cheese. Nature’s way of preserving milk. A tasty, creamy cheese that makes a really good frosting for einkorn zucchini bread and other sweet breads.
Soft Sweet Potato And Peanut Butter Cookies are a delicious snack for anytime. Loaded with healthy ingredients that give these cookies a distinct and delicious flavor. Great for lunch boxes, trail food, tea time, snacks and more.
Cajeta – Make this ultra-delicious, uniquely flavored, goat’s milk based Mexican caramel to use as a topping for ice cream, pancakes, cheese cake, waffels and more. Or use to stuff sandwich cookies, or make frosting!
Foraged Wild Weeds Pesto Recipe – Make a delicious Pesto with dead nettles and other wild weeds with this guide to foraging wild greens.
How to make your own sourdough starter – This forms the basis for any sourdough bread. Once you get a starter going, you can keep it going for a hundred years or more with proper care. Sourdough can also be used to clabber milk and make cheese, learn how Here!
The best Sourdough Rye Bread – Easy, lazy method that makes super delicious, moist, chewy rye bread to partner with your favorite cheese.
Sourdough Seeded Rye Bread With Spelt – If you are a fan of rye bread, you need to try this awesome seeded rye. Loaded with whole grain berries and seeds, awesome with cheese.
Make an ancient grain sourdough bread – The easiest sourdough sandwich style bread you can imagine. No kneading required and it bakes up nicely airy and chewy and tastes amazing.
Pin this post

Shop this post:
Skimmer
Flour sack towels
Organic flour sack towels
Cheesecloth
Thermometer
New England Cheesemaking Company cultures
Walcoren Organic Kid Rennet
Animal Rennet
Vegetable Rennet

Chevre Recipe
Equipment
- 1 6 – 8 quart non-reactive pot – stainless steel is great
- 1 6 – 8 quart non-reactive pot or bowl – stainless steel or glass
- 1 30 x 30 inch piece of fine woven cheese cloth – I like standard flour sack towels, or you can use butter muslin, or any piece of muslin fabric from the fabric store.
- 1 Skimmer or large spoon
- 1/3 Measuring cup
- 1 Tablespoon measure
- 1 /8 Teaspoon measure if using kid paste – or just guess at half of a 1/4 teaspoon
- 1 Large towel
- 1 hook for hanging – optional
Ingredients
- 1 gal raw or pasturized goat's milk – you can use cow's milk too if you can't get goat's milk, but it wouldn't be called chevre.
- 1/4 cup home made starter culture or cultured buttermilk – refer to the instructions in the post to make your own starter from raw milk
- 2-4 tsp pure salt with no additives – avoid table salt, choose from pure sea salt, Himalayan pink salt, Redmond real salt or kosher canning salt
- 1/8 tsp Walcoren organic kid rennet – or use 3 drops of calf rennet or vegetable rennet. Or use 1/8 of a rennet tablet
- 1/3 cup non-chlorinated water
Instructions
- Use fresh warm milk from the goat or warm your milk to 85 °F
- Add the starter culture or buttermilk and incorporate it with an up and down motion
- Dilute the rennet you chose in the 1/3 cup of water and use only one tablespoon of that mixture. Mix it well into the milk by making an up and down motion with your skimmer or spoon. Stop the milk from moving after 15 -20 strokes.
- Cover the pot and wrap with a large towel to maintain an even temperature. The ambient room temperature should be about 70 – 85 degrees. You can put the pot into the sink and keep adding hot water to maintain that temperature if it's too cold in your room.
- Do not disturb for 24 hours, except if it's really hot out, you may want to check after 12 hours.
- Open the lid and check to see if there is a thin layer of whey above the curd. You're looking for a clear liquid with a thin velvety layer floating on top.
- If you see that, tilt the pot slightly to check for a solid curd underneath.
- If there is a solid curd, you can drain the whey. If not, let it sit for another 12 to 24 hours, checking at intervals.
- Now transfer the curd with your skimmer from the processing pot to a cheese-cloth-lined second pot or bowl.
- Gather three of the ends of the cloth, wrap the fourth around the three, then thread it under itself to tie into a knot. Use this knot to insert your hook and hang the bag. Test carefully to make sure it doesn't unravel. That would make a mess!
- Hang from a hook that is suspended from a cupboard knob, a rafter or other convenient place and let it drip into the second pot. Alternatively, if you don't have a hook, you can tie a noose knot and get that to tighten below the cheese bag knot.
- Check to make sure it stays suspended over the whey or hang it higher, or drain the whey occasionally. Keep the room temperature at about 75 degrees or a little warmer to facilitate drainage.
- After 24 hours remove the bag, open it, and break up the curd inside. If it's still runny, scrape the sides and hang it a little longer.
- Salt the curds and mix well, right inside the cheese cloth. I like to use a butter knife for that. Tie it up again and hang it for a few more hours to finish draining. The salt will help with drainage. The amount of salt depends on your preference. You don't need any salt if you use it fresh and in sweet recipes. If you plan to age it for a long time, use 3-4 teaspoons of salt, which will help with preservation. Taste and adjust.
- Now your cheese is ready to enjoy as is, or mixed with add-ons in the list above. Or pack into jars for storage. It can age for a year or more at 55 degrees in your cellar or wine fridge or you can keep it in the regular fridge.


This looks amazing! I eat goat cheese all the time, its my favorite! I have access to goat milk so this recipe makes me happy. Thanks!
That’s awesome! It makes me happy to hear that!