Natural cheese making process turns fresh milk into unique cheeses using traditional, natural methods, and making starter culture from scratch.

This post contains affiliate links, which means I make a small commission at no extra cost to you if you click through and make a purchase. See my full disclosure here.
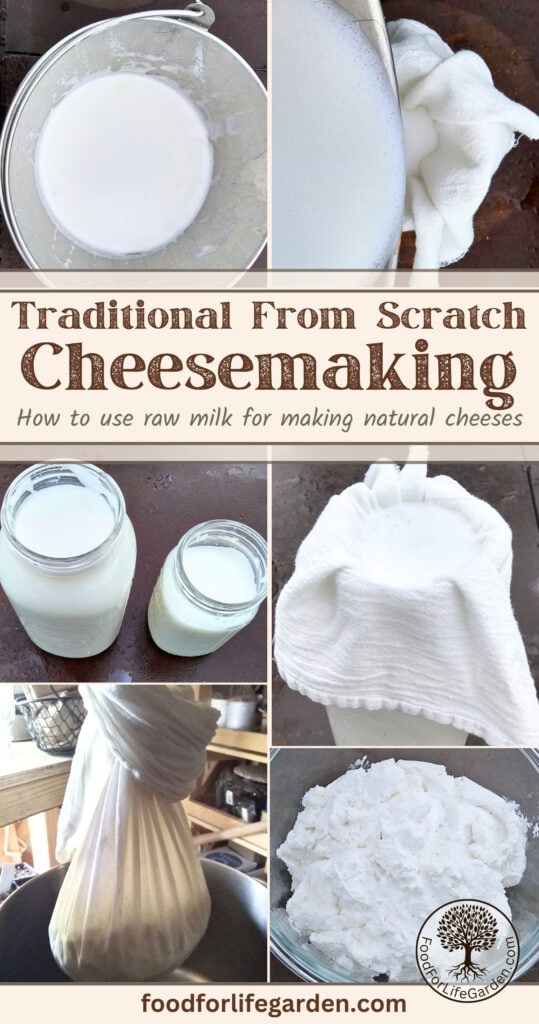
Learn about making cheese the natural way, completely from scratch, using raw milk. Here you can learn to make your own mesophilic and thermophilic cheese cultures and learn about how cheese happens naturally and without freeze dried cultures. Nature’s way of making cheese as it has been done since humans kept dairy animals.
If you want to make your own cheese, you might like Chevre from goat’s milk, or Clabber Cheese from any raw dairy milk. And give Sirene (Bulgarian Feta) a try! Make the quickest cheese ever, and an un-cultured substitute for quark, Queso Fresco. And if you make cheese, you’ve got whey discover, Dozens Of Uses For Whey! How To Make Sirene (Bulgarian Feta) -Try making your own feta-style cheese. Learn all about this wonderful and easy to make cheese and get the recipe! If you don’t have access to raw milk, Make Cheese With Sourdough Starter from scratch.
Jump to Natural Cheese Making Process 101
Cheese Starts With Dairy Animals

Dairy animals have been a part of my life for many years. At least a decade. Being able to bring home fresh, raw milk from a milking session with my dairy cows or goats, is a super important part of my life. Maybe, because I just adore cheese! But maybe it’s because I like to feel more connected with the food I eat and feed to my family. And then I love to make anything from scratch. It fascinates me! And it’s pretty hard to imagine life without my animals. They are, in a way, part of my family too.
My day starts with getting my boots on, grabbing the milking bucket and going out to say ‘good morning’ to the animals. Then, while they chew gratifiedly on their ration of feed, I squat and lean on them while I hand milk them. It is a very personal, intimate, down to earth, experience. And it is super satisfying to have a nice full bucket of fresh, warm, foamy milk to bring home. I usually share a little with the guardian dogs too, who do such a good job at keeping those goats safe.
I’ve had both cows and goats in the past. Right now. I have just 3 momma goats, but am looking to add another dairy cow soon. I love to drink the milk from either, but goats, in my opinion, make better cheese but cows have wonderful cream that separates out. So yes, I miss the cream when I don’t have a cow. But I am grateful for having that awesome goat’s milk in my bucket. And this leads to the subject of this post:
What To Do With All That Milk?

I use fresh milk for all sorts of things. Making chowder or other cream soups, ice cream, milk shakes, pudding or I just drink it plain. But I usually have a lot more than I can use fresh. So after freezing a little for the dry periods, I turn to preserving it by fermentation. As in making cheese.
Now here comes a whole lot of cheese related reminiscing but you can just skip to the Natural Cheesemaking Process 101
The Beginning Of My Cheese Making Journey

When I first started to make cheese 30 years ago, I got a book, “Cheesemaking Made Easy” by Carroll & Carroll. I also read several other books on handling fresh milk that I can’t remember now what they were, but they were all emphasizing the importance of pasteurization. The Internet was of not much use then, there was some information, but nothing near what you can find now.
So my first introduction to making cheese was from the commercial, or industrial point of view. Meaning that everything has to be sterilized and milk has to be pasteurized, so you start with a sterile medium that is fed a certain commercial culture in order to produce a certain desired result.
You would purchase certain freeze dried, direct set cultures for a certain kind of cheese. I didn’t really understand milk and that was the reason I followed a recipe as I would in baking a cake. It came out good most of the time, but it was complicated and reminded me of a lab experiment.
It was so much trouble and seemed so unnatural that I soon started to omit the sterilizing and pasteurizing. By then I also found other literature that leaned on keeping the cheese making process natural.
The original cheese
My memory recalls an observation I made when I was younger, when my family was hiking in the German alps, where we stayed at an “Alphütte”, a mountain farm. There, an old farmer set a jar of milk in the window where it was nice and warm so it would clabber. Now I know he made bonnyclabber. And I remembered the clabbered cream from my grandma, which was homemade sour cream.
That information is exactly what I was naturally gravitating towards. I don’t like manipulating natural things into unnatural products. I also always prefer to mimic natural processes instead of industrial ones. And my whole life I have always been seeking out how to make things in traditional ways.
Leading Up To A Natural Cheese Making Process

After several years of educating myself, I completely headed in a different direction with my cheese making. Now I don’t buy any cultures and I don’t try to recreate a perfect Gouda or Emmentaler or Gruyère. I do love those cheeses, but I don’t try to copy them exactly. It is impossible, even when using purchased cultures, to create a Gouda in America that tastes exactly like a Gouda from the city of Gouda. It may resemble it but it will not be the same.

Cheese has terroir
What cheese is like, is very region specific. My dairy animals eat locally grown pasture and browse. The climate here is different from other parts of the world and the organisms that live in my environment are different as well. The time of year matters too, so even my very same cheddar from spring will be different in fall.
Knowing that your cheese will be unique is liberating. Because if frees you from trying to create a cookie-cutter copy of that cheese from the artisan cheese case. And it makes cheese making an art rather than a recipe to follow with a predetermined end result.

So now, when I make cheese, it is with a completely different mindset, goal and view point and I use natural methods to create it. I embrace the fact that it will be a unique end result. I can use a similar or exact same technique for example as what is used to make traditional Gouda. But I am not striving to produce the exact same end result, in fact, I celebrate my very unique, distinctive, region-specific specialty cheese. My cheeses are distinctly my cheeses, in character and in what microorganisms live in them, and that is exciting to me. And it all starts with my own, homegrown starter culture.
Natural Cheese Making Process 101

The first thing one needs to understand when following a natural cheese making process, is the properties of milk. I don’t think a lot of people who make cheese, and I’ve watched many you-tubes and read many blogs about it, really understand this. It is true, that cheese can be really good when made with purchased cultures, but it is not the natural way to make cheese. Who knows how these cultures are produced and some use GMO material, which is in my opinion unacceptable.
Understanding how milk works
Without understanding milk, you won’t truly understand cheese. You can follow a recipe and arrive at a decent end product, but that will not give you an understanding of the why behind it.
One of the most influential and valuable books I have read, for understanding milk and the natural cheese making process is David Asher’s ‘The Art Of Natural Cheese Making”. It gave me several ‘aha’ moments when I was reading it. In Germany, my parents raised me on cultured milk. Quark was ever present, and Kefir was bubbling away on the counter. Butter was even made from cultured milk and looking back now, I learned the process of natural cheese making even as a child, without realizing it at the time.
So to learn the reasons and the science behind it gave me a whole new understanding of the WHY behind my observations. It made the connection real and everything suddenly ‘clicked’ into place. Reading this book was the main catalyst that not only completely steered me away from any purchased cultures, but it freed me from those blocks that reading things like the book ‘Cheesemaking Made Easy’ put in my brain and cleared the path to a natural cheese making process. I still lean on the recipes in the book, but I put my own spin on it and I skip the industrial methods and replace them with natural and traditional ones.
Understanding Milk

Milk is a natural product that comes from dairy animals or any mammals. Moms, human or animal, make it to feed the babies and it includes everything babies need to grow up strong and healthy. The first milk, after an animal or human freshens (has a baby), contains colostrum. This is a very rich, thick, sweet milk, full of nutrients and antibodies meant to support a brand new baby and to keep it from getting sick. It is an ultra potent immune booster and kick-start elixir.
Colostrum
It is so important for a baby to get colostrum within the first hour of life, or it will end up riddled with sickness. I know, because I once obtained three male calves from a dairy farm to raise for meat. I realized later that they were just ‘discarded’ and did not receive colostrum when they were first born. They invariably got sick as soon as I took them home. Scours was inevitable and I nursed them for weeks. Only one made it through alive in the end.
The one that lived through it, however, was just sickly and stayed small and did not ever thrive. It was sad. Once I found out about the colostrum, I made sure that I had some on hand before I ever got another calf and I also keep some in the freezer in case one of my baby goats would need any from a bottle. It is also great to have on hand in case you have a little goat kid that needs a boost.
After a few days, the colostrum starts to diminish until there is just milk to nourish those babies. The milk does not taste very appealing while it has colostrum mixed in and I usually give any extra to the dogs. They love it. After a couple of weeks, the milk starts to taste better, and then I start using it for drinking and cheese making.
Milk Properties In Ruminants And How It Relates To Cheese Making
In ruminant dairy animals, milk is full of the nutrients that the babies need to grow strong and healthy. It also is full of living organisms, antibodies and probiotics to fend off illness and strengthen the immune system. And it is full of bacteria that turns the lactose sugars in the milk into lactic acid in the little critters stomach.
The stomach also contains rennet that will curdle the milk. So when the milk hits the stomach of the baby, it turns to cheese. This is what nourishes the little critter. Having the milk turn to curds in the stomach keeps it in the stomach longer and the acidification that has taken place helps make it more digestible for the gut bacteria of a little kid, lamb or calf.
I believe, that we are supposed to drink milk and eat cheese and other dairy products to promote our health. Milk is a super-food and will boost our immune system, keep our gut environment healthy, add beneficial bacteria and those probiotics that attack pathogens in our gut. But only if we don’t kill all that good stuff!
Dairy animals make more milk than they need, so there is plenty for the kids and for us. God put a system in place that can grow healthy offspring and nourish the keepers as well. And milk becomes very digestible after it undergoes culturing. It is full of beneficial bacteria, probiotics and antibodies that our own guts can utilize for our health benefit.
Milk Wants To Change
Milk is not meant to stay unchanged. As soon as milk comes out of the udder, the bacteria in the milk start working toward turning it into cheese. The temperature of the milk is perfect for the mesophilic strains to get active. They start consuming the lactose in the milk and turning it acidic. This in turn thickens the milk.
For that reason, if we want milk to remain milk, we need to put those bacteria to sleep by putting the milk into the refrigerator. Otherwise, they’ll keep working till you have a pot of thick clabber. Milk will stay sweet in the refrigerator for a couple of weeks. But even though the bacteria that want to make cheese are mostly dormant, there is still a slight bit of activity, enough to eventually sour the milk.
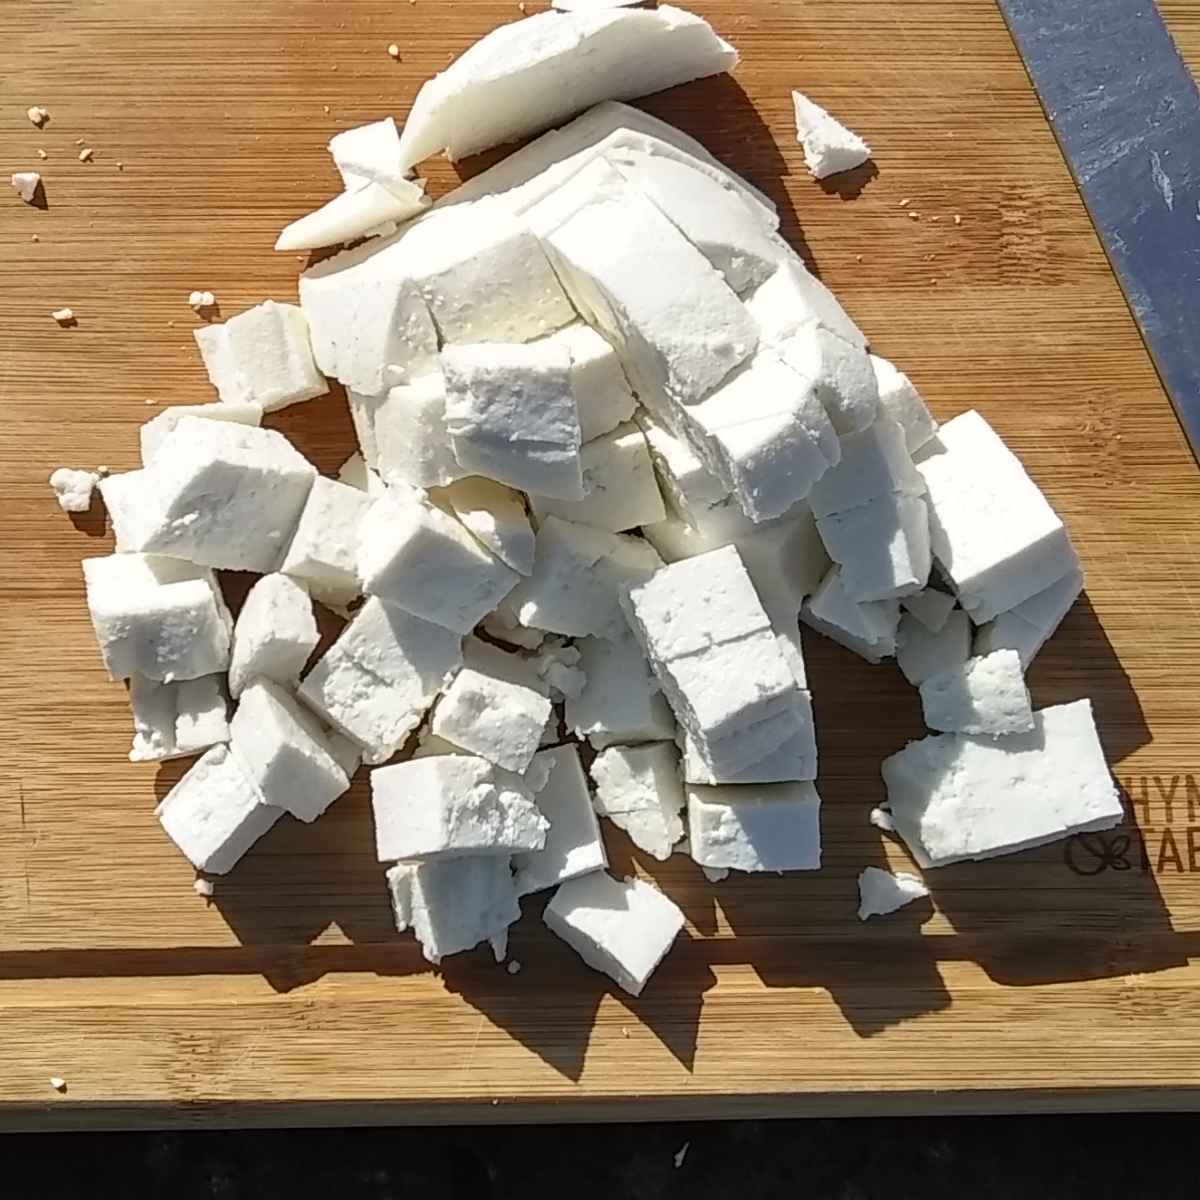
At this point it is probably not the tastiest sour milk, although it is not inedible. But because the cold refrigerator environment didn’t allow the desirable bacteria to work efficiently, the outcome may not taste so good. But it is not bad at this point and you can either make a cooked cheese, use it in baking, or feed it to the pigs, who will love it no matter what it tastes like.
Cheese Happens
So the one important thing to understand is that milk wants to become cheese. Cheese is not something that you have to work at, it happens. Now that doesn’t mean that we can’t help steer it into a desired direction, or manipulate it so it becomes a certain type of cheese. But naturally, there is nothing we must do to obtain cheese.
Remember, that we are talking about raw milk here. Milk that comes straight from dairy animals, and has not been adulterated. We are talking about the natural cheese making process. Or the natural cheese happening process if you will.
If you can get some raw milk, you can observe this. Leave it out at room temperature in a jar for 2-3 days and you’ll end up with a thick product that resembles buttermilk or yogurt and has a pleasant sour smell to it. That was the work of the lactic acid bacteria, which lives in the milk. Milk has all the ingredients in it to make cheese. It does not however, contain rennet, which we need to add to make hard cheeses.
We Are Meant To Use Milk And Cheese In Our Diet
Some say that because we’re not babies we should not drink milk, since our stomachs don’t process it in the way a baby’s stomach does. But milk actually does its own acidifying and that makes it super healthy for your gut. And very often, lactose intolerance is actually a misnomer. Many people are milk intolerant, because what they consume is pasteurized and/or comes from grain fed animals. Both alter the milk. Dairy animals are meant to graze or browse to obtain all the nutrients they need. That is why they have all those stomachs, to process the material. They are not made to feed on grain. This changes the animal’s stomach pH, which can allow e.coli or 0157/H7 organisms to grow.
Natural Grass Fed Dairy Milk Is Incredibly Healthy
Grass fed dairy animals produce a milk that is probiotic. This property will help take care of any pathogens that might find their way into the milk. It comes out of the animal sterile, but handling it could introduce pathogens and good and bad organisms also live in the air and environment all around us. They are not going to hurt the milk because of the naturally present probiotics.
And these probiotics can also boost our own immune system when we drink milk. It’s a superfood that can support our health and gut bacteria. Many people who can’t drink regular milk, report that they had no problems digesting raw milk from grass-fed dairy animals. That is because the raw milk contains the gut supporting probiotics, has the right pH, is free of pathogens and has not been altered to an unnatural state by pasteurization.
If milk is allowed to clabber and become sour, it has the added benefit of containing very little lactose, since the bacteria in the milk consume it and turn it into lactic acid. This predigested milk is especially beneficial for your gut bacteria. It makes nutrients easily available and doesn’t cause extra work for your gut organisms.
A Deliberate Approach In The Natural Cheese Making Process

So how can we take this natural process and steer it into the direction of our desire? It involves making a starter culture first. There are different organisms residing in raw milk, which can be activated by giving them the environment they prefer to work in. The main ones we use are mesophilic and thermophilic bacteria.
Mesophilic bacteria are happy in a medium temperature environment, which is at or below body temperature. If you culture milk at 70 – 85 degrees, these particular bacteria thrive and will happily turn your lactose into lactic acid. These are the bacteria that make buttermilk, chevre, lactic cheese, quark, cheddar cheese and so on.
Thermophilic bacteria on the other hand likes temperatures above body temperature. These are activated in the milk at 90 degrees or above. Yogurt is one example of a cultured milk product that is created by thermophilic bacteria. Mozzarella cheese is another. Feta usually uses both.
The basic requirement towards making the type of cheese you want to end up with is to activate the correct bacteria for that kind of cheese or dairy product.
Learn How To Make Sirene (Bulgarian Feta) -Try making your own feta-style cheese. Learn all about this wonderful and easy to make cheese and get the recipe!
Making Starter Culture To Use In A Natural Cheese Making Process

Cheese starter culture is for cheese making basically what sourdough starter is for making sourdough breads.
When you make your own starter culture, you will not ever have to buy any mesophilic or thermophilic starter culture. It can be kept going forever if you take care of it. And the product you create will be unique and especially healthy, because you use bacteria that is specific to your location, environment and season.
No sterilized purchased product can approximate that benefit. Instead of making “laboratory cheese” you’ll make a living, healthy location specific utterly unique cheese that will be super delicious and that you can feel good about eating.
Grow A Beneficial Environment For A Natural Cheese Making Process
The more you make cheese, you will increase the population of beneficial bacteria in your cheese making room or kitchen. Your environment will become increasingly more suitable for making cheese and your cheeses will improve. In fact, when cheese used to be made in most everyones’ kitchens a few generations ago, they would paint a newly built kitchen with whey, in order to introduce the beneficial bacteria in the home.
To make both, mesophilic and thermophilic starter culture, take 2 quart canning jars and label them. It is helpful to sterilize them in this case, to start on a clean sleight, using just your milk’s bacteria. But I never do. I’ve never had a bad starter because I didn’t sterilize. Bacteria are everywhere and they’ll hop into your milk, the moment it’s out of the udder. So I don’t see the point.
Mesophilic Starter Culture:
Now take 3 cups of the freshest raw milk, still warm, straight from the dairy animal, and pour it into the jar you labeled ‘mesophilic’. If you obtain your milk from elsewhere and it’s not warm anymore, then heat it to 85 degrees before adding it to the jar. Now try to maintain a temperature of about 70-85 degrees, basically room temperature for most people. I like to wrap a towel around it to keep the temperature even. You’ll want to keep it out of drafts too.
Learn how to make mesophilic German Quark or Chevre Cheese!
Thermophilic Starter Culture:
Take another 3 cups of milk and warm it to about 110 degrees. Then pour it into the jar you labeled ‘thermophilic’. You will need to keep this culture above 90 degrees, preferrably at about 110 degrees, to keep those thermophilic bacteria active. One way to do that is to set the jar in an oven with the pilot light on, test first to make sure the temperature is right. Or maybe you have an instapot with a low temperature setting (for proofing bread dough for example). You could also fill a cooler with warm water and set your jar in it and then just add more hot water if it cools. You can do the same in a sink, if you’re vigilant about checking that temperature.
How To Know When It’s Ready For Cheese Making
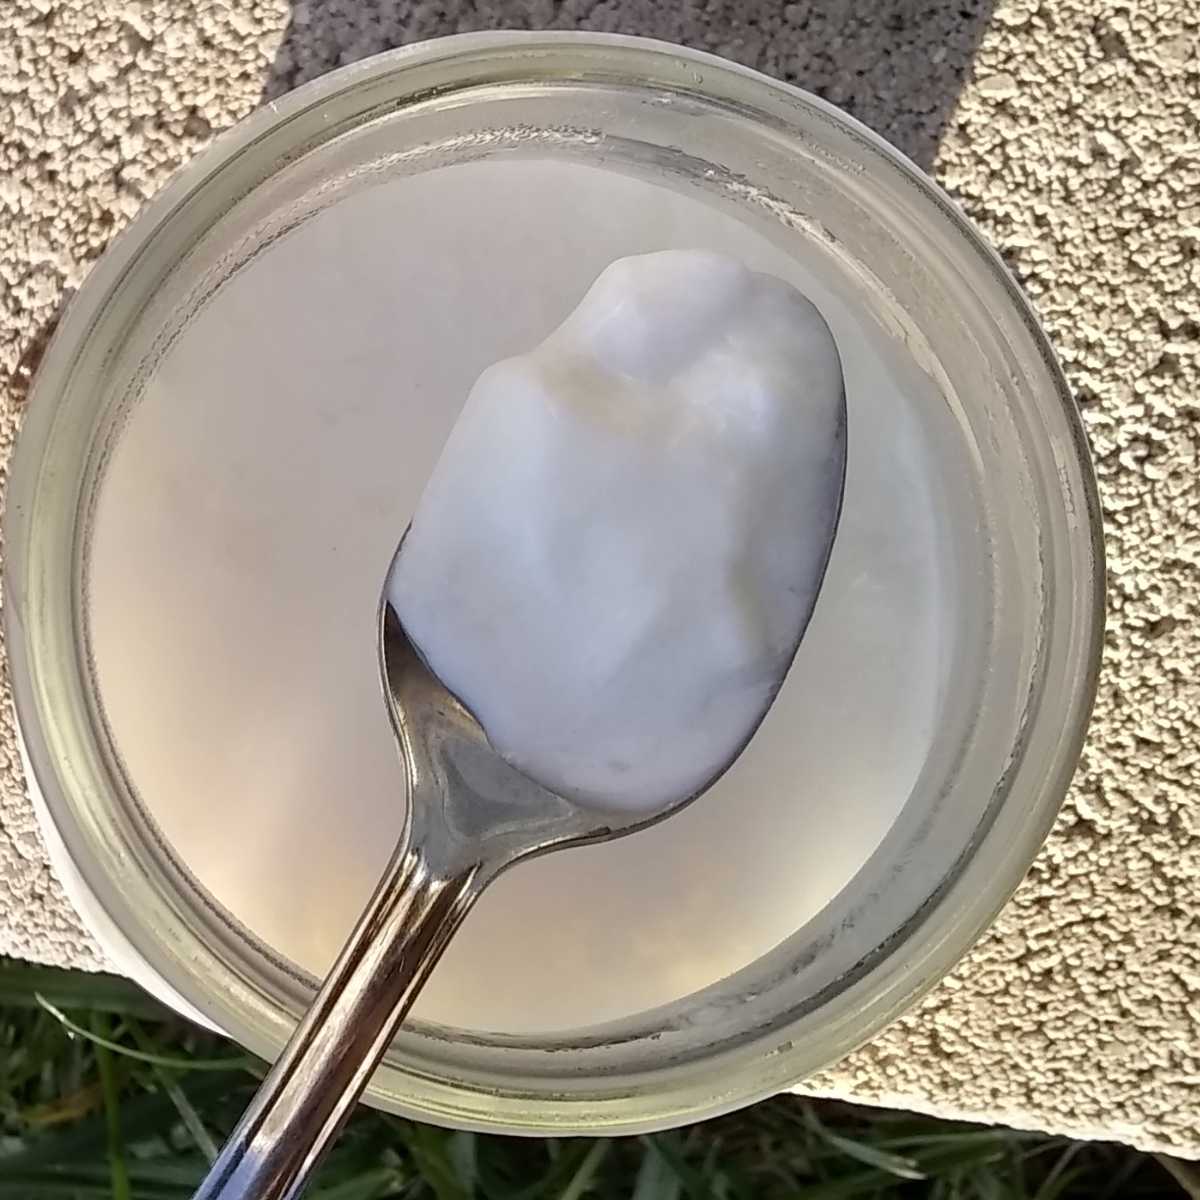
In both cases try to maintain the correct environment for your desired culture type. Now the bacteria can do their business happily. The thermophilic family will finish much quicker. It usually takes 6 hours to 12 hours. Once you have a thick product, that smells pleasantly sour, taste a spoonful. If it tastes like a good yoghurt, it’s done and you can save it for future yogurt or sourcream making. Or you can use it to make thermophilic based hard cheeses.
The mesophilic critters take a little longer. It can take up to three days for them, depending on the temperature in their space. Check after the first 24 hours if it was very warm in your room, but more likely it will take 48 hours or longer. Tilt the jar and see if you have a solid curd in it with some clear whey floating on top, covered with a thin velvety layer. If you can clearly see a separation and a curd formation (clabber), open the jar and smell it. It should smell pleasantly sour. You can taste a little and if you like the taste, then go ahead and use it to make your first batch of Chevre or buttermilk.
Troubleshooting A Not So Great Tasting Starter Culture
If your culture does not taste really great, let it sit a few more hours. If it just doesn’t want to get tasty, you can repeat the above culturing process several times until it does. So again, just take a spoon-full from your current batch, add it to fresh milk, let it culture, taste and repeat if necessary.
Sometimes it takes a few consecutive attempts to get a good tasting strong starter. It’s possible you had some funky organisms in you kitchen the first time around that messed up a batch. If it is bubbly, you might have caught some yeasts. If reculturing doesn’t make it better, then you may have to start fresh. But you should eventually have a great, strong starter for making cheese.
Don’t discard the not so perfect batches, unless they are clearly off-putting. Use them for milk shakes, smoothies, baking, cooking or feed to your chickens, pigs or dogs for a treat.
Make Your Best Starter Culture Using The Natural Cheese Making Process
Once you’re satisfied with the taste of your culture, then you should save some to use later. If you make cheese regularly, you can just reserve a quarter or half cup and use it to start your next batch tomorrow or the day after. It will keep in the fridge for several weeks.
To save your starter for future cheese makings, pour it into ice cube trays and freeze it. It keeps for a year in the deep freezer. When you’re ready to make more cheese, use two one ounce ice cubes per one gallon of milk.
How To Apply This Natural Cheese Making Process
Making A Basic Clabber Bag Cheese Using Just One Ingredient!

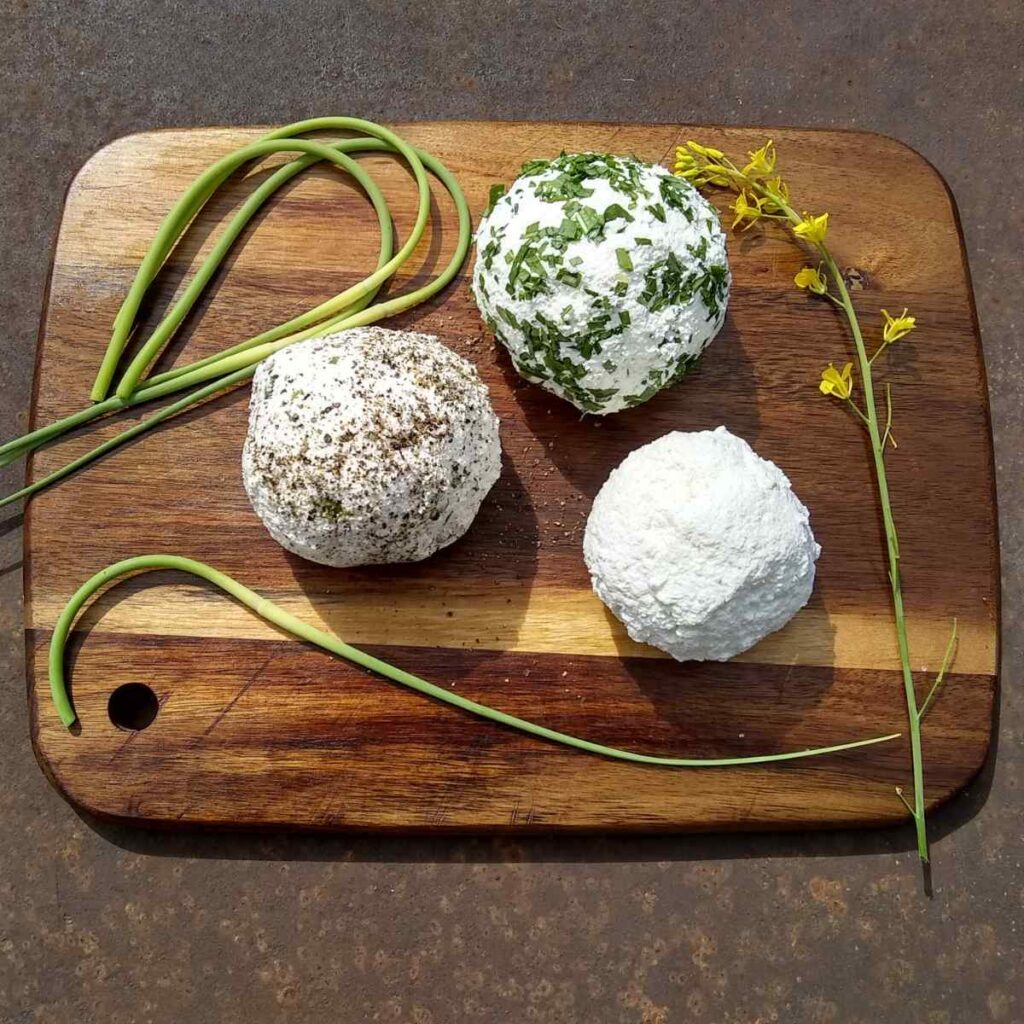
To make your first cheese, you can use a quarter cup of your home grown mesophilic starter, add it to a gallon of milk, let it sit for 24-48 hours till it’s thick and then strain it with a cheesecloth. This will be a very basic lactic cheese, or traditional chevre.
For detailed instructions on how to make chevre, lactic or cream cheese, check out my post Chevre Recipe.
Buttermilk
Make your own buttermilk by creating a mesophilic starter as outlined above. The milk, left at room temperature for several days, will turn into mesophilic starter, but it is the same thing as buttermilk. Use it just like the buttermilk that you get from the store, except your homemade is more healthy because it was not pasteurized. Homemade buttermilk contains a large variety of probiotics and micro-organisms that are beneficial for your gut.
Take a spoonful of this and place it into fresh milk (now it’s OK to use pasteurized milk if that is easier for you to find). This will start a new batch of buttermilk if you let it culture at room temperature.
You can use this buttermilk for baking, fresh drinking, making ice cream, and as a starter for cheese.
Sour Cream
Make sour cream the same way as you make buttermilk, but add your mesophilic starter to raw or pasteurized heavy or light cream and it will culture into sour cream.
You can also make sour cream with thermophilic culture if you follow the procedure for making yogurt below. In place of milk, use heavy or light cream.
Making Yogurt
Yogurt is easy to make, using your thermophilic starter. If you prefer a more thin European style yogurt, then just heat the milk to 110 degrees Fahrenheit and add a tablespoon of thermophilic starter per each quart of milk. Stir it well. Set it in a warm place that stays around 110 degrees. Keep it at that temperature for 6-12 hours till it’s thick. Then taste it. If you like it, you can put it in the fridge to stop the action of the bacteria and you’ll have delicious yogurt. It will thicken a little more over time and it will get a little more tart as well.
If you prefer a firm yogurt, first heat your milk to 180 degrees and keep it at that temperature for about 10-15 minutes. Then cool it in a cold water bath to 110 degrees. Now add your thermophilic starter culture. Proceed as above and you should end up with a nice thick yogurt in 6-12 hours.
To make Greek yogurt, you can strain the yogurt through a cheesecloth, until it is the consistency you like.
I’ll be posting a more detailed article on yogurt making pretty soon, so stay tuned for updates by signing up for my email newsletter.
Start Making Your Own Chevre Cheese
To help you start making your own cheese, I posted detailed instructions for Making Chevre (soft goat cheese). And be sure to check out my German Quark Cheese recipe, which is also called lactic cheese by some. Try your hand at an easy brine-aged Sirene (Bulgarian Feta) cheese. Learn all about this wonderful and easy to make cheese and get the recipe! And try the one ingredient original cheese, Clabber Cheese.
I’m also planning to publish several of my favorite cheese recipes in my cheese making series here. They all start with a basic culture such as you just learned to make. It’s so liberating to not have to rely on purchased cultures to make your own cheese. You will need rennet for some recipes, and you could make that from scratch as well, however, it’s a bit of a complicated process and I choose to purchase my rennet for now. But I might decide to make my own in the future and, if so, I’ll be sure to post it here.
If you found this article helpful, I’d appreciate a 5 star review! Let me know if you’ve made your own cheese or yogurt using this method and how it turned out in the comments below. If you have any questions about starting your own cheese cultures, please feel free to ask. And stay tuned for more recipes using the natural cheese making process.

FAQs
How much cheese will a gallon of milk make?
It depends on the time of year or milking cycle in your dairy animals. But you can get about one pound of hard cheese and two pounds of soft cheese from a gallon of milk. When the pastures are less rich in late summer and fall, your cheese will contain more solids and you’ll end up with more cheese per gallon of milk.
What do you need for cheese making?
Milk, culture and rennet. But milk is all you need for the most basic cheese, a clabber cheese. To make most other cheeses, you’ll need a starter culture, which comes from raw milk in natural cheese making, as I describe above, or you can purchase it. You’ll also need rennet to get firm cheese curds to make hard cheeses.
What does rennet do?
Rennet helps to form curd in cheesemaking. This is necessary to make hard cheeses and is helpful in small amounts for making soft cheeses. But you can make many soft cheeses without rennet, such as chevre, cream cheese, queso blanco, paneer or cottage cheese.
Can you make cheese with store-bought milk?
Yes you can. However, you won’t be able to create your own starter from store bought milk that has been pasteurized. You can use cultured buttermilk or yogurt as a starter for various cheeses.
New! Here is another option: Make Cheese With Sourdough Starter from scratch. No raw milk required! Use pasteurized milk and sourdough and follow my easy steps. (added 11-21-25)
What is raw milk cheese?
Raw milk cheese is from natural fresh raw milk that has not been pasteurized or heated to high temperatures. It retains all the vitamins and the natural good bacteria that is native to the milk and which is used in a natural cheese making process.
What to do with sour raw milk?
Milk’s natural tendency is to turn sour. The bacteria that live in the milk eat the lactose sugars in the milk and turn it into lactic acid. The resulting sour milk is very healthy to drink. It can also be used as a starter for cheese. It is very healthy for animals as well. Pigs, chickens and dogs love it and can benefit from the gut healthy organisms in sour milk.
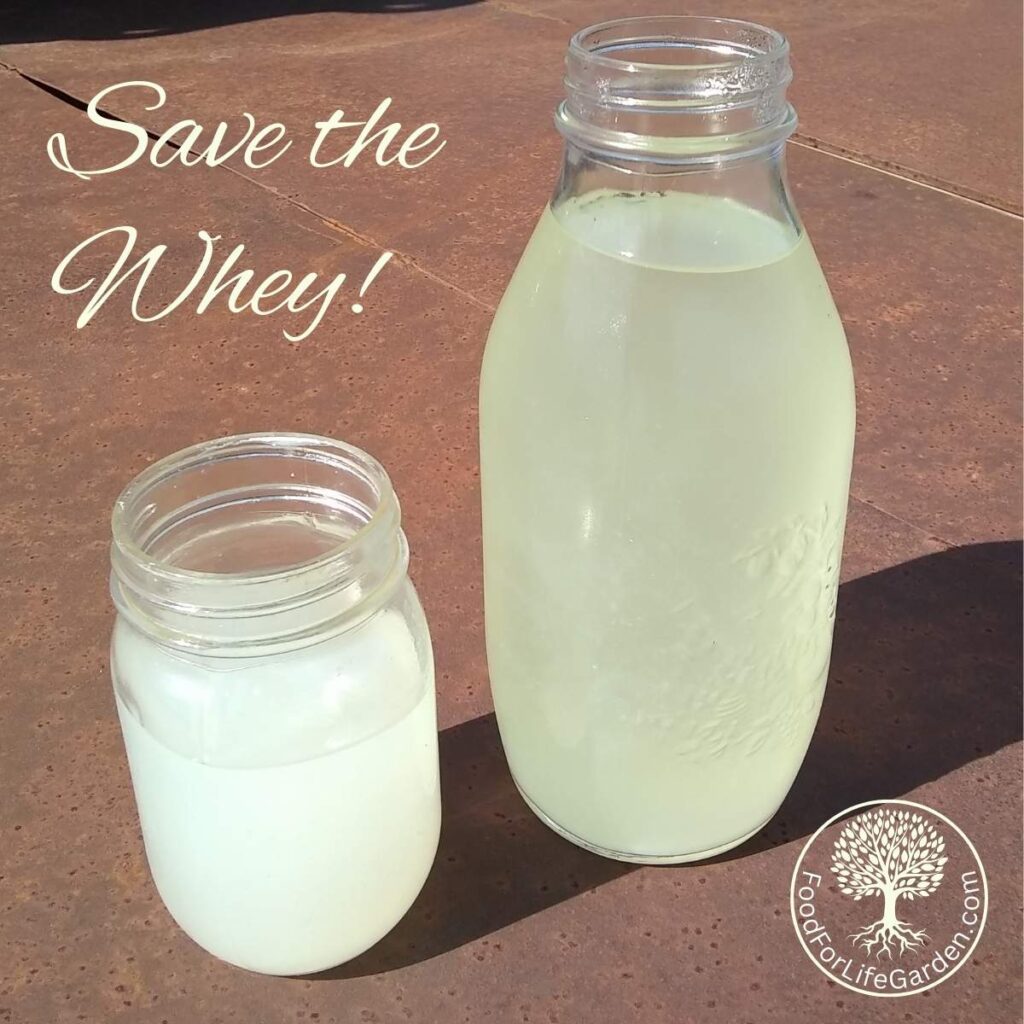
What to do with whey?
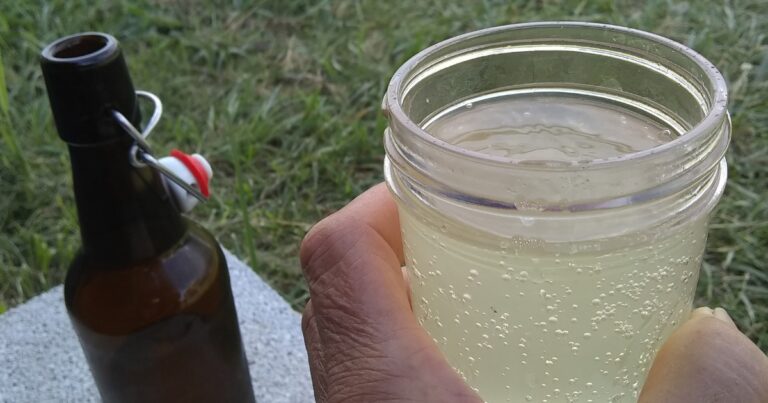
There are dozens of uses for whey, from cooking and baking with it, to making fizzy probiotic sodas, to making caramel and to use for skin and hair care. Find ideas, recipes, and more in Awesome Uses For Whey.
What to read next

Make creamy chevre from scratch – How to make your own soft, spreadable cultured cheese for fresh use or aged.
Make Cheese With Sourdough Starter from scratch. No raw milk required!
How To Make Sirene (Bulgarian Feta) -Try making your own feta-style cheese. Learn all about this wonderful and easy to make cheese and get the recipe!
Make German Quark cheese – Make authentic German Quark, also called Topfen. A versatile fresh, soft cheese that is a staple in German cooking.
Awesome Uses For Whey – Save the whey! And use it in dozens of ways. You’ll find something to do with whey for every single drop. It’s nutritious, versatile, healthy, and makes great fizzy sodas!
Soft Feta Cheese – An easy soft white brined cheese that does not need to get pressed. Great for salads and sandwiches!
Bonnyclabber – What is clabber milk and its uses Learn to make bonnyclabber, the original cheese. Nature’s way of preserving milk. A tasty, creamy cheese that makes a really good frosting for einkorn zucchini bread.
Queso Fresco cheese recipe – The quickest, easiest cheese you’ll ever make and so versatile!
Creamy Quark Dessert With Oranges – Use quark cheese in a German dessert, a creamy, luxurious mousse, healthy enough for every day desserts, but fancy enough for special occasions.
Awesome Strawberry Quark Cheese Mousse – A delicious German quark cheese dessert with pureed strawberries.
How to make your own sourdough starter – This forms the basis for any sourdough bread. Once you get a starter going, you can keep it going for a hundred years or more. Just feed it occasionally and use it to bake whenever you like. Transforms a hard to digest bread into bread that your gut will be happy about.
The best Sourdough Rye Bread – Easy, lazy method that makes super delicious, moist, chewy rye bread to partner with your favorite cheese.
Sourdough Seeded Rye Bread With Spelt – If you are a fan of rye bread, you need to try this awesome seeded rye. Loaded with whole grain berries and seeds, awesome with cheese.
Make an ancient grain sourdough bread – The easiest sourdough sandwich style bread you can imagine. No kneading required and it bakes up nicely airy and chewy and tastes amazing. Great for sandwiches with homemade cheese!
Gingerbug recipe – Make your own soda starter you can use to create your own ginger beer, root beer and other fizzy soft drinks.
Pin This Post
Shop this post:
The Art Of Natural Cheese Making
General cheese making supplies
Flour sack towels
Organic flour sack towels
Butter muslin, hemmed on 2 sides
Unbleached Cheese cloth
Organic cheesemaker’s cheese cloth
Cloth diapers
Rennet
Redmond’s Real Salt
Himalayan Pink Salt
Celtic Sea Salt
Skimmer
Thermometer
Walcoren Organic Kid Rennet
Walcoren Kid Rennet Tablets
Animal Rennet
Vegetable Rennet
Mesophilic Culture
Micro measuring spoons

Thank you so much for this helpful information. I’m just getting into cheese making and you put milk into a new perspective for me and also gave me a better chance at success.
Your so welcome! I’m glad if this helped!
What a great post, I am going to be picking your brain about this topic a lot once I get more milk from my girls !!! Keep up the great work, I love your blog 🙂
Hey Petra! Thanks so much for saying so! I’m glad you love it and I’ll be happy to help if I can!