Soak garlic before planting to impart vigor, boost growth, and improve the health and root development of your garlic, yielding bigger bulbs!

This post contains affiliate links. As an Amazon affiliate I make a small commission at no extra cost to you if you make a qualifying purchase. See my full disclosure here.
Today, we’ll discuss how to plant garlic, and why we want to soak garlic before planting. Find a complete planting guide below with steps for planting garlic from bulb to bulb!
When I first started growing garlic, my harvest consisted of a bunch of small bulbs, some were hardly worth peeling. Some had just two cloves in the whole bulb, and a few had only one big clove and no more. Some were breaking apart and started to rot.

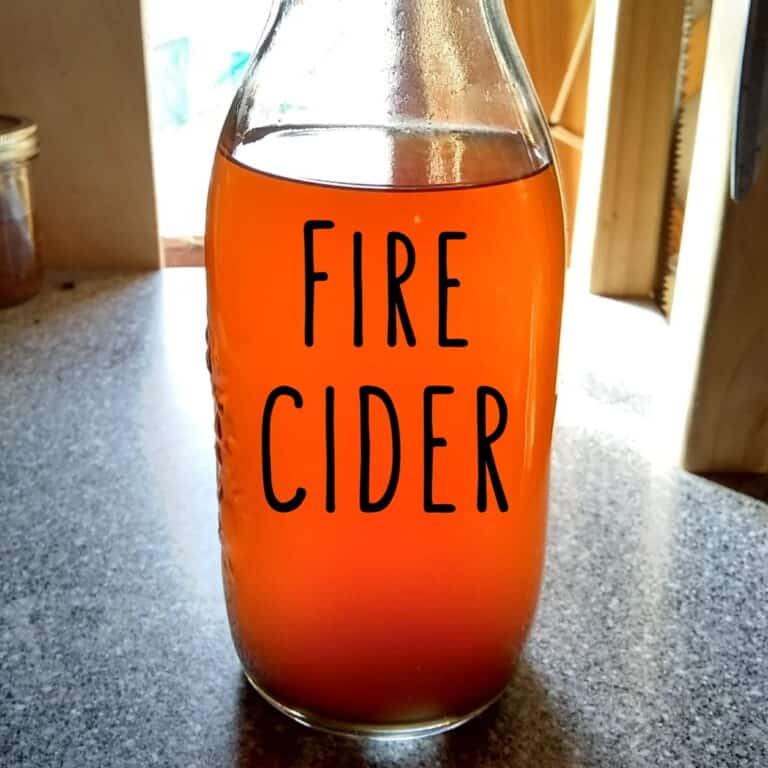
It was frustrating, because I love garlic and wanted to get plenty for making my garlic honey remedy, and I use a lot of it fresh, sprinkled over foods, and when cooking. Buying that much organic garlic can get expensive.
So I started to research how to grow garlic, and I talked with farmers about it. Then I tried using all the information I gathered, and here I’ll reveal what I do now and how I started growing huge bulbs with thick healthy stalks. I hope it will help you if you’re struggling too.
Discover how to use your garlic in a delicious Foraged Wild Weeds Pesto Recipe!
How to grow big, healthy garlic

Growing garlic is easy enough, you stick a clove in the ground either in fall or spring and most likely it will sprout and start to grow.
However, as easy as it is, the yield might not be what you hope for. But there are several things you can do to improve the size and quality of your garlic.
After I started to implement the following steps, my garlic responded and the result was wow-some.
To Begin, Get Good Seed!
This is so important. You will want some disease free, large, healthy bulbs to start with. Once you successfully grow your own healthy garlic, you can use your own as seed for the next year. But do try to get some good garlic in the beginning to get you off to a strong start.
If you can find local growers, so much the better. You’ll get garlic that will have adapted to your climate and this will make your success all the more likely. Here is a list of local growers that I found, however, it covers the more northern parts: Garlic Growers list.
I did have really good luck with Baker Creek garlic seed in the past. But I’m not sure where their garlic is grown. I used their seed when growing garlic in Washington State and I got beautiful, large bulbs from that seed. This year I ordered too late and they were sold out of all the hardnecks, my favorites.
One company that was frequently referenced in my searches, is the Keene Organic Garlic company. I decided to order a few garlic and shallot cloves from Keene Garlic after I wrote this post and they arrived yesterday. They are soaking and I’ll be going out to plant them in a little bit.
I wanted to report that I’m really pleased with their product and recommend them. The German extra hardy they sent are huge!
They were out of the varieties I had hoped to get, but I’ve planted the Germans before and like them. And they store very well. I also found a great fertilizer soaking guide on their website if you want to check it out.
What type of Garlic should you plant: Hardneck or Softneck
This is a matter of preference for those in the middle zones, but for those who live in warmer zones, you will do better with softneck garlic. The quick answer is: zones 1-5 are best for hardnecks, 8-12 for softnecks and both would work in the zones between.

Choose softnecks, such as silverskin or artichoke, if you live in USDA Hardiness Zones 8 and higher. In the higher zones, choose varieties that are bred for the hot weather. Softnecks like hot summers and mild winters. Those are the kind that you normally find in a grocery stores.
You could actually plant those, if you can find organic ones. But commercial garlic was probably treated to prevent sprouting. It is also recommended that you buy certified disease free garlic for planting so you don’t introduce pests into your garden that you don’t yet have.

Hardnecks, such as porcelain, purple stripe, and rocambole are best for the cooler climates in zones 1-5. But I’ve researched it and some people are growing them in zone 8 successfully. I grew them in 7b in Washington with great results and here in 6b in Missouri, they did just fine.
I prefer to grow hardnecks, with their rugged, robust taste, they are easier to peel, the cloves are huge and they produce delicious garlic scapes! That is a huge bonus in my opinion. They also store longer than softneck garlic.
The reason hardnecks aren’t suitable for southern climates is that they need an extended period of cold temperatures to fracture and form cloves.
When to plant your garlic
Plant garlic in the Autumn!
In almost all climates it is best to plant garlic in the fall and give it time during the winter to make strong roots. Then, when spring comes around, they are ready to put out some growth.
The best time to plant in the autumn varies, depending on your region and climate. A rule of thumb is to plant after the first light frost and before the hard freeze starts.
This can be a pretty large window of time. I like to plant it when the weather gets cooler after the first frost. When it starts to feel like fall and you can smell winter in the air, but before it hits hard.
In Washington, this was usually in November. Here in Missouri, I’m not used to the climate yet, but if last year was an indicator, then November to December sounds about right.
Planting garlic in spring
Some softneck garlic can be planted early in spring and still yield good sized bulbs. There are special varieties available that do especially well when planted in spring. I’m not sure if they’ll grow as big, my guess is not, but all is not lost if you miss the fall planting season.
Preparing garlic for planting
When you receive your garlic and you’re not ready to plant, just store it at moderate to cool room temperature in a darkish place. The day before planting, or even on the day of planting, but a few hours before, here is how to prepare your garlic.
What you will need:

- Liquid fish fertilizer or a mix of fish and seaweed.
- Hydrogen Peroxide, Rubbing alcohol, Everclear, or Vodka (go with what you have on hand or just buy the cheapest!)
- Baking soda
- A container, or several if you’ve got more than one variety
- Plant labels or some masking tape and a pen
- A kitchen sieve
- A quart or gallon container for mixing the garlic booster solution
Separate the bulbs

Ideally you will have nice firm bulbs that are not separated yet. Separate the bulbs into cloves just before using them, taking care to leave the hard skin around each clove intact. It will help protect your garlic in the ground. But they still work with broken skins.
Select the nicest, biggest cloves for planting in your garden. If you have some small cloves, just set those aside to either eat or to plant as a companion near other plants and realize that you won’t get huge bulbs from them.
Label your containers
If you have more than one variety, label a few canning jars with the variety name (I like to stick a plant marker in each jar and write on it with pencil. If you use a marker, the alcohol will erase it. This marker will stay with the garlic till I plant it and then it will serve as a row marker in the garden.
First Soak the garlic in Hydrogen Peroxide or Alcohol
This will kill pathogens and fungi that might inhabit your garlic, which could infect your soil and might ruin your crop. The alcohol will sterilize the surface of the garlic.

Put your garlic cloves into the labeled jars. Now it’s time for the first soak.
Pour some alcohol or hydrogen peroxide over the cloves in the jar. Enough to just cover the cloves. Leave them to soak for 10-20 minutes. Then strain off the liquid.
Here is a tip: I start with one jar and when the cloves are done soaking, I strain the alcohol straight into the next jar, that is filled with cloves. This reduces the amount of alcohol or peroxide needed.
Soak the garlic in a garlic booster solution
This will give your garlic a nutrient boost, that will set it up for a great start. The baking soda will give added protection from fungal infection when the garlic goes into the ground.

While the garlic is soaking in the alcohol, prepare the garlic booster solution. For that you’ll fill your quart or gallon container with water. Then add the following per quart of water:
- 1 teaspoon of the seaweed or fish fertilizer
- 1 teaspoon of baking soda
And mix it all well. When your first container with garlic cloves is done soaking in alcohol or peroxide, and after you strained off the alcohol, pour some of this solution over the garlic cloves to at least cover them. Proceed in the same way with all the jars you have prepared.
Now they will need to soak for at least 30 min or overnight. Put a cover on them and just set them aside if you’ll soak overnight.
Planting your garlic
Ideally, you’ll have your ground prepared and ready to go after growing your summer crops. I don’t till mine. All I do is, clear an area by cutting off the plants (leaving the roots in the ground). The plants go into the compost and I’m ready to plant the garlic.
Then I cover everything with a layer of compost. Garlic does like loose soil to grow big bulbs, so if your ground is a bit hard, use a garden fork to aerate it about a foot deep, but no need to turn or till.
You can try to mix in a little peat moss and compost. Or you can spread a thick layer of compost over your planting area and plant into the compost.
Plant spacing and depth

Garlic should be planted about 6″ apart when you grow them in rows. I used plant them about 4 inches apart, but they can get pretty crowded.
Now I recommend planting them at least 6″ apart. If they have more room they are likely to grow a little bigger than when they are crowded. The varieties I planted are all large varieties.

Plant your garlic a little deeper in the very cold zones that have hard frosts with little snow cover, to give it winter protection, but in the milder areas, plant about 2 inches deep.
Procedure
Pour off your soaking solution, but don’t toss it. I like to pour it into a bucket with some more water and use it to moisten the soil around my garlic after planting.
To plant your garlic, use a dibber or a hori hori knife to make a hole about 2-3 inches deep. Place your garlic in it with the pointy side up and the little hard root end knob down. This is important so your garlic will grow well and not end up twisted.
If you have sandy or depleted soil, adding a little bone meal to the hole can help the garlic grow strong roots over the winter. Just mix a pinch or two into the soil where you’ll plant your garlic bulb. This is not as helpful in alkaline soil because bone meal needs some acidity to be useful.
Cover your hole with soil and plant your whole area. You could also just plant one here and there throughout the garden then they will be companions to your other plants in spring and help keep pests away.
The challenge here is to be vigilant in late spring when the hardneck garlic sends up scapes. You’ll need to find all your garlic, which can be a bit hard if it’s all over the place. Then you need to cut those scapes off, or they wont form big bulbs.
My strategy is to plant the main crop in one area and spread around all the tiny, less useful bulbs in the garden. They don’t grow big garlic bulbs, but they’ll be wonderful buddies for your tomatoes, carrots and spinach. And if they go to seed, the pollinators will love them!
Compost

At this point, I like to sprinkle a thin dusting of azomite over the planted garlic bed and then a layer of compost. About an inch thick.
The azomite contains trace minerals that can enhance your soil composition. It is a slow release mineral supplement, a dust made from rock.
Mulching and Growing mushrooms

To finish this off, my garlic gets a thick mulch cover. This can be hay or straw or chopped up leaves. I’m using straw this year, since I’ll be planting mushroom spawn into it.
I am hoping to get a crop of mushrooms come spring before the garlic harvest. Mushrooms are good for your garden and can help supply your plants with nutrients and moisture.


You’ll want about 4-6 inches of mulch. This will insulate your garlic in freezing weather and keep the ground moist.
A note of caution is in order here about mulch. Straw and hay are often sprayed with pesticides right at the point of harvest. To be safe, you should get untreated straw, because the pesticide residue could potentially kill your vegetables.
Here is where you can learn how to grow your own mushrooms in the garden. Of course this is not necessary to grow garlic, I just like to take advantage of the situation and I love growing and eating mushrooms.
And I do have to add that when I grew mushrooms in one of my garlic beds a couple of years ago in Washington, I had my best ever garlic harvest from that bed. Coincidence?
Care
Now you can leave your garlic alone for a while, give it time to grow roots over the winter and get excited when you see the first green shoots come up early in the spring.
After you planted and mulched your garlic, it won’t need you anymore for a while. Let it do its thing and watch the shoots to emerge in spring. It doesn’t need any attention really, especially if you gave the soil some compost.
You can water with a little of the diluted fish or seaweed fertilizer every few weeks or as necessary to give it a bit of a boost. Otherwise just keep it watered well enough to keep the ground under the mulch moist. It probably won’t need a lot of water because of the mulch.
Now, if you are growing hardneck garlic, watch out for those garlic scapes in June! They will suddenly appear and if you’re on the lookout for them and don’t wait till they get tough, you’ll have a great treat on your hands.
Wether you like to eat them, or not, garlic scapes need to be pruned off so the garlic will put its energy into growing large bulbs rather than going to seed.
Garlic Scapes are a delicacy!

Garlic scapes are a great way to get an early garlic taste, especially if you’ve run out of garlic by now and are craving some garlic-goodness in your meals.
But they are actually a delicacy all of their own. In fact back in Washington they were served as edible decoration in a fancy restaurant. No-one knew what they were. But you would know if you went there now, wouldn’t you!
So wait till the scapes grow a bit but try to catch them just as they start to curl. That is the perfect time to take them into the kitchen, fry them in some butter and eat them like asparagus. It’s a treat!
They are also great on any food, whole as edible decoration or chopped as seasoning. You can also cook them in soups and stews, or mix the raw chopped slices into fresh cheese, like you would with scallions.
And if you have too many, they can be frozen easily, just chop and bag them and toss them into the freezer to use in winter stews.
You can make pesto with garlic scapes and that can be frozen too, or just make a scape paste to freeze in ice cube trays to use as seasoning.
I like to chop them into 2 inch pieces and ferment them too! It’s easy to do and it’s a great garlicky snack.
You can make delicious fermented garlic scapes!
Learn more about garlic scapes and find my favorite ways to use garlic scapes in Recipes for Garlic Scapes and Bolted Onions.
Harvesting Garlic

After your garlic starts to produce scapes, it’ll be about a month till harvest. I usually harvest garlic sometime in July. How to tell when to harvest?
Don’t wait till the plant dries up completely, as that will be too late if you’re planning to store your garlic!
Garlic wants to split and start sprouting to grow new garlic at that point.
I know a lot of people who harvest after the plant dies, and if you’ll be eating them right away, that’s ok, but if you want to get some storage life out of your garlic you’ll want to harvest sooner.
So when is the best time?
Count the leaves! When you have 5 green leaves left and the 6th leaf starts to turn brown, it’s time to harvest. Basically you want about half your leaves to be dry and the rest still green.
Your bulbs will have grown to full size but they will still be nice and firm and tightly closed, which is important for storage.
To get the garlic out of soft ground, you can gently tuck on the stem, being careful not to break it and ease your garlic out that way.
If your garlic is not easy to pull out, you might have to help it with a garden fork or a cobra head cultivator. Be careful not to damage the bulb, just loosen the dirt a bit around it and then try to pull it out.
It is best to harvest after a few dry days, so you don’t get chunks of dirt stuck to it. Shake the dirt off or gently rub it off if it’s thick. Then place your garlic out in the sun for a day to cure stem, leaves and all.
Curing the garlic

Garlic needs to be cured for storage. Just lay the whole plant on wire shelving or similar.
I used my gorilla cart sides in the past, which I placed on stacked wood in the woodshed, off the ground.
They can be gathered and hung as well, but make small bunches so you don’t get mold. I’ve also laid them out on my compost sifter (plywood square with stapled on hardware cloth). Be creative.
If you’re growing softneck garlic, you can braid the garlic stalks and cure the braids hung from rafters.
Important is that they get airflow and to keep the humidity down. They need to dry on the outside, and preventing mold is important.
Storing the garlic
Once the stalks dry completely, after about 2 weeks, it’s time to put the bulbs into storage. Use strong scissors, garden clippers or pruners to proceed.
Cut the stalk off about 2 inches away from the bulb. Leave plenty of the stalk for longer storage. Don’t cut it short like store garlic.
Now cut the roots off. Leave just enough so you don’t damage the area where the roots attach.
Brush off any dirt, but be careful not to puncture or tear the garlic bulb. I like to remove the very outer layer that has dirt on it, because I find that leaving any dirt on can promote mildew.
If you have a lot of dirt stuck in the root area, use a soft vegetable brush to get it off.
At this point, while cleaning, I start sorting them.
I use a three basket system:
I usually have a basket for the nicest, biggest bulbs, to become seed in the fall. They will be replanted come November and produce next year’s crop.
Then I have another basket for the smaller ones that are designated for eating.
And lastly, I have one basket for all those that I want to use first. That includes any that show signs of spoilage or look like bugs got into them. Any that have started to separate and aren’t nice and tight anymore.
I also add any that I damaged during harvest or cleaning, or maybe I forgot to get the garlic scape off and the bulbs are not as developed.
Now you can store your garlic bulbs. Keep them in a breathable basket. I like to use a wire mesh trash can with a small cooling rack in the bottom if I have a lot of garlic.
A basket or one of those hanging baskets would work or a mesh bag (try a used bag that had oranges in it or similar. A cloth bag, burlap or an old pillowcase will also work.
Important is that it’s breathable. Keep them in a darkish place. You don’t want to trigger any ‘time to grow’ hormones in your garlic.
Some Questions answered:
What to do if they start sprouting prematurely
If they do start sprouting at any time, you can still use them if they aren’t shriveled up yet. If they are not appetizing anymore just put them aside and plant them as companions for your other plants, and you may get a harvest out of them.
You can also chop and freeze them or freeze them whole if you don’t have time to prepare them in any way. This will save them and you can just take them out, peel and chop them when you need them while they are still partially frozen.
Can you grow garlic from seed?
Hardneck garlic produces scapes, or flower stalks, that will open up and reveal a ball of tiny flowers that turn into tiny bulbils, these can drop to the ground and produce little garlics.
Generally, you’ll want to cut these scapes off before they flower, in order to encourage big garlic bulbs. But if you miss one (very easy to do), you could try to grow garlic from the little bulbils.
These will not grow big garlic bulbs in the first year though. What you do is dig them up after year one, split them, replant and keep doing so over the next few years until they start to become a decent size.
It takes about 3-4 years to get good sized bulbs from those tiny bulbils. If you’re in a hurry for garlic, it’s best to just split your bulbs and use the cloves to propagate.
Can I use Garlic as pest control?
I like to use the little bulbils and any tiny garlic cloves and plant them around my fruit trees as companions for the trees.
I also sprinkle them in garden beds just to get some garlic here and there as pest deterrents. When I have garlic cloves that are too small for peeling, that start to sprout or that get shriveled, I plant them around trees.
Many critters don’t like to hang out near garlic, and the strong garlic scent might cover up the scent of another plant that you want to protect.
Enjoy your garlic!
I hope you’ll enjoy growing garlic as much as I do. I am sure you’ll love those thick green stalks emerging out of a dead garden in spring, when nothing else is growing yet.
Something beautiful, new to look at when you walk through the still sleepy garden in early spring. A harbinger of what’s soon to come everywhere else.
But in the meantime, while you wait, enjoy your own homegrown delicious garlic! Now that you have baskets full of it, use it generously fresh or cooked.
And if you have a bit to spare, or you think you have more than you can use before next harvest, do consider making fermented garlic with some of it.
It’s a super convenient way to have garlic chopped and ready to use whenever you need some right in your fridge. It’s the ultimate homegrown, homemade convenience food.

I also recommend that you make some of the garlic honey remedy to have on hand for cold and flu season. Another great way to use extra garlic, and an easy way to take your daily quota to repel sickness.
If despite all your efforts a cold or flu should strike, it will help with the symptoms, soothe coughs, and speed recovery.
Do let me know how your garlic growing went and what you did to grow vigorous garlic. I’d love to hear from you below in the comments.
And I hope you’ll subscribe to my newsletter, where I keep you updated on new posts and where I’ll give you helpful tips for homesteading, gardening and more. It’s a great way to support my blog too.
My gift to You for subscribing!
Now I have a Gift For You! I’ve created some Homestead Wall Art that you can print and put in a frame for your home if you like. You might even use them as a gift.
I love having a Life is better in the garden plaque hanging on my wall because it makes me feel good, especially in winter. If I’m feeling gloomy, I look at it and it reminds me that spring is coming.
So maybe I can do the same for you. Let me know if you like these and please feel free to download, print and use them for personal use as you wish
More information about gardening and fermenting
25 Essential Herbs To Plant – Start your home apothecary garden with these 25 powerful allies for your health. Learn their benefits, how to grow them and where to source them.
Recipes for Garlic Scapes and Bolted Onions – There is much you can do with garlic scapes and bolted onions. I’m sharing my favorite ways to use them and how to make a delicious pesto sauce.
Fermented Garlic Scapes – Preserve your extra garlic scapes and gain a lot of health benefits by fermenting them. They make delicious, tangy pickles with lots of uses.
Foraged Wild Weeds Pesto Recipe – Make a delicious Pesto with wild weeds and garlic, a guide to foraging wild greens.
How to start onions from seed – Learn all about growing onions from seed to harvest and how to prepare them for long term storage. Plus how to choose the right varieties!
Grow Your Own Sweet Potatoes – How to grow slips, plant them, care for your sweet potatoes, harvest and cure them. Don’t miss out on growing your own nutritious, edible sweet potato greens too!
How to Grow Celery From Seed To Harvest – All about the celery. If you want to grow it for bulbs, stalks, leaves or seeds. This post has you covered.
How to make mulch from wood chips for your garden – Read about the many ways that wood chips can help you with your garden and your food forest.
Grow mushrooms at home in your garden – This is one of the most rewarding experiences in wood chip gardening. Grow your own mushrooms intentionally. It’s easy and they taste so delicious!
How to prepare the soil to plant fruit trees – How to prepare your planting hole, what to put in it and how to give your tree the best odds for growing up strong and healthy.
How to make 18-day compost – The best compost for your garden beds in less than 3 weeks.
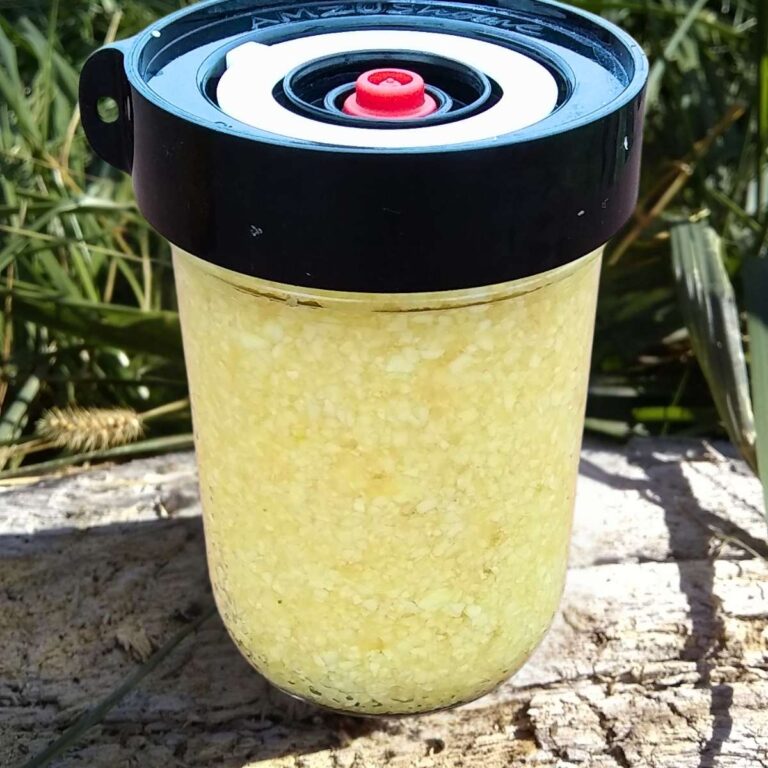
Fermented Garlic – Lacto-fermented garlic paste is kind of a special food. It’s the ultimate convenience food and health supplement. But besides that, it gets better as it ages. Just like a fine wine.
Fermented Garlic and Honey – A powerful combination of two all-star infection and sickness fighters. Make this easy remedy today and be ready for cold and flu season!
Pin this post

Shop This Post
Cobra head cultivator
Azomite
Dibber
Hori hori knife
Bone meal
Fish fertilizer
Fish and Seaweed
I think you will love to grow big garlic bulbs! And don’t forget, if you have any questions, you can ask me right here in the comments section and I’ll get back to you as fast as I can!