Lacto-Fermented vegetables, benefits and recipes. An ancient way of preserving vegetables, brimming with probiotics for gut and immune support.

This post contains affiliate links, which means I make a small commission at no extra cost to you if you click through and make a purchase. See my full disclosure here.
Come along and discover the very basics of making super delicious lacto-fermented vegetables. Learn how lacto-fermentation works and why consuming lacto-fermented vegetables is so valuable for your health.
There are two methods used to create probiotic rich lacto-fermented vegetables. One is the dry-salted method and the other is the salt-brined method. You’ll find both methods covered below in detail. If you want to jump right in to start fermenting, skip the fundamentals, details and benefits section.
- Jump to recipe card
- Jump to lacto-fermented vegetables recipe details
The Benefits of Lacto-fermentation

Back when I started to ferment vegetables, mainly sauerkraut and cucumbers, there was little information on the process. You’d find some recipes in ethnic or old cookbooks, but not much mention of health benefits or detailed processes in the form of dedicated fermenting books, let alone the internet, which was very young then.
There are many benefits attained when you preserve vegetables by using the method of fermentation. Fermented vegetables can easily keep for a year or more. I’ve eaten several ferments that I kept in the root cellar for two years and they were a bit sour, but still crunchy and delicious.
Fermenting is an ancient and most nutritious way to preserve foods
Fermentation will keep your vegetables raw and thus preserve all its vitamins, minerals and enzymes. It will even enhance certain vitamins, and make nutrients more bioavailable. But best of all, the process of lacto-fermentation will add a huge bonus through developing probiotics, which are super valuable for your gut health.
The immune system is in your gut! This has been discovered in scientific studies and recorded in numerous scientific papers. And so, feeding the gut properly can support and enhance your immune functions as well as gut functions. A diet that includes lacto-fermented foods, can also decrease inflammation and prevent or lower the chance of developing diseases. Because lacto-fermented foods will help restore a balanced gut microbiome. (source, source)

Add lacto-fermented foods to your daily health regimen
Adding a bit of fermented food to your daily diet is better than taking a probiotic powder or pill! You’re eating living organisms, which will readily populate or “seed” your gut with beneficial bacteria. These will flourish to benefit your overall health. If you make your own ferments, you’ll utilize local bacteria in your fermentation, which makes them custom fit to you and in tune with your own gut environment. And a little goes a long way.
All things start with a healthy gut. It affects all functions in the body. If bad bacteria is dominating your gut, your health will be negatively affected. So the goal is to increase your good bacteria population to restore balance. And one of the easiest ways to ensure that your gut bacteria is healthy, is by feeding it a proper diet of living beneficial organisms. Such as the ones that are growing in raw lacto-fermented foods.
Serve a small side of fermented vegetables such as sauerkraut or salsa at dinner. It will provide beneficial bacteria and enzymes that can help break down your hard to digest proteins in cooked meats and other foods. And it enhances immune power while providing some neccessary vitamins and minerals that are present in raw food. This is especially important during the gloomy days of winter, when raw vegetables are out of season and your immune system is sluggish.
Benefits of Lacto-Fermented Vegetables include increased GABA levels
Fermentation increases GABA levels in food. Gamma-aminobutyric acid, known as GABA is an inhibitory neurotransmitter in your central nervous system. It produces a calming effect. And it has been linked to controlling anxiety, stress and fear, as it is acting on neurological and mental health conditions. Increasing GABA levels can possibly help with high blood pressure, diabetes and insomnia.(source)
GABA is considered an antidepressant with sedative, antihypertensive (lowers blood pressure), antidiabetic, and anticancer properties. It is also an immune system enhancer and helps with improving the mood.(source)
Gaba has been found to help with inflammation issues. It can relieve pain that is associated with PMS as well as other chronic pain. GABA can help increase exercise tolerance and help with recovery after over-exercising. Increasing your GABA levels is important because low GABA activity leads to anxiety, depression, insomnia, and mood disorders. (source)
Restore your gut flora after antibiotics or chemo
If you have to take a course of antibiotics, or if you have to go through chemo, most likely you’ve heard that taking probiotics can help restore your gut flora. The probiotics do not have to come from only yogurt, pills or powders. Any probiotic food will work, such as lacto-fermented vegetables, bonnyclabber, whey, cultured cheese or other cultured milk products or probiotic fermented drinks such as ginger beer.
A little history of lacto-fermentation
The process of lacto-fermentation dates back to the beginnings of human life. The earliest evidence of fermented foods and beverages dates back to 8000 BCE according to some sources. And while our ancestors might not have known the science behind it, they discovered how to preserve foods and found that they kept them healthy.
How lacto-fermented vegetables saved the sailors

Sauerkraut has gained fame with tales of saving sailors at sea during the age of sail. Thousands of sailors had succumbed and continued to loose their lives to scurvy, a disease that is caused by lack of vitamin C. Contemporaries sought out remedies for this malady. In the past, these sailors had brought with them on their journey, citrus fruit and other vitamin C rich foods. However it could only keep fresh for a short while before it rotted. So what were they to do? In an experiment on captain Cook’s journey he was provided with several barrels of fermented cabbage. His crew ate regular doses of it during the months at sea and no one on Cook’s ship contracted scurvy. This is how sauerkraut became famous and saved the age of sail (source).
This gives me goosebumps! It was found that even though fresh cabbage contains only marginal amounts of vitamin C, the process of lacto-fermentation increases the vitamin C content in vegetables as well as some B-vitamins. How exciting is that?!
What is lacto-fermentation?
Lacto-fermentation refers to the transformation that happens when bacteria that is present on all the vegetables, the lactobacilli, consume naturally occurring sugars in foods and convert them into lactic acid. When we ingest lacto-fermented foods, these bacteria will populate our gut and help balance the gut flora. How the balance of your gut flora relates to your health is truly an intriguing and important subject to explore.
Lacto-fermented vegetables are created by natural processes.

a cloudy brine and bubbling.
Lacto-fermentation happens when naturally occurring bacteria eat the sugars that are available in foods. All meats, dairy, fruits and vegetables contain such bacteria. That is why we can get any raw food to ferment. Grain turns to sourdough; milk turns into yogurt, cheese and whey; vegetables become sauerkraut and kimchi. Even meat and fish will ferment and produce lactic acid, such as in cured sausages and brine-pickled fish. This resulting lactic acid creates an environment in which undesirable bacteria can’t survive. This will not only preserve the food, but it is ideal for our gut bacteria to remain balanced when we eat it.
When we encourage lacto-fermentation without adding a starter, we encourage naturally occurring bacteria, and the process then is called wild fermentation. We can create an ideal environment for starting this process by adding salt. This draws out the juices of the vegetables including the sugars. The added salt will also help to prevent the growth of undesirable salt-intolerant bacteria. Thus we have created the perfect environment for lactic acid bacteria to start reproducing.
Special note: Cook any vegetables that should not be consumed raw such as green beans. Since this kills the bacteria you need, you’ll have to add some raw vegetables such as onion and garlic, or add a little starter brine from already fermented vegetables, or you can use whey to inoculate your brine.
Lacto-Fermentation is an anaerobic process
Lactic acid bacteria thrive in an oxygen free, or anaerobic, environment. For this reason we need to keep the solid ingredients submerged in a brine or their own juices by adding some kind of a weight to press all the ingredients below the surface. In mason jars, we can also try to wedge in vegetable pieces in a way that will prevent the solids from floating.
Wild Fermentation vs. Using a Starter Culture
Wild fermentation utilizes the bacteria that is already present on the food and in our environment. When you’re using the wild fermentation method, the outcome will vary from one batch to the next. Depending on your environment, the room temperature, the type of vegetable you use, the type of bacteria that is dominant at the time, the amount of salt you use, and possibly many more factors. This makes wild fermentation a more unpredictable, but also more exciting and very unique method of fermenting. No ferment is like any other. I prefer to let fermentation take its own direction.
However, lacto-fermentation can also be brought about by adding a starter. This can be a spoonful of whey from yogurt or cheese for example, a bit of brine from a finished batch of lacto-fermented vegetables, or a purchased culture. These can steer the fermentation into a specific direction, as it is often utilized in cheesemaking, wine making, and beer brewing. It can also speed up the process a bit. You’re inserting a certain set of bacteria, that is now dominant and will determine the direction your ferment is heading into.
In this post about how to make lacto-fermented vegetables, I’ll focus on wild fermentation!
Lacto-Fermented Vegetables Basic Recipes
Without going into details about specific ingredients and seasonings, I am going to provide a fundamental recipe that you can use as a basis for any lacto-fermented vegetables. Check out fermented cucumber pickles, fermented salsa, fermented sauerkraut, and fermented herbs for details on specific vegetables. I’ll be posting more eventually as well. I recommend that you sign up to receive my newsletter so I can keep you up to date about new recipes!
There are two basic methods that are used for salt-based fermenting: dry-salting or adding a salt-brine. The fermentation process is the same for both, but where things differ is in the way the vegetables are salted. Read on to find out which salting method to use and when.
Equipment for making lacto-fermented vegetables:
A container for fermenting
Best options are glass containers such as quart or half gallon mason jars, used glass containers or other glass jars. But you can also use a 5 gallon food grade plastic bucket if you have a large quantity to ferment. Or try a food grade plastic tub such as the cambro bpa-free container, which is my favorite for fermenting sourdough for bread and doubles as a fermentation vessel as needed. Food safe ceramic containers such as a crock pot insert or a dedicated fermentation crock will work as well.
Do not use metal containers or non-food-grade plastic. Make certain that imported ceramic containers use a food-safe, lead-free glaze.
Homestead Savvy: My suggestion is that you start out with several smaller containers, such as quart or half gallon jars and practice until you feel confident. It’s disheartening to ruin a whole 5 gallon batch of your hard earned garden produce.
Lid or covering, appropriate for the container you chose.
If you use a mason jar, any of the mason jar lids will work. Screw the lid on just “finger tight” to prevent over-pressure in the jar. Or ‘burp’ the jar once a day. Note however, when using metal bands, the metal will react with the salt and acid in the brine and will get rusty. Which smells bad and leaves rust on your jar. Worst case, it will bond to your jar and you might have trouble opening it. Ask me how I know!

You can also use a piece of butter muslin, floursack towel or other cloth secured with a rubber band, to cover your container for keeping bugs and debris out. A coffee filter works as well.
Optional but very helpful and my preference, are fermentation tops or airlocks if you go with canning jars. Fermentation tops and airlocks do a great job at keeping out oxygen and allowing the gasses in the container to escape. No burping required, no fear of explosion, no rust on the rim, and less chance of spoilage if some floaters make their way to the surface, since little oxygen remains in the headspace.

A Fermentation weight
This is any somewhat heavy object, that needs to fit into your chosen container fairly tightly, to keep all the solid ingredients submerged in the brine. Lacto-fermentation is taking place in an anaerobic environment and any floaters, which have contact with air, or oxygen, might spoil if they are not continually pushed back under or skimmed off.
Here are some options: mason jar sized glass weights work really great and are my preference. Ceramic weights are nice and come in larger sizes as well. I have also used a small plate in my cambro plastic container, a larger plate in a 5 gallon bucket, a clean scrubbed rock, a freezer bag filled with filtered water, small rocks or marble, or a food-grade plastic lid that fit inside the container opening. You can also try a large piece of any vegetable wedged into a canning jar, so it can’t get loose and float.
Your choice of weight should not be made of metal and should be food-safe.
A Scale (optional)
Any kitchen scale will do, but if you don’t have one, I’ll provide the alternative measures in the recipes, but a scale is great for scaling your recipes. It makes it very easy to convert the ratios for any size batch.
A tamping tool for kraut and other chopped or grated dry salted ingredients
This will help compact the veggies inside their fermentation container and easily create brine from the vegetable juices alone. I love my acacia wood tamper for this.

Ingredients for lacto-fermented vegetables:
For this post, I will be covering the basics of lacto-fermented vegetables without delving into fancy ingredients or seasonings, but I’ll provide a list of flavoring options if you feel like experimenting. You may also look up my other fermentation recipes for details on specific ingredients and extras.
For a basic recipe, all you need are your preferred vegetables, salt and in the case of a brine fermentation, water. This allows the veggie itself to shine in its own glory with no competitors for flavor.
Salt
Salt plays an important role in fermentation. It draws out the juices from your vegetables and creates the perfect environment for the desired bacteria to thrive and at the same time prevents the undesirable critters from reproducing.
Avoid salt that has additives! And this eliminates ordinary table salt from our list of contenders. It can cause off-flavors and discoloration.
Kosher salt is often used for pickling. However, check the box it comes in, since at least one major brand of kosher salt contains anti-caking agents. Canning and pickling salt will work fine as well. Both of these options are just plain sodium chloride, without any nutritional benefits.
I am a strong proponent for Redmond’s Real Salt. After using most every salt that has been popular, I keep going back to Redmond’s. Because it is mineral rich, comes from US salt deposits that are not contaminated, and it tastes great.
It’s a bit pricey though, and if I need large amounts of salt such as for brining a ham or cheese, which call for a saturated brine solution (= lots of salt), and sometimes for fermenting vegetables, I’ll use Himalayan pink salt or plain, additive-free unrefined sea salt. My other favorite is Celtic sea salt. All of these are rich in trace minerals that are essential for our bodies and are an important dietary additive. Make your salt do double-duty!
Water
Fermentation is caused by lactic acid bacteria. These are little living creatures that are going to convert the sugar in your vegetables into healthy lactic acid in order to preserve the vegetables for long term use.
When we use tap water, we need to be mindful that chlorine is an antibacterial and can kill or severely inhibit these microbes, which would result in a failed fermentation attempt, and it should be avoided if possible.
If all you have is chlorinated tap water, boil it and let it cool, to cause the chlorine to evaporate. Alternatively, leave the water uncovered for 24 hours. It is good practice to do that for your drinking water as well, to keep your gut bacteria healthy.
A better option is to use filtered water. You can also use well water. If you have high mineral content in your water, be aware that some of the minerals in the water such as high iron, can cause discoloration or off-flavors in your pickles.
The two salting methods and ratios:
01 Fermenting by dry salting:

This method is usually used for vegetables, which produce their own brine readily, or that are finely grated, chopped or blended, such as is done for hot sauce, kraut, relish, salsa, grated zucchini or finely chopped herbs. This treatment causes the juices to be readily released when plain salt is added.
The formula to use for dry-salting is usually 1.5% to 2.5% of the vegetable weight in salt. I use 1.5% mostly, but if it’s very hot, in the middle of summer, and my room temperature is above 80 degrees, I like to use 2% to keep the vegetables from getting mushy and to slow down fermentation.
The formula for a dry salt fermentation: For a 1.5% salt ratio, multiply the product weight in grams x .015. For a 2% salt ratio use product weight x .02. My strategy is to use 1.5% if the temperature is about 75℉ or less and then I taste it to see if I would like to add more. And I use 2% if the temperature is over 80℉.
Example: When making kraut, core and then finely slice the cabbage and weigh it. If you have 1000g of cabbage, multiply by 1.5% or .015. Your result is 15 grams of salt. Use this to mix with your cabbage, or use 2% by this formula: 1000g x .02 = 20g of salt.
Let the salted cabbage stand for a bit, then knead it well to release its juices. Press into a crock, a food-safe plastic bucket, a glass container or a canning jar. Use a tamper of some kind to compact the kraut and press it below the juices.
Cover with a weight, such as a plate, glass weight or ceramic weight, or a rock, to keep all the bits under the brine and skim off the floaters. Then cover with a lid or piece of cloth, secured with a rubber band to keep flies and debris out. If you have a fermentation lid, you can use that as well.
Homestead hack: when you make just a small amount of fermented herbs, or grated zucchini, or salsa for example you can skip the math and mix 2 Tb of salt into each quart of vegetables.
02 Fermenting with salt brine:
This method is used for vegetables that are kept whole or in chunks or slices, which do not produce abundant juice on their own. Examples are cucumbers, cauliflower, zucchini slices, broccoli, jalapeno slices, purslane, watermelon rind, or whole peperoncinis. If we just added salt, these would not make enough of their own juices to submerge the pieces. So we will help them by making a salt brine to submerge the veggies in.

The brine
Dissolve the salt in the water and pour the brine over the vegetables that are arranged in your jar. The amount of salt can vary depending on a) your preference, b) the type of vegetable and whether you want it to remain crispy, and c) your climate or weather.
The basic recipe for a salt brine without using a scale, which is what I use most of the time:
Use filtered water and add 1-3 tablespoons of salt per quart. Technically, you’ll want to arrive at a 2% to 4.5% salt solution. Most vegetables will work great with a 3% brine most of the time.
Per quart of filtered water, use
4 teaspoons of salt for a 2% brine
2 tablespoons of salt for a 3% brine**
3 tablespoons of salt for a 4.5% brine*
*More salt will slow down fermentation, which is a good strategy for hot weather and to keep vegetables more crunchy.
**When you’re just starting out, I suggest using 2 tablespoons per quart of water as a basis. Once you learn more about the process, the science behind it, and what works for you from experience, you’ll be able to adjust this for different situations based on that experience and observation. For example, if your pickles turn out less crunchy than you like, use more salt next time and lower the room temperature if possible.
The scientific method for making a brine by using a scale: The most accurate way to measure your salt ratio is with a scale: Tare your container. Then fill fill it with all the ingredients and the water. Multiply the combined weight by .02, or calculate 2%. The result is the amount of salt you need for a 2% salt ratio. Add the salt and close the container and shake it gently to dissolve the salt. Then place a weight on top and use your fermentation lid to cover it.
How Temperature affects your salt to water ratio
If it’s coolish, you can possibly get by with a tablespoon of salt per quart of water. If you’re finding yourself sweating through the dog-days-of-summer and 80℉+ degrees in your room, then you’ll need at least 2 tablespoons or even more, to slow fermentation and keep the vegetables from getting mushy and your ferment from turning ugly. Cooler temperatures will also aid in keeping your vegetables more crunchy. But any cooler than 65℉ and fermentation may not take place at all. The lactobacilli like it a little on the warm side and they are the ones to please!
My own rule of thumb is to use 2 tablespoons of salt per quart of water. I rarely use less, except with salsa, but I use a little more if it’s 90℉ in my yurt. The more you ferment, the better your chances at finding your salting “sweet” spot, which satisfies your preference in flavor and works with your current environmental conditions. But for starters, I suggest you use 2 tablespoons of salt per quart of water.
Adding the brine
Add enough brine to cover the ingredients. Leave a bit of headspace (the area between the rim and the top of the brine). Your brine will expand as it becomes active and bubbly and will spill over if there is no room at the top. Which is fine, just be aware that it may happen and place a catchment container underneath your jar. I like to place mine on a doubled up towel on a surface that can get wet.
Submerge your fermentation with the aid of a fermentation weight to keep the ingredients submerged. Next Seal it with a fermentation lid or cover it with any lid or a piece of cloth, secured with a rubber band. As long as the solid ingredients remain below the surface of the brine, they will have anaerobic conditions. And in essence, the cover is mostly important for keeping the bugs out.
Making your lacto-fermented vegetables
Now that you have your ingredients in a container and covered, you can just place the container in a darkish corner and leave it to start fermenting. Much of the following is a very inexact science. The fermentation progress depends on your room temperature and fluctuations in it. But it depends also on the type of ferment, the type of vegetable or combination you used, the kinds of bacteria that are present on them and in your environment and so on.
Assuming your temperature is around 75℉, your fermentation should be usable in about three to ten days. Here is what you’ll want to look for: your brine will get cloudy and bubbly. Some of the brine might spill out. This can go on for several days, or even weeks with some ferments.
There is no one-size-fits-all in fermenting
So as you see one size does not fit all in fermenting. And besides gathering experience and through experimentation, there is not much of a rule you can follow exactly. Be flexible and observant, and you’ll likely end up with an amazingly awesome result that you’ll love. After several batches, you’ll become very comfortable with the process and you’ll most likely begin to recognize when your ferment is done. And then you will feel confident to experiment. It’s such great fun, once you get into it!

It is done, when you like it!
The main indicator that your ferment is completed, is the reaction of your taste buds. Wait about 3-4 days or until it has been bubbling away for a couple of days. Taste it. The brine should have a slightly tart taste. There should also be a signature “fermentation” smell, which you might not recognize at first, but it will become a familiar theme in all your fermentations and you’ll soon learn to discern it. If it tastes just mostly salty with little other flavor, put it back in its spot for a few more days and let it continue to bubble away.
If you like it at this early “half-sour” stage, you can call your ferment done.
To achieve a full-sour ferment, let it ferment until it tastes distinctly sour and has a strong fermentation smell. Lactic acid bacteria will continue to multiply and produce more of the benefits than at the early stages. This can take several weeks or more at cooler temperatures. So if it’s your goal to have the most probiotic benefits, let it ferment for several weeks to a month.

What to keep in mind when making lacto-fermented vegetables
Important: If you are using a lid with a seal, you’ll want to burp the container every day or two, to prevent too much pressure from building up inside. Some containers may burst from the pressure. Burping means to just barely open the lid to let the gasses escape, then screw it tight again. You can also keep the band on a canning jar just finger-tight so gasses can escape on their own when pressure builds up. Tightly sealing lids will need burping.
Skim off any kahm yeast (a thin layer of a whitish crinkled looking substance, which is harmless).

Keep an eye on your ferment surface. Skim off the floaters so they don’t ruin your batch by growing mold.
If there is a floater with a little mold on it, just skim it off. It won’t ruin your batch, unless it becomes pervasive. The mold won’t grow into the acidic brine, it’s just on top, but enough of it, or not skimming it off for a few days can ruin the batch by giving it a moldy scent and flavor. So if there is a lot of hairy mold growing in your jar, feed it to your compost pile. It’s actually a great compost accelerator, sort of like a starter culture for your composting process.
When should I toss my lacto-fermented vegetables?
If your ferment has thick hairy mold growing on it, or if it smells bad, putrid, or musty, toss it. Something went wrong. There are a number of things that can go wrong when dealing with natural processes and all the environmental variables involved, but it is a rare thing to happen.
If your ingredients turned mushy, toss it. It may have gotten too hot in your room and the wrong bacteria or yeasts were activated. Or some undesirable bacteria multiplied before the ferment turned acidic and ruined the batch. If you scrubbed and washed your vegetables thoroughly, you might not have enough lactobacilli left on them and “bad” bacteria may prevail. Next time, just spot-clean them or rinse them lightly.
If you wait too long, your fermentation will just continue to sour until all the sugars are used up. After that, the bacteria will start to die off and at that point your ferment will start to degrade. So try to not forget about it. Though it does take a long time for that to happen, as in months, especially if you’re fermenting at cooler temperatures.
Preserving your lacto-fermented vegetables
Once your fermentation is perfect according to your desires, seal it up and place it into a root cellar or the refrigerator. The temperatures in a refrigerator will put the little lactic acid bacteria to sleep and your ferment should remain mostly stable for a year at least. A root cellar may not be cold enough to completely arrest the bacteria growth, but it will slow it way down. So your ferment may continue to very slowly sour over the months that it’ll be stored away. But it will remain edible for a long time. I just pulled out a jar of sauerkraut that was in my root cellar for 2 years and while it is pretty sour, it tastes very good and it is still crunchy.

Tips for making the best lacto-fermented vegetables
Start with the best vegetables you can find. Pick them fresh and preferably in the morning, before they turn soft and wilted in the hot midday sun. Place them in salted ice water immediately to keep them crispy and to force out any bugs, especially with cauliflower and broccoli. Don’t wash them, just spot clean, to keep more of the bacteria on the skin. Cut off the blossom end when making cucumber pickles. Keep your fermentation temperature between 65 and 85 degrees for best results. Keep your vegetables submerged in the brine at all times.
What to do with the brine
Don’t toss the brine after you’ve eaten the vegetables! This brine is full of the same goodness as the vegetables were. Vitamins and minerals were extracted from the vegetables and are now floating in this probiotic rich brine.
- Use it as a tonic, take a shot glass full each day to keep your gut microbes happy.
- Add a little to a glass of water and chill for a refreshing drink.
- Use in salad dressing.
- It makes a killer potato or macaroni salad when you mix it with the mayo and some sourcream and toss while the potatoes or macaroni are still a little warm. It needs really no other flavoring, except some fresh herbs. Then chill for a few hours for the flavors to meld.
- Use in bread dough.
- Use in soup for a bit of tangyness. It’s great in borscht or a beef stew. However, you’ll loose the benefit of the probiotics when you cook it.
- Use as starter culture for your next batch of ferments to speed it up.
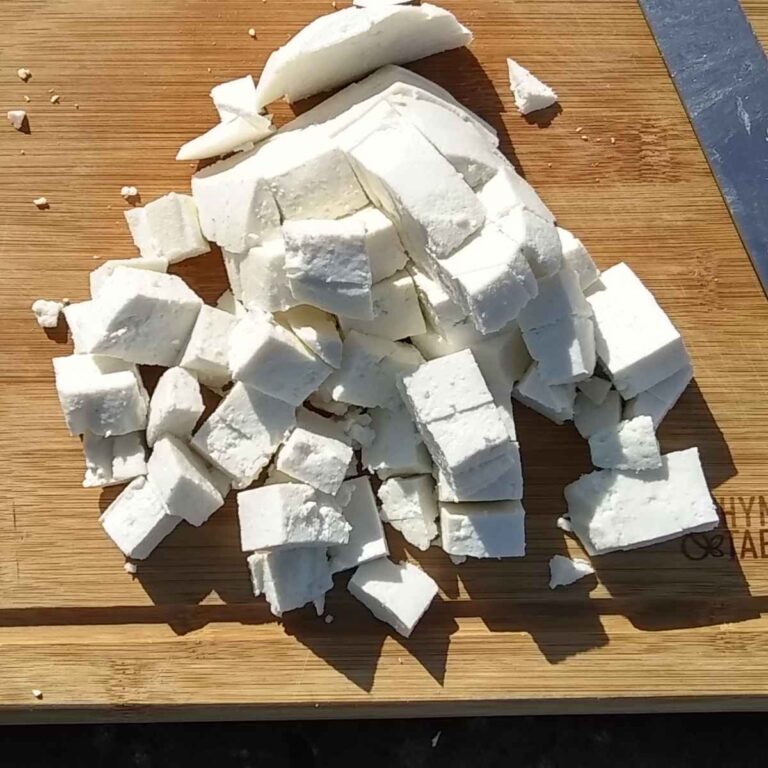
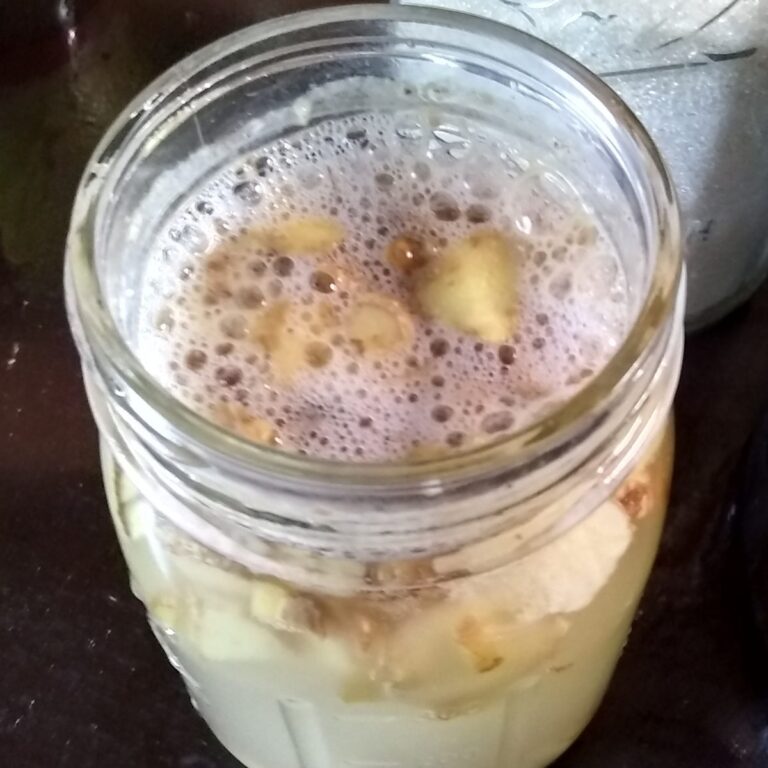
- Use it to brine mozzarella cubes or unsalted queso fresco or paneer cubes for a tasty side or salad topping.
- Brine your next roast or chicken before cooking it for a great tangy flavor. If you’re German, or like to cook German foods, try brining your Sauerbraten in it.
Here are some spices you can try with your lacto-fermented vegetables
- Dill: Fresh Dill heads, leaves or seeds all work. But fresh dill tastes best.
- Garlic: Garlic in my book is not optional, but I won’t try to twist your arm to use it. If it pairs well with your vegetable and you use it, be generous! And eat the fermented garlic too!
- Cayenne pepper: I’m a hot and spicy fan and so I like my dills hot and spicy too. I like to add whole cayennes dried or fresh. Slit the skin to help the brine to penetrate them.
- Ginger root, ground, granulated or fresh sliced: I love ginger and use it in many baked recipes, tea, and probiotic ginger beer. It has so many medicinal properties. Adding it to my probiotic pickles gives the pickles a nice spiciness.
- Turmeric root, ground, granulated or fresh sliced: It will give your pickles and brine a lovely yellow hue and fresh flavor. And it is a potent medicinal herb. Pair turmeric with with black pepper to make it’s beneficial components bio-available.
- Black Pepper: Add some whole peppercorns for flavor and as companion for turmeric.
- Coriander: The seed from cilantro is another popular spice for pickles and pairs well with the dill.
- Mustard Seed: For that nicely spicy mustardy flavor that you’ll get in mustard pickles.
- Horseradish: Give your pickles a nice zesty twist with spicy horseradish. It’s also a great medicinal if you have a cold or flu!
- Celery Seeds
- Allspice Berries
- Fennel seeds
- Cinnamon stick
- Cloves
- Juniper berries
- Cardamom seeds
- A couple of tannin rich leaves: Add one or two bay leaves, grape leaves, or oak leaves to help keep the pickles crispy.
FAQs
What vegetables can I lacto-ferment?
Technically, you can ferment any vegetables, however some will be more suitable than others. I like asparagus, carrots, onions, cabbage, peperoncini peppers, jalapenos, cauliflower, broccoli, zucchini and summer squash, cucumbers, garlic cloves, herbs, beets and more. I’ve also fermented garlic scapes, purslane and many mixed vegetables. Try mixing vegetables to make tomato salsa, salsa verde, hot pepper paste and hot sauce. Find out what method of salting to use for which vegetable ferment in salting methods.
How long does it take to ferment vegetables?
That depends on several factors. It varies from one vegetable to another. Some are quicker to ferment than others. The temperature matters as well as the strength of your brine. And last but not least, your preference. Half sour lacto-fermented vegetables will take anywhere from 3-14 days. Full sour lacto-fermented vegetables can be achieved in 14 days up to a month. If it’s very warm in your room, increase the salt to slow down fermentation a little and to keep your vegetables from getting mushy.
How to keep vegetables crisp?
Choose only firm, fresh and high quality vegetables when you buy at the market. If you pick your own, pick vegetables early in the morning when it’s still cool out. Place your vegetables into salted ice water immediately and let them bathe for half an hour or more. Bathing cauliflower and broccoli can also dislodge any critters that might be living in their many hiding places. Cut the blossom end off cucumbers if you use them. Add a tanin-rich ingredient, such as a grape leaf, oak leaf or bay leaves. Use a stronger salt brine. More salt will keep your vegetables more crunchy. Let them ferment at cooler temperatures of about 65-75 degrees. Don’t let them ferment for too long. Taste your lacto-fermented vegetables after 5-7 days. If it’s cool in your room, it will take longer. Warmer temperatures and longer fermentation will begin to soften your pickles.
Recap and what to do next
Congratulations! You now have the skill to ferment vegetables. I hope this puts you on a life-long journey of experimentation and discoveries, and I hope you’ll love it as much as I do. Lacto-fermenting vegetables is a process that is as old as time and no matter what human culture you explore, you’ll discover a version of it in their culinary repertoire. Let’s keep the tradition alive and with it enhance our overall health and well-being.
And please do leave me a comment if you try your hand at fermenting and tell me how it turned out. What vegetables did you use and did you add any spices? What are your favorites? If you have any questions, I’ll be happy to answer them too.
Stay tuned for future fermentation recipes by subscribing to my Food For Life Garden Newsletter.
Disclaimer: The material on this site is intended to be for general informational use and is not intended to constitute medical advice, medical diagnosis, or medical treatment. You should consult your physician or other health care professional before making any changes in your diet or exercise regimen.
Other recipes you might like:
Fermented Dill Pickles – How to ferment your excess of cucumbers to enjoy all year long and with the added benefit of improving your gut health with probiotics.
Lacto fermented sauerkraut – Famously healthy and so tasty! Make your own from scratch.
Fermented Cherry Tomatoes – This is a tasty way to quickly preserve an abundance of cherry tomatoes for a tasty snack during the cold season. Give your immune system a boost when it needs it!
Fermented Chili Paste – Here is a great way to preserve your end-of-the season harvest of green peppers. This paste will last all year in your refrigerator to use as a condiment, seasoning, or topping.
Fermented Onions – Keep some onions ready to use on Sandwiches or to put on your salads. Zesty or plain, onions are great fermented and a great storage option for your non-storage types.
Fermented Hot Sauce With Cantaloupe – How to make a delicious fermented hot sauce that is great with meat, fish, eggs and on sandwiches. What a great way to use some cantaloupe and spicy peppers.
Fermented Basil Paste – Keep a jar of this in your refrigerator all year, to season your italian dishes. Preserve not only the herb, but also its aroma and pungent basil flavor. It’s one of my favorite ways to preserve basil and many other herbs.
Make your own Ginger Beer with wild fermentation, the traditional way to make this fizzy, tasty soft drink that will knock your socks off with flavor and boost your health too.

Lacto Fermented Vegetables
Equipment
- ½ gal Mason jar, or use 2 quart size jars.
- Fermentation Lid – a fermentation top, airlock lid, or a regular mason jar lid, or a piece of cotton cloth secured with a rubber band. Fermentation lids and airlock lids are the easiest option, since you can just ignore your ferment until it’s done. They let the gasses escape, but oxygen can’t get in.
- Glass weight – use a glass weight or other object to press the solid contents below the brine surface. A baggie filled with marbles or filtered water, a plastic lid from a regular size canning jar, a small baby food jar, a rock…
- Large mouth canning funnel – a funnel is optional, but super handy to get salt-brined vegetables into your jars without making a big mess.
- Tamping tool – I love my Acacia wood tamper but you could use a piece of clean wood or a tamper that came with your blender for example.
- Bowl – for mixing veggies, for a salt-water bath for getting bugs out of cauliflower and broccoli, and for an ice-water bath if you're making crunchy vegetables.
Ingredients
- 2 quarts firm, fresh vegetables
- 1 qt filtered water if you want to make a salt-brine ferment – if you only have chlorinated tap water, let the chlorine evaporate by boiling without a lid and letting it cool, or by letting it sit on the counter for 24 hours without a lid.
- 2-3 Tbsp sea salt, Himalayan pink salt or Redmond's Real Salt
Optional Spices, mix and match according to your preference. Listed in the order of my personal preference 🙂 and I most often use the first 6 spices listed. All the amounts are suggestions, but you may use more or less to your preference.
- 2-12 cloves garlic – if it partners well with your vegetable, garlic adds great flavor and powerful health benefits plus it tastes great fermented. Be generous and eat the garlic too. You can also make just garlic pickles by themselves for a healthy snack.
- 1-2 large dill heads, or a big bunch of fresh dill leaves – in case you have no fresh dill, substitute with a tablespoon of dill seed.
- 2 cayenne peppers, or to preference – when using fresh cayenne peppers, cut a slit in it.
- 2 tsp black pepper corn
- 2" piece fresh ginger root, thinly sliced – adds a nice spiciness and has lots of health benefits too. Or substitute with ground or granulated dried ginger.
- 2" piece fresh turmeric root, thinly sliced – adds a bright, fresh flavor and more health benefits. You can substitute with ground or granulated dried turmeric. If using turmeric, add black pepper as well, to make the health benefits of turmeric bio-available.
- 1 tsp coriander
- 2 tsp mustard seed
- 2 tsp caraway seed – almost essential for making sauerkraut
- 2" piece horseradish, thinly sliced
- 1-2 tannin rich leaves, such as oak, grape, or bay leaves – to help keep the vegetables crispy if that is your preference.
- 1 tsp celery seeds
- 2 tsp allspice berries
- 1 tsp fennel seeds
- 6 cloves
- 1 -2 star anise
- 2 tsp juniper berries
- 1 tsp cardamom seeds
- 1 small cinnamon stick
Instructions
Steps for preparing your vegetables
- Soak your vegetables in ice water to keep them crispyIf you prefer crispy pickles, this step is important. Otherwise it is optional. Just place the veggies into the ice water as soon as possible after picking. Give them a half hour or so to chill and crisp. In the meantime gather your fermentation equipment and spices. If you have cauliflower or broccoli with hundreds of places where little bugs can hide, soak them in a salted water bath first to encourage those critters to make their way out of their homes. Special note: Cook any vegetables that should not be consumed raw such as green beans. Since this kills the bacteria you need, add some raw vegetables such as onion and garlic, or add a little starter brine from already fermented vegetables, or whey to inoculate your brine.
- Prepare your vegetablesSpot clean your vegetables. Chop, blend, slice, grate or leave whole. Cut the blossom end off of cucumbers.
- SaltingFind the salt ratios below!Dry-salt method: For vegetables that are grated or blended, thinly sliced, or finely chopped, and if you use any vegetables that have natural juiciness such as tomatoes.Salt-brine method: If your vegetables are thick slices, spears, whole or chunks such as is the norm with peppers, cucumbers, broccoli spears, or cauliflower chunks, carrot sticks, cubed or sliced beets or zucchini, etc.A side note: if you dry-salt and find that you don't have enough brine to submerge the vegetables, make a 3% salt-brine and add enough to cover the vegetables.
Salt-Brine Method
- Make your brineTo mix your brine, add 2 tablespoons of salt to one quart of filtered water and mix till dissolved.
- Add SpicesDecide on what spices you would like to use for your pickles by choosing one or more from the list above, or experiment if you love another kind of spice that is not listed. Use about a half teaspoon of each per quart or a teaspoon per half gallon. Place them in the bottom of the jar. If you want to avoid floaters, pack the loose spices into a piece of cheesecloth and secure with a piece of cotton twine.
- Place the vegetables in your containerPack your vegetables into the jar and when the jar fills up, arrange the top vegetables so you can wedge them in to stay in place below the rim area. Alternatively you can use a fermentation weight to hold them down. The vegetables need to stay submerged in the brine to keep oxygen from touching them. This is very important to avoid mushy vegetables and to keep mold from growing on the surface.
- Add brine and cover.Pour your brine into the jar to cover the vegetables, but leave about an inch of head space (the space between the top of the jar rim and the brine). If you have too little headspace, your ferment might bubble over. Which is not a big deal, just know that it might happen and keep a doubled up towel under it or a plate if you don’t want your counter to get wet.Put a cover on the jar and place the pickles in a dark or shady spot with an ideal temperature of 70-75 degrees. If it’s very warm in your house, keep a closer eye on your pickles, they will ferment much quicker.If you use a screw-on lid, don't close it too tight to allow gasses to escape. If you use a tight fitting lid with a seal, you should burp the jar once a day to let the gasses escape. Just barely open the lid enough to let the pressure out and reseal.If you use a cloth cover, check every few days to skim off any floaters or the thin layer of kahm yeast if it forms.
Dry-Salt Method
- Put all your vegetable ingredients into a bowlUse a big enough bowl to work your vegetables and add all the ingredients
- Add saltAdd Salt according to the formula below. If you're making a quart jar of any dry-salted vegetables, you can just add 2 tablespoons of salt per quart jar as a rule. Breaking the rule, I use just 1 tablespoon for making salsa.
- Mix all ingredientsMix everything well and let it sit for a few minutes to draw juices. If you use thinly sliced firm vegetables, such as cabbage to make sauerkraut, you'll want to knead it well, to soften it and encourage release of the juices.
- Bottle and capWith the help of a funnel, put your ingredients into a jar. Using a tamper, press them down tightly and get the juices to cover them. Add a glass weight or other item, to keep the ingredients below the brine. Try to leave about an inch or even a little more of headspace to allow for expansion when the brine starts to bubble up. Cover with a lid or cloth.Place the jar in a shady corner, and onto a plate to catch the juices if they overflow. Then just let it ferment. If you covered the jar with a cloth, it's a good idea to check every few days and skim off any floaters or the thin layer of kahm that might appear.
- Taste and smell your ferment to determine when it’s doneYou should notice the brine becoming cloudy and after a day or two there will be air bubbles when you tap the jar.It is your preference which determines when your pickles are done. If you enjoy eating less sour pickles that are still really crunchy, then check after 3-4 days. The pickles should have a pleasantly tangy smell and if you take a taste, it will be a mix of tangy and salty.The temperature in your room will determine the speed of fermentation. In a cold room it may take up to a week, but if it’s warm, 3-5 days may be enough to get some good acidity.At this point the pickles are considered half-sour pickles. If this is how you like them, you can remove the fermentation weight if you used one, seal it with a tight fitting lid, and place the ferment into the refrigerator or root cellar, where it will keep for a year or more. It will continue to sour, but very slowly.If you prefer full-sour pickles, which have a greater amount of probiotics, let them ferment for at least 14 days or more, up to a month. Taste a bite and if you are happy with the flavor, seal them up and place them into the root cellar or refrigerator for long term keeping. They will keep on the counter in a coolish location for many more weeks or even months too, but they will continue to sour and will get softer. Once the bacteria have eaten all the sugars in the fermentation, your pickles will start to deteriorate and will not be good to eat anymore. Placing them in cold storage will put those microbes to sleep or at least make them very groggy and this will bring fermentation to a near halt. Thus preserving your pickles.
Notes
Salting formulas:
The formula for a dry salt fermentation:
For 1.5% salt multiply the product weight in grams x .015. For 2% salt use product weight x .02. My strategy is to use 1.5% if the temperature is about 75℉ or less and then I taste it to see if I would like to add more. And I use 2% if the temperature is over 80℉. Homestead hack: when you make just a small amount of fermented herbs, or grated zucchini, or salsa for example you can skip the math and mix 2 Tb of salt into each quart.The basic recipe for a salt brine, without use of a scale:
Use filtered water and add 1-3 tablespoons of salt per quart. Technically, you’ll want to arrive at a 2% to 4.5% salt solution. Most vegetables will work great with a 3% brine most of the time. Per quart of filtered water, use 4 teaspoons of salt for a 2% brine 2 tablespoons of salt for a 3% brine** 3 tablespoons of salt for a 4.5% brine* *More salt will slow down fermentation, which is a good strategy for hot weather and to keep vegetables more crunchy. **When you’re just starting out, I suggest using 2 tablespoons per quart of water as a basis. Once you learn more about the process, the science behind it, and what works for you from experience, you’ll be able to adjust this for different situations based on that experience and observation. For example, if your pickles turn out less crunchy than you like, use more salt next time and lower the room temperature if possible. The scientific method for making a brine by using a scale: The most accurate way to measure your salt ratio is with a scale: Tare your container. Then fill fill it with all the ingredients and the water. Multiply the combined weight by .02, or calculate 2%. The result is the amount of salt you need for a 2% salt ratio. Add the salt and close the container and shake it gently to dissolve the salt. Then place a weight on top and use your fermentation lid to cover it.Examples of vegetables you can use:
I like to ferment carrots, onions, cabbage, padron peppers, jalapenos, cauliflower, broccoli, zucchini and summer squash, cucumbers, garlic cloves, herbs, beets, tomatoes, watermelon rind, and more. I’ve also fermented garlic scapes, purslane and often mixed vegetables. One veg I’d like to try but haven’t yet is okra. Try mixing vegetables to make tomato salsa, salsa verde and hot sauce. I love to blend hot peppers to make a fermented hot pepper paste. A friend of mine makes a hot sauce with hot peppers and smokes them first. Super!Enjoy your delicious lacto-fermented vegetables!
If you would like to learn more about fermenting specific vegetables, look up recipes in the Fermenting category. Did you know that you can lacto-ferment (salt-ferment) all vegetables, herbs and fruits? Some may not taste that great fermented, but many are delicious this way and all will have enhanced health benefits because they are loaded with probiotics and will not only retain the vitamins, minerals and enzymes of fresh picked raw produce, but they will be enhanced by fermentation.Other recipes you might like:
Fermented Salsa – Delicious zesty salsa, preserve fresh produce at the height of the season to enjoy during the garden down times. It’ll bring back memories of summer and tastes of fresh vegetables, while brimming with all the stored vitamins, nutrients and probiotics!
Fermented Garlic – Fermented garlic paste is kind of a special fermentation. It’s the ultimate convenience food and health supplement. But besides that, it gets better as it ages. Just like a fine wine.
Fermented Dill Pickles – How to ferment your excess of cucumbers to enjoy all year long and with the added benefit of improving your gut health with probiotics.
Fermented Basil Paste – Keep a jar of this in your refrigerator all year, to season your italian dishes. Preserve not only the herb, but also its aroma and pungent basil flavor. It’s one of my favorite ways to preserve basil
Brine fermented Basil – Basil can be brine-fermented too. Preserve whole basil leaves for your winter dishes right in your refrigerator all year.
Try making Fermented Eggs! A probiotic, nutritious, delicious snack that you can keep in your refrigerator for several weeks. It’s there, ready to satisfy that food craving with something that’s good for you.
Make your own Ginger Beer with wild fermentation. The traditional way to make this fizzy, tasty soft drink that will knock your socks off with flavor and boost your health too.
Pin This Post

Shop This Post
Cambro bpa-free container
Butter muslin
Floursack towel
Fermentation tops
Airlocks
Redmond’s Real Salt
Himalayan pink salt
Celtic sea salt
Glass weights
Ceramic weights
Acacia wood tamper
[pt_view id=”1f957233lv”]


I can’t wait to try this!
You’ll love it. Let me know how it went! Thanks for the comment, Megan!
This is such great information! I really appreciated learning about the GABA! I had no idea. I also need to get me some of those lids. Thank you for sharing the wealth of knowledge.
Loved this awesome guude to fermenting! I totally just learned a ton & can’t wait to try out the recipes!🤩
You’ll love them! Fermenting makes every vegetable better! Thanks for commenting!
You’re so welcome and thank you for your stopping by here and commenting!
Very interesting, great info!
Thanks so much for commenting and for stopping by my page!
I feel your passion for fermentation in this post. Thank you for sharing your wealth of knowledge! Time to get some vegetables into jars! *skips off to the kitchen*
That made me laugh! Thanks for the comment! *sits here smiling*
Wow! This post is packed with information. I think some lacto-fermented veggies is just what my body needs! Thank you for sharing!!
Thanks for commenting Haley, I’m sure your body would love some 😉 !
We are currently looking for ways to restore our gut health. I am excited to try some of these!! Great post!
Hey Brianna, I’m glad you liked this. Enjoy and I’d love to hear how it went! Thanks for commenting!
My mouth watered looking at these! Love fermented veggies. I have only tried salt brine/wild..never lactose but now im inspired to try!
That’s great! It’s so easy, I’m sure you’ll love it! Thanks for checking in here and commenting!
This is so cool! I had no clue you could ferment eggs! I’ve heard of pickled eggs but not fermented. I am pinning this so I can try some of these!
I’m glad you like this, I’d love to hear what you think when you try it. Thanks for hanging out here and commenting!
LOTS of great info here! I’ve done some fermenting in the past but would like to experiment more with it in the future.
That’s great, Jennifer! Fermenting is so rewarding and there are so many possibilities. Have fun experimenting!
What veg would you recommend with juniper berries? I have some! I made fermented pickles this year and I’m NEVER going back!
Well, I don’t use juniper berries much, but I know that they are often used with German fermented sauerkraut. But there is also a fermented juniper berry drink called smreka from the balkan region of Bosnia that is popular there. Juniper berries are often used with roasted meats and vegetables in Germany and they can also be added to cured meats such as ham or bacon for flavoring. And I’m glad you got to try some fermenting! It’s my favorite way to preserve vegetables.
This is a great primer on fermenting! I have been fermenting vegetables for several years, and I still learned things, like about the GABA. Great info. Saving for future reference! Such a good skill to have– frugal, easy way to build health.
Wow, what an informative post! Thank you 😊
You’re welcome, Kirsten, I’m glad you stopped by!
Hi there, thank you so much for all this helpful information. I’d like to know can you ferment smoked tomatoes or vegetables? I really love smoky flavours so I smoke my veggies but just wondering how to keep them for a long time also, so is fermenting them an option?
Hey Coralee! Thanks for visiting and your comment. That’s a good question and I have not ever tried fermenting smoked fruit. I’m not sure if smoking kills the bacteria we need to activate fermentation. Hot smoking would in my opinion, but cold smoking? I don’t know. However, if you have any kind of fermentation starter, you could try adding that to a jar to test it out. I know you can ferment cooked foods as long as you add a starter. I would assume that that will work with smoked foods too. Your starter could be whey (from yogurt for example), the juice from previously fermented foods, or kefir, live kombucha or a ginger bug. Although the latter option might introduce a boozy flavor, since it is yeast based. If you experiment, I’d love to hear how it went.