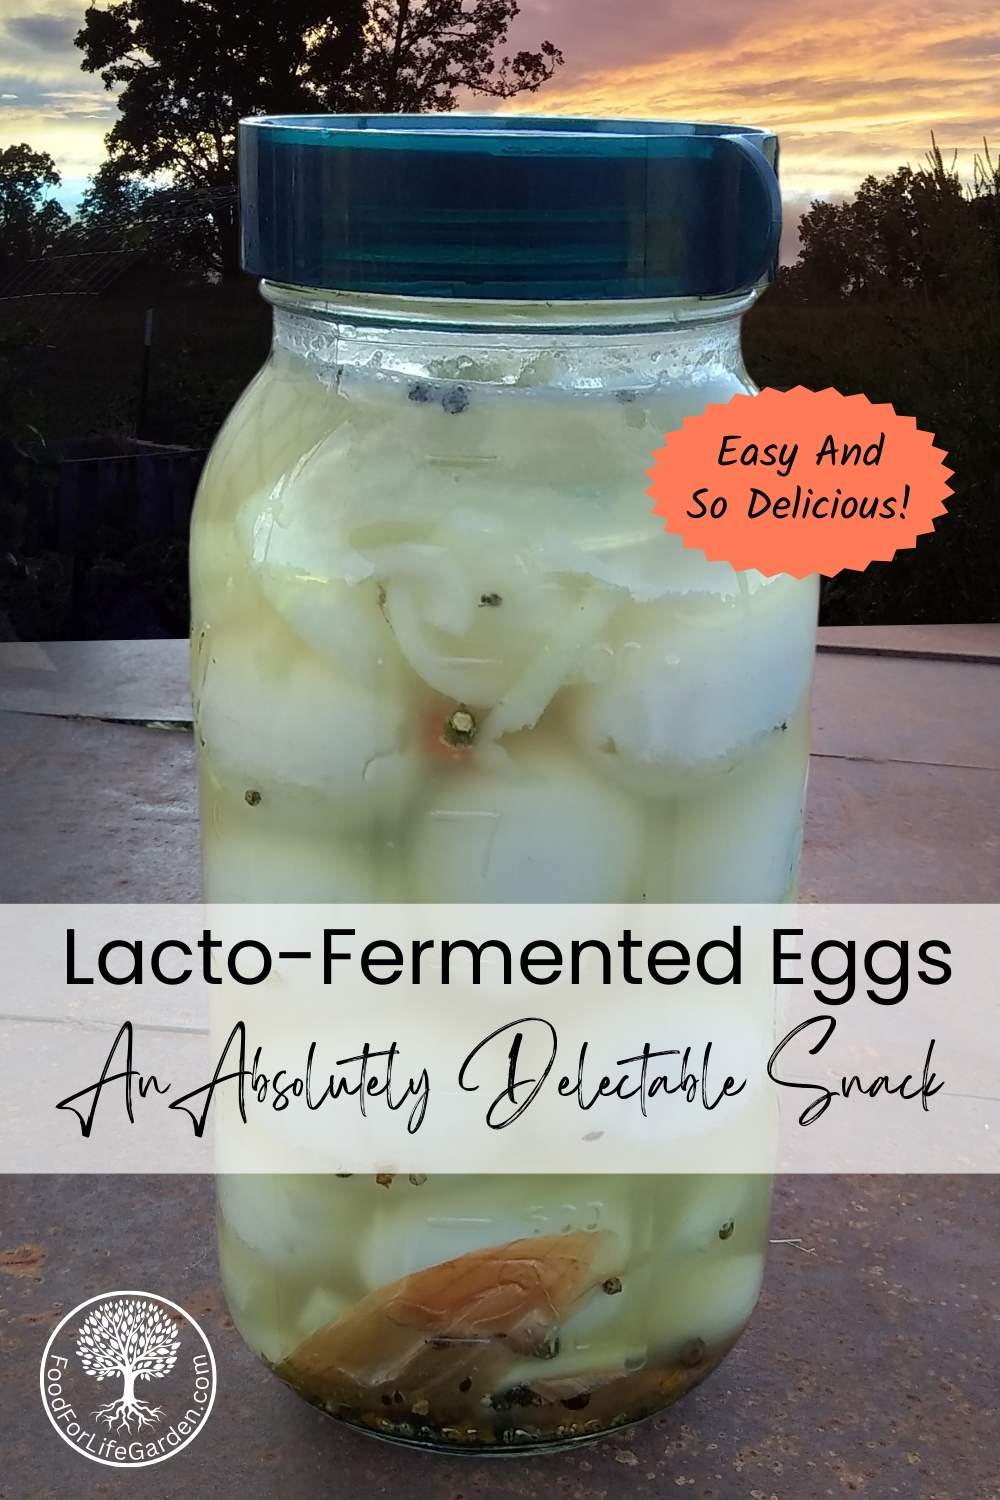
Fermented eggs are so delicious! Submersed in a salty and tangy brine, plain or zesty, they make a super tasty probiotic snack.

This post contains affiliate links, which means I make a small commission at no extra cost to you if you click through and make a purchase. See my full disclosure here.
If you keep a flock of chickens, you’ll know all about times of abundance and times of want for eggs. And when your little dinosaurs are cranking out their eggs, it’s sometimes hard to keep up with all that abundance.
In this post, we’ll look at a delicious way to use the extra eggs to make a healthy and super delectable snack. Fermented eggs are not just delicious though, they are nutritious and, like all the lacto-fermented foods, good for your health. You can store fermented hard boiled eggs for several weeks in your refrigerator.
Make Some Delicious Fermented Eggs!
Fermented eggs are such a convenient treat! Reach for them when you need a quick lunch, make deviled eggs or egg salad, or slice them into a salad. You can add them to a charcuterie board, serve them as an appetizer, or just to eat them as a snack, anytime you have a hankering for one. And believe me, that will be often!
You can certainly make this recipe with store bought eggs as well. Fermenting is a great way to get more nutritious eggs into your diet, especially when you can stock up on a sale.
Why you’ll love fermented eggs
- They taste delicious
- They are a convenient, ready to eat snack food
- Fermented eggs are versatile for many occasions
- Use to make deviled eggs with homemade mayonnaise, in salads, as toppings on various dishes, make egg salad, or eat them just plain
- Eggs are nutritious and healthy and fermented eggs are even healthier. Full of probiotics, which are acclaimed to support gut health, restore the gut flora, help with gut ailments, support the immune system and have many more benefits. Learn more about the health benefits of fermentation.
Sourcing your eggs

I’ve been keeping chickens now for decades and can’t imagine life without chickens, their fresh eggs, and delicious homegrown meat. And if you ever tasted free-range chicken eggs, you’ll know that store-bought commercial eggs just will never compare to home-raised.
However, if you are city bound, or for some other reason unable to keep your own flock, I highly recommend that you seek out a local source for free-ranged backyard chicken eggs. Many chicken owners will gladly sell you some when they are drowning in a glut of eggs.
When eggs are a-plenty and when eggs are a-miss
As it is, keeping your own chickens comes with a downside. They’ll crank out the eggs for about 6-8 months of the year, but when the days are shorter and the weather cools, they will slow way down, or quit laying altogether. Our tendency then, as humans, is to try and make them keep laying.
This can be achieved by placing bright lights into the coop to stimulate their egg making ability. And it is what the commercial farms do and the unfortunate chickens are forced to lay at top-rate year-round without a break. Since this is not natural, they wear out quickly and are replaced every 2 years.
I do feed extra protein in winter to add a bit of warming fat to their bodies, and it actually gives me a few extra eggs too. But I don’t add extra lighting, and so there are times when I don’t get any eggs from my girls. But since there are many ways to preserve eggs for the down times, I don’t mind and my flock will live longer and stay healthier for it.
Things to do with extra eggs
On the other hand, when I find more eggs than I can use every day. I preserve a lot of them, share with the dogs for a healthy treat, and occasionally cook some up for the pigs and chickens too, so they will love me. And any sick critters or humans get a raw beaten egg for a health boost, even goats. Everybody loves eggs.
But there are yet more eggs. Now, as I’m sure you know, eggs are loaded with nutrition, and to get more eggs into my diet during the summer, I like to ferment some of them. Because fermented eggs are so very delicious and are just irresistible to me.
Having a jar of fermented eggs in the fridge is a great way to have a quick lunch on busy days, to top a garden-fresh salad with some protein and to satisfy a hungry toddler. They make great party snacks and are a unique gift too, as long as you advise the recipient to keep them refrigerated.
Here is how to make fermented Eggs

Equipment:
A large saucepan for boiling the eggs
A quart mason jar – Use a classic mason jar for this recipe or invest in a flip-top Fido jar by Bormioli rocco. They are great for fermenting and they look so cool.
A lid – You can use a regular 2-piece mason jar lid, screwed on just fingertight, but the metal will likely start to corrode when the salty, acidic brine bubbles out. You can also use a plastic lid. I prefer fermentation tops or airlocks for any fermenting. And purchasing these was worth it, since I ferment a lot and they make it easy and maintenance free. They will also reduce the chance for spoilage, especially when you get some floaters. If you own a Fido jar or Weck jar or similar, they will work like a fermentation top, keeping oxygen out while letting gasses from inside of the jar escape.
Optional: a fermentation weight – This is a short ferment and you might not need a fermentation weight if you wedge a few larger eggs into the jar to keep them from floating up in the brine. It is important that all your ingredients stay below the surface of the brine! You can also try a flat clean rock or a plastic bag filled with marbles or brine.
Ingredients:
One dozen small to medium eggs

These need to be hard boiled. Soft yolks will not work with fermenting. You could also use quail eggs here. I have made fermented quail eggs when I kept quail a few years ago. They are so perfect for fermenting and make super cute one bite party appetizers. For this ferment, I had a lot of really small chicken eggs, because my chickens are pretty young still. They make great fermented eggs.
Adjust the amount of eggs to fit your container. And adjust the rest of the ingredients if you use any container other than a quart.
salt
Use a mineral rich salt if you can. Such as Redmond Real Salt, Himalayan pink salt or Celtic sea salt. If you use any other salt, make sure that it does not contain additives.
fermentation starter
You can use fresh cultured whey, unpasteurized kombucha, kefir, buttermilk, or the active brine from another ferment like fermented cucumber pickle juice, or garlicky fermented garlic scape brine.
If you add vegetables to your fermented eggs, you could get away with not using a starter. But since eggs are boiled and do not have lactobacilli present, and because they are mostly all protein, it is safer to add a starter culture to introduce the kinds of bacteria that you want to promote in your fermented eggs.
Optional: spices and vegetables
Dress up your eggs in any manner that you like. Add fresh dill sprigs and garlic for some dilly eggs. I used my homemade pickling spice mix, that contains equal amounts of dill seed, cilantro, peppercorn, turmeric, and ginger.
Then I added some garlic, hot peppers, and onion slices in this latest version. You can also flavor your eggs by pickling them in 100% used brine from any fermented vegetable. If you use 100% brine, then you can skip the salt or any other spices.
One cool variation to fermenting eggs is to brine them in beet kvass or using beet juice instead of some of the water to color your eggs pink. Turmeric will color them yellowish, and red cabbage blue. Hmmm… will cabbage plus turmeric = green? Play with natural colors and serve them as an easter snack. Let your imagination be your guide.
Step-by-Step Instructions For Making Fermented Eggs
01. Boil your Eggs

I like to poke the wide end of the egg with a needle so they won’t crack when they are heated. Place in a pot with water to cover. Bring to a boil and then gently boil small to medium eggs for 8-10 minutes. Larger eggs might take twice as long. Pour off the hot water and run cold water over the eggs. Peel them and place them into a bowl for now.
02. Add spices to your mason jar

If you’re adding spices, place them into the bottom of your jar.
03. Add eggs and vegetables to your mason jar

If you’re adding vegetables, you can layer them with the eggs. Fill your jar, leaving about 1-2 inches headspace.
04. Add salt brine

I’m using a starter brine from fermented zucchini chips. I added a tablespoon of salt and filled the jar with filtered water. Then I shook it well to dissolve the salt and poured it over my eggs.
Mix the salt, fermentation starter and water in a quart mason jar and shake it well to incorporate the salt. Pour the salt brine over the eggs in your fermentation jar.
05. Top with a Fermentation weight

Your goal is to keep all the ingredients below the brine surface. The best way to do that is by adding a glass weight. These are fitted to a mason jar opening. You can also use a flat, clean rock, or a small baggie filled with brine or marbles. Or just try to wedge your eggs below the rim of the jar so they don’t have room to float.
06. Seal with a lid

If you use a 2-piece mason jar lid, tighten it just finger tight, so the gasses can escape from inside the jar. Otherwise you’ll have to burp it every day to release pressure and keep the jar from exploding. If you use a fermentation lid, it will do that for you while keeping oxygen out. This keeps maintenance to a minimum; likewise with a Fido jar.
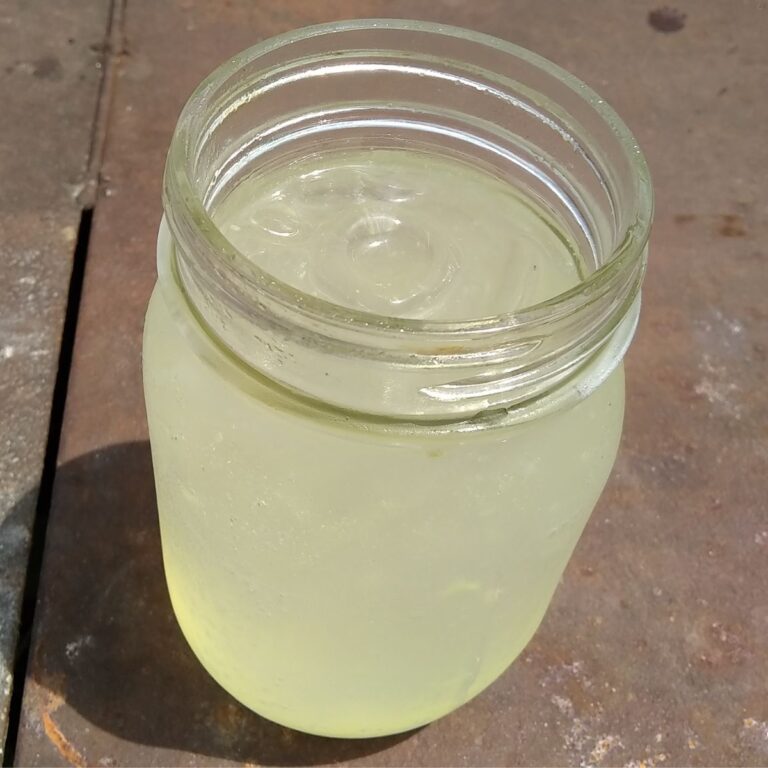
07. Ferment eggs for 3-5 days

and, if you look real close, you can see some bubbling. I tasted it at
this point, and placed it into the refrigerator.
You’ll notice that the brine is clouding up and there should be bubbling after a day or two. These are good signs that your ferment is heading in the right direction. Wait until the end of 3 days and taste your brine or an egg. It should smell slightly sour and taste salty and tangy, both.

If you like your eggs at this stage, place them into the refrigerator. If you want them more sour, wait another day. After 5 days they should be placed into cold storage.
They will keep fermenting in cold storage, but very slowly. Officially they will keep for 2 weeks in the refrigerator. I want to test out what happens this time and made extra eggs. And so I’m going to keep a few going to see how long I like them and what happens after more than 2 weeks. But just know that 2 weeks is the official expiration date at the time of this writing. Enjoy your fermented eggs!
There you have it: Delicious Fermented Eggs!

I love salsa with eggs! Besides, doesn’t it look so awesome together?!
Delicious fermented eggs, with all the goodness and nutrition of eggs. Plus they are full of probiotic, gut healthy, and immune supporting properties. What a great way to replace the dead, high calorie, packaged snack foods that are so often consumed. And it’s just as convenient. Ready to eat and already seasoned. Hope you love them as much as I do.
Try different flavors if you’re the adventurous type and let us all know in the comments below what your favorites are!
There will be more delicious recipes coming soon. Sign up to get updates from food for life garden.
Other fermented recipes you might like:
Preserve Eggs In Lime Water – Store fresh eggs for a year or longer in a lime water solution and use them like fresh eggs even after a year.
No-fail Homemade Mayonnaise – Make mayonnaise from scratch with this easy recipe, which includes a fermenting option to preserve it for long-term storage.
The Ideal Homestead Chicken – Learn about my experiences with my new favorite dual purpose chicken breed and what I think is an ideal homestead chicken. Find you why and how you can raise American Bresse Chicken.
Fermented Garlic Scapes – Preserve your extra garlic scapes and gain a lot of health benefits by fermenting them. They make delicious, tangy pickles with lots of uses.
Fermented Salsa – Delicious zesty salsa. Preserve fresh produce at the height of the season to enjoy during the garden down times. It’ll bring back memories of summer and tastes of fresh vegetables, while brimming with all the stored vitamins, nutrients and probiotics!
Fermented Jalapenos – Make these for convenient taco, sandwich and burger toppers. Chop into potato salad or eggsalad for some zest or make a spicy creamy cheese spread.
Fermented Cucumber Pickles – How to ferment your excess of cucumbers to enjoy all year long and with the added benefit of improving your gut health.
Fermented Vegetables – How to ferment your summer’s bounty to enjoy it all year long. They are full of probiotics and are great for your gut health. Learn the basic skill of fermenting any kinds of vegetables and get the science behind it too.
Fermented Basil Paste – Keep a jar of this in your refrigerator all year, to season your italian dishes. Preserve not only the herb, but also its vitamins and minerals, the aroma and pungent basil flavor. It’s one of my favorite ways to preserve basil
Make your own Ginger Beer with wild fermentation. The traditional way to make this fizzy, tasty soft drink that will knock your socks off with flavor and boost your health too.

Fermented Eggs Recipe
Equipment
- A large saucepan – For boiling the eggs.
- A quart size mason jar – Use a classic mason jar for this recipe.
- A lid – You can use a regular 2-piece mason jar lid, screwed on just fingertight, but the metal can corrode and you might get some of the flavor into your ferment. You can also use a plastic lid. I prefer a fermentation lid or airlock.
- Optional: a fermentation weight – This is a short ferment and you might not need a fermentation weight if you wedge a few larger eggs into the jar to keep them from floating up in the brine. It is important that all your ingredients stay below the surface of the brine!
Ingredients
- 1 dozen small to medium eggs – These need to be hard boiled. Soft yolks will not work with fermenting. Adjust the amount of eggs to fill your container. And adjust the rest of the ingredients if you use any container other than a quart.
- 1 tbsp salt – Use a mineral rich salt if you can. Such as Redmond Real Salt, Himalayan pink salt or Celtic sea salt. If you use any other salt, make sure that it does not contain additives.
- 1/4 cup fermentation starter – You can use unpasteurized kombucha, fresh cultured whey, cultured buttermilk, kefir, or the active brine from another ferment like fermented pickle juice. If you add vegetables to your fermented eggs, you could get away with not using a starter, but since eggs are boiled and are mostly all protein with little sugar content, it is safer to add a starter culture to introduce the kinds of bacteria that you want to get multiplying in your fermented eggs.
- 1 tsp each of your favorite pickling spices. And any vegetable you like to pair with the eggs. Dress up your eggs in any manner that you like. Add fresh dill sprigs and garlic for some Dilly Eggs. I used pickling spice with turmeric and ginger. Then I added garlic, hot peppers, and onion slices in this latest version. You can also flavor your eggs by pickling them in used brine from any fermented vegetable. If you use 100% brine, then you can skip the salt or any other spices. Try brining them in beet kvass or use beet juice instead of some of the water to color your eggs pink. Turmeric will color them yellowish and red cabbage blue.
Instructions
- Boil your EggsPoke the large end of the egg with a needle. Place in a pot with water to cover. Bring to a boil and gently boil small to medium eggs for 8-10 minutes. Extra large eggs will take twice as long. Pour off the hot water and run cold water over the eggs. Peel them and place them into a bowl for now.
- Add spices to your mason jarIf you're adding spices, place them into the bottom of your jar.
- Add eggs and vegetables to your mason jarIf you're adding vegetables, you can layer them with the eggs. Fill your jar, leaving about 1-2 inches headspace.
- Add salt brineMix the salt, fermentation starter, and water in a quart size mason jar and shake well to incorporate the salt. Pour the salt brine over the eggs in your fermentation jar.
- Top with a Fermentation weightYour goal is to keep all the ingredients below the brine. The best way to do that is by adding a glass weight. These are fitted to a mason jar opening. You can also use a flat, clean rock, or a small baggie filled with brine or marbles.
- Seal with a lidIf you use a 2-piece mason jar lid, tighten it just fingertight, so the gasses can escape from inside the jar. Otherwise you'll have to burp it every day to release pressure and keep the jar from exploding. If you use a fermentation lid, it will do that for you while keeping oxygen out. Likewise with a Fido jar.
- Ferment for 3-5 daysYou'll find the brine to cloud up and there should be bubbling after a day or two. These are good signs that your ferment is heading in the right direction. Wait until the end of 3 days and taste your brine or an egg. It should smell slightly sour and taste salty and tangy.If you like your eggs at this stage, place them into the refrigerator. If you want them more sour, wait another day. After 5 days they should be placed into cold storage.They will still ferment in cold storage, but very slowly. Officially they will keep for 2 weeks in the refrigerator Enjoy your fermented eggs!
Notes
Pin This Recipe For Later

Shop This Post
Fermentation tops
Airlock lids
Bormioli Fido Jar
Redmond’s Real Salt
Himalayan pink salt
Celtic sea salt
Glass weights
Ceramic weights
[pt_view id=”1f957233lv”]


What a great way to make eggs last longer!
It’s a very tasty way, I think!
Can’t wait to try this recipe! Love finding more ways to eat eggs.
Hope you get to try it! It’s so delicious!
I am always so delighted to discover something new on your blog. I’ve fermented many things but never eggs! I didn’t realize that was an option. thanks for the inspiration!
You’re welcome, Kayla! I do hope you get to try fermenting eggs!
I’m saving this for the spring when I know I’ll be swimming in eggs again. Thank you for sharing this new way for me to use eggs and get even more nutrition from them!
Thank you Chris, it sure is a great way to do something with all those extra eggs in the spring!
Fantastic guide!! I never fermented eggs before, but it sounds delicious. I will be making this for sure. I also love how you don’t force your chickens to lay in the winter. Neither do we so this is a great extra way to keep our eggs when they stop laying.
Sure is, and I don’t know if you’ve tried waterglassing eggs to preserve them, but you can find the recipe here
I’ve never done fermenting with eggs, can’t wait to try this!
I hope you’ll love it, Nikki!
you always have the most interesting and well founded articles!
Thank you so much for the feedback, Ophelie!
I had chickens for more than a few years and had no idea you could do this! Pinned this and definitely want to try this in the future during those seasons of abundance!
I think it’s a great way to use those extra eggs when you’re swimming in them.
I have a dairy intolerant daughter. Could I use ACV with mother for the starter?
I have not tried ACV and am not sure if that will work. Maybe you could try it by putting just one egg in a brine with the ACV and see if you get a fermentation going, but it would not be a lacto-fermentation. I would recommend using fermentation liquid from another fermented vegetable. You can follow any of my fermented vegetable recipes to get an active fermentation liquid. Then you’d be able to use it to make the fermented eggs, and you’ll have a jar of delicious fermented vegetables to eat!