Fermented Turmeric increases the benefits of fresh turmeric, adds probiotics, and increases its storage life. A power partner for health!

Updated December 2, 2025
This post contains affiliate links, which means I make a small commission at no extra cost to you. See my full disclosure here.
Turmeric is a potent wellness ally, that I use almost every day in different ways and it is most beneficial as a fermentation. Here I’ll tell you about the many benefits of turmeric and how to make a fermented turmeric paste that will store in your refrigerator for long term. Make this easy paste to have turmeric conveniently available year round, to use in cooking, baking or as a wellness aid when you need it.
I’m always amazed at how nature supplies what we need. We are given the benefits of healing plants but also the awesome processes that preserve them and make them even more powerful and useful. Fermentation increases the many benefits of fresh turmeric to make it more bioavailable and adds probiotics for your gut health.
While you can buy fermented turmeric commercially, you can easily make your own! If you grow your own it won’t even cost you more than a few cents. This is my favorite way to keep turmeric on hand for every day use. Come along and explore its awesome qualities.
Make Fermented Turmeric, Your Wellness Ally

If you like Indian cuisine with its many curries, you are probably familiar with turmeric paste. This, along with ginger paste, is an important ingredient in many Indian recipes. It is also highly regarded in the more than 5000 year old Indian Ayurveda holistic system. And rightly so!
Even if you’re not an adherent to folk wisdom, you’ll probably have heard of turmeric. Modern science and many doctors now acknowledge the anti-inflammatory and other properties in turmeric and validate many of the age-old beliefs given to this herb and its healing powers. Supplements and preparations abound even in main stream grocery stores.
I use turmeric regularly to help with arthritic pain, and this is probably the most common prescription for this herb. Turmeric has powerful anti-inflammatory properties.
But that is not all, it is full of beneficial compounds and antioxidant activity, that could positively affect your wellness and provide aid or healing for different health complaints. I’ll provide a list here of the most noted health properties that I found when researching turmeric benefits.
Turmeric is a member of the Zingiberaceae family, just like ginger. They have several overlapping health benefits, and are very often used together in immune boosting preparations. And you could very well make this paste using half ginger, half turmeric.
I often use both in a tea together or add both to different fermentations and also to my garlic and honey. To read about the benefits of ginger, visit my pages fermented ginger honey and the health benefits of ginger beer.
If you take turmeric or curcumin regularly, you can make your own effective turmeric supplement for convenience and when you’re on a go. Get the turmeric tincture recipe!
The Benefits of turmeric

The most well-known compound in Turmeric is curcumin. It is the one that is often extracted and sold as pills, extracts and other commercially available forms.
However, with most natural medicinal herbs, it is usually more beneficial to take them in a holistic formula that includes the whole herb. Many compounds within a herb interact with each other and provide better bioavailability and stronger actions together, rather than taken as a singular extract.
I encourage you to do your own research on the many benefits of turmeric. Here is a quick summary of what I found and there are a few links to scientific papers and forums at the bottom of this post.
- Anti-Inflammatory – The curcumin in turmeric has potent anti-inflammatory effects. It can benefit conditions such as arthritis, respiratory infections, allergies, inflammatory bowel disease and other chronic inflammatory conditions.
- Powerful Antioxidants – the rich antioxidant compounds in turmeric can help neutralize free radicals and relieve oxidative stress, which can often cause disease and lead to early aging. This can also help with skin conditions like acne, eczema, and psoriasis. It might even reduce scars and wrinkles.
- Anti-Cancer – Several of the active compounds in turmeric have shown promise to help with the prevention and treatment of cancers. Turmeric has been shown to help inhibit the growth of some cancer cells and prevent metastasis.
- Pain Relief – Turmeric is most often used for pain relief with conditions such as osteoarthritis, rheumatoid arthritis, and muscle pain.
- Improved Brain Function – Turmeric was studied and found helpful for its positive effects in Alzheimer’s disease and similar conditions. It is likely to promote growth of new neurons.
- Digestive Health – Stimulates bile production, which can aid in the digestion of fats. Symptoms of indigestion, bloating and irritable bowel syndrome might be relieved with taking turmeric.
- Heart Health – Curcumin can help with regulating blood pressure and prevent blood clot formation, plus it can lower cholesterol.
- Antimicrobial and Antiviral – Here is where you’ll get the infection-fighting benefits of turmeric. And it can support and improve immune functions.
- Liver Detoxification – Turmeric increases production of enzymes that can promote liver health by detoxifying harmful substances. It might protect from liver damage as well.
- Blood Sugar Regulation – Turmeric is thought to help regulate blood sugar levels and improve insulin sensitivity. It might help with type 2 diabetes management.
- Mood-Enhancing and Anti-Depressant – Curcumin can increase serotonin and dopamine levels in the brain. This might help with anxiety and depression.
Wow, I’ll have to get me some of my turmeric, my fingers are sore from so much writing about its benefits 😉. But all kidding aside, this is a seriously impressive resume for turmeric, I’m sure you’ll agree. It’s a bit mind boggling, but I sure want this ally by my side in the aim for wellness.
If you like to get more turmeric into your diet, be sure to also check out my Fire Cider Recipe!
Bioavailability of Curcumin

Curcumin needs a little help to be bioavailable to our bodies. It is poorly absorbed by the body on its own. Fermenting will greatly improve absorbance! And to add more bioavailability, it should always be taken with freshly ground black pepper (piperine in pepper is an absorption enhancer). Furthermore, fat is necessary, because curcumin is fat soluble. I don’t put fat into my fermentation, but I stir some olive oil or coconut oil into it once it’s done fermenting. It can also just be eaten with fatty foods, such as a few nuts or buttered toast. If you use it in foods, most likely you’ll add some kind of fat, such as oil in salad dressing, or butter in sauteeing. If you’re cooking with the turmeric, add it after you finish cooking for best results because curcumin is heat sensitive.
Benefits of fermented turmeric

This is why I started to ferment turmeric. Fermenting makes the benefits of turmeric more useful for our bodies and greatly increases absorption of the healing compounds. And, while turmeric powder is useful as a cooking spice, it loses some of its benefits in the drying and heating process. And the fresh herb tastes decidedly more vibrant for fresh use. When I can find fresh, organic turmeric, I’ll buy a bunch and make fermented turmeric paste.
Now here is where things get so much better! When you ferment turmeric, many of the compounds become more available for your body, so the same spoonful of turmeric paste can be a lot more useful for your body after it’s fermented.
When you ferment, you get the raw benefits, yet they are stronger than just eating fresh turmeric. And you get probiotics which gives you more gut-healing properties. And along with increasing the already impressive health benefits of turmeric, fermenting will preserve it for the long-term. Whoa, 1 + 1 = 3!
Now you can have fresh turmeric year round. Left unpreserved, it might sprout or dry. If that ever happens to you, stick it in some dirt and grow some of your own! But fermenting will make it cellar or refrigerator stable for a year. Another benefit is once you make it, your turmeric is conveniently available anytime you want to use some, so you can take it regularly for health reasons or cook without the mess.
Cautions
As with every food or herb, there are people who might react adversely to Curcumin or turmeric. Because it has powerful medicinal compounds, it is advisable to consult with your doctor if you are taking any medications, have health conditions, or are pregnant.
Turmeric for Animals
Just like with humans, turmeric can benefit your livestock as well. I’ll be writing more on herbs for animals in the near future, stay tuned and you can get notification when it’s available. For now let me just say that the same benefits that apply to humans can apply to animals as well. Here is a short list:
Turmeric can increase milk supply in your dairy animals, and help with inflammation in all animals, including your dogs. So keep that in mind if you’re facing some health issues with your critters such as infections, tumors and cysts, wounds, allergies, itching and joint issues.
You can get turmeric powder to mix with their feed or make extra fermented turmeric paste for them as well, which would be more effective. Mix it with a little fat before feeding it to them.
I have not found any contraindications for turmeric with specific animals. It seems as though all animals can benefit from a little turmeric in their diet and be positively affected by its health properties. If you want to use turmeric for your livestock, I encourage you research it yourself too.
More about herbal solutions for animals:
Anti-parasitic Black Walnut Tincture recipe
Make Your Own Fermented Turmeric

Alright, after this lengthy introduction, hopefully I got you motivated to make some of this awesome fermented turmeric paste and introduce the benefits into your own wellness routine.
We’ll be making a paste today in this recipe. If you prefer to ferment turmeric whole or in slices, you can do so by making a 2% brine of sea salt and water and submerging the turmeric pieces or slices to ferment. You can find basic fermentation instructions in my fermented vegetables post to find out exactly how to do that.
Equipment
A Jar for fermenting the ginger paste – My favorite vessels for fermenting are wide mouth mason canning jars, but I’ve started using Bormioli Rocco Fido Jars and find that they work really well because they do not need venting. This eliminates maintenance during fermentation!
Fermentation lid – You can totally use a regular canning jar lid, just know that you’ll need to burp the jar daily. On the other hand, Fermentation lids or Airlocks require no maintenance and you can forget about your ferment for a few weeks. I highly recommend investing in some of these if you’re going to ferment a lot.
Blender, food processor or grater – An electric food processor or Manual chopper will finely chop your turmeric and it is what I use. You can use a grater for small amounts and it will be fairly close to a true paste, but it takes a little more ellbow grease. To make a quantity of a smooth paste quickly, you’ll want to reach for your Blender that can handle pastes, or a Vitamix.
I believe that most Asian people still use a mortar and pestle for grinding their turmeric paste. Here is a suribachi style set if you’re interested.
Pickle packer (optional but very helpful) – I love using my Acacia wood pickle packer. It’s super useful for packing the paste into jars to eliminate air pockets and to coax out the juices. Use some sort of tamper or a spoon if you don’t have a pickle packer. I’m thinking that a tamper from a food processor will work ok.
Fermentation weight – I invested in some glass fermentation weights for wide mouth mason jars early on. And they fit my Fido jar openings pretty good too. I think they are just the best for the job. However, you can use a boiled rock, a baggie with salt brine or marbles, a small jelly jar, or an upside down food-save lid that fits.
Funnel – optional – Don’t spill your precious ingredients. Use a handy wide mouth funnel to get ingredients into the jars without making too much of a mess. Another highly recommended optional item and very useful around the kitchen.
Scale – optional – I’ve always owned a scale, because I’m German, lol. If you’re cooking from a German recipe book, all the ingredients are listed in grams. And, mostly for the sake of easy scalability, I have adopted the weight method for many of my fermentation projects too. This way, I can just weigh my ingredients, add the correct amount of salt, no matter what amount of ingredients I have, and not have to think too hard. So while you can wing the salt most of the time, I feel that a scale makes it much easier to be consistent, which leads to successful fermenting.
Ingredients
Turmeric – Use fresh organic turmeric. It not only helps to keep your intake of harmful chemicals lower, but you will not want to have the microbes destroyed that are naturally present on the skin of turmeric. They will get your fermentation started. You can get fresh organic turmeric at Azure Standard if you can’t find it locally!
Peppercorn – Freshly grate whole black peppercorn, or whirl whole ones in your food processor together with the turmeric. The active ingredient in pepper, piperin, oxidizes quickly when ground and not much of it stays present in pre-ground boxed pepper.
Salt – I recommend using Redmond’s Real Salt or Himalayan pink salt. You can also use unrefined sea salt or Kosher sea salt. With any salt, it’s important to read the label! It needs to be free from any additives, and consequently that rules out table salt or any salt with anti-caking agents or added iodine. And even some kosher salt and sea salt have additives.
Instructions to make Fermented Turmeric
01. Prepping your Turmeric

Roughly chop the turmeric. While peeling improves the flavor of turmeric, you’ll not want to do that when you ferment it. We want the beneficial bacteria that grows naturally on the skin, to make fermenting possible. If you absolutely want to peel yours, you’ll need to add a quarter cup of starter. This can be a previous ferment or whey from strained yogurt or cheesemaking.
02. Process the Turmeric

Weigh your food processor bowl, record the weight and tare it to zero in grams. Add the turmeric, record the weight, and process. I used a food processor, since my blender doesn’t work for things like this paste and my good one is still packed away.
03. Add the pepper
Add peppercorn or freshly ground pepper (the piperin will oxidize quickly and lose its benefits, so don’t use ground pepper from a box).
04. Adding Salt
Now calculate your salt. You’ll be using 2% of the weight of the turmeric in salt. If your turmeric weighs 400 grams, this is your formula: 400 x .02 = 8. You’ll be adding 8 grams of salt. If you don’t have a scale, add 1.5 tsp per pint of turmeric paste.
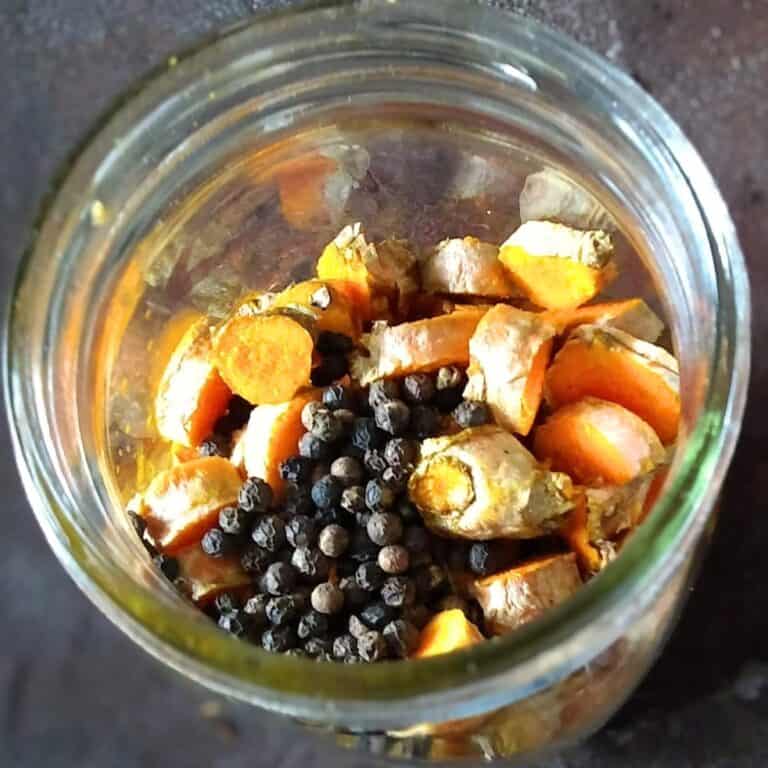
05. Pack the jars

Give the paste another whirl to incorporate the pepper and salt. Then, using a funnel, transfer your ingredients into the fermentation jar. With your pickle packer, or spoon, press the ingredients firmly into the jar to eliminate air bubbles and to submerge the ingredients in the brine that develops. Keep at least an inch of head space because your brine will ooze out otherwise.
06. Weigh down the ingredients and seal the jar

Cover the ingredients with a fermentation weight or a ziplock baggie that’s filled with 2% salt brine. Seal with a fermentation lid or a 2-piece canning jar lid.
07. Let it ferment

Place a plate under it and leave it for 10 to 21 days in a darkish corner at about 70-80℉. 3 weeks is the recommended time for long-fermentation and to get the most benefits. But it will be ok if you want to start using it after a week.
08. Maintenance and Observing
Keep a casual eye on your fermentation. You don’t need to do anything if it looks ok. It will start to bubble and possibly ooze out of the jar. If you see a whitish layer on top, you should skim it off every few days.
Important: If you’re using a regular mason jar lid, don’t forget to burp it every day. Pressure builds up from the fermentation process and you’ll need to release it so your jar doesn’t explode.

Now you can open it, look at it, smell it. If nothing seems off, taste some. If it’s good, take out the weight, top with a regular lid, and place into the refrigerator.
In case your turmeric paste is a little dry and your brine isn’t covering your ferment anymore, you can add a little brine from another ferment or just add some raw vinegar to cover the ingredients and keep them from getting moldy on top. And always use clean utensils when removing a portion from your jar.
You can pour a layer of olive oil or coconut oil over the paste and eat it with the paste. The fats are going to help with absorption of the beneficial compounds in your body.
Once in storage, it will keep for a year. I also have kept my ferments successfully in a cellar with fluctuating temperatures (35-60 degrees) even for 2 or more years.
Uses For Fermented Turmeric Paste
- Use in baked goods like cookies or pumpkin bread.
- Great in soups, stir-fries, curries, or sauces.
- Use in a latte or golden milk, if you just warm the milk, you’ll also get the probiotic benefits.
- Add to your vegetable, grain, rice or pasta dishes.
- Eat by the spoonful for health benefits.
- Add to cold smoothies for probiotic benefits.
Your Questions Answered
What are the benefits of fermented turmeric?
Fermenting increases the bioavailability and absorbance of turmeric. The healing compounds in turmeric are known for being difficult to use for our bodies and fermenting assures that when you take turmeric, you will actually benefit from it.
Another benefit is the added bacteria, which is great for your digestion.
Another benefit of fermenting turmeric is preservation. I find it hard to keep turmeric fresh in the fridge for a long time, it usually gets moldy. But fermenting it preserves it for a year or longer in a jar, that you can keep in your fridge for convenient use any time you need it. This will help get more of the beneficial healing power of turmeric into your diet.
What is the difference between turmeric and fermented turmeric?
Turmeric has a reputation for keeping it’s healthy compounds unavailable to the body when it’s just taken on its own. There are some ways to increase bioavailability. One is to add black or white pepper, another to add some kind of fat. But this only helps in part. There are several methods to boost absorption, some of which require industrial methods, I’ll mention a couple of them here.
You can get nano-curcumin, which is a special preparation where curcumin has been isolated and is fragmented into nano particles for better absorbance. Another way to increase absorption is by liposomal delivery, where the curcumin is encapsulated in fatty spheres that protect the curcumin on the way through the digestive tract to be delivered to where it’s most effective.
Fermented turmeric is often used in conjunction with liposomal delivery. Fermenting greatly improves bioavailability of turmeric’s healthy compounds and increases the nutrients in the turmeric. It gets ‘predigested’ by the fermentation process which helps the compounds to be more ready for absorption in the digestive system.
Fermenting turmeric is one of the best strategies to make it’s compounds work for your health. And it allows use of the whole herb, not just isolated curcumin. It also adds beneficial bacteria to help with digestion. Fermenting turmeric with pepper and adding fat at the time of consumption, can increase absorbance even more.
What cannot be mixed with turmeric?
There are some drugs that don’t mix well with turmeric, such as blood thinners, diabetes medication, certain chemotherapy drugs, antacids, and some high blood pressure medications. Turmeric supplements should be discontinued before surgery. Learn more here! As with any herbs, consult with your health provider before adding new herbs, especially if you have health issues, are pregnant, or are on medications.
How long does it take to ferment turmeric?
It will take about 5 days to 3 weeks for a full fermentation. You’ll find that it develops tang and that signature lacto-fermentation aroma and taste. Once it is fermented, it needs to be refrigerated in a well sealed jar, where it should stay fresh for a year or more.
Is turmeric good for inflammation?
Turmeric is probably best known for its anti-inflammatory properties. Just taking turmeric without proper preparation will not be very helpful, though. Our bodies can’t absorb its compounds easily and much of turmeric’s healing power remains unused. This is the reason we need to add extra steps and ingredients for the best results.
Enjoy Your Fermented Turmeric!

Congratulations! You’ve got a nice jar of living turmeric paste in your fridge! This was so easy and now you can enjoy mess free turmeric paste whenever you need it. Cooking or baking with it will destroy the probiotics. However, all the other benefits are still going to be there, and gentle cooking actually releases a few more. So use it generously raw or in your cooked meals and reap the benefits of this powerful ally for your health.
Let me know your favorite uses for turmeric paste! And if you have any questions, I’ll be glad to answer them in the comments below. To your health!
To get more recipes like this and other information on homesteading and traditional skills, sign up for my Food For Life Garden News, and I’ll let you know when I post new information.
More recipes you might like:
Probiotic Ginger Paste – A convenient way to have ginger on hand when you need some, either as seasoning in cooking or baking, or to use this powerful ally in your daily health routine.
Turmeric Tincture Recipe – Make your own effective turmeric supplement, that is convenient to use and keep with you when you’re not home. A potent extract of the whole turmeric root.
Fermented Garlic – Lacto-fermented garlic paste is kind of a special food. It’s the ultimate convenience food and health supplement. But besides that, it gets better as it ages. Just like a fine wine.
Fermented Garlic and Honey – A powerful combination of two all-star infection and sickness fighters. Make this easy remedy today and be ready for cold and flu season!
Fermented Ginger Honey – Keep this potent fermented health food on hand. Use the powers of Ginger and Honey in a tasty syrup form that you’ll love.
Fire Cider Recipe – Get your fire cider recipe and make this tonic to be ready for cold and flu season!
Make A Lemon Balm Salve – Benefits of lemon balm and how to make a salve for cold sores, bug repellant, bug bite relief and more.
Health benefits of ginger beer Learn all about the awesomeness of ginger.
Ginger bug recipe puts exciting fizzy sodas on your table! Meet my friend the ginger bug and learn how to get one started for yourself.
25 Essential Herbs To Plant – Start your home apothecary garden with these 25 powerful allies for your health. Learn their benefits, how to grow them and where to source them.
Fermented Chili Paste – Here is a great way to preserve your end-of-the season harvest of green peppers. This paste will last all year in your refrigerator to use as a condiment, seasoning, or topping.
Fermented Basil Paste – Keep a jar of this in your refrigerator all year, to season your italian dishes. Preserve not only the herb, but also its aroma and pungent basil flavor. It’s one of my favorite ways to preserve basil.
Black Walnut Tincture – Black walnut has been used as a deworming tincture for a long time. Make your own with my recipe. I like to use it as part of my goat deworming routine with great results so far.
Pin for later!

Shop This Post
Fermentation Equipment
Bormioli Rocco Fido Jars
Fermentation lids
Airlocks
electric food processor
Manual chopper
Blender
Vitamix
Suribachi style mortar and pestle set
Acacia wood pickle packer.
Glass fermentation weights
Wide mouth funnel
Scale
Recommended Ingredients
Fresh turmeric at Azure Standard
Whole black peppercorn
Redmond’s Real Salt
Himalayan pink salt
Kosher sea salt
Some resources: NCCIH – Turmeric, Mayo Clinic – Turmeric, PubMed Central – Curcumin Health Benefits. Curcumin for use with animals: National library of medicine
Disclaimer: Any material on this site is intended to be for general informational use and is not intended to constitute medical advice, medical diagnosis, or medical treatment. It constitutes my personal opinions and my own conclusions from life-long research and practice of home herbalism. You should consult your physician or other health care professional before making any changes in your diet or when adding new herbs. Talk to your medical care provider if you are pregnant, on medication, or have health issues.

Fermented Turmeric Is A Superfood That’s Packed With Health Benefits
Equipment
- A pint jar for fermenting – A mason jar or Bormioli Rocco Fido Jar works great.
- Fermentation Lid – Fermentation lids or Airlocks require no maintnance, but a regular lid works fine if you burp it daily.
- Fermentation weight – Best: a glass fermentation weight for wide mouth mason jars or use a baggie filled with 2% salt brine.
- Pickle packer (optional) – I use a pickle packer but you can use a spoon too for packing your ingredients.
- Scale (optional). – Helpful but not neccessary is a scale. You'll find it useful if you ferment a lot but in this recipe you can also use a measuring spoon, see the instructions below.
- Blender, Grater or Food Processor – An electric food processor or Manual chopper will finely chop your turmeric. You can use a grater for small amounts, or for a smooth paste, use a Blender that can handle pastes, or a Vitamix.
- Wide mouth funnel (optional) – very handy is a wide mouth funnel for packing your jar.
Ingredients
- 1 lb Organic turmeric, unpeeled (You might need a little less, I used 14 oz for my pint) – Get fresh organic turmeric at Azure Standard.
- 1 tsp Peppercorn – Use whole black peppercorn,
- 1½ tsp Salt – Redmond's Real Salt or Himalayan pink salt. You can also use unrefined sea salt or Kosher sea salt. Avoid table salt or other salt that has additives!
Instructions
- While peeling improves the flavor of turmeric, you'll not want to do that when you ferment it. We want the beneficial bacteria that grows naturally on the skin, to make fermenting possible. If you absolutely want to peel yours, you'll need to add a couple of tablespoons of starter culture. This can be juice from a previous ferment or whey from strained yogurt or cheesemaking.
- Roughly chop the turmeric. If you're using a scale, weigh your food processor bowl, record the weight and tare it to zero in grams. Add the turmeric, record the weight, and process. I used a food processor.
- Add peppercorn or fresh ground pepper (the piperin will oxidize quickly and lose its benefits, so don’t use ground pepper from a box).
- Now calculate your salt. You'll be using 2% of the weight of the turmeric in salt. If your turmeric weighs 400 grams, this is your formula: 400 x .02 = 8. You'll be adding 8 grams of salt. If you don't have a scale, add 1½ tsp per pound of turmeric.
- Give the paste another whirl to incorporate the pepper and salt.
- Using a funnel, transfer your ingredients into the fermentation jar.
- With your pickle packer, or spoon, press the ingredients firmly into the jar to eliminate air bubbles and to submerge the ingredients in the brine.
- Cover the ingredients with a fermentation weight or a ziplock baggie that's filled with 2% salt brine. If your jar is only half full, this is actually the best solution, so you can reduce the air space that occupies the jar.
- Seal with a fermentation lid.
- Place a plate under it and leave it for 10-21 days in a darkish corner at about 70-80℉. 3 weeks is the recommended time for long fermentation. But it will be pretty good after a week.
- Maintenance and Observing: Keep a casual eye on your fermentation. You don't need to do anything if it looks ok. It will start to bubble after a few days and might possibly ooze out of the jar. If you see a whitish layer on top, that should be skimmed off every few days.
- If you’re using a regular mason jar lid, don’t forget to burp it every day.
- Now you can open it, look at it, smell it. If nothing seems off, taste some. If it's good, take out the weight and top with a regular lid and place it into the refrigerator or cellar. If your turmeric paste is a little dry and your brine isn't covering your ferment anymore, you can add a little brine from another ferment or just add some raw vinegar to cover the ingredients and keep them from getting moldy on top. Most ferments will keep for at least a year. I have kept many of my ferments successfully in a cellar with fluctuating temperatures (35-60 degrees) even for 2 or more years.
This is so awesome! We have been using turmeric in our family for a while now, and I’m becoming obsessed. Thank you for sharing this!
You’re very welcome, I’m glad you like this!
Don’t forget, if you have any questions, you can ask me right here in the comments section and I’ll get back to you as fast as I can!