How to store basil long term by salt curing. Here is a method to keep basil and other herbs on the shelf without them losing their flavor.

This post contains affiliate links, which means I make a small commission at no extra cost to you. See my full disclosure here.
Learn about several methods to salt cure basil and other herbs such as dill, cilantro, or parsley for storing year round in your refrigerator or on the shelf. Store basil leaves whole or chopped with salt for use any time. Preserve the full flavor and aroma to lighten up your winter dishes with bright summer deliciousness.
Overview: Long Term Salt Curing
A shelf-stable recipe: Layering Basil With Salt
For your refrigerator: Simple Salted Herbs
Refrigerator stable dry salted Fermented Basil Paste
Refrigerator stable Salt Brined Basil
How totally awesome, to have a basil glut!
To give you some perspective here: I tried to grow basil pretty much every year that I ever gardened. Sometimes it was OK, other times dismal or a complete bust. Only once did I have one nice big full basil bush and understood what basil can be like if it’s got optimal conditions. Unfortunately, I never again could duplicate such a result over the last few years, though I tried. Until this year…
I’m thinking the area where I lived in Washington would just get too cold at night for the basil to really take off. I don’t have that problem here in Missouri. It’s been hot-hot-hot since the beginning of May and the basil looks super happy.
Alas, because of my past experience of puny little basils, I planted at least as many plants this year as usual, and well, they are all thriving now. There are more than a dozen big full bushes throughout my garden with lush huge perfect looking and wonderfully pungent smelling leaves. It’s such a joy to see. And I’ve decided that you just can’t have too much basil!
How to harvest basil

Now I need to keep pruning them to prevent them from flowering and they are just growing bigger all the time. Just pruning the tips above 2 leaf nodes fills my basket and helps the plant grow more bushy. Soon I’ll let some go to flower for collecting seeds. But for now I’ll keep pruning and am using much of it in my meals. The rest goes to long-term preservation.
Preserving Basil
When it’s the dead of winter and I want that summer feeling back, not much can do that for me besides preserved tomatoes and basil. When it’s icy and snowy out and you yearn for the abundance of summer, for its lush greenery and fragrant harvests, won’t you be glad to have some summer bounty preserved in your pantry. And it is even more delightful, if you open a jar of your preserved food and it smells just like fresh picked!
There are many ways to preserve basil. However, basil has a fleeting aroma that is hard to catch and keep locked up for the long term. But there are some methods that will allow basil to shine months after it was picked. Here is a quick overview before I dive deeper into one of the methods that I prefer.
How To Store Basil Short Term
For short term storage, you can just place the basil in a jar of water and cover loosely with a plastic bag. Keep it on the counter at room temperature. Replace the water every few days and snip a little of the end in the water off. Basil hates being cold and will turn black in the refrigerator.
How To Store Basil Long Term:
If you want to keep basil for longer-term storage though you’ll need to use a different method. There are several options.
Freezing:

Freezing is a simple technique and there are several ways to freeze basil. Making pesto and freezing it is one way, although it will not keep as long. The most common is probably to freeze basil in ice cube trays so you can use basil cubes or other herb cubes in your cooking. I do keep quite a bit in my freezer, although I don’t like to use the ice cube trays. I’ll tell you all about my basil-freezing methods in my post How To Freeze Basil.
Store Basil Long Term By Freeze Drying
I do not have experience with freeze drying for storing basil long term, since I don’t own a freeze dryer. From my research into freeze-drying basil however, it sounds like this method is superior to dehydrating with regards to preserving the basil flavor, some claim it yields the best result for preserving basil long-term.
The biggest drawback with this method is the acquisition expense and later the operating expense. These freeze dryer units are quite expensive and they do take up a lot of space too, which is something to consider. But if you have a big garden and a big need for preserving lots of food, I would check into it if I were you. My top choice, if I could buy one, would bea medium size Harvest Right Freeze dryer.
Store Basil Long Term By Dehydrating:
Using a food dehydrator, or drying basil on baking sheets, racks or in bundles, does not yield a great result. Dried basil loses its flavor pretty quickly, and it quickly turns to an unappetizing brown.
Plant Basil In Pots:

Pot some basil plants to keep on your windowsill. You might need some artificial lighting in the middle of winter though when sunshine is rare and days are short. I took a few cuttings from my vigorous basil plants, rooted them in water and then planted them in pots. They are growing pretty nicely here by my window in December.
Canning:
Here is another way to store basil long term although it’s indirect. You can take a glut of tomatoes and add some basil to make pizza and pasta sauces to can for storage. This can increase shelf life quite a bit, up to 18 months. However, I stopped doing that because I didn’t think that the basil flavor came through when using the canned sauces later. I always can tomatoes plain now without any additives and then I add the salt cured or frozen basil later.
How To Store Basil Long Term By Salt-Curing:

The method I describe in detail in this post is salt-curing. This method can also be used with other herbs that don’t lend themselves well to drying. Such are delicate herbs, like dill, cilantro, or parsley. And you can make a really nice fresh basil salt or celery salt that will keep in your refrigerator for up to a year. I have had a jar of salt-cured dill in my refrigerator for over a year ago, which still tastes like fresh dill, just salty.
These salt-cured herbs are great for salad dressing, to sprinkle over food as a seasoning salt, and in cooking. I also like to have salt-cured whole basil leaves for the top of my Pizza Margherita, whenever I make it out of season. This is pretty much the original, simplest, and I think tastiest Italian style pizza. I’ll have to post the recipe some time, it is super amazing good.

The very cool thing about salting herbs is that this method preserves the freshness of the herbs, but as it removes the excess moisture, it keeps the herbs from spoiling. Even months later, the herbs have retained their fresh flavor.
The salt-curing method is a great way to store basil long term, which is much superior to dehydration. Pulling a jar of fragrant fresh tasting sweet basil out of the refrigerator, to sprinkle over your middle of the winter pasta dishes or cioppino, is just so gratifying.
Different Variations Of An Age-Old Preservation Technique:

Below I will introduce four ways about how to store basil long term. They all describe different variations for curing herbs with salt and explain the processes step-by-step below. Salt curing is a traditional method that has been used to preserve meat, fish and vegetables throughout the ages. While it is not recommended to eat excess salt, salt cured herbs can be added to meals as a seasoning and can replace plain salt in recipes. If you use mineral rich salt, you’ll have some added health benefits. That’s what I call value added!
Extra leftover salt after you use up all the herbs, can be reused. It will have a nice herb flavor and you can use it to salt soups, dinners, or for fermenting pickles and for canning. So it is not going to waste and will add a nice herbal aroma to your cooking.
If you have leftover brine after filling your basil jar, save it for next fermentation. It can keep on the counter till you’re ready to use it again. If you don’t need it anymore, use it for seasoning dishes!

How To Store Basil Long Term by Preserving With Salt:
There are different methods of salt curing that can preserve your basil or other herbs. You can keep experimenting during the growing season to see which method to store basil long term, works best for you.
Of the different methods to salt cure herbs, number one yields a shelf stable product and the others will need to be kept in cold storage, such as a basement, cheese cave, root cellar, or in the refrigerator:
Ingredients:
You’ll need some herbs, and salt. And you’ll need water if you use a brine for fermenting.
Herbs
You can use any leafy herbs that you like to use in your cooking when fresh herbs are unavailable. Herbs like oregano, mint, thyme or sage are easy to dry and their flavor preserves well even when dried. But many others don’t. But you can use the salt-cured method to store these herbs long term too.
I digress here with a quick bonus tip for drying herbs: The best way to preserve a strong flavor in your herbs if you do dry them, is to not crush or powder the leaves for long term storage after drying. This will make the flavors deteriorate quickly and the volatile oils will escape. If you dry them so they are crunchy, keep them well sealed, if possible vacuum sealed. Then you can just crush them between your palms at the time you want to use them, right into the dinner pot or tea pot, and you’ll get much more flavor that way.
However, some herbs lose all their qualities during drying, turn an ugly brown, or quickly become bland. Such herbs are great candidates for salt curing or freezing.
Here are a few herbs that lend themselves better to salt curing than drying:
- Basil
- Celery leaves
- Chives
- Cilantro
- Dill
- Fennel
- Papalo
- Parsley
What Types Of Basil Work For Salt Curing
I like to use Genovese basil or Italian large basil. They both have nicely pungent aromas and the familiar flavor of fresh basil is embodied in these varieties. But you can use any different basil varieties if you like, including Thai basil, holy basil, purple basil or lemon basil.
Salt
Salt is necessary to store basil long term outside of the freezer.
What Not To Use: Salt as a preservative should be free of any additives. Table salt is unsuitable since it contains iodine and anti-caking agents. Iodine can inhibit fermentation, discolor foods and can possibly impart an off flavor.
Recommended Salt Choices:
My favorite salts to use are mineral rich salts, that include lots of essential trace minerals that we should be adding to our diet. So a mineral rich salt can add health benefits as well as preservation.
That said, my number one favorite salt is Redmond’s Real Salt. It is mined here in America from uncontaminated deposits and I love the texture and flavor and that it contains a lot of trace minerals.
Most often I use Himalayan Pink Salt for large projects such as meat and herb curing, since it is cheaper. This salt contains trace minerals as well and that makes it healthier than just plain kosher or pickling salt.
Another good quality sea salt I like to use is Celtic Sea Salt. It too is full of trace minerals and it is unprocessed whole salt from pristine coastal regions.
Other Salt that is acceptable:
Traditional Kosher Salt is coarse sodium chloride, with no trace minerals and normally with no additives. (Be sure to check the label though, at least one kind of Morton’s Kosher salt contains an anti-caking agent). Kosher salt can be used for preserving, but since you’ll be retaining the salt for cooking and in food preparation, sea salt would be a more healthy choice. If you need to use a kosher salt, there are also some Kosher sea salts available, which I feel would be preferable.
Canning and Pickling Salt will have no additives since it is produced for canning in particular. But it is made of sodium chloride (NaCI) and has no nutritive or health-promoting value.
Water
When wet-brining your herbs, any non-chlorinated water should work, however, keep chlorinated tap water out in an open container for 24 hours so the chlorine will evaporate. Chlorine can inhibit fermentation. It is best to use filtered water.
01 Layering whole herbs with salt

This is the easiest and quickest way to preserve herbs with salt. When you need to use the herbs, you can just simply take what you need out of the container, shake off the salt and reseal. This is the only method that is shelf stable and can sit on your countertop for convenience.
Equipment:
- You’ll need an airtight container, preferably glass or ceramic, such as a canning jar with a sealing lid.
- Salad spinner, tea towel, Flour Sack Towel, or paper towel to dry the basil after washing if you need to wash your herbs.
Layer Herbs With Salt:
- You’ll start with a layer of salt at the bottom of your container, about ¼ inch deep.
- If you wash your herbs, be sure to do so in cold water or ice water, then dry them thoroughly with either toweling or a salad spinner.
- I leave the basil tops whole, but you can pick the leaves off and add them separately. Key is to spread a thin layer of herbs and sprinkle with a thin layer of salt. Not a ton, just a sprinkle is good.
- Then add another layer of the herbs on top of the salted first layer in your bowl.
- Again sprinkle with salt.
- Keep repeating until you reach the top of the container. Your final layer will be about ¼ inch of salt.
- Seal the container and place it on a shelf somewhere in a darkish corner.

When you want to use the herbs, just take out what you need, shake off the salt and use as usual. It will be a bit salty but it will have a nice fresh, true flavor.
02 Chop Or Process Herbs And Mix With Salt

This method is used when you want more of a seasoning salt, ready to sprinkle on your food. It needs to be kept refrigerated.
Equipment:
- Food processor or sharp knife.
- Canning jar or other glass jar with tight fitting lid
- Salad spinner, tea towel, Flour Sack Towel, or paper towel to dry the basil after washing if you choose to wash. Be sure to dry it thoroughly.
Chop Herbs and Mix With Salt:
- Wash and dry your basil. It needs to be thoroughly dried.
- Measure out your basil by stuffing it tightly into a measuring cup.
- Place into the bowl of a food processor. Alternatively, chop it with a kitchen or Ulu knife.
- Add ¼ cup of salt for every 1 cup of herb.
- Process till it is well chopped
- Place in a jar and press it down a bit to eliminate air pockets.
- Cover tightly with a lid and put it into the refrigerator for storage
This should easily keep for 6 months to a year. Use a clean utensil to remove what you need.
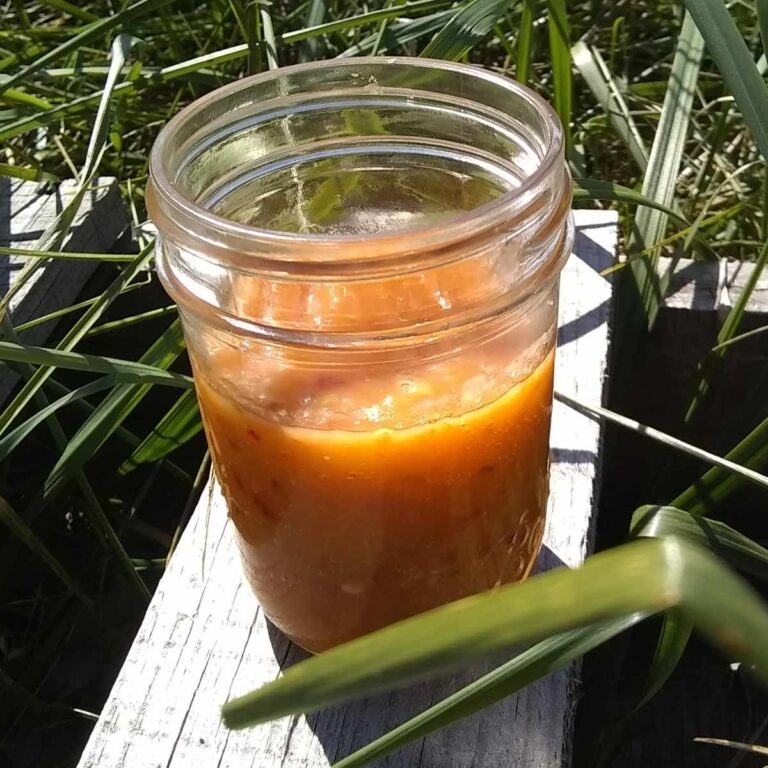
03 Fermented Basil Paste

When fermenting basil, you do the same as in method 2. The only difference is, you’ll be using less salt and leaving it out at room temperature for a fermentation. Then you can keep it in the basement or the refrigerator for long term storage. You can also mix the basil with chopped garlic for this ferment. It will be milder as it ages and it will have the tang of fermentation added, but will retain a great flavor.
Equipment:
- Food processor or sharp knife.
- Canning jar or other glass or ceramic jar with tight fitting lid.
- Fermentation weight or some other thing that will hold the basil submerged in its brine.
- Optional: Fermenting lid such as the ones I love to use from Nourished Essentials. You could also use an airlock top or just cover with an airtight lid that you have already. Remember that they need to be burped every day, but fermenting lids or airlocks do not, and you can reuse them for any fermenting or wine making.
- Salad spinner, tea towel, Flour Sack Towel, or paper towel to dry the basil after washing. If you wash your basil, be sure to dry it thoroughly.
Ferment Basil Paste:
- Pick a big bunch of basil and wash your basil leaves if you feel necessary and dry it thoroughly. (It’s ok if there are some tender stems mixed in).
- Place the fresh leaves into the food processor or use a sharp knife
- Add a teaspoon of salt per 4 cups of Basil. Chop it up into a paste.
- Press into a jar to release the juices.
- Add a fermentation weight, a rock or some other kind of contraption to press the basil down into the jar and make sure it is all submerged in the liquid.
- Seal with a canning jar lid with a band and keep the jar on the counter at room temperature for about 7-14 days or whenever you like the taste best. Cooler temperatures will slow it down while very warm temperatures will get it done fast. It will become bubbly after a while as fermentation kicks in and then it will start to get tangy. If you’ve fermented before, you’ll recognize the smell and taste.
- Keep an eye out for bits floating to the top and remove them so they don’t get moldy.
- Burp your jars occasionally by loosening the band, but don’t lift the cover unless you need to, for maintenance. This is to keep the oxygen exposure to a minimum.
- After it is done fermenting, you can store the jar in a cool basement or in the refrigerator. It should keep for many months, up to a year with no problem at cold temperatures.

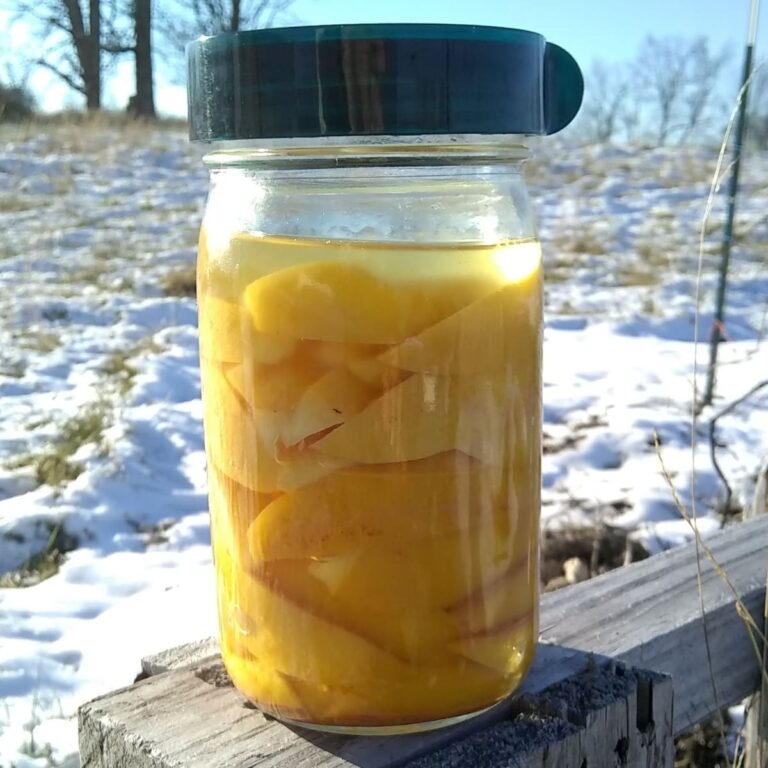
04 Salt-Brined Fermented Basil

This method involves fermentation in a brine. Instead of salting the basil and using its own juices for fermentation, which is how Sauerkraut is made as well, in this method you’ll use a brine to submerge the basil. This is an easier way especially if you want to keep the basil whole. The brine fermentation is exactly the same concept as used when making fermented dill pickles.
Equipment:
- Canning jar or other glass jar with lid or cloth and a rubber band
- Fermentation weight or something that will hold the basil submerged in its brine. I actually used an upside down small canning jar plastic lid here, since I was out of fermentation weights, but I do prefer the weights. They are great!
- Optional: Fermenting lid such as the one I love to use from Nourished Essentials. You could also use an airlock top or just cover with an airtight lid that you have already. Remember that they need to be burped every day, but fermenting lids or airlocks do not, and you can reuse them for any fermenting or wine making.
- Tea towel, Flour Sack Towel, or paper towel to dry the basil after washing if you choose to wash yours.
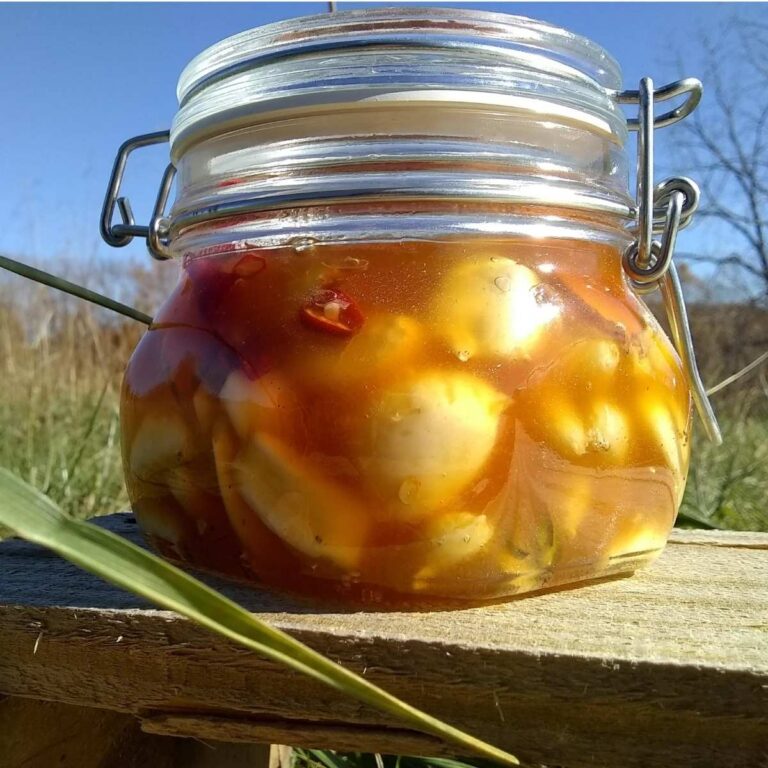
Salt-brined And Fermented Basil:
- Wash your basil if you like. You won’t need to dry it much for this recipe, just pat it a little with a towel, so your water to salt ratio doesn’t get too diluted. But we’re not dealing with low tolerances here.
- Place fresh basil leaves into an appropriate sized jar. I usually use a quart for smaller batches or a half gallon for larger amounts. In this demonstration I used a quart jar.
- Fill the jar full with basil leaves. You can pack them down pretty tight.
- In another quart jar, mix the brine. My standard brine for all fermented foods is two tablespoons of salt per one quart of water. One tablespoon can be enough, but foods can spoil if they are not salty enough and to be safe, I always use two tablespoons as my low measure. If it’s super hot out and I don’t have cold storage available, I’ll use three tablespoons, which is pretty salty, but that will keep food from spoiling even in hot weather. And my ferment can be kept at low room temperature for months that way too, although it needs to be monitored. In this demonstration I used two tablespoons per quart since I’m planning to put it into my cheese cave at 55 degrees after. It will keep fine for a year there.
- Place a weight on top of the basil to keep it under the brine. A plastic baggie filled with water can work as well or a clean rock. If you use a fermentation top, you can get by not using a weight, but keep an eye on it. I rarely have a fermentation fail when using a fermentation lid but it can happen. If at any point you notice a piece of basil with some mold on it swimming on top, remove it right away. Scum happens and it can be skimmed off, as well as the thin whitish layer of kahm yeast that sometimes forms on top, especially when it’s warm out.
- Place the jar in a darkish spot where you remember to check on it occasionally. If you use a canning jar lid, burp it once a day. Otherwise, just check for mold or scum every few days and skim it off if necessary. You should start seeing bubbles form in a couple of days.
- Your basil should be well fermented in about 7-14 days. Taste the broth and if it’s sour enough for your taste, you can put it to rest in a cool spot. Put a tight fitting lid on it with a seal and place it in a basement, root cellar or a refrigerator.
- Use a clean utensil to remove what you need and replace the lid to keep the rest for later. Try to keep all the pieces submerged to prevent mold forming on top.
Now You Know Many Ways To Store Basil Long Term!
And well, I hope you are having a basil glut too! Or maybe you have lots of other extra herbs in your herb garden. And if you do, I think you’d be pleased with trying one of the preservation methods I’ve listed here. Your harvest is worth preserving! Salt curing herbs is a really great way to store away any extra for the winter months and beyond. Check out my post about freezing herbs as well where I write about other ‘cool’ ways to preserve your harvest.
Now I can look forward to some basil flavored dishes in the middle of winter. With so much basil to preserve this year, it will be possible. And I’d be thrilled to hear from you if you try salt-curing your herbs. Let me know what kinds of herbs or methods you use, how it turned out, and what your favorite is!
Stay tuned for future recipes and posts about herbs by subscribing to my Food For Life Garden Newsletter.
What to read next
How To Freeze Basil – Preserve The Best Fresh Flavor – Preserve basil for convenience and for long-term use in your winter soups and comfort foods.
Prepared and Fermented Horseradish – Make your own prepared horseradish with homemade vinegar or ferment it. Bonus recipe: horseradish tincture. Great for digestion and sinus infections.
Creamy Cucumber Salad – This is a super delicious summer salad. A must for cucumber season, but it’s great any time if you can get cucumbers! If you don’t have fresh dill, you can use salt-cured dill, made the same as sal-cured basil, or frozen dill instead.
Fermented Garlic – Lacto-fermented garlic paste is kind of a special food. It’s the ultimate convenience food and health supplement. But besides that, it gets better as it ages. Just like a fine wine.
Fermented Turmeric Paste – Make this convenient fresh turmeric paste for your wellness and as a convenient seasoning for your curries and other foods. Turmeric has so many benefits, find out all about it and why fermenting it makes it even better.
Fermented Garlic and Honey – A powerful combination of two all-star infection and sickness fighters. Make this easy remedy today and be ready for cold and flu season!
Fermented Ginger Honey – Keep this potent fermented health food on hand. Use the powers of Ginger and Honey in a tasty syrup form that you’ll love.
Lacto fermented sauerkraut – Famously healthy and so tasty! Make your own from scratch.
Fermented onions – You’ll love these tasty, tangy onions. Try them plain or spiff up any sandwiches, salads and burgers with a ready supply of these onions sitting in your fridge.
Ginger bug recipe puts exciting fizzy sodas on your table! Meet my friend the ginger bug and learn how to get one started for yourself.
Make your own chevre cheese from scratch How to make super versatile, creamy, spreadable cheese.
Shop This Post
Harvest Right Freeze dryer
Redmond’s Real Salt
Himalayan Pink Salt
Celtic Sea Salt
Kosher Salt
Kosher sea salts
Canning and Pickling Salt
Non-electric food processor
Black & Decker food processor
Fermentation weights
Nourished Essentials Fermenting lids
Flour Sack Towel
Salad Spinner
Pin This Post

[pt_view id=”1f957233lv”]
I LOVE this so much! I’m definitely going to try this for the upcoming grow season. I’m also going to share this with my in-laws who are multigenerational survival gardeners.
I’m so glad you like this. I love having a few jars of salted herbs in the fridge and use them all winter long. It’s so convenient. Thanks for stopping by my page.
This is so interesting, I had never even thought about salt curing herbs. Thanks for sharing!
Hi Chris, you’re welcome. Thanks for hanging out on my page for a bit!
This so cool! I love growing basil in the summer and always have a ton. I’m saving this so I can give it a try this summer.
Thanks for stopping by here. I’m glad you like this. Ever since I found out about it, I’ve got several jars in the fridge every year with salted dill, parsley and basil.
I have a ton of basil ready to harvest. I’m going to try this!
That’s awesome, Sarah! Thanks so much for commenting!
I am totally obsessed with Basil! LOVE the basil salt. I’m going to try it!
Hey Megan! I love having a jar of this in the fridge. I can mix it into dips and sprinkle it on foods. It’s really convenient.