How to grow celery from seed and nurture it throughout the growing season. We’ll also cover types of celery, benefits, and how to harvest.

This post contains affiliate links, which means I make a small commission at no extra cost to you if you click through and make a purchase. See my full disclosure here.
Celery (Apium graveolens) is such a versatile vegetable and great for your health. And celery has many uses for your culinary needs. It’s a seasoning and a vegetable, and all parts of this plant, from root to seeds are edible and useful.
But it has many more benefits, and what better way to have access to this beneficial plant than to grow it in our own healthy soil, close-by in our garden or in planters on your balcony. Grow your own celery and use it more often, to reap the benefits of clean, real food. Pick it fresh, and use it or preserve it at its peak for the most benefits.
With some care you can grow great celery in your garden. Let’s get some celery growing!
All About Growing Celery!

Get To Know Celery
Celery is a biennial plant that will grow its seeds in the second year just like parsley and carrots, and in fact they are related. They are all members of the Apaceae family.
If celery is stressed or gets disturbed too much, however, it can be stimulated to bolt even in the first year. Stress could mean danger to the celery, a signal that it might not survive till the next year. So the innate response is that it better hurry and produce seed before it dies prematurely.
Producing seeds is the ultimate goal of the celery, which completes its life cycle. It stores the nutrients that it collects throughout the first year in its root, which is then used in the second year to direct celery’s energies into growing seeds.
Best Location For Growing Celery
Originally, celery is a marshland plant, which indicates that it likes moist conditions. And that is why we need to take care to keep up a consistent watering schedule if we want thick, tender and crunchy stalks. Since celery has shallow roots, try not to let the soil dry out and place some mulch around this plant to retain the moisture. Not enough water will yield bitter and fibrous stalks and stunted growth.
While celery loves the sun and appreciates plenty of it, it likes a bit of shade during the hottest part of the day and prefers a soil pH of 6.0-7.0.
Celery Is A Voracious Feeder!
Celery loves rich, nutritious food. So we need to ensure that our soil is healthy and rich with organic matter. Prepare your spot with plenty of compost and add a bit of fertilizer every 2-3 weeks throughout the growing season. Fish emulsion works great as a mineral rich, organic plant food. Use it diluted in water according to the bottle label.
If we give celery what it wants, it will reward us with nutrient dense food and medicine, that is rich in minerals and all the nutrition we should expect from it. We don’t likely get this from the nutritionally devoid, mass-produced, store-bought specimen.
When To Start Celery
Celery takes a long time to grow. So it normally needs to be started indoors early in the year. It can be started as soon as the beginning of February for some of us in the warmer zones. But is best to be started by the beginning of March anywhere.
Here is a cool calculator for your seed starting dates that was created by Brian Lowell.
Use this tool to find your average last frost date and then plug that into the calculator above. Now you’ll have your ideal seed starting or planting dates for your growing zone.
Celery needs to be started about 10 weeks before your last frost date, but it doesn’t hurt to start it a bit earlier and if you’re too late, that’s ok too, it might not grow as big by the end of the season, but you’ll still get celery.
You can also plant celery for leaves which takes a shorter growing season. The leaves make super tasty greens and are great for seasoning, if not for ants on a log. Read more about it below.
The benefits of celery as a food
Celery is not just a vegetable, but also a culinary herb and medicinal plant. All parts of the celery are edible. We use the stalks mostly in the US, but when growing up in Europe, the main parts we used were the root and leaves. I can’t remember having had celery stalks as a child.
There are celery cultivars that we grow for their big bulbed roots. And we grow others for the leaves and these plants look more like big versions of parsley. Those greens make a very tasty green vegetable too that contains more nutrients than the stalks. The seeds are also edible and are often used to flavor pickles and many other dishes. All parts of the celery have medicinal properties.
A bit of a nerdy paragraph here on Nitric Oxides
One of the great benefits of celery is that it is rich in nitrites. It is produced when the plant converts nitrogen through photosynthesis into nitrites. And those get converted to nitric oxide inside our bodies after consuming celery.
If you’ve been learning about nutrition, no doubt, you’ve heard about NO. This compound is produced in our bodies quite generously throughout our young lives, but as we age, it tends to diminish and that is how our cells start to age and how we come to have certain age-related problems.
A side note to clarify
We’re talking here about nitric oxide, not nitrous oxide! I actually found a source that said celery produces nitrous oxide, and AI promptly repeated that hogwash, duh. That is incorrect. Made me laugh even without inhaling nitrous oxide, the dentist’s laughing gas.
Nitric oxide can help with delivery of oxygen to muscles and other tissue. In fact, athletes report that ingesting high amounts of nitric oxide can increase performance with lesser effort.
And the best way to get that fix is by dietary means. By eating nitrate rich foods. Our body’s ability to produce this compound declines as we age, once we reach the age of 40, by 50% or more.(source)
Lower NO levels can reduce our vitality, energy, our body’s healing responses and oxygen levels. And while NO can also be bad for us, it is usually by adding it to foods in its isolated form.
The safe way to get these nitric oxides and support our bodies is by eating whole foods that are rich in these compounds, such as celery, spinach, and beets. In this way, the NO compound is supported by other antioxidant co-factors such as carotenoids and polyphenols. Ok, that’s as far as I’ll go with chemistry and science. Just wanted to clarify.
Other benefits of Celery

Celery is full of health benefits if it is grown organically and in rich organic, living soil (such as you might have in your garden). And it can support overall health and well being.
Celery is rich in antioxidants. It contains flavonoids and vitamin C to protect cells from damage through free radicals. It’s also high in vitamin A, B6 and folate.
For those who are trying to lose weight, celery can help because it is rich in fiber, promotes feelings of fullness and can reduce calorie intake if used as a snack instead of chips. And it can help with digestion and promote regular bowel movements. Try eating celery if you have a tendency toward constipation.
Celery can support heart health with its high potassium content, which helps regulate blood pressure. It’s high vitamin K content can help with bone health and reduce risk of fractures.
Celery contains phthalides which are compounds that have anti-inflammatory properties and can help with swelling and pain.
And because of its high in water and mineral content, it is helpful for hydration when we lose a lot of body fluids due to sweating and exercise. (source, source, source)
Varieties Of Celery And Where To Source Them

While there are many varieties of celery, I will introduce just a few here to get you started. And forgive me, but I’ll stick with the open-pollinated varieties.
And here I go off on a quick tangent to explain: Hybrid vegetables might have an immediate benefit by being resistant to a certain disease, or show especially strong vigor. Or they may have been bred to exhibit an ability to grow best in certain conditions, or, very often, to be uniform and pleasing on a market table.
But they are not sustainable because they lack the ability to reproduce true to type or are steril. This means we don’t know what we get when we save the seed, and we might not get anything. So if we want to become resilient gardeners, who aim to decrease dependency, we want to start saving seeds and growing our own saved seeds year after year.
This will produce vegetables that are more and more adapted to our growing conditions and our micro climates. And eventually they will outperform any hybrid varieties in our location. Hybrids have their place, but I don’t want them in my garden.
Celery For Big Stalks

As I mentioned, we can plant celery for more than just it’s stalks. But I’ll start with those varieties are bred to produce thick, crunchy stalks.
Ventura – The classic American celery! An improved Utah tall variety that is a workhorse and deserves much regard! Can stay in the ground in winter if temperatures stay above 20℉ source
Giant Red – An old heirloom from England with old fashioned celery flavor. This is a very large celery variety with a strong following. I have not tried it before, but it’s on my list for this year. (source)
Utah Tall – A vigorous, crisp and stringless variety with tightly folded hearts and thick stalks. Introduced in 1953. They can grow a foot or more high when conditions are good. source
Golden Self-blanching – This is a heirloom variety that you do not need to blanch for tender stalks. It is stocky with thick string-free stalks that are crisp and rich. source
Giant Golden Pascal – (or Winter King) This tall-growing French heirloom is a celery for winter use. I couldn’t find any specific hardiness information, except that it can survive mild winters. source
Tango – An outstanding, vigorous and uniform variety that can reach 18-20 inches tall. With long, smooth, broad, crunchy, sweet flavored stalks. source
Red Venture – A cross between Ventura and Giant Red celery. This is an adaptive and resilient variety. Although it is a cross, the seeds apparently grow true to type and have been passed down for many generations. It is my favorite celery. It’s flavor is a bit strong, and the stalks on mine were not as thick as on the green varieties, but the flavor was amazing for cooking in soups. source.
Chinese Celery

Also known as Cutting Celery or Nan Ling. This type will produce abundant leaves and skinny, more fibrous stalks. It is used more as a seasoning and a soup green and will not make great ants on a log! I love using these in soups and stir fries. They also make delicious micro greens after 30 days.
These are great for drying if you want to preserve some celery for winter. They don’t have as much water in their stems and are very intensely flavored.
Amsterdam – I like this celery from Baker creek a lot. It’s a type of Chinese celery. source
Nan-Ling – Here is another chinese celery grown primarily for leaves. Use as microgreens after. 30 days or let it mature until 60-90 days. source
Celeriac Roots

Celery roots are delicious when roasted in chunks combined with other root vegetables. But they are also great when julienned and with apples and walnuts served as a salad, also known as Waldorf salad. Most people now make it with the celery stalk, but I used to enjoy this with the celery root.
And best of all, you can have celery all winter long. The roots can store for up to 8 months in a root cellar environment. They can also overwinter in the ground in milder climates.
Giant Prague – An elite European strain root celery that has a subtle nutty and celery-like flavor. The large solid roots are delicious fried, roasted and julienned in raw foods. source
Mars – large uniform roots and big healthy plants. Interiors stay firm even when roots are large and they hold well in the field. source
Monarch – hearty roots that are great in risottos, gratins and soups. Monarch is a top performing celeriac with outstanding eating quality. It stores very well through winter. source
Celery Seeds
All the above varieties make celery seeds in their second year that can be used for seasoning for pickles, soups, and medicinal teas.
Equipment:

Here is a list of supplies that you can choose from depending on your needs. The essentials are a seed starting mix, a waterproof tray or dishpan for underneath your pots and some pots or a flat. You’ll also need a bit of plastic wrap to cover the seeds. And you’ll need a grow light unless you have a heated greenhouse to start your seeds in.
I’ve even used those cheap black lunch box containers from Walmart for seed starting. They come in 5 packs with clear lids. I drilled holes in one set and used a second set for my waterproof trays and the lids were humidity covers that worked well until seeds started to emerge. You can also use soda cups for planting pots (save some used ones at your next party!). They are very tipsy though.
However, if you want the more standard seed starting supplies here is a list of items such as what I use. And some of my favorite tools and set-ups. This will set you up for a lot of seed starting and more.
Seed starting waterproof trays – These trays are waterproof and they are used to put your pots or soil blocks in. They are also available with holes in case you want to start a lot of seeds in a flat. Then you add your soil mix to the one with holes and place that into one without holes. This is a great system for growing sprouts, microgreens, or wheat grass.
48-cell inserts – These inserts are used inside the waterproof trays. You can easily cover them with a sheet of regular plastic wrap that can be reused.
Soil blockers – If you want to skip the plastic pots, try this Ladbrooke original micro 20 soil blocker. It makes potless compressed soil blocks that you can just place your seeds into and they will air prune the roots as the plant grows, which prevents root bound seedlings. This can be upgraded with an additional Ladbrooke mini 4 blocker. The micro cubes fit perfectly into the mini cubes for up-potting if the seedlings get too large. I highly recommend this system for reducing plastic waste and it can improve plant health too.
Starter pots – If you prefer separate pots, here are some 3″ pots like the ones I use. I really like having separate pots and they are more durable than the disposable cell trays.
Complete seed starting sets – If you like an all-in-one seed starting kit, give these a try. I have not tried them, but they look like they would work very well.
Seed Starting Mix – A dedicated seed starting mix is best for starting your seeds. A home made soil mix (⅓ peat, ⅓ sifted compost, ⅓ perlite or vermiculite) can also work.
Grow lights (shop lights) – these need to be at least 2000 lumens and 5000 kelvin light temperature. Here are the 4-ft LED shop lights that I use and I quite like them. They are a good price for the set of 4.
Small clamp on grow light – If you just have a small area for starting your seeds, you could use these Table mount grow lights.

Seed Starting Shelf – In my tiny yurt there is little space and I needed a shelf for seed starting. So I got the largest and tallest 4ft long wire shelf with wheels that would just barely fit and it works out perfectly. It has 6 shelves, thus maximizing my space. The grow lights fit perfect length-wise and there is plenty of room for 4 full-size 1020 trays side by side. Last year I had 12 of them lined up with 6 grow lights on 3 shelves. I wrap the whole thing in Emergency blankets to reflect the lights.

Heat Pads – If you are starting your seeds in a cold room, I recommend a Heating pads with a thermostat. This will also double for heating the soil later in the season when you start peppers and other heat loving plants. And it can be used for raising yeast bread dough, making infused oils, making yogurt and more. Do get the thermostat! You won’t regret it.
Fish Emulsion or Compost tea – I highly recommend fish emulsion as plant food. Use once every 2-3 weeks diluted. Alternatively you can use compost tea. For a transplant soak I also like to add a tiny bit of EM-1 to the drench to infuse the roots with beneficial microorganisms. You can read more about EM-1 here.
Compost – Use compost to enrich the soil at planting and side dress with more midway through the season.

Transplanting and cultivating tools – Rakes, hoes and garden forks are indispensable in the garden, but for small work around the tiny plants, I like to use my cobra head cultivator and for transplanting my favorite tools are the dibber and the hori hori knife.
Garden Cart – Besides a wheelbarrow, I use my Gorilla garden cart with removable sides every day. It holds several trays of seedlings, buckets of water or compost, fallen leaves for leaf mulch, branches and logs, firewood heavy bags of peat moss and potting soil and so much more. It’s an indispensable tool for me.
How To Start Celery From Seed

Celery has a bit of a slow germination habit and that could be frustrating. It can take up to 3 weeks before you see the little green baby leaves appear, so be aware and try to be patient with it.
Keep the temps above 55 degrees to prevent premature bolting throughout the growing stages. When hardening her off, be sure to keep the temperatures up, but reduce watering.
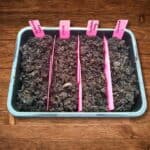
Sowing the seed:
Prepare your starting flat or pots. Fill with a quality seed starting mix that has been pre-moistened. I like to use a cheap dishpan (from Walmart or the Dollar Store) or, for larger amounts, a concrete mixing pan.
Tap your pots or flat onto the table a few times to get the soil mix to settle.
Celery seeds are tiny! Sprinkle a few seeds over the surface. Then very lightly cover with a bit of soil mix. Like barely! I don’t cover mine at all, I just press the seeds into the surface a bit so they have good contact with the soil and then I put a sheet of plastic wrap or one of those greenhouse covers over the tray.

Now you play the waiting game and while you wait, check every now and then to make sure the surface stays moist.

Technically you don’t need lights if you keep the trays near a window, until germination. Once they germinate though, you’ll need to place them under lights immediately. Keep the lights no more than 2″ above the seedlings. Raise the lights as the seedlings grow.
Once the seedlings have reached a 2″ height, you can carefully transplant them into individual pots in case they are crowded. Or, if you started seeds in small pots, thin to one plant per cell or pot. They are ready for transplanting when they are 3″ tall.
Transplanting
Harden plants for a week before transplanting by exposing them to the elements and full sun gradually. Start with an hour, and increase each day. Reduce watering for the week, but don’t let them dry out.
Transplant once night temperatures stay above 40 and soil temperatures are above 55 degrees, to prevent bolting. I like to give the plants a soak in some fish fertilizer solution or compost tea just before transplanting, so they can soak up some nutrients to minimize transplant shock.
Plant the celery into compost-enriched soil. 8″ apart for leaves and 12″ apart for celeriac roots.
Care and Harvest

Keep the soil moist by watering consistently and add a bit of mulch. Grass clippings, comfrey leaves, hay, chopped leaves, or what else you have. Some celery should be blanched for more tender and lighter color stems. A cardboard tube or mulch can help with that. Some people plant celery in trenches and cover the stems with soil as the celery grows. I like mine just the way it is without blanching.
Feed with compost tea or diluted fish emulsion once every 2-3 weeks. Add extra compost midway through the season.
Celery takes about 90-120 days after transplanting, depending on variety, for full size maturity. But you can harvest when you feel the stalks are large enough for use. Just break off individual stalks as needed from the outside and let the inside keep growing.
The mature celery can be harvested anytime up until a hard frost is about to hit. Its flavor actually improves with the cold weather, but can get frost damage in freezing temperatures.
How to Preserve Celery
Celery can easily be frozen without the need to blanch in boiling water. Just chop into usable chunks and put it into freezer bags. You can also flash-freeze on a cookie sheet and bag once frozen solid. This way you can easily remove just what you need.
Celery root can be stored just like carrots.
Celery stalks will stay fresh in cold storage at 32 degrees with 98-100% humidity for 1-2 months.
Diseases and Pests
Aphids, snails and slugs can be a pest problem. Use beer traps for slugs or spread diatomaceous earth or wood ashes around the plants. Take care with the diatomaceous earth since it can also harm beneficial insects. For aphids you can try to spray them off or use an insecticidal soap.
In general, always try to resolve any pest or disease problems without spraying where possible, since most sprays or powders, organic or not, can harm beneficial insects too.
To avoid leaf blight, ensure good air circulation around the plants and avoid overhead watering. Rotate celery each year.
To prevent blackheart, ensure adequate calcium in the soil and water regularly.
Seed Saving
Seed saving is a skill all of its own and it can be a bit intimidating. I would start with just one variety. Choose the one that did the best and save the roots for the next year to produce your seed. This way you don’t have to worry about cross-pollination, unless you have a close by neighbor who also lets his go to seed. And you could alternate years between two varieties.
Seeds are produced in the second year. If your celery bolts in the first year and makes seed, I would not save it. You don’t want to perpetuate that trait.
Celery varieties need to be separated by a quarter mile to prevent cross pollination. Yikes! Best thing to do is to cover the plants that you want to save seed from before they flower with organza or a row cover.. Then you’ll need to play bee and hand pollinate the flowers using a soft hairy brush. You can also try to just shake the plant whenever you walk by.
Collect seeds from 15 or more plants of the same variety for replanting (to maintain genetic diversity and prevent inbreeding). Thresh by hand or by hitting seed stalks against the sides of a bucket, then winnow to clean.
Growing celery in a Planter
Celery can be grown in pots. A single plant needs a pot that is one foot wide and one foot deep, filled with rich potting soil and some compost. Keep it moist and mulch the surface with pine bark or vermiculite.
In Summary

I hope you will try to grow your own celery. It is so much fun and it’s super rewarding to have those beautiful plants to harvest from. Celery is so beneficial for your health, but if you buy it in the store, it can be devoid of nutrients at best and full of pesticides and chemicals if it is not organically grown. This is one reason why planting your own can be so important. And if you take care of your soil and use good compost, you’ll be rewarded with nutritious food that is going to help you and your family to stay healthy.
Let me know in the comments if you will try growing your own celery and what varieties you prefer. Do you like it for the root, the stalks or the leaves? And if you have any questions, please ask and I’ll answer them.
I’ll be posting more growing guides like this and information about how to grow foods and herbs for better health. Subscribe to my newsletter to get notified about new content.
How To Start Celery From Seed
Equipment
- Seed starting trays – Waterproof seedling trays
- Starter pots – 48-cell inserts or 3" pots or all-in-one seed starting kit
- Soil blockers (pot-less system) – Ladbrooke original micro 20 soil blocker and Ladbrooke mini 4 blocker
- Seed Starting Mix – seed starting mix
- Grow lights (shop lights) – 4-ft LED shop lights
- Small clamp on grow light – Table mount grow lights
- Fish Emulsion or Compost tea – fish emulsion and optional: EM-1
- Compost – Make your own or get a few bags of compost
- Transplanting and cultivating tools – cobra head cultivator, dibber and the hori hori knife
Instructions
Introduction
- Celery has a bit of a slow germination habit and that could be frustrating. It can take up to 3 weeks before you see the little green baby leaves appear, so be aware and try to be patient with this girl. Keep the temps above 55 degrees to prevent premature bolting throughout the growing stages. When hardening her off, be sure to keep the temperatures up, but reduce watering.
Sowing the Seed
- Prepare your growing flat or pots. Fill with a quality seed starting mix that has been pre-moistened. To pre-moisten the soil, I like pour it into a cheap dishpan (from Walmart or Dollar Store) or, for larger amounts, a concrete mixing pan. Add water and mix thoroughly. Get it damp but not wet. When you squeeze it it should just release a few drops of water.
- Tap your pots or flat onto the table a few times to get the soil mix to settle.
- Sprinkle a few seeds over the surface. Don't cover, or very lightly sprinkle a bit of soil mix or vermiculite over it. Like barely! I don't cover mine at all, I just press the seeds into the surface a bit so they have good contact with the soil and then I put a sheet of plastic wrap or one of those greenhouse covers over the tray, to keep the soil moist.
- Now you play the waiting game and while you wait, check every now and then to make sure the surface stays moist.
- Technically you don't need lights if you keep the trays near a window, until germination. Once they germinate though, you'll need to place them under lights immediately. Keep the lights no more than 2" above the seedlings. Raise the lights as the seedlings grow. They will need 14-16 hours of light per day.
- Once the seedlings have reached a 2" height, you can carefully transplant them into individual pots in case they are crowded. Or, if you used small cells to plant your seeds into, thin to one plant per cell or pot. They are ready for transplanting when they are 3" tall.
Transplanting
- Harden plants for a week before transplanting by exposing them to the elements and full sun gradually. Start with an hour, and increase each day. Reduce watering for the week, but don’t let them dry out.
- Transplant once night temperatures are above 40 and soil temperatures are above 55 degrees, to prevent bolting. I like to give the plants a soak in some fish fertilizer solution, EM-1, or compost tea just before transplanting, so they can soak up some nutrients to minimize transplant shock.
- Plant the celery into compost-enriched soil. 8″ apart for leaves and 12″ apart for celeriac roots.
Care and Harvest
- Keep the soil moist by watering consistently and applying some mulch. Grass clippings, comfrey leaves, hay, chopped leaves, or what else you have. Some celery varieties should be blanched for more tender, classic light colored, stems. A cardboard tube or mulch can help with that. Some people plant celery in trenches and cover the stems with soil as the celery grows. I like mine just the way it is without blanching, but for fresh eating, blanching is recommended.
- Feed with compost tea or diluted fish emulsion once every 2-3 weeks. Add extra compost midway through the season.
- Celery takes about 90-120 days after transplanting, depending on variety, for full size maturity. But you can harvest when you feel the stalks are large enough for use. Just break or cut off individual stalks as needed, near the bottom and from the outside, and let the inside keep growing.
- The mature celery can be harvested anytime up until temperatures start dipping below freezing. Its flavor actually improves with the cold weather, but it can get frost damage in freezing temperatures. Some varieties are more frost hardy than others.
How to Preserve Celery
- Celery can easily be frozen without the need to blanch it. Just chop into usable chunks and put them into freezer bags. You can also flash-freeze on a cookie sheet and bag once frozen solid. This way you can easily remove just what you need.
- Celery root can be stored just like carrots in a root cellar, garage, or other cold, humid environment. It can keep up to 8 months that way. Store away from fruits and vegetables that produce ethylene gas.
- Celery stalks will stay fresh in cold storage at 32 degrees with 98-100% humidity for 1-2 months. Chinese celery will not store long past a few days in the refrigerator. Wrap with moist paper towels or moistened paper bag.
Diseases and Pests
- Aphids, snails and slugs can be a pest problem. Use beer traps for slugs or spread diatomaceous earth or wood ashes around the plants. (This must be reapplied after it gets wet). Take care with the diatomaceous earth since it can also harm beneficial insects. For aphids you can try to spray them off or use an insecticidal soap.
- In general, always try to resolve any pest or disease problems without spray where possible, since most sprays or powders, organic or not, can harm beneficial insects too.
- To avoid leaf blight, ensure good air circulation around the plants and avoid overhead watering. Rotate celery each year.
- To prevent blackheart, ensure adequate calcium in the soil and water regularly.
Seed Saving
- Seed saving is a skill all of its own and it can be a bit intimidating. I would start with just one variety. Choose the one that did the best and save the roots for the next year to produce your seed. This way you don't have to worry about cross-pollination, unless you have a close-by neighbor who also lets his go to seed. Then you can alternate varieties each year.
- Seeds are produced in the second year. If your celery bolts in the first year and makes seed, don't save it. You don't want to perpetuate that trait.
- Celery varieties need to be separated by a quarter mile to prevent cross pollination. Yikes! Best thing to do, if you're trying to save more than one variety, is to cover the flower stems that you want to save seed from before the flowers open, with organza. Then you'll need to play bee and hand pollinate the flowers using a soft hairy brush. You can also try to just shake the plants whenever you walk by.
- Collect seeds from 15 or more plants of the same variety for replanting (to maintain genetic diversity and prevent inbreeding). Thresh by hand or by hitting seed stalks against the sides of a bucket, then winnow to clean.
Growing celery in Planters
- Celery can be grown in planters or grow bags. A single plant needs a pot that is one foot wide and one foot deep, filled with rich potting soil and some compost. Keep it moist and mulch the surface with pine bark or vermiculite.
More Growing Guides
How To Grow Bigger Onions – A complete tutorial on growing onions from seed to storage.
For The Best Onions Choose The Right Variety – A guide to selecting the right onion varieties for your region and needs and a dive into other alliums you can grow from seed.
How To Get Bigger Garlic – What to do to get big and healthy garlic bulbs. When and how to plant and harvest.
Grow Your Own Sweet Potatoes – How to grow slips, plant them, care for your sweet potatoes, harvest and cure them. Don’t miss out on growing your own nutritious, edible sweet potato greens too!
25 Essential Herbs To Plant – Start your home apothecary garden with these 25 powerful allies for your health. Learn their benefits, how to grow them and where to source them.
Grow mushrooms at home in your garden – This is one of the most rewarding experiences in wood chip gardening. Grow your own mushrooms intentionally. It’s easy and they taste so delicious!
Make mulch from wood chips for your garden – Read about the many ways that wood chips can help you with your garden and your food forest.
How to plant fruit trees – How to prepare your planting hole, what to put in it and how to give your tree the best odds for growing up strong and healthy.
How to make 18-day compost – The best compost for your garden beds in less than 3 weeks.
Pin This Post

Links For Items Mentioned In This Post
Large 4ft long wire shelf with wheels
4-ft LED shop lights
Table mount grow lights
Heating pads with thermostat
Emergency blankets
Fish emulsion
Waterproof seedling trays
48-cell inserts
3″ seedling pots
All-in-one seed starting kit
Seed starting mix
Compost
Vermiculite
EM-1
Jadam
Dibber
Hori hori knife
Cobra head cultivator
concrete mixing pan
Gorilla garden cart with removable sides
Non-GMO Seed Companies
MI Gardener
Baker Creek Seeds
Adaptive Seeds
True Leaf Seeds
Johnny’s Selected Seeds
Fedco Seeds
Sow True Seeds
Uprising Seeds
High Mowing Seeds
Celery Seeds at Amazon
[pt_view id=”d25d36cip0″]


I think you will love growing celery and don’t forget, if you have any questions, you can ask me right here in the comments section and I’ll get back to you as fast as I can!
This is such a great guide to growing cellery! We have only planted the centers but now with this awesome guide it will fun to try out seed!😁
Can’t wait to add celery to our seed starts this year. Thank you for all the in depth info!
Absolutely! Hope you have a crazy good celery year!
Thank you for your kind comment! I think you will love growing them from seeds and you get to choose from so many varieties. Have fun growing celery!
Such a great guide to come back to every spring!
I’m so glad you like it! Thanks so much for your comment!
Heidi- every one of your posts is so thorough! We plan to start our first garden this year and I 100% am coming back to your posts!
Hi Makenzie, I’m glad if you liked it and I hope the information will help you! Thanks so much for commenting!
I remember reading about how the Amish plant celery to be used during wedding season and actually as part of the reception decor! I thought that was intriguing. I’ve always wanted to give growing it a try. Maybe I will. Thanks for the post!
Oh, I like that! I never heard about it before. I wonder if it has any special meaning. Thank you for commenting, I appreciate you sharing that.
I’m getting so excited for spring planting! It’s snowing here right now but my mind is starting to move towards spring and all the prep work I will need of do soon.
Yes, right? I feel the same way. Spring is coming! Thanks for your comment!