How to make your best compost for garden beds is a recipe for making a beautiful, super-rich and nutritious compost in just 18 days.
This post contains affiliate links, which means I make a small commission at no extra cost to you if you click through and make a purchase. See my full disclosure here.
Learn how to make awesome compost for your garden. This is a complete guide to hot composting in a short amount of time. It takes just 3 weeks to make the compost and a month to age it and you’ll have great compost for your garden!
This is a great technique for using any scraps you have, because most weed seeds and pathogens will be killed using the hot composting method, so when you put it in your garden, you don’t need to worry about perpetuating diseases or new weeds sprouting everywhere! This is the best Compost for growing vegetables, especially heavy feeders such as onions, garlic, and cabbages.
There are other ways to compost such as cold composting and sheet mulching, but this method of hot composting, which we cover here, has a lot of advantages. And, although it’s a bit more labor intensive, the result is well worth it! If you’re interested in other methods, you can find more information in 22 types of compost.
Jmp To The Composting “Recipe”
Composting – A Miracle At Work

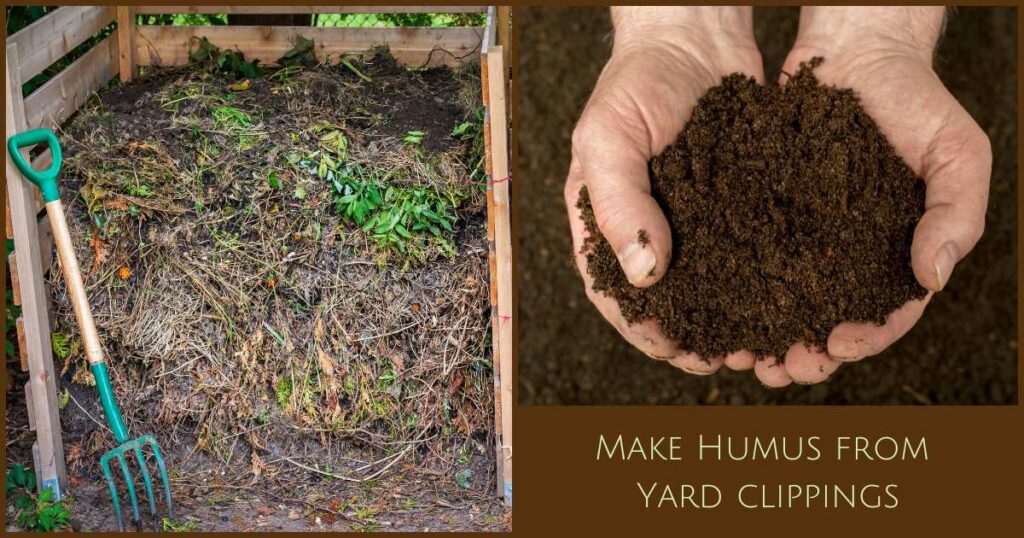
When I gather a bunch of yard and kitchen scraps and pile them in a corner of my yard, it gives me a great thrill. Why? Because now I get to see nature at its best when witnessing the incredible transformation that will happen before my eyes. It is nothing short of a miracle! In just a few weeks, that pile of scraps will turn into a lovely pile of humus. It will be the best compost for garden beds.
This then will feed my garden soil and vegetables with essential nutrients the whole growing season. And it will nourish the herds of microbes that live in the soil under the surface. A healthy soil, that is full of life, will bring forth healthy plant growth and an abundant harvest for me. All without having to purchase soil amendments. It will add moisture-holding capability to sandy soil and it will help towards good drainage and lightness in heavy clay soils. Compost is awesome stuff!
The Best Compost For Garden Beds in 18-Days

The composting process I describe here is one of my favorites! It is quick to make, contains all the nutrients my vegetable garden needs and it is easy. I find that it is a good size for home gardeners, which doesn’t require a huge amount of space. By following a formula when using a mixture of organic materials, I can produce the best results in just under 3 weeks if all conditions are favorable. If not, compost will still happen, but may take a little longer. Then I let it age for a month and voila, in just a short time I’ve got some awesome compost for garden use. The bonus: I cleaned up my yard and recycled all that stuff that many just people throw away. If you are intrigued, the best time to start making your own nutrient-rich compost is Now!
How Compost Happens
When leaves are falling to the ground in the forest, they don’t just lay there forever. These leaves have nutrients in them that can feed little critters that live in the forest. However, leaves contain phyto-acids that taste bitter. The tree produces these chemicals to deter bugs from eating the leaves. This serves the tree well while the leaves are still growing on it. It keeps pests away.
The work of decomposition begins:
After the leaves fall to the ground in the fall though, those phytoacids are not useful anymore. But nature fixes that. The fallen leaves get wet from dew or rain, those protective chemicals will leach out and the leaves will now be palatable to bugs. First bacteria, then fungi will feast on these leaves. After those guys break down some of the tough compounds of the leaf, it will be fit for other organisms to digest.
Soil inhabitants such as millipedes, pillbugs, and earthworms will come to feast on the leaves and break them down further. Earthworms will eat leave particles and grind them up in their stomachs. Enzymes and gut bacteria process this mash, and the worm poops out the resulting worm castings. This will enhance the soil and provide more material for bacteria, enzymes and fungi to digest. This process goes on until the leaves turn into humus. This humus will now feed the tree roots, which will give the tree energy to grow more leaves, and the process repeats itself.
Humus can compound!
The microbes and other organisms work tirelessly at breaking down organic matter. Thus strengthened, they will burrow ever deeper into the ground, loosening hardened dirt and fertilizing it with their excrements. They are nature’s tillers. But unlike human gasoline powered tillers, they use a gentle and enriching way to do it. They create more humus, ever deeper, as they go. It is a good idea to keep in mind the big difference here between how the soil’s microorganisms till and enrich the ground versus a human chopping up clumps of soil to break them into small particles, loosing all their structure and cohesiveness.
Microorganisms create a strong soil structure with water retention properties
As the microbes work the soil, bacteria excrete substances that glue microscopic particles together to become small clumps of soil. Fungi form hyphae which hold all these clumps together. This forms a structure in the soil that we cannot duplicate. This structure is capable of accepting and holding large amounts of water, preventing run-off, holding the moisture for later use, and preventing soil erosion.
This prevents the soil from drying out when there is a dry spell. And it keeps the water where it is needed. It is not running off a crusty, damaged soil and collecting in a ditch somewhere or flooding a lower-lying area. This is why it is so beneficial to garden in a way that does not require tilling. Tilling will destroy this carefully created architecture and it will have to be created all over again after each disturbance.
Tilling destroys the benefits of water holding and the synergistic community that was created. It’s like knocking down a house each time it has just been built. It can never really serve a purpose, because it just has to keep getting rebuilt.
How This Process Translates To Compost For Garden Use
Here I’ll explain how nature’s process works in your own food and garden scrap piles. It is basically the same procedure. All the different types of compost start out like this. Wet the material first. This makes it soft and palatable and easy to navigate for the first-on-the-scene bacteria and fungi, which will start feasting on the ingredients that you just provided.
The activity in the pile will create heat and if the ratio of the ingredients is balanced right, it will make the microbes happily chewing away. The compost will get hot enough to sterilize any weed seeds and pathogens. At this point it is very beneficial to turn the pile, to keep it hot and to keep it aerobic and smelling agreeable.
After a time, and after a few turnings, it cools down. Now all sorts of mesophilic (medium temperature loving) bugs will move in to break down the materials even further. With time, the organisms have processed the pile enough that it will resemble soil. This is your precious humus. After you let it age a little, you can add it to your garden. This is the finest organic compost for garden beds. There it will feed your soil, which will feed your vegetables and flowers to create an abundant harvest. You can even use it to make a raised bed soil or make some potting soil with it.
How To Make Fast 18-Day Compost For Garden Beds
Whenever you need much compost fast, you can put in a little extra work and produce it in less than 3 weeks. This method results in the best multi-purpose compost I know of.
I’ll outline the steps here and list the recommended materials. This compost will heat to a temperature of 130 – 150 degrees Fahrenheit, if you build it properly. The high temperatures will kill weed seeds and pathogens.
This is a great advantage over the cold composting method. The cold method makes really good compost too. But it takes longer, and it retains viability in weed seeds. So you will find lots of weeds sprouting, shortly after you apply it to your garden beds. If you want a weed-free garden, follow this recipe to make fast 18-day compost for garden beds.
Start Composting!
To make your own compost, you will need to stock-pile and chop all the materials ahead of time, then build the pile all at once. This is not a pile you will add on to. Adding on to it will not produce the desired result.
What Are The Important Things?
- Size of the pile must be at least 3 cubic feet
- The types and ratios of materials are very important for the right microbial activity
- Layering the various materials
- Keeping the walls as straight as possible
- Turning it every few days according to schedule
- Covering it to keep it from drying out and from leaching
Step 1 – Plan your compost pile area.
Your compost pile must be 3 feet by 3 feet by 3 feet (One cubic yard or meter). It can be bigger, but should not be smaller. This minimum size is necessary to create enough heat and activity for the process to work as intended.
Keep in mind that if you make it much larger you will also need to stock-pile very large quantities of material to have on hand for pile-building day. It is important that no matter how large around you build it, it must be 3 feet high or just slightly higher.
To put size into perspective: a 3x3x3 foot pile is 27 cubic feet. A 4x4x3 foot pile is 48 cubic feet. Just adding a foot to your square makes it close to double the amount of material needed. If you have it, go for it! But one reason I like to make them just 3x3x3 is that when it comes to turning, it takes a lot longer to turn a bigger pile. You can split up turning 2 smaller piles to fit it into your schedule easier. Something to consider.
You can just form a square or round pile without walls if you like. But you must take care to pile it in a way to keep the walls pretty vertical. One way to do that is to drive 4 posts in the ground, 3 feet from each other. You can mark these at 3 feet high. This will serve as your size guide while building.
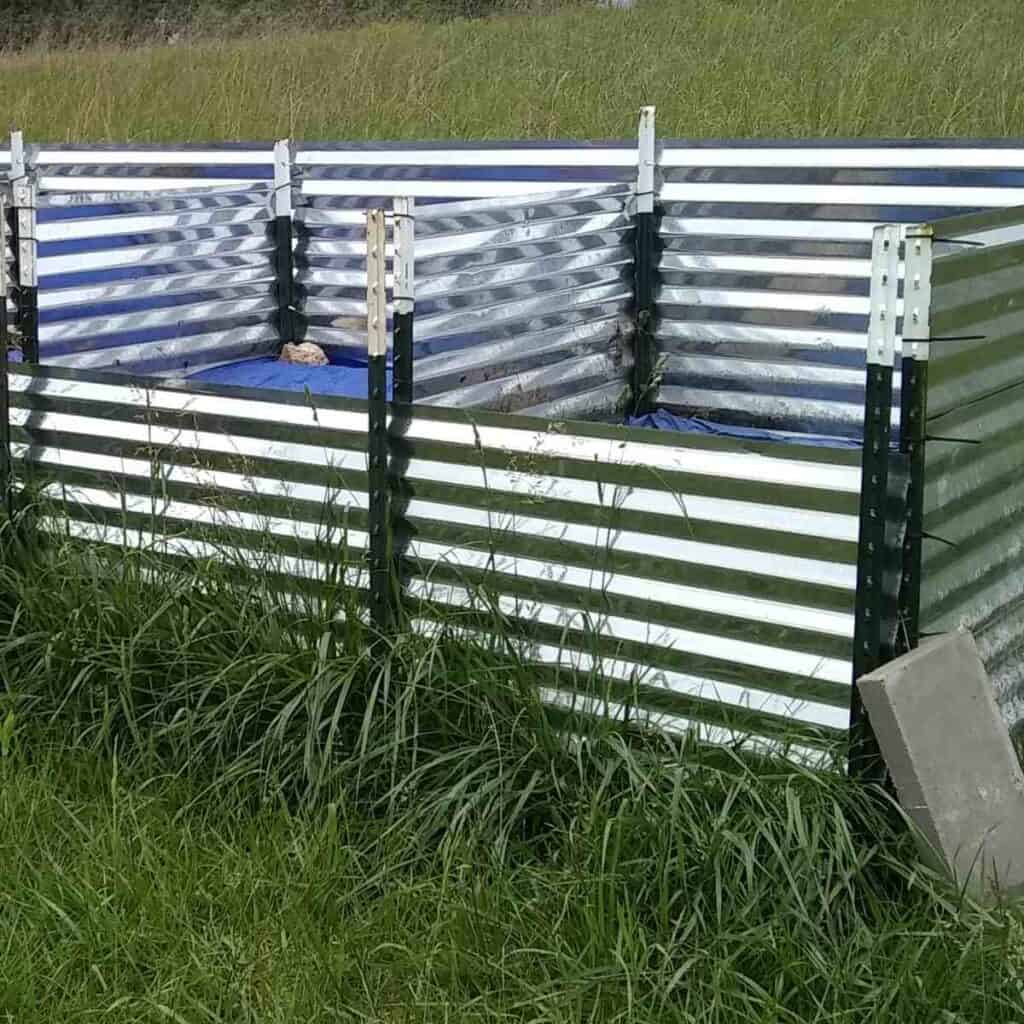
Why I Prefer A Compost Bin
My preference is to use a compost bin. Where I live, it’s super windy all the time and my piles dry out really fast if I don’t contain them on all sides with solid walls. Plus I don’t like to worry about losing material the whole time I turn it. It adds time and tediousness to the project. Whenever that happens, I start to get reluctant to work on it. So for me, it is worth the effort to build a bin that makes my job easy and that I can use over and over again.
But if you don’t have a bin and want to get started, by all means, pile it up and make compost. That is the main objective!

Step 2 – Materials For Your Best Compost For Garden Beds

Gather enough material to build your pile completely on pile-building day. You will not be adding to it later. Once it’s built, the building is done and then all you do is turn it when it needs it. Keeping browns and greens on separate piles will help with the ratios later.
We create this pile with layers of materials that are selected by applying a ratio of 30:1 nitrogen to carbon. We nick-name these materials ‘Browns’ and ‘Greens’. This part can get very technical. You can find long lists of ratios of each component, but in the end, since the nitrogen parts are more moist than the carbon parts, it is hard to figure out exactly the right amount to use. To top it all off, each item is not always the same. So if you were to be scientific about it, you would have to carefully weigh and calculate each item each time you build a pile.
If you’re super geeky, you might enjoy doing the math. Your aim is to have a final ratio of 30:1 carbon to nitrogen. But if not, you can do as I do. I use about equal parts in volume of browns and greens and most of the time this works out pretty darn well. Your ‘Greens’ are anything with a C:N ratio of 30:1 or less.
Browns
Browns are dry, dead, carbon-rich materials. This includes dry grass hay, straw, dry, fallen leaves, wood chips, cardboard, paper, sawdust, etc.
Greens
Green materials are nitrogen rich, fresh and moist. This includes fresh cut lawn clippings, vegetable scraps, fresh leaves, fresh cut weeds, and other plant materials. It also includes food scraps such as fish bones and skin, and also coffee grounds. Materials that are especially high in nitrogen include legumes, such as alfalfa hay, manure and urine.
Some Tips For Composting
Tip 1: Whenever I have animal manure that is already mixed with bedding, from the barn, I use it straight up without adding any other materials. When I clean out the goat barn, I just pile up the bedding in a compost bin, turn it a few times and it makes the best compost for garden use. The reason it works straight up is that it already has an approximate ratio of 30:1, naturally.
Tip 2: Smaller pieces will compost faster. If you don’t have a yard waste chopper, you could use your lawn mower to go over the leaves before you rake them up for your compost or put them into a large bin and chop them up with your weed whacker.
Tip 3: Go for diversity! The more types of material, the better. Each adds, or invites, different bacteria, fungi and other microorganisms.
A List Of Carbon To Nitrogen Ratios
Here is a short list of Carbon (C) to Nitrogen (N) ratios of some compost ingredients for your reference:
| Material | C : N |
| Human Urine | 0.8 : 1 |
| Cottonseed meal | 5 : 1 |
| Chicken Manure | 7 : 1 |
| Vegetable scraps | 12 : 1 |
| Cow Manure | 18 : 1 |
| Horse Manure | 25 : 1 |
| Grass clippings, dry | 19 : 1 |
| Grass clippings, fresh | 15 : 1 |
| Hay, Legume with Grass | 25 : 1 |
| Dry leaves | 50 : 1 |
| Fresh leaves | 30 : 1 |
| Wheat Straw | 80 : 1 |
| Rotted sawdust | 200 : 1 |
| Hardwood sawdust | 400 : 1 |
| Newspaper | 800 : 1 |
I have prepared a brochure that has a more comprehensive list of Carbon and Nitrogen materials and it also explains in more detail why it is important and how to best select your composting materials for superior results. Get your FREE guide to Composting Basics here.
Keep these things in mind when you gather your material:
- All material must be biodegradable. Remove the packing tape from cardboard if you use it and don’t add things that have inorganic materials mixed in. Do take any staples out of paper and cardboard as well, it will not degrade quick enough and might poke you later.
- Grind Eggshells if you don’t want to find bits of them in your garden for years to come. They take many years to decompose (I wonder, do they ever??), but they will make minerals available for your garden and are a good addition. I grind mine to a powder first.
- Animal based food scraps are fine to use if you don’t have critters that will want to dig them out of your pile. If so, it’s better to bury them next to a tree.
What to watch for when using woody materials:
- Take care to select safe woody materials that were not treated with pesticides or chemicals. Wood material should come from saw logs or branches and not from pallets, treated lumber, or painted wood. Many commercial wood chips are dyed and treated with pesticides, so do not use those.
- Wood should be cut or ground as fine as possible. It will take longer to degrade than most materials. If you have cedar, hickory, oak or locust chips, I’d use these for your garden paths instead of the compost pile.
- If you use pallets to build your compost bins, it’s a great idea to check the treatment stamp on each. If it has a HT stamp, that means the wood was heat treated and is not infused with toxic chemicals. It will be safe to use. Otherwise I’d use the pallets for something that doesn’t go in your garden. You don’t want those toxins leaching into your precious compost and end up in your garden.
- Steer clear of railroad ties for garden use. They are always treated.
- Walnut wood products should be used sparingly or as mulch in paths rather then around plants, especially if it contains walnut hulls or leaves. These contain a chemical which inhibits growth in many plants. If you have a lot of walnut chips to compost, pile them up separately and let them compost for a year or so. This will neutralize the juglone chemical and make them safe to use in your regular compost and garden beds.
Avoid Toxic Materials

Toxic material should never be used
Watch for hay and straw that came from commercial farms. Wheat, almost everywhere, is treated with herbicides such as glyphosate just before harvest, to speed drying. Straw from wheat therefore often contains glyphosate. Hay often comes from fields that were sprayed with Grazon, a picloram based herbicide. Hayfields may also be fertilized with manure, which came from animals that were fed Grazon-contaminated hay. The chemical will be present in those animals’ manure. Hay often gets treated with a dessicant chemical as well to speed drying and prevent mold. All these should be considered toxic.
Beware also of lawn clippings from lawns treated with weed killer. These should be treated as toxic material and not used in compost for your garden.
All these herbicides remain in the grass, straw, and hay. When you use it in your compost pile and put that in your garden, you’re basically spreading that weed killer. This can be detrimental to your plantings and may take years to leach out of the garden once introduced. It is worth making an effort to avoid such a situation, however it can be very hard to avoid unless you know your sources and ask questions.
Step 3 – Building Your Compost Pile

The next step is to layer all your stock-piled materials in the correct way. You can layer into a compost bin or just free form a pile. Using posts in all 4 corners helps keep things square. Or roundish if you prefer.
A pitch fork works best for hay, straw and manure, or try a garden fork. A shovel usually works best for crumbly things, so keep both handy.
Moisture:
Whet all materials thoroughly as you go. Don’t finish the pile before you water it. The water will not penetrate through such a big, dense pile evenly. You can hose down each layer as you go or leave a sprayer directed into the pile, while you pile on the materials. Just don’t give it too much water or it can turn into a stinky anaerobic clump.
If you are challenged with a less than abundant water supply or no running water, as I am, here is my advice for thorough watering without wasting water. I collect rain water and any that is dirty or messy or even gray water from washing hands or clothes works great. I have a very large bin dedicated to compost making. This is where I dump the water and sometimes, if I have it, I add special treats for the microbes, such as urine, Lactic Acid Bacteria (LAB), EM-1 or ‘fertilized’ water from the goat barn.
You can read about why and how to use LAB and EM-1, two natural substances full of microorganism in my post about 22 Different Types Of Compost.
I take a few scoops of brown material and throw it in the water container, to soak it for a moment. Then I add it to the compost bin. Now I take a few fork-fulls of greens and put those into the water container, soak that, and layer it onto the compost pile. I continue this, and add water to my bin when necessary, until I’m done. Everything gets well wetted without over-watering. It doesn’t work too well for some things, such as goat manure pebbles. Those I just throw on the pile dry. They get wet enough, when I add the next soaked layer.
The Layers:
First put down a layer of browns. About 4 inches thick. Sawdust, chopped leaves, straw, shredded newspaper, tore up, or soaked and mashed cardboard.
Second layer is about 4 inches of greens with extra nitrogen if needed. This is grass clippings, weeds from the garden, food scraps, coffee grains, vegetable peelings, legume hay, manure and such. If you’re short on nitrogen (no legumes or fresh manure), sprinkle on some cottonseed meal, bone meal, urine, or fresh chicken manure.
Layer 3 will be another brown, about 4 inches
Layer 4 is green again, about 4 inches
Alternate layers and fill the bin to 36-40 inches high. A few inches over is alright, under is not. The last layer should be carbonaceous material or brown.
Compost Accelerators
You should always add some compost accelerator to introduce microbes to your pile. While there are naturally microbes around, it will greatly speed up the process if you add some at the start. This can be several things:
- A few handfuls of native soil from one or more nearby ecosystems such as the forest, the edge of a field, riverside or pond edge mud. This will add more diversity to your microbial collection.
- If you have composted in the past, then add a sprinkle of that existing compost every few layers on the new compost.
- You can also add fermentation juices from recent ferments that you made or whey.
- If you’re building on bare ground, which is the case with most piles, you’ll get some introduction of microbes from your soil below, but it helps to dig up a few handfuls and scatter it throughout the pile while you’re building it. If you have sod from digging tree holes, you can add those as well.
- You can also purchase compost accelerators, if you prefer, such as EM-1 by Terraganix, Jobe’s organic compost accelerator, or Bokashi Bran. These are what I recommend. Bokashi is also very useful for predigesting bones and meat in a bucket before adding it to the compost pile if you have rodent or predator problems. And it’s great for small-scale indoor composting.
Treats
If you like, you can throw in some nutritious treats for your garden as you layer. Here are a few things I like to add:
- EM-1 or LAB as a compost starter
- Rock dust such as Azomite, Basalt or Greensand
- Activated and inoculated charcoal bits! Activated and inoculated Biochar is the best you can add to your garden for immediate and long-term benefits. To learn more stay tuned on my upcoming post on biochar. Subscribe to my Food For Life Garden Newsletter, to get updates in real time!
- A little Seaweed like kelp or few spoonfuls of mineral-rich seasalt such as Redmond’s.
- a small amount of chicken manure is great to add as an accelerator and for nutrients. Don’t add too much if you’re planning to use your compost within a couple of months though. Chicken manure takes a while to break down and you’ll want to age your compost at least 3 months with a large part of chicken manure in it. A thin sprinkle over every few layers is fine though.
Keeping the sides straight:
It is good practice to keep the sides vertically straight, for even heating of the pile. If you don’t have a bin, that can be a bit challenging. I like to use the hayfork and with every layer, pushing the fork in a little ways and pulling the material towards me, working my way around the pile. It helps too, to put the crumbly stuff more toward the inside rather than on the edges, so it doesn’t get lost. Longish grass or other tangly material is good for the sides, it kind of knits it all together and keeps it from collapsing.
After you complete the pile, cover it completely with a tarp. If you use a compost bin, you can also use a piece of cardboard as a cover. Keep the cover in place with some logs or rocks or water-filled buckets. The goal here is to keep the pile from drying out and to keep rain from leaching all the good stuff out of it.
Step 4 – Turning
Now the fun part!
About 2-3 days later, your pile should be steaming. In winter it takes a little longer than in the heat of summer. If you have a thermometer with a long stem, push a little material out of the way and push your thermometer deep into the pile. It should read between 130 and 150 deg F.
Another way to test is by pushing a piece of re-bar into the pile when you first build it. Then, when you pull it out a few days later and wrap your hand around it. It should feel too hot for comfort.
Keep an eye on the temperature. As soon as it starts to cool down a little, it’s time to turn. Turn the pile to a spot next to it. You can again, use posts to mark the size, just pound 2 posts next to 2 of your existing ones and start turning by moving any outside parts to the inside and the inside parts to the outside.
The purpose of turning
The purpose of turning your pile is to heat all parts of the pile evenly. The outside will not get enough heat the first time around to kill weed-seeds. When you turn the outside parts to the inside, then they will get their turn to be hot enough on the second round.
A second reason for turning is to keep the pile aerobic and to keep it from getting pasty and smelly. It will allow decomposition to happen faster. An anaerobic pile takes a long time to decompose.
Another reason for turning is to keep the pile hot longer. This is the best way to break down the materials faster. And to make sure you get all the weed seeds and pathogens sterilized. You will have garden compost in only a few weeks instead of a few months.
How often do I need to turn?
Best practice is to go by temperature. Turn every time the pile starts to cool after it peaks. Usually that is about every 2 days after the initial turning, if you don’t want to bother with checking the temperature. I usually don’t watch the temperature that closely and just get on a schedule of turning every 2-3 days.
After 3 weeks you should have some very nice compost!
If after 3 weeks it doesn’t look good yet, you can continue turning a few more times. You can also just leave it and age it a month or two before using it. Microbes will continue to break down the material even if you don’t do anything to it. Eventually it will become a very nice humus.
Step 4 – Using Your Best Compost For Garden Beds

Great job for getting your composting done! It is so very rewarding, isn’t it? I just never cease to be amazed at what awesome black goodness results from piling up a bunch of what many consider food waste and garden waste. It truly is a miracle!
Before you start using it in your garden, the best advice is to let it age for a month after the initial 3 weeks of cooking it up. Then it is good to use for any purpose. If there are still some clumpy chunks, use a 2×4 sifter with 1/4 in hardware cloth to sift out the nice crumbly stuff and let the clumpy chunks decompose for a while longer, or add to a new compost pile as catalyst.
Add a layer of compost for garden beds on your existing soil, or make a soil mix with equal parts compost, sphagnum peat moss and pine bark to fill your raised bed. This recipe also makes great potting soil.
If you don’t have time to age your compost because you need it right now, go ahead and use it, but don’t work it into the soil. Put an inch of compost as a top or side dressing around your plants. It will age in place and later you can work it in if you like, but even as a top-dressing, it will boost soil health and feed your plants with its nutrient-rich properties.
Troubleshooting Your Best Compost For Garden Beds
Ok, I will not claim that this will always turn out perfect. There are so many factors to consider. With any natural processes, nothing is ever the same from one time to the next and from one location to the next. Whenever you ask nature’s allies to do some work for you, they’ll do it on their terms, however they’ll do a great job for you if you provide the right environment.
How to fix my compost pile
| Things that can go wrong | Remedial suggestions |
| The pile doesn’t heat up enough | Your carbon ration is too high compared with your nitrogen ratio. Turn the pile and add a few nitrogen rich materials as you layer it. Examples: urine, fresh chicken manure, cottonseed meal. |
| The pile heats too much | Too high in nitrogen. This can be remedied by mixing in a few more carbon materials when you turn the pile. Extra shavings or sawdust, straw, dry leaves, shredded paper, cardboard. |
| There are pieces of wood in the otherwise nicely finished compost | You used wood chips from trees that resist decay naturally, such as Locust, Hickory, Oak, or Cedar or the chips were just too large to break down in 3 weeks. Go ahead and use it as a top dressing or, better yet, sift out the chunks and put them in your next pile. |
| The pile is a gooey mess | This is a sign of too much water or large particles that matted together, forming an anaerobic clump. This can happen with a high percentage of leaves that were not chopped small or manure that was mixed with hay and added in sheets. When you turn the pile, try to break up the chunks a little and add in some sawdust or shredded paper or some other carbonaceous material. |
| There are rodents in my pile | Shoot. I hate it when that happens. If you used a lot of animal based food scraps, rodents might be attracted to your pile for that reason. Maybe next time bury those separately near a tree, who will thank you. For now there is not much you can do except keep turning and get it finished. One thing you can do to prevent this, is rodent proof your compost bin with hardware cloth. |
What next
This type of compost is very rewarding to make, but sometimes it might not be exactly what you need or want. I introduce many ways of composting in my overview of 22 Types Of Compost, Methods, Uses. Something for everyone. Check out the various ways you can get your organic matter to rot. If you want to plant fruit trees, do read my post on Best Compost For Fruit Trees And How To Plant Them.
I hope this step-by-step guide for making the best compost for garden beds was helpful to you. If you have any questions or would like me to elaborate more on any part of it, and for additional help, please leave a message in the Comments. I’d be excited to learn about your composting experiences there as well. Composting is so rewarding, don’t you think?
Download my FREE comprehensive list of Green And Brown Compostables along with some red hot composting tips.
More Related To Making Compost:
How to make mulch from wood chips for your garden Read about the many ways that wood chips can help you with your garden and your food forest.
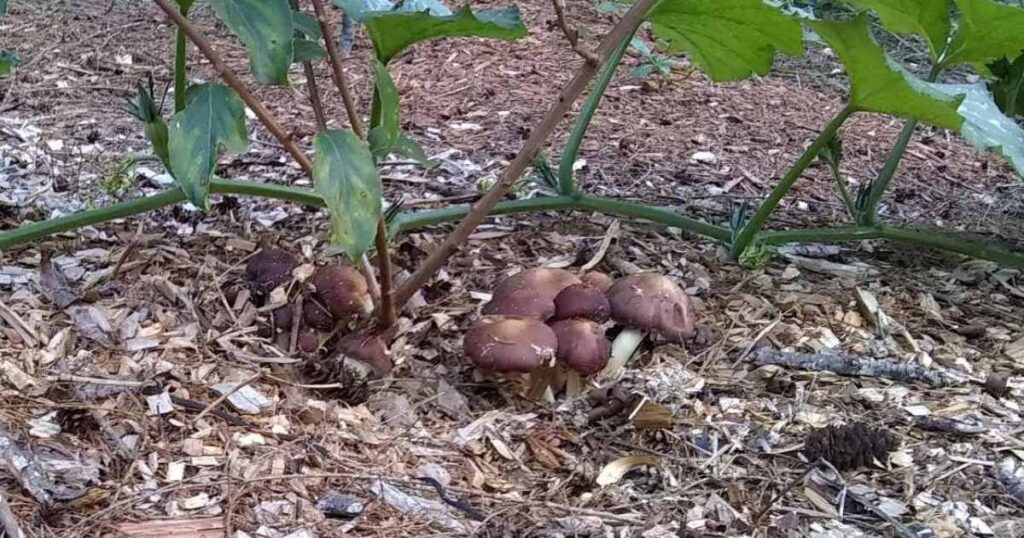
Grow mushrooms at home in your garden This is one of the most rewarding experiences in wood chip gardening. Grow your own mushrooms intentionally. It’s easy and they taste so delicious!
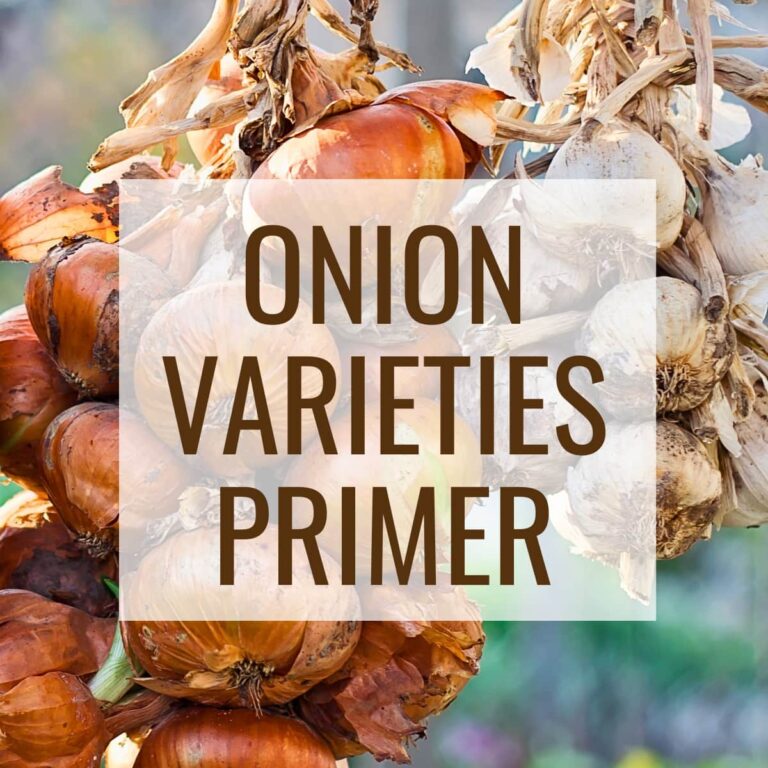
Bigger Onion Bulbs With The Right Variety – A guide to selecting the right onion varieties for your region and needs and a dive into other alliums you can grow from seed.
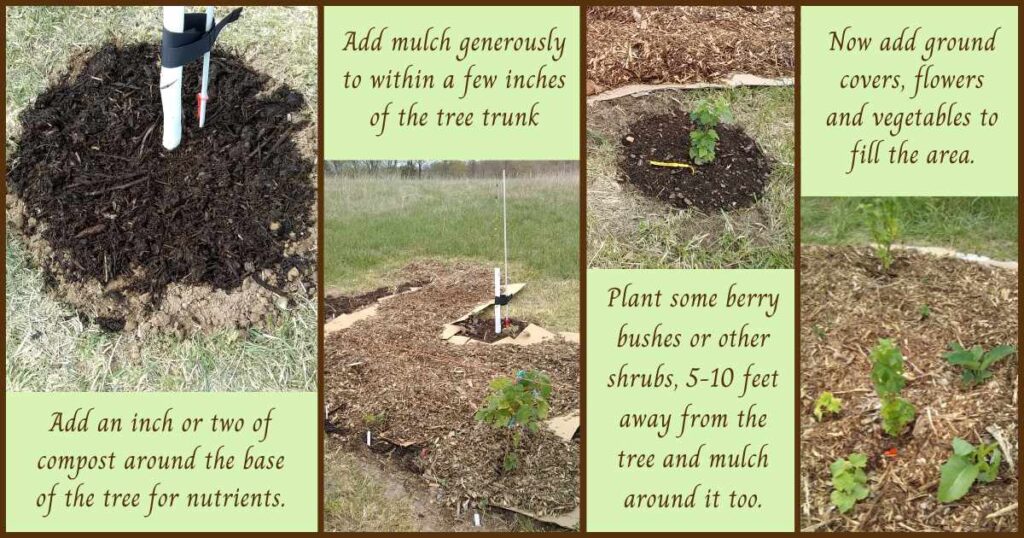
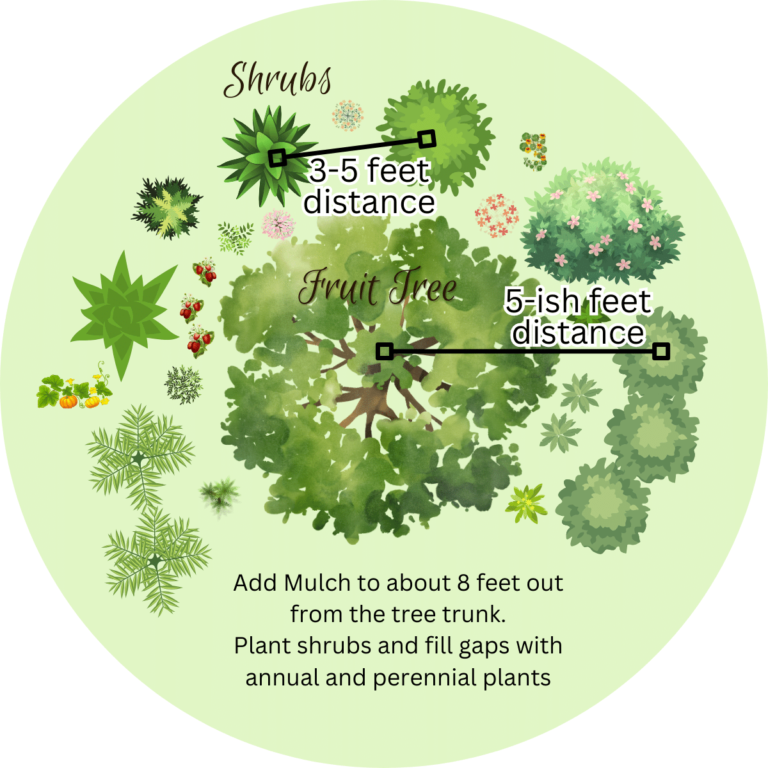
How to prepare my soil to plant fruit trees How to prepare your planting hole, what to put in it and how to give your tree the best odds for growing up strong and healthy.
22 different types of compost There is surely a way you can compost. Either in your backyard or in your kitchen. Composting fits all sizes and situations.
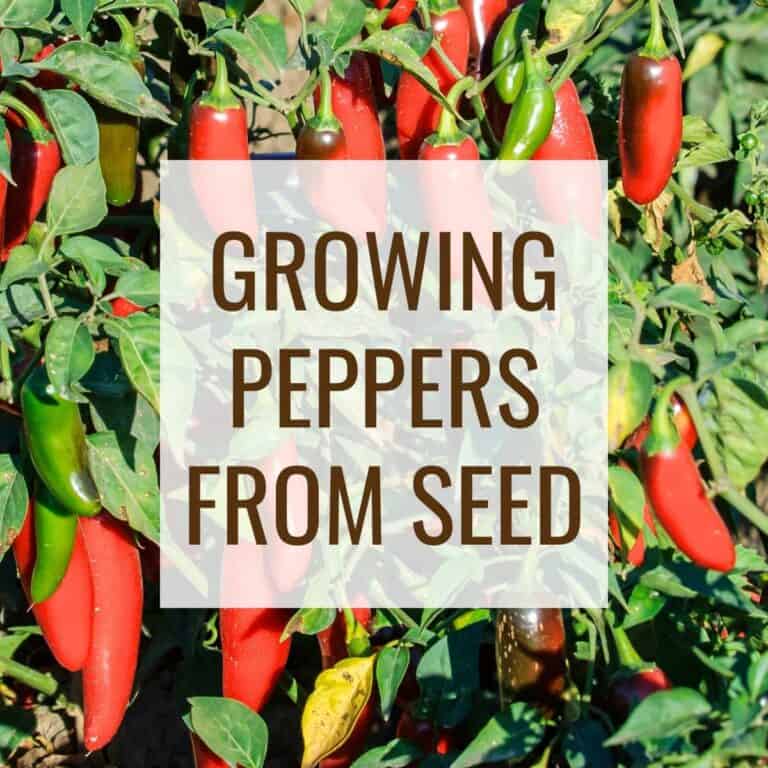
Grow your own peppers from seeds – Your complete guide to growing peppers. From selecting seeds to planting, growing, companion planting, and harvesting. Find out the benefits of growing your own peppers and how to preserve them.
How to start onions from seed – Learn all about growing onions from seed to harvest and how to prepare them for long term storage. Plus how to choose the right varieties!
How To Get Bigger Garlic – What to do to get big and healthy garlic bulbs. When and how to plant and harvest.
FAQ
What is the best homemade compost?
The best homemade compost is a mix of diverse materials that are either carbon rich or nitrogen rich. The best ratio is about equal amounts of moist fresh materials such as grass clippings, weeds, vegetable scraps, coffee grounds, kitchen scraps. And the same amount in dried materials such as sawdust, straw, shavings, leaves, pine needles, shredded paper, etc. Here is my preferred strategy for making the best homemade compost.
How often should I turn my compost?
To make the best compost, it should be turned every 2-3 days throughout the first 18 days. The objective is to keep the temperature high, above 130 degrees for as long as possible. The turning also keeps the pile aerobic and eliminates foul odor and off-gassing. Turning the outside of the pile to the inside each time, ensures even heating of all the parts. This will help to sterilize pathogens and weed seeds.
How to start composting for beginners?
The best compost is one that can be made in about 3 weeks. You gather all the materials you need and build a pile that gets turned every 2-3 days. This pile will need to be layered alternately with dry materials such as leaves, pine needles, or shredded paper and fresh green materials like kitchen scraps, lawn clippings and weeds. Click here for detailed instructions.
Pin This post


This was fantastic! Made composting not so daunting. We have been trying to figure out the best way and this post was so great!
This is another wonderful and helpful guide from you. I appreciate your detailed information. composting is something Ive wanted to try for our garden but have felt a bit intimidated by it. This guide is sooo helpful and gives me lots of confidence to try it. Thank you!
Hey Kimberley, I’m so glad you found this helpful. I appreciate you stopping by and hope you have some great composting success!
Composting is something I’m wanting to get better at. Thanks for all the good information!