How to grow a food forest is about a perennial based food growing system that can provide food for life and even generations.

This post contains affiliate links. As an Amazon associate I make a small commission at no extra cost to you if you make a qualifying purchase. See my full disclosure here.
How To Grow A Food Forest That Will Produce Food For Life
One of my primary goals with this blog is to introduce ways to attain food security for your family. Especially within a system of growing fruits and vegetables that will keep on producing once established.
This is a way of food production which, after it is put in place, will require little maintenance and provide abundant harvests. While installing a food forest takes some elbow grease in the beginning, it is much less work than a traditional garden in subsequent years.
Integrate livestock
You can also integrate livestock in your food forest. For one, the trees and other plants can provide fodder and medicines for your milk, meat and egg producing animals. Up to a point where you will need to acquire little or no external inputs. Or you can set up a regenerative grazing system between rows of trees. Which is the way nature gardens.
In both methods, the manure from the animals can then be returned to feed the food forest, either by your animals while they graze or by you collecting the manure and adding it as fertilizer. This will help grow a food forest that is efficient, productive and works in harmony with nature to provide you with food for life.
I have always been a tree ‘nut’ and a plant hoarder. Wherever I could, I planted trees and shrubs for food, even if I only lived there for a few years. But I rarely got the benefit of a tree food harvest for myself. That was for the next person, who came after me.
It’s been my dream to move somewhere and stay there, so I can reap the fruits of my efforts. I hope that I get to do that with my new property here. Besides that, I decided this time to record the process, as well as drawing on my years of experience for your benefit.
So let’s get started!
What is a Food Forest?
A food forest can have many faces, but in essence, it is a food producing system, patterned after a natural forest. This is based on planting mostly perennial edible plants and otherwise useful plants with great diversity. Indeed, you can include nut, fruit, fodder, and coppice trees, shrubs, vines, ground covers, herbs, root crops and mushrooms.
Furthermore, you can even include a pond or swales for catching runoff water to keep your forest irrigated and create more habitat for wild life. These are integral parts of any Permaculture based system. When you grow a food forest you introduce biodiversity on all levels from the treetops to below the soil.
This little ecosystem is able to attract wildlife, store water and build soil. In that way, not only does it provide future food security. But it brings life and beauty as well as a feeling of serenity, satisfaction and awe and it can be very meditative.
And let me tell you that the taste experience, as you sample a fruit right there, still warm from the sun, with bees humming and birds singing all around, cannot be duplicated by any toppest of the line grocery fare. A food forest is a holistic way of gardening that brings the highest level of well being for you and your backyard.
A Food Forest Is Less Work
Once established, a food forest provides harvests each year without having to plant anything. Besides that, it requires little or no watering and little maintenance. In this way, it is unlike traditional gardens where you plant annual vegetables.
By comparison, in a common vegetable garden, you have to start plants, prepare the ground, add compost, and sow seeds each year from scratch. Then water several times a week, weed almost daily and wait about a month before anything is ready for harvest.
A food forest eliminates these steps by following the seven layers principle, as introduced by Robert Hart. You’ll see details in the list below. Here we can observe a natural synergistic interaction taking place that reminds us of being in a forest.
Get A Headstart On Your Growing Season
After you plant perennials in the first year, they’ll just come back on their own year after year. Even if you have a short growing season, if you plant the right kind of plants for your area, you’ll likely get a head start over the annual garden.
If you like you can add some self-seeding hardy annuals and biennials and let them flower and spread their seeds. No need to start them over again. Mache, lettuce, mustard, radishes, carrots, kale and broccoli work well for that. And yes, tomatoes will sprout up everywhere on their own too.
I had abundant stinging nettles at my Washington farm, growing naturally in the wild. So I was able to get nettle greens for my soups a whole month before any greens were growing in my annual garden. Dandelion greens, plantain, sorrel and chickweed followed shortly after, still before my annual garden produced anything.
Grow A Food Forest Using Permaculture Strategies
Food forests are usually created from dimensional designs, consisting of vertical layers and stretching horizontally as far as one has the room or wants to expand. In Permaculture, all components have several functions that support and interconnect the whole.
This is referred to as ‘stacking functions’. Food forests are only a part of the very intricate philosophy of sustainability that is Permaculture. There will be more on Permaculture in future posts. Do sign up for my newsletter to get weekly updates here!
The principles of Permaculture do apply here. They involve ethics, interconnectivity, energy efficiency, adaptation to natural influences, resiliency and redundancy. When designing a food forest the focus is very much on each of these.
Each plant that grows in this ecological community should supply benefits to the one next to it and should have its needs met by the food forest itself. The food forest should sustain your family and surplus should be returned to the food forest to sustain it.
Once you have your plants, you do not have to import inputs. Any inputs can be created or produced on your Permaculture farm with sustainable cycling.
To learn more about Permaculture principles, check out this post by Permaculture fundamentals
How To Grow A Food Forest Starting With A Tree Guild
A Tree guild can be a part of a larger Permaculture food forest system or it can be just one small island, located where it is most beneficial in your garden. The components of a tree guild are all interconnected and serve each other and you too. A tree guild is built like a forest with many layers from the tallest trees to below the soil.
The Layers Of A Food Forest

| Canopy Layer: | Canopy trees are tall trees, such as a large fruit, nut, or oak tree or it can be a nitrogen fixing tree such as a Honey locust or acacia tree. They can provide fodder for livestock or nuts for your own use. They are the tallest trees in your food forest and will provide some shading for other plants. |
| Under Story Layer: | Trees in this layer are usually semi-dwarf or dwarf size fruit trees, such as apple trees, peach trees, cherry trees or pear trees. |
| Vertical or Vine Layer: | Letting grapes or Kiwi grow on the trees mimics the way vines grow in nature. The trees should be mature for that purpose. Vines can also be grown on a trellis. |
| Shrub Layer: | Shrubs are generally three to twelve feet tall and can include many types of berry bushes such as currants, gooseberries, and blueberries. Elderberries can be an under story layer if you let it grow out to mature or a shrub layer if you cut it back each fall. Fig trees can be used as a shrub, if they die back each fall in cold climates. They can also be pruned to stay smaller. Otherwise they count as a small tree. |
| Herbaceous Layer: | This can include all sorts of herbaceous plants from culinary to medicinal to beneficial flowers that attract pollinators and insects: sage, rosemary, comfrey, marshmallow, echinacea, lemon balm, mint, etc. |
| Ground Cover Layer: | These are usually low-growing shrubs that spread by runners such as strawberries, lingonberries, cranberries, uva ursi and many herbs as well. |
| Root Or Rhyzosphere Layer: | This includes roots grown for food and also to loosen the soil and to create tunnels for the little soil microbes and for water to infiltrate. Carrots, turnips, radishes and parsnips are some examples, as well as skirret, sunchokes and salsify. |
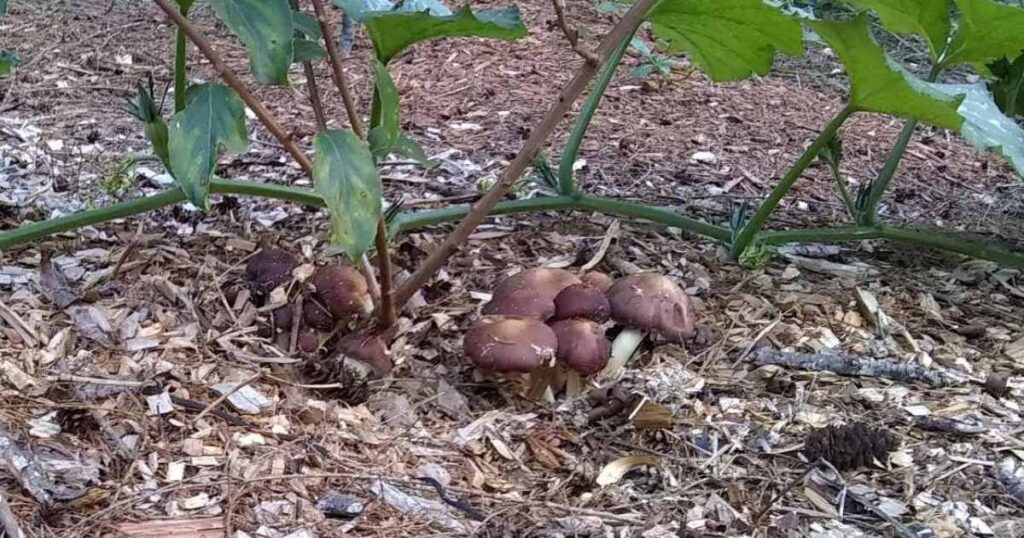
| Fungi Bonus Layer: | Mushrooms are decomposers. When you use wood chips for mulch, there will be a lot of fungal activity working on breaking those down. If you want to grow edible mushrooms, you can inoculate the wood chips with mushroom spawn from edible mushrooms and if conditions are good, you’ll be amazed at the abundant flushes of mushrooms you will grow. |
| Wetlands Bonus Layer: | This is another layer I like to add. It can introduce a whole new world of microorganisms, serve as bird baths and watering holes for insects, reptiles and all sorts of critters and it will have an ecosystem of its own that can utilize aquatic plants and possibly fish for diversity. There are many details to observe when adding a water feature, but I think it is a great addition to any food forest. |
Tree guild basics:

Tree guilds are deliberate arrangements of mostly perennial plants in natural ecosystems. Planting fruit tree guilds is how to grow your food forest. You arrange them in a way that creates a lot of edge. This will attract a great number of diverse beneficial birds, insects, and pollinators. And it promotes a healthy environment for all plants to grow in.
Small Area Tree Guild:
A tree guild can be small, in which case you omit the tall canopy layer and the under story layer becomes the canopy. Then you surround your tree with all the other plants. Place shrubs 5-10 feet away from the fruit tree and plant them in a circle around it.
Arrange them about 3 to 5 feet away from each other, depending on their size. Keep in mind their mature sizes and where the shade will fall. Make sure your sun-loving plants get plenty of sunshine. And do plant a variety of plants. Also keep in mind that some varieties need a second variety as pollinators.
This is how to grow a food forest even in a small backyard.
Large Tree Guild:
If you want to install a large tree guild, it can have a great big nut or fruit tree at its center, and in a circle around it, you would arrange fruit trees at a respectable distance, at least 25 – 30 feet away.
Arranging The Fruit Trees
You can arrange several fruit trees in that circle around the nut tree, taking care that all sun-loving trees are able to receive at least 6-8 hours of sunlight during the day. And for that reason, you could decide to plant shade-tolerant trees north of the central tree, such as hazelnuts.
In addition, allow them at least 15 feet of distance from each other if they are semi-dwarfs. Dwarf trees can be about 10 feet apart and standard trees need about 25 feet.
It’s difficult to put an exact number on the distances. They depend on the mature size of the tree or shrub. Refer to the description of the trees you choose and decide whether you want to prune intensively or not.
Arranging The Companions
Arrange shrubs or brambles about 5-10 feet away from each fruit tree, as many as you like or fit. Keep in mind where the shade will fall from the fruit trees and the nut tree and reserve that space for your shade tolerant shrubs.
Always plant shade loving plants on the north-side of larger vegetation. And reserve the southern side for your plants that need lots of sunshine.
The shape of your food forest can be whatever you like. Round is great, but a row of trees along the contour of a slope or just an orchard style arrangement works just as well. In this case you would plant your companions beside and in between the larger trees, thus expanding your tree guilds as a row. Or you can just expand into whatever spaces you have. You can make a cool free-form shaped Food Forest. There is no rule about the shape of it.
Add all the other plants where they might fit in the spaces between. The ground should eventually be covered completely with plants or mulch. Annual vegetables are great too while your trees and shrubs are still small and there is much room before the perennials start to take over.
You can also reserve an area for annuals by placing a raised bed into the wood chips where you will grow annual vegetables each year. Or you can arrange your food forest around the northern edge of your regular annual garden. There are so many possibilities…
Growing mushrooms: Inoculate your wood chips if you’re using them with mushroom spawn in the dappled shade on the northside of perennial plants. You’ll be rewarded with flushes of mushrooms a few months later and the mycelium with populate your woodchips to help decompose them and create humus.
Grow A Food Forest By Expanding Your Small Tree Guild

Once you establish a small tree guild, you can add on to make it a large tree guild. If you have the space, you can also keep adding to create as large a food forest as you like. Now you can expand it like an orchard in rows, taking care to plant them on contour with your slope. Or you can just expand into whatever spaces you have.
Start From Scratch Or Add To Existing Trees
To grow a food forest starts with growing a tree guild. That is a mini-food forest, an arrangement of plants that mimics how nature likes to grow things.
A tree in nature is always surrounded with other vegetation like shrubs, vines, herbs, grasses, sedges, large rooted plants, fungi and flowers. Planting a tree guild is leaning on nature’s example. In nature it is unnatural to have a single tree with just a lawn around it. Trees are always part of a diverse ecosystem. Diversity is nature’s way of having redundancy.
Start your own tree guild from scratch by planting a tree in an unused area in your yard that is in a convenient location. Make sure it gets plenty of sun. Then add an ecosystem around it. Or find an existing tree and start working on the perimeter providing new plants as companions for it. Create your food forest after nature’s example.
Tree Guild Goals:
When you start to grow a food forest, the main goal of planting a tree guild is to create an ecosystem where all plants interconnect and can form beneficial relationships. Rather than planting a single stand-alone tree, it is a good idea to give that tree companions to interact with. It will make for happier and healthier plants. And you can use your space more economically and enjoy a diversity of abundant harvests.
Keep Your Soil Covered:
Always keep your soil covered. And for that, I love to use wood chips as mulch, and the trees love wood chips. Check out my post on How To Make Mulch From Wood Chips to learn more about the benefits of this type of mulch. Mulch suppresses weeds, adds nutrients, and beneficial microorganisms that will improve your soil and feed the root systems of your plants. How to grow a food forest is all about multi-functions. This is a great example of that.
If you have trouble getting wood chips or you feel that they are not sustainable in your own setting because you cannot make them yourself, you can use any other organic matter for mulch.
Apply a sheet mulch on a layer of cardboard or paper, by adding layers of straw, hay, weeds that you chop-and-drop right on site, or prunings from your trees, herbs and shrubs. Think about a forest floor and how that is covered with fallen leaves and tree debris, nuts and their shells and fallen fruits.
Comfrey and Nettles make great nutrient-rich mulch. They are considered a living mulch if you grow them in situ. However, these mulches tend to be a little more maintenance intensive and the possibility for weed growth is greater with material that contains weed seeds. Many weeds can be your friends as mulch and forage.
You’ll want to make it your goal to grow enough vegetation that it will keep the ground covered and provide green manure for mulching bare spots. Choose edible, bee-friendly and medicinal mulches and you’ll get nothing but benefits.
What Plants Are Best For My Tree Guild?
The answer can be short: plant what you’ll want to eat. But technically when planting a tree guild you should take into consideration its interrelations as well. I’ll list the six categories of plants for fruit tree guilds below.
Keep in mind that native plants should be given preference if they accomplish the same as a non-native plant would. Personally I do not condemn the use of introduced species. I feel that many have some great uses and can be beneficial. And many just taste really good, like apples for example. But I like to select from the long list of natives whenever possible.
Here are the six major companion plant functions for tree guilds:

| Suppressors | Plants that suppress weed growth. These can be any ground covers, large-leaved plants and plants that grow faster than weeds. Examples: Strawberries, creeping thyme, mints, comfrey, squash, zucchini, sweet potatoes, cranberries, or low-bush blueberries. |
| Dynamic Accumulators | Plants with deep tap roots that find nutrients far below the soil surface and plants that accumulate specific nutrients in concentration. These plants are nutrient accumulators. Examples are lambs quarters, skirret, comfrey, dandelion, chicory, and yarrow. They can be chop-and-dropped to release those nutrients to the soil or use them to enhance compost. You can harvest some roots, but leave some in the soil to rot as microbe food and to increase organic matter deep in the soil. |
| Attractors | Plants that attract birds, pollinators and beneficial insects. These can be medicinal herbs such as echinacea, marshmallow, any herbs that produce umbel type flowers, such as carrots, fennel and dill. Then there is borage, bee balm, comfrey, butterfly weed, and so many more. A specific example is that of attracting trichogramma wasps by planting cosmos or beans. These will help with peach moths that can be detrimental for peach trees. |
| Fixers | Plants that fix nitrogen out of the air. They release nitrogen as ‘fertilizer’ all season long when their roots grow and die every day. This is a continuous cycle in plants and each time some of the roots die, nitrogen gets released. Chop-and-dropping plant material from fixers also adds nitrogen to the soil. Examples of nitrogen fixers are legumes like peas, beans, lentils, ground nuts, and more. Others are vetch, clover, siberian pea shrub, or indigo bush. Edible berries like sea berry, autumn olive, and goumi are also nitrogen fixers. |
| Repellers | Plants that repel pests and diseases. They are a natural pest control. A prime example are marigolds. They don’t smell very good and many critters stay clear. Alliums are great, including garlic, onions, walking onions, shallots, and chives. Garlic might prevent peach tree borers. Mints, and lemon-scented herbs such as lemon balm or citronella work great too against some pests. |
| Mulchers | Plants that you chop-and-drop to become mulch on location. The prime example in most Permaculture literature is comfrey, and I love it for that and so many other reasons. Nettles are really my favorite (beware of their sting though), buckwheat, rhubarb, zucchini, hostas, or any other vigorous or large leaved plants. |
How To Grow A Food Forest Starting With An Easy Fruit-Tree Guild
Okay, let’s build a fruit tree guild.
First, select a suitable location that gets lots of sunshine and is about 15 feet in diameter for a dwarf tree and up to 30 feet for a standard tree. A semi-dwarf tree needs about 20 feet of space. All varieties are different and you’ll need to check the description of the tree you purchased.
Start with planting a fruit-tree. Pick any tree that works for your growing zone, your area and soil. And pick a fruit variety that you love, because you’ll have abundant harvests with this growing method. Pick some varieties that you want to grow as companion plants from the list above.
What You’ll Need
- A shovel
- A digging spade, if you have challenging soil, rocks or dense, deep sod
- One 5-gallon bucket with water
- Another 5-gallon container filled with compost
- Some kind of tarp or large piece of cardboard for the soil you excavate
- Optional but super beneficial is biochar
- A stake to support your tree for a little while
- A mallet to drive the stake into the ground
- Tree guard or tube, optional
- Some soft, but sturdy twine
Let’s Start Digging

For detailed instructions on preparing your ground and the best compost and mulch for fruit trees, go here. If you have tough soil and thick sod, try a diamond edge pointed digging spade. I love to use this Spade From AM Leonard in heavy rocky clay with thick fescue sod.
Lay a tarp next to your selected spot and use it to pile the excavated dirt on when you dig. It saves a lot of time when back-filling and you don’t lose a bunch of that nice topsoil where you don’t need it. Put your tree into a bucket of water till you’re ready to plant, so it can get well hydrated, but no more than a couple of hours. Add a little EM-1 or fish fertilizer to your water for an extra boost and to help counter transplantation-shock.
Digging The Hole
First, remove the sod and shake all the good topsoil onto your tarp. Use the sod to fill holes in your yard. Or lay it upside down in the sun to kill the grass roots and cover the top of your tree hole with it upside down. I’m on a slope, so I use it to make a shallow dam on the lower side of the tree hole.
Dig a hole that is about twice the size of your root system in width, when you spread out the roots. Score the sides of the hole to make ridges to prevent roots from circling later. Dig only as deep as your roots go. You’ll want the part where the roots grow out of the trunk to be at or just slightly above the soil level. Or use the same depth that it was grown at the nursery. Lay your shovel across the hole as a guide and lean the tree against it as a support while you back fill.
Spread the tree roots out toward the edges of the hole. If they don’t fit, dig some more. Fit your hole to the size of the roots and never bend the roots to fit. Prune off any broken roots.
Back-filling:
Add nothing besides the native soil to your hole, except some inoculated biochar if you have it. Mix at a rate of about 20% volume with your back-fill soil. Back-fill about half of the hole. Firm the soil gently with your hands as you go, but refrain from stepping on it and compacting it. Pour a half bucket of water into the hole around the roots of the tree. This will help fill air pockets, which are not good for the roots. I like to tuck on my tree just very gently to help with that process. Backfill the rest of the soil into the hole and water again with another half bucket of water.
Grow A Food Forest Final Steps:

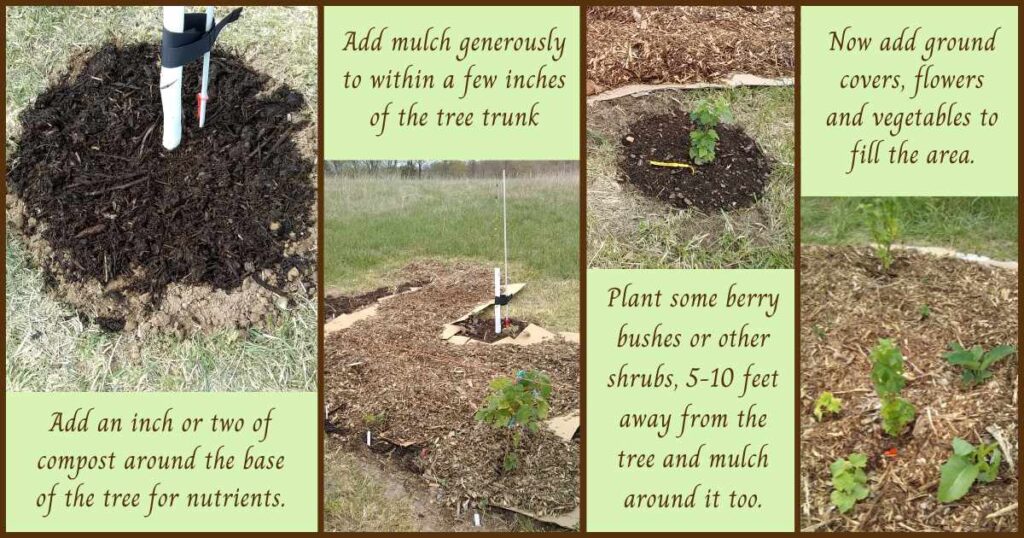
Grab your bucket of compost and spread it around the tree. Pound the support stick into the ground deep enough so it’ll not fall over when you tuck at it. It does not have to be super stiff. Use your twine to tie the tree to the post, about ⅔ up the trunk from the ground. Tie it very loosely. The tree must be allowed to sway in the wind, while the support will keep it from falling over until the roots have established themselves.
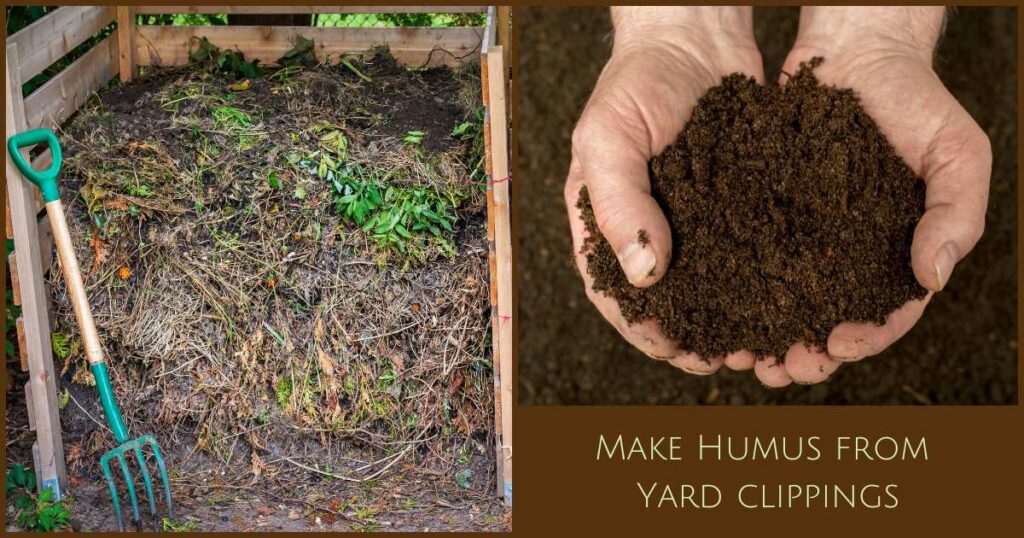
The compost along with the mulch you add will increase soil fertility and it will slowly release nutrients to your tree. This will improve soil quality over time and can turn even very poor soil into a rich humus. Learn how to make great fast compost here.
Important: remove the nursery tag from the tree trunk. Because it can choke your tree dead when the trunk grows thicker.
Wrap a tree guard around the trunk if bunnies or deer are a problem where you live. If you have a lot of deer pressure, consider growing companion plants around the tree that deer don’t like. Alternatively, a tall fence will also work for deer.
Taking Care Of Your New Fruit Tree
Prune off any dead or broken branches. You don’t need to do any other pruning right now. Wait for a year or two till the tree gains some strength. You might want to add spreaders to the branches if they are at acute angles from the trunk. They should be at least a 60 degree angle from the trunk.

If you like, you can just leave your new tree guild be for now and get back to adding on whenever it is a good time. Just mulch several feet around the tree, either with chop-and-drop materials or wood chips. And be sure to leave a few inches around the trunk without mulch or the trunk may rot. But the really awesome thing is, you have your tree planted! Now you can look forward to some amazing fruit in a few years.
Find more detailed instructions on how to plant a Tree. You’ll learn about selecting a site, preparing the soil, and what compost is best for trees.
Adding More Plants As Your Tree’s Companions:

To Continue planting your tree guild, take your shovel and tarp and dig several more holes about 5 feet or more from the tree trunk, for your shrub layer.
They can be in a circle all around the tree or just off to the sides. The rules for hole size apply here too. Look at each shrub and dig your hole to the size necessary to accommodate the roots without bending any. Fit the hole to the shrub!
Plant your shrubs following the same steps as you did to plant your tree. Then fill the in-between areas with ground covers like strawberries, herbs, flowers, root vegetables, legumes and vining plants, such as Grape, Kiwi berry or just annual vines like sweet potatoes or winter squashes.
Squashes will go a long way in suppressing weeds with their large shade producing leaves. The key here is to plant many different plants with different functions. Try to include some from each layer and each of the functions on the lists.
Cover The Ground With Mulch
Finally you’ll need to get or grow some mulch. If you like, first cover the area with cardboard or paper for enhanced weed suppression.
Mulch with what you have on hand, such as hay, straw, wood chips, pine bark (not the colored toxic kind!), shavings, chopped leaves, pine needles or grass clippings. Read more about mulching with wood chips here. Use the wood chips to introduce edible mushrooms into your food forest.
Grow large leaf plants for mulch. Many have the added benefit of being medicinal, having multiple functions in the tree guild, and they can be food.
Voilà, You’ve got yourself an amazing fruit-tree guild. This is a great start and if you caught the bug like I have and you have some more space, continue adding on. There will be more posts on tree guild expansion in the future. Keep an eye out for those. Join my Email List to get updates weekly!
How To Grow A Food Forest If You Don’t Have Much Space?
If you have just a small space, you can still plant a fruit tree guild on a smaller scale. And one way to do that is to use dwarf trees or espalier trees which can be planted fairly close together, depending on the type you get.
Espalier trees can be squished against your house wall or fence. In addition, you can use vertical plantings of vining plants by adding a trellis or having the vines climb on the tree.
Heavy pruning of trees from the beginning can turn large trees into small trees (bonsai is a good example, but we don’t want them that small, no!), and they can still produce a lot of fruit. Make use of shade-loving plants if you have a shady corner. However, realize that amount of sun = amount of fruit. So, much sun will produce much fruit, but lack of sun will give you a small or no harvest.
What to do if you lack any outside garden space

There are many examples on how to grow a food forest when you have little space, which still yields an abundance of food. People in urban areas use the tiniest corners to grow food for their family. Don’t let lack of space keep you from growing something. Use your patio, roof top, window boxes.
Introduce the idea of a food forest in your local community, someone may be interested in donating space and some might get involved. Start a community food forest if your town has a vacant space nearby.
Maybe someone will allow you to garden in an unused corner of their yard, in exchange for some produce. Many guerrilla gardens have been started in neighborhoods with small unused spaces which your town neglects to care for. Maybe your church will let you use a corner for a congregation garden. Let your imagination run, find a way and grow some food!
Grow A Food Forest Final Considerations:
Also keep in mind that many fruit trees need another variety of its kind planted nearby in order to cross-pollinate or they will not bear fruit. If you’re short on space, then one way to do that is by planting a couple of dwarf trees right next to each other. Another thing you can do is to graft several varieties onto one trunk or buy a tree that has several varieties on it.
The hardest part about growing a food forest is to wait for your trees to bear fruit. Some will take many years, and nut trees can take a decade. But once you taste those fresh fruits from your own trees, you’ll find that it was worth the wait. It follows too, that the sooner you start, the better. And honestly, a few years will go by quicker than you think.
Growing A Food Forest Is A Life-Long Food Growing Adventure
I hope you’re as excited about growing your own food and starting your own food forest as I am. And I am sure you’ll enjoy your tree guild. Here is to a life-long journey of growing your own food and I wish you abundant harvests. And if you’ve never eaten a peach that’s completely ripe, fresh off the tree, juice running down your face, boy, are you in for a treat!
I’d be super excited if you would share with me what you planted into your tree guild in the Comments below. If you already planted tree guilds in the past, what plants did you choose and how well did it work? If you have any questions, please don’t hesitate to ask. I’ll be glad to answer them.
If you would like to have a downloadable and printable quick reference booklet of the information on this page, you can purchase it on Etsy.
More Related To Planting Tree Guilds:
How to make mulch from wood chips for your garden Read about the many ways that wood chips can help you with your garden and your food forest.
25 Essential Herbs To Plant – Start your home apothecary garden with these 25 powerful allies for your health. Learn their benefits, how to grow them and where to source them.
Grow mushrooms at home in your garden This is one of the most rewarding experiences in wood chip gardening. Grow your own mushrooms intentionally. It’s easy and they taste so delicious!
How to prepare my soil to plant fruit trees How to prepare your planting hole, what to put in it and how to give your tree the best odds for growing up strong and healthy.
22 different types of compost There is surely a way you can compost. Either in your backyard or in your kitchen. Composting fits all sizes and situations.
Pin this post

FAQ
What are the seven layers of a food forest?
The official 7 layers of a food forest are the 1. Canopy or tall tree, 2. Understory tree or small tree, 3. Shrubs and berries, 4. Herbaceous, 5. Ground covers and creepers, 6. Rhyzosphere, 7. Climbers or vines. I like to add Fungi or mycelial layer and Wetlands to this list. They don’t fit into the 7 categories and are important parts of an ecosystem.
Can you live off a food forest?
Almost! It may not contain all that you pine for, but it will supply all the nutrients you need and can sustain human life. If you add in the wild life that can be harvested, there should be nothing you need to survive from the outside, except salt. If you don’t live near salt deposits or the ocean, there are ways to harvest salt from plants. Such as the roots of dandelion, hickory, walnut or pecan trees. Carrot, Celery, spinach, artichoke, parsnip and beet also have high salt content. Coltsfoot is also high in salt and its ashes can be used as salt. If you plan to live entirely off your food forest, be sure to plant all that you will ever want to eat and food that is high in calories.
Shop This Post
Tree guard
Spade from AM Leonard
Biochar
fish fertilizer
EM-1
[pt_view id=”d25d36cip0″]


Wow, think about how our world would dramatically change if even 3 out of 5 people did this?! I love this post. Thank you for sharing!
I’d never heard of a food forest, but what a smart idea!! Thank you for sharing all the amazing info!
Very good article! I love this concept. I’ll have to refer back to this in due time!
Thank you for commenting, I’m glad you found this helpful!
This is so interesting! I have to think this is the way… If we ever own a little yard I will know where to learn. For now, I ill keep working on my bins of food and herbs growing on out our back slab. Thank you for including the bit about small spaces!
Right on! My sister just sent me a picture of her balcony in the city, she’s growing a little pear tree and an apple tree there in pots! I think that’s awesome!
Such a comprehensive and helpful post for people like me with little or no experience with fruit farming. You make it look easy, i am glad i have a guide when i eventually can do this
Thanks for sharing
You’re welcome, Tomi! And thanks for reading! I hope you get to grow your own fruits some day soon!
This is so inspiring! I’m wanting to plan my own food forest!
Thank you so much, Lindi! I appreciate your visit here!