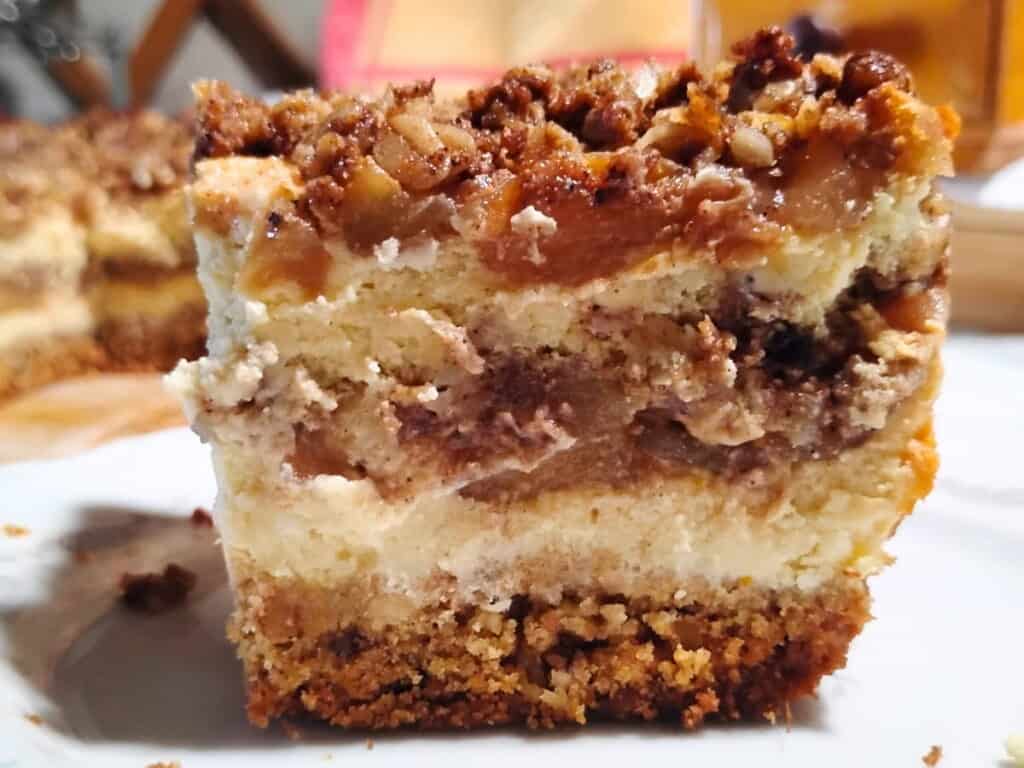
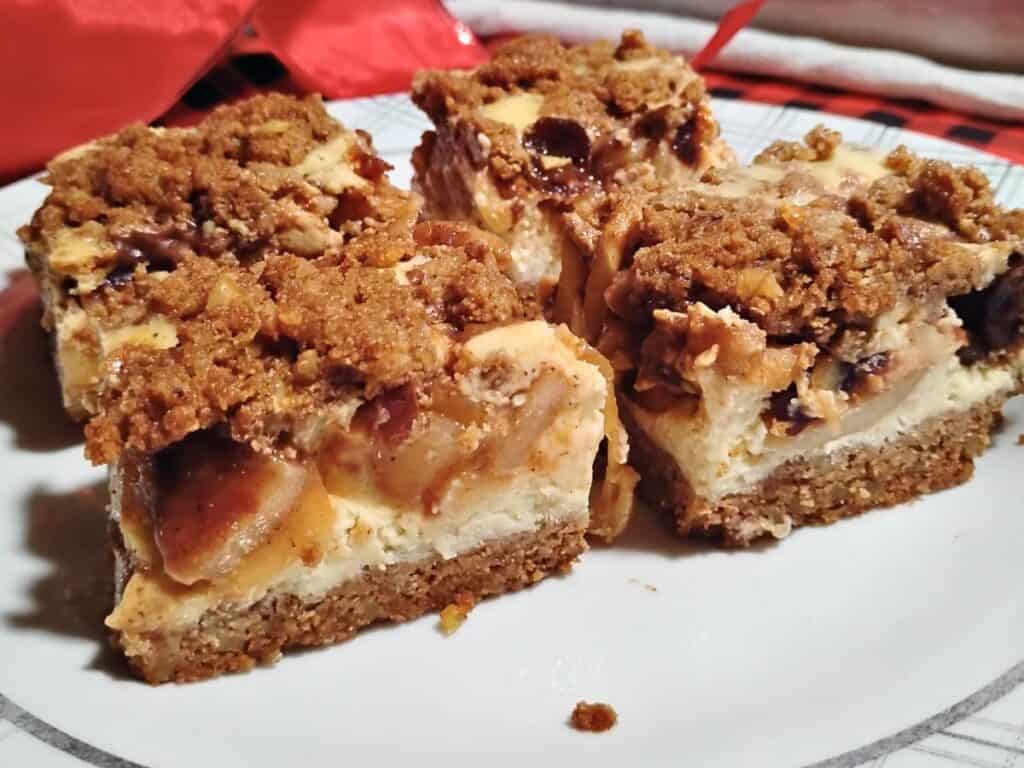
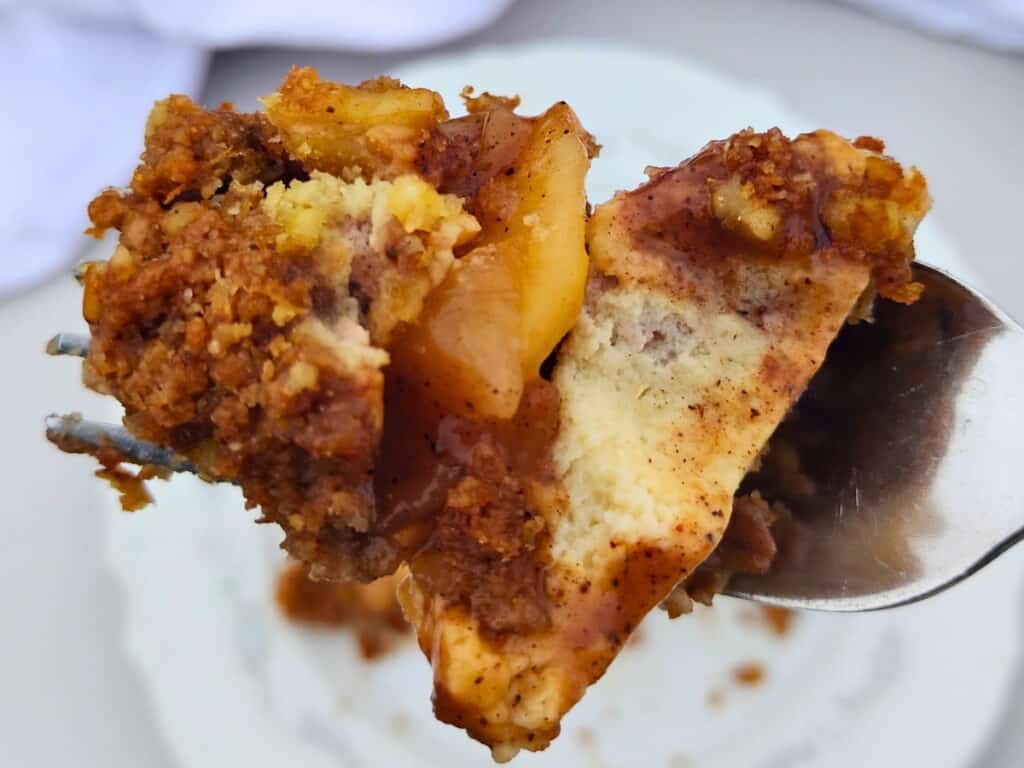
Apple Cheesecake is a little sweet, a little tart, a little crunchy and a lotta creamy. A great fall or holiday dessert or afternoon treat.
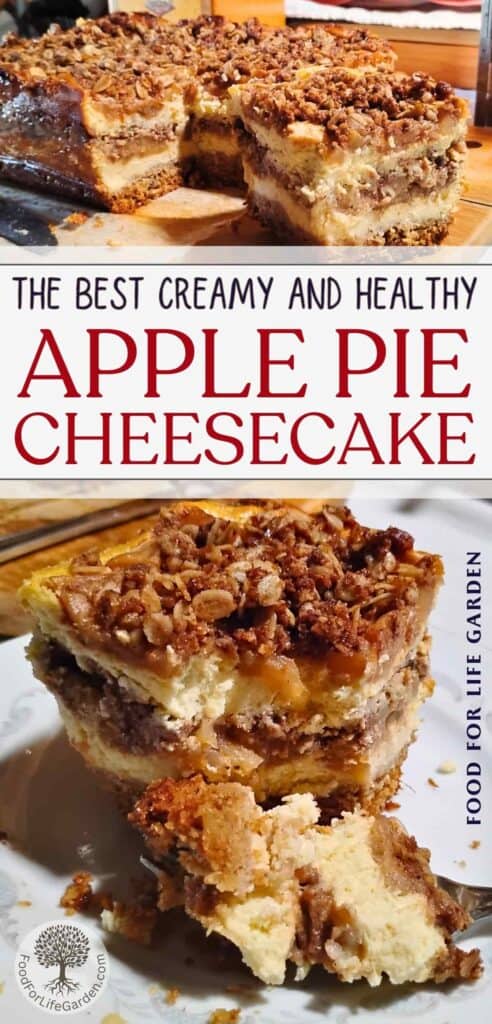
When you need a special cake that comes together easily, looks spectacular and tastes fantastic, you’ll want to reach for this recipe! It’s just so amazing! You’ll discover a little bit of apple pie, some apple crisp, and some cheesecake in this dessert. Start with a buttery ginger crust made with fresh milled flour and finish with a delicious streusel topping!
And if you’re trying to eat healthier, you won’t have to pass on this one! It is made with wholesome ingredients, and you’ll get a nutrient-dense treat that can work with your health, not against it. This makes a wonderful holiday dessert that can feed a crowd but you can make it and freeze some if you don’t have a crowd to feed. And did I mention that it tastes ridiculously delicious? Let’s head into the kitchen and whip it up, shall we?
If you like cheesecake, you’ll love this delicious German Cheesecake. And do try these awesome Lemon Blueberry Cheesecake Bars and Blackberry Cheesecake Streusel Bars. Learn how to make an easy, probiotic Quark Cheese From Scratch, which is the best cheese for making cheesecakes and creamy, dreamy cheese desserts such as Lemon Cheesecake Mousse and Creamy Orange Dessert.
For fall and the holidays, try my fabulous Ginger Spice Apple Crisp With Cranberries dessert or Sourdough Pumpkin Cake with Apple & Ginger Streusel a cozy breakfast cake, Zimtsterne, (Cinnamon Stars), Linzer cookies, Lemon Hearts Cookies, and Vanillekipferl, delicate German almond and vanilla crescent cookies, perfect for Christmas cookie platters and gifts.
- Must Try Fantastic Healthy Apple Cheesecake Bars
- Germans Love Their Cheesecake And More
- Why You’ll Love This Apple Cheesecake
- Choose Your Cheese
- Why Use Whole Grains?
- How To Make Apple Cheesecake Bars
- Tips for Making The Awesomest Apple Pie Cheesecake
- Enjoy This Amazing Apple Cheesecake Recipe
- Other Recipes You Might Like
- Pin This Recipe For Later
- Shop This Post
This post contains affiliate links. As an Amazon affiliate, I make a small commission at no extra cost to you if you make a qualifying purchase. See my full disclosure here.
Must Try Fantastic Healthy Apple Cheesecake Bars
It’s apple harvest time and I was able to get a few bags full of delicious apples from a neighbor’s tree. So that was perfect, because I was starting to crave some apple desserts and with evenings getting chilly and fall just around the corner, my taste vibes are shifting a little from refreshing towards cozy. And so I took those bags of apples, and started baking. Yay!
As a result, here is one recipe I’m totally excited to share, because it’s a fantastic comfort food and tastes awesome! Read on…
Germans Love Their Cheesecake And More
So I need to confess, I’m a cheesecake addict. I love dairy products and a sweet and lemony traditional German cheesecake, made with quark cheese, has ranked high on my favorites list ever since I can remember. It was always presented with pride by the German baker when serving this amazing cake at parties, potlucks, and church festivals.
But there are so many more cheesecake recipes that may be less spectacular in presentation, but are incredibly delicious when eaten. Any bakery in Germany will have a fair share of quark-based cheesecakes and pastries and I never grew tired of eating these delicacies.
So here I found myself in America, trying to recreate some of these awesome recipes. However, since quark was not available in the stores, I had to learn how to make my own quark cheese a long time ago, so I wouldn’t have to miss out on all these great German quark recipes.
But I get it that not everyone is thrilled to make quark cheese from scratch which is totally fine and, fret not, there is still a way for you to make this recipe.
If you have never tasted quark, of course you wouldn’t know what the fuzz is all about. Well, let me tell you, quark is special. It’s not really comparable to anything that is available for purchase in the markets here, but it was easy to get in every grocery store in Germany, Austria, and Switzerland and is a part of our culture as much as Oktoberfest and Lebkuchen.
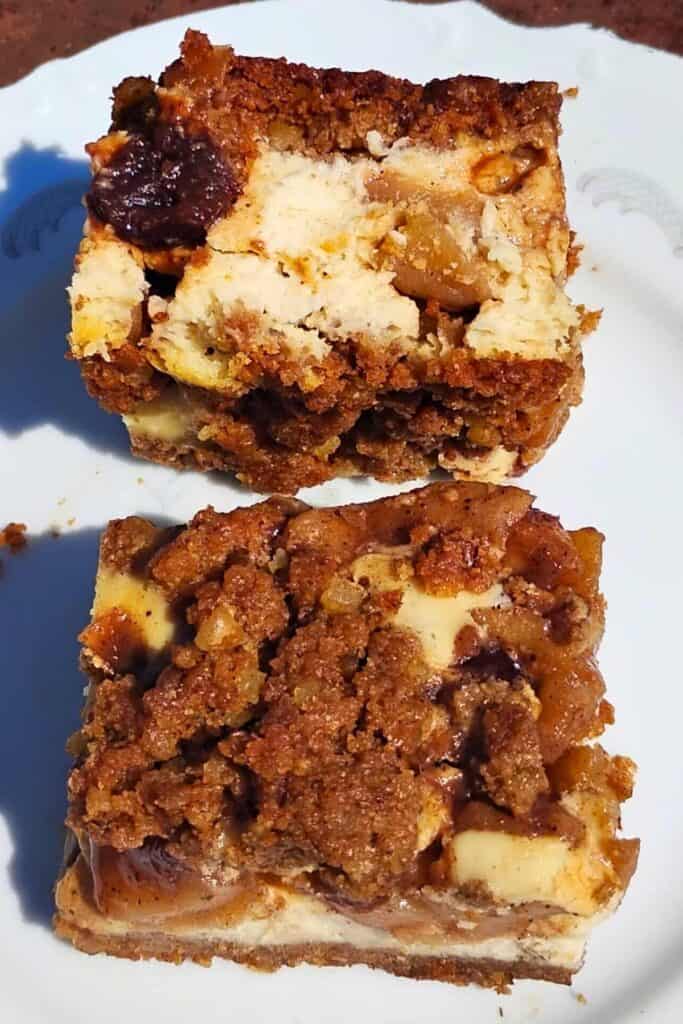
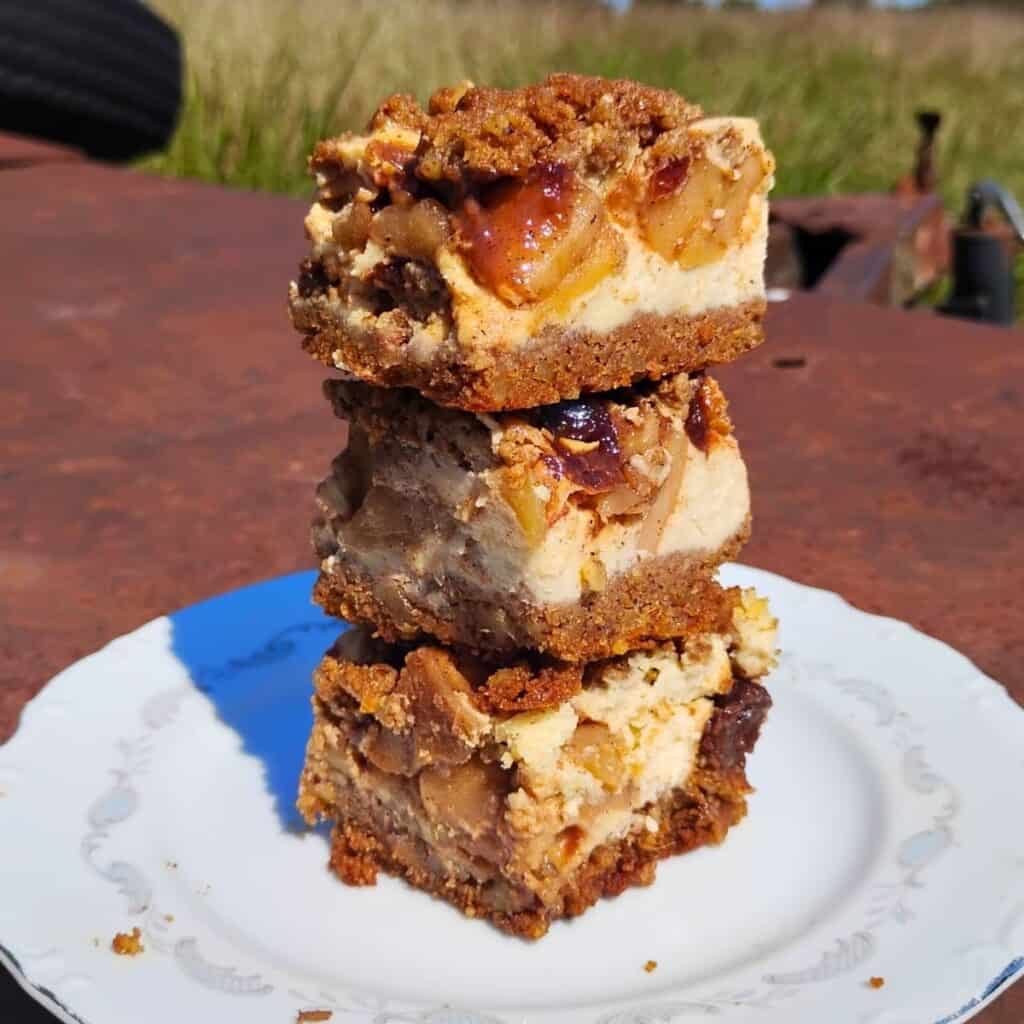
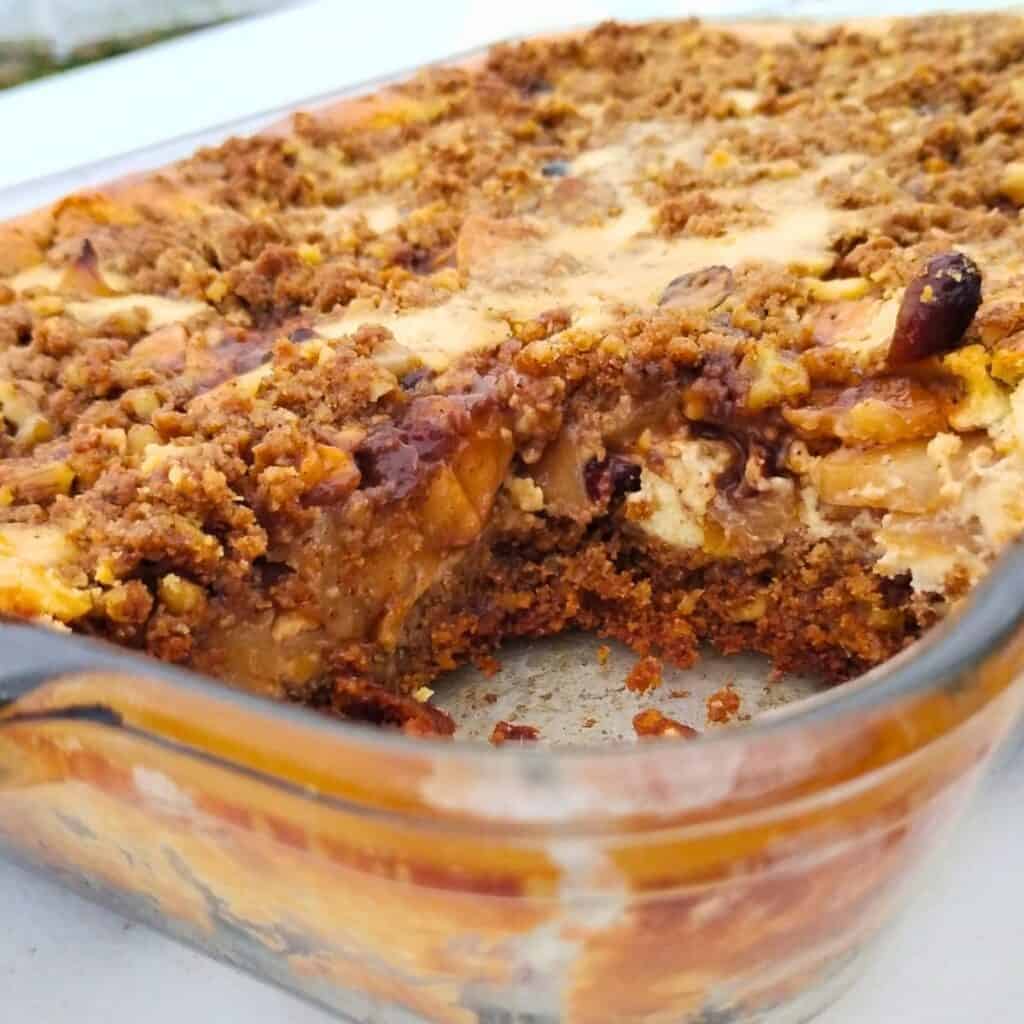
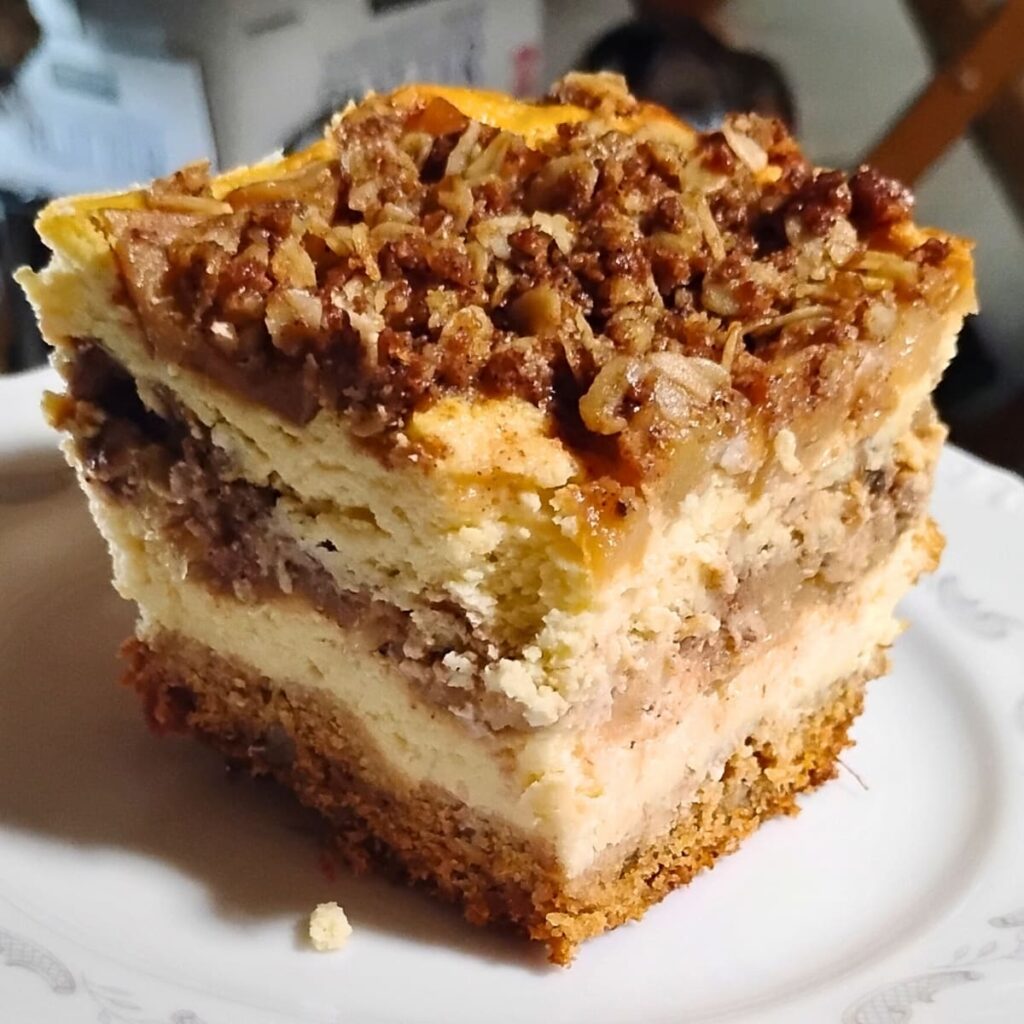
Maple Walnut Cranberry Caramel Apple Cheesecake Bars
I have since discovered that these cheese cake recipes can be made with other cheeses and while the results are different they are still delicious. However, and I might be partial, but I think quark beats them all in flavor and texture for sweet baked goods.
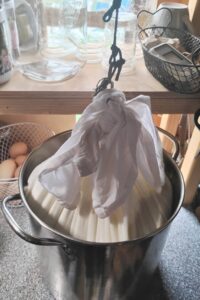
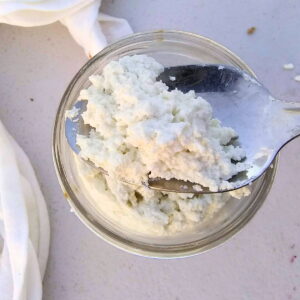
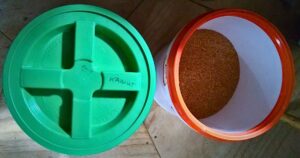
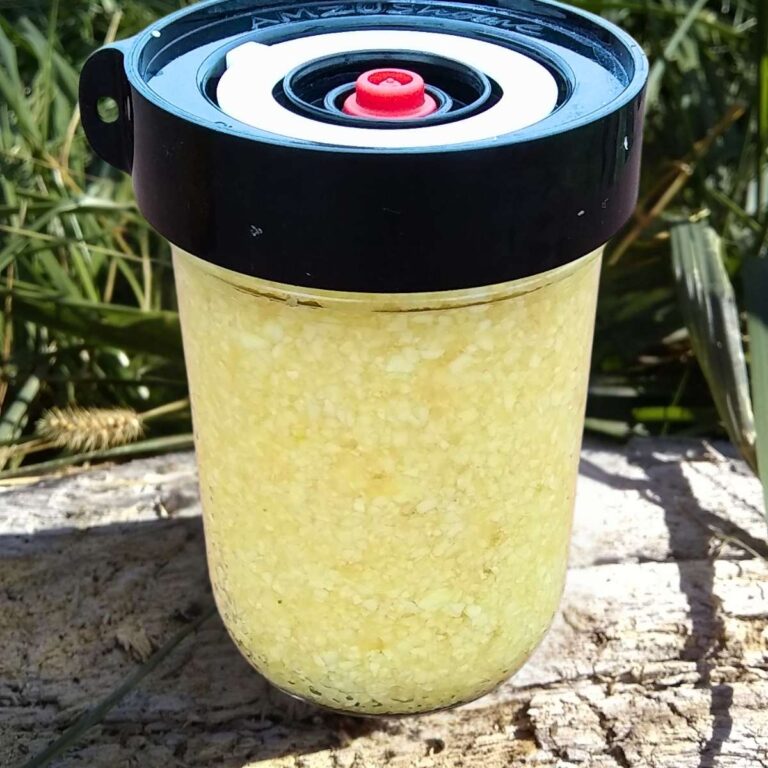
Quark cheese getting drained
I did provide substitutions below if you don’t feel like making quark cheese, but it is super easy to make and you just need to plan ahead a little so your quark can have time to culture and drain. Read how to do it on my quark making page, make some, then come back and make this delicious cheesecake… Or make it right now with one of the substitutes listed below.
Why You’ll Love This Apple Cheesecake
- The best part is that it tastes super delicious.
- This apple cheesecake offers a delectable medley of flavors and textures that are pleasing to the palate, and reminiscent of an apple pie and apple crisp melded with the creaminess of the cheesecake layer. It is all your favorite baked apple treats plus creamy cheesecake rolled into one fantastic cake.
- While not exactly a health-food, this cake is quite healthy if eaten in moderation. You’ll find that it is less sweet than most comparable cakes, and you’ll be using unrefined sweeteners, fresh milled whole grain einkorn flour, a good amount of healthy apples, fresh quark cheese or cottage cheese, butter, walnuts, and cranberries. It’s so delicious, you won’t miss the extra sugar. In fact, in this cheesecake, those delicious wholesome ingredients get to shine, and not sugar.
- Leftover apple cheesecake bars can be frozen for later.
- This is a great make-ahead cake. Make it the day before your event and keep it refrigerated. It’ll taste even better the next day.
- While it requires preparing 3 layers, they each are super easy to whip up and throw together.
- This is a perfect dessert for Thanksgiving or Christmas, it’s festive, delicious, and full of those cozy holiday flavors we all love. Apple, spice, and everything nice!
- Fresh milled flour has so many benefits and will lend a hearty, wholesome and delicious flavor and texture to your crust, similar to a graham cracker crust, but with all healthy ingredients.
Choose Your Cheese
The Issue With Quark Cheese
It’s unfortunate that quark cheese is not widely available in America. You can sometimes find it in health food stores or try German ethnic stores.
Quark cheese is a super healthy, cultured fresh cheese, similar to chevre in consistency and a lot like yogurt in health benefits and it’s easier to make than yogurt in my opinion, because unlike yogurt, it can be cultured at room temperature.
If you’d like to give it a try, visit my quark cheese page for instructions. For its basic form, you’ll need just 2 ingredients, milk and buttermilk or milk kefir. Just mix a few spoonfuls of buttermilk or kefir into a quart of regular pasteurized milk, let it sit for about 24 hours or until a firm curd forms, then drain it. There is a bit more to know about it, and I prefer to add a tiny amount of rennet, all of which is explained in how to make quark cheese, but that’s how easy it is. If you have access to raw milk, you don’t even need buttermilk, just make clabber and drain it well, that is the original quark cheese, and you can certainly use that. Easy Schmeezy.
Substitutions For Quark Cheese
If you’re not into making your own quark cheese, here are a few dairy products that work as substitutes.
Cottage cheese – Use a full fat, small curd cottage cheese with this recipe. It’s best to wash the curds and drain it well, but you can use it as is too, however, your cheese mix will be very runny.
Homemade ricotta cheese
Ricotta cheese – If your ricotta cheese is a bit wet, you can drain it first for a better cheese consistency. But it works either way.
Greek yogurt – Use a full-fat, unflavored version.
Cream cheese – Cream cheese will make a very dense and heavier cheesecake, but you can definitely use it. I’d mix it half and half with the Greek yogurt for a bit of tang and a similar consistency to quark cheese.
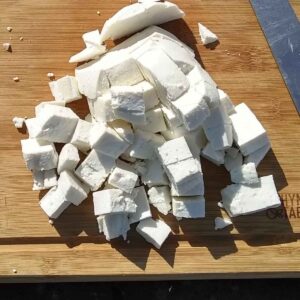
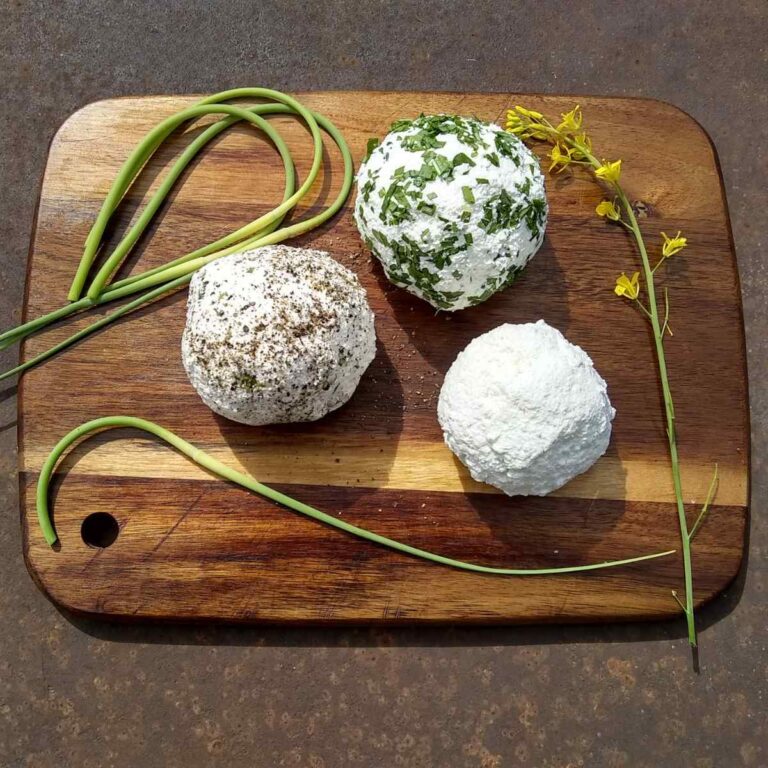
Queso fresco – This is another homemade cheese, but it’s super quick to make. I’ve got instructions on my queso fresco cheesemaking page for that. You’ll need just milk and vinegar or lemon juice and it takes 15 minutes to make and about half an hour to drain. Done!
You can also buy queso fresco in some stores that carry Mexican foods, but I’ve never tried it. It may work, but it might be too firm/dry and maybe too salty?
Make Cheese With Sourdough Starter from scratch using only pasteurized milk and sourdough or fermentation juice. No raw milk required!
Why Use Whole Grains?
White all-purpose flour or store bought whole grain flour can certainly be used here, but there are so many reasons to use whole grains and grind your own.
White flour has been stripped of all the nutrients that were in the grain originally. Ever since the use of steel rollers became popular for milling flour in the late 1800s, white flour has become popular and affordable for everyone. However, for those who eat a lot of baked goods, this means a huge loss of nutritional value in the overall diet. And this can lead to deficiencies in the body and subsequently health problems. Anytime food is separated into components and only part of those are consumed, our bodies miss the benefits and supporting role of the others.
Add to that the excessive use of refined sugars (with the same problem of the removal of the most benficial parts), and you’ll soon pave the way to declining health. Using wholesome ingredients in all your foods can go a long way to supporting your bodies functions and your health. Even occasional sweet treats can be made in ways that will support health and not sabotage it. All the compounds in whole foods work in synergy and are supportive of each other and stripping away one or two will cause imbalances and other problems.
I try to make all my meals count. And while I enjoy a very occasional white flour and sugar treat, I find them less satisfying than a good wholesome treat with fresh milled whole grain and restrained use of unrefined sweeteners.
Now, Why Mill Your Own Flour?
Even whole grain flour, when purchased in a bag in the store, does not include all of the grain. Some vitamins and the oily parts of the grain have been removed to prolong shelf life.
You see, once whole grains are broken and made into flour, their nutritional value immediately starts to decline and it’s oils will turn rancid pretty quick.
Stripping the oils and with it a good amount of nutrients will eliminate that problem and make milled flour more shelf stable, but that also means that your whole wheat flour is not nearly as healthy as you might assume. It’s really just a small bit better than refined white flour.
When you mill your flour at the point of baking, you’ll catch all those vitamins and healthy oils before they deteriorate, and they’ll end up benefitting your health and body instead. So this is the greatest benefit for milling your own flour, however, it comes with many more. Check it out!
Fresh milled grain tastes fantastic
Fresh milled einkorn grain makes this apple cheesecake extra special
Milling your grain at home right when you are using it will have other benefits too. You’ll be amazed at the delicious flavor of fresh milled whole wheat. It has a nutty flavor without the bitterness that’s often found in whole wheat flours that come in a bag. Once you try it you’ll never want to go back!
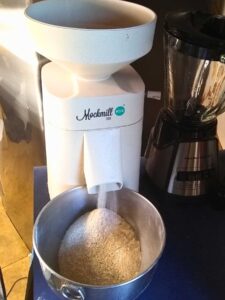
If you don’t own a grain mill yet and are interested, consider the Mockmill. I love mine and it’s got a small profile, taking up little room so I can keep it ready to use any time.
I also love my Country Living grain mill, but don’t use it currently. It’s a manual mill that’s great for off-grid situations where you have no or limited electricity. It does take a bit of room and needs to be mounted for best results. I don’t have the room right now, but if I had to, I’d make it work.
Save money and stock your pantry
And you can stock up on whole grains, because when whole, they can be stored for years under the right conditions without significant loss of nutrient value or rancidity. The kernel is protected and will stay preserved for years if left unbroken.
So you can buy grains in bulk to store them and mill them as you need them for maximum health benefits and great savings in the long run.
Try Azure Standard for bulk grains, they are a buyer’s club that sells just about everything healthy that you can imagine in bulk or small quantities and delivers goods once a month by truck to drop off points in your area.
How To Make Apple Cheesecake Bars
Equipment
Grain mill – You’ll need a grain mill if you want to make fresh milled flour. If you don’t own one yet, I highly recommend the Mockmill. It can grind superfine to coarse flour and the flour does not get overheated in the process. It takes up little room on your counter and gets the job done quickly. Plus it’s made to last!
A few bowls – You’ll need one medium size for mixing the crust/topping ingredients and you need one for melting the butter. If you’re using a hand-mixer for the cheese filling, you’ll also need a large bowl for that.
Saucepan – I used my 3 quart Farberware saucepan for cooking up the apple pie filling. This pot comes with a metal lid, yay! That is so hard to find these days and I hate glass lids on pots.
Scale – optional but highly recommended. I use a scale to make adding ingredients easier and have less dirty measuring cups. And when you’re working with fresh milled flour, it will have a lot more volume than packed down flour from a package.
Blender – used for processing cottage cheese, ricotta and queso fresco, you’ll need it to break up the curds. Be sure to use a powerful high speed blender or Vitamix.
Hand mixer – you can use a hand mixer for processing quark cheese, yogurt, or cream cheese. I used quark cheese today and made the filling in a blender this time, which worked fine.
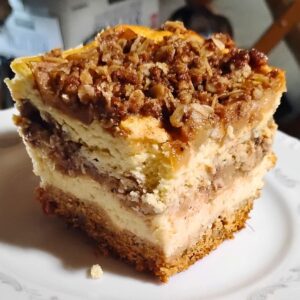
Baking pan – You could make this in a 10″ round spring form, or a 8×10″ rectangular dish for a taller cake, and make it more festive using layers. But I prefer making this as single-layer bars in a 9×13″ baking dish with deep sides. It’s easier to eat that way and you can make smaller snack sized portions easily.
Ingredients
I always recommend clean, organic ingredients whenever possible. That goes a long way toward increasing nutrient density in the food and reducing the toxins in the body. All of which can cause all sorts of imbalances and inflammation, which can lead to diseases.
Apple Pie Filling

Apples – I do not know what variety apples I ended up with, but they worked great in the pie filling. The best pie apples are the ones you have and next best are Granny Smiths, in my opinion, if you’re purchasing apples. I’m sure there are other great pie apples out there, but basically you’ll want to get some that are tart, sweet and firm.
Lemon juice – Use lemon juice to toss with your apples while you’re cutting them. This will keep them from browning and it adds flavor to your filling.
Maple syrup – I like maple syrup best in this recipe but you could substitute the same amount with a mild flavored honey, or other unrefined sweeteners such as coconut sugar or panela sugar (sucanat) or, for a more neutral flavor, natural evaporated cane juice crystals.
Butter – Salted or unsalted is fine, just omit the added salt if you’re using salted butter.
Arrowroot flour or corn starch – My preference is arrowroot flour, but organic cornstarch is fine too.
Cranberries – I think they are just a perfect way to round the flavors in this recipe and I recommend adding them. I used applejuice sweetened dried cranberries, since I can’t get cranberries here until later this year, but I prefer the fresh ones. You’ll just need to add more volume-wise if you’re using fresh cranberries.
Water – used to make a slurry with the arrowroot flour or cornstarch to eliminate lumps.
Cinnamon – Ceylon or cassia is fine, I prefer Ceylon.
Nutmeg – dried, ground
Cardamom (optional) – I love cardamom in any baked foods that benefit from added spice. Don’t use too much or your food will taste like soap. But it is a great spice to add here and it’s got so many health benefits.
Crust/Topping
I’ve decided to use the same dough for the crust and crumbles here, to make this easier.
Walnuts – toast them if you like for best flavor, then finely chop or crush. I put them in a quart sized zip-lock bag and smash them with a mallet. A rolling pin works too. And don’t worry about it if some larger pieces are in it. Substitute with rolled oats if you can’t do nuts.
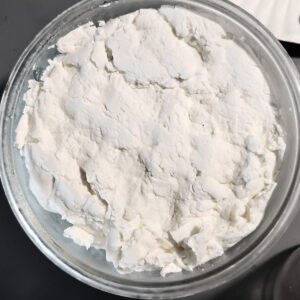
Fresh milled einkorn flour – The volume measurement is for fresh milled einkorn flour. If you’re using all-purpose or pre-milled flour in a bag, I’d use only 2 cups to start. Add more later if necessary. In this recipe I’m using fresh milled Einkorn berries. You can also use pre-ground Einkorn flour, just fluff it up before measuring, or weigh it. You can, of course, use all-purpose flour too.
Baking powder – I use only aluminum free baking powder.
Cinnamon
Ginger – Fresh grated ginger is best, but you can use half the amount powdered. I make my own preserved ginger paste, which I keep in the refrigerator year round. This makes it easy to add fresh grated ginger to my baked goods, and I love to add ginger often.
Sweetener – Panela sugar (sucanat) is my favorite natural and unrefined sweetener aside from honey and maple syrup. I’m using it in this recipe because it adds a bit of molasses for a ginger bread flavor. It works really well in this recipe. But you could also use natural evaporated cane juice crystals, or coconut sugar, which has a similar depth of flavor, although the flavor profile is not the same. Panela sugar is more like a dark brown sugar in flavor, but much healthier because it has not been processed and had nothing taken away.
Butter, melted – use salted or unsalted. But I would not add extra salt to the crust if your butter is salted.
Salt – a pinch of salt helps bring out the delicious graham flavor of the crust.
1 egg – This will help bind the crust. It’s not neccessary for the crumbles, but it won’t hurt them either and making both in one bowl saves a lot of time and extra dishes. Something to consider when you’re off-grid and without running water, let me tell you!
Cheesecake Layer
Quark cheese – or choose one of the substitutes (see note above about details). Options listed are cream cheese, Greek yogurt, kefir cheese, cottage cheese, ricotta and queso fresco. Drain if necessary.
Heavy cream – I love Organic Valley products. They have a grass fed heavy cream that I can even find at Walmart here in the middle of southern Missouri!
Maple syrup – For a healthy, natural sweetener, I like honey or maple syrup best in my cheese batter. In this recipe I’m purposely using maple syrup, because it goes so well with the walnuts. But you could substitute the same amount with other unrefined sweeteners such as coconut sugar, Panela sugar (sucanat), or, for a more neutral flavor, natural evaporated cane juice crystals.
Eggs – This recipe uses large eggs. If yours are small, use an extra one.
Vanilla extract – I prefer to use organic vanilla. You can get it in bulk from Azure Standard for a good price, or make your own, here is a great recipe.
Arrowroot flour – or corn starch. Corn starch is most often from a GMO crop and heavily sprayed, so I would only use organic, non GMO corn starch. But I normally use arrowroot flour.
Lemon zest – Use lemon zest or preserved lemon paste. I like my preserved lemon paste for recipes like this, which gives my cheesecake an extra dimension of flavor, and it’s quick and easy to add to recipes whenever I want to add lemon. It keeps in the fridge year round.
Lemon juice – This is optional, but gives the cheesecake a nice tang. If you’re using Quark cheese, you’ll get some tang from the cheese itself and that makes the lemon juice not as important, but it’s nice to add anyway.
Mineral salt – Just a pinch or two of a good mineral salt, such as Redmond’s Real Salt, to balance the flavors of the cheese cake and add important trace minerals to your diet. If you used salted butter, don’t add any extra salt here.
Apple Cheesecake Bars Instructions
These instructions are for 9×13 single layer cheesecake bars. If you’d like to make a layered cake, please see the notes below.
Alright, let’s start making the cake. First you’ll want to get the apple pie filling started and while that is cooking, you’ll have plenty of time to work on the rest of the recipe.
Apple Pie Filling
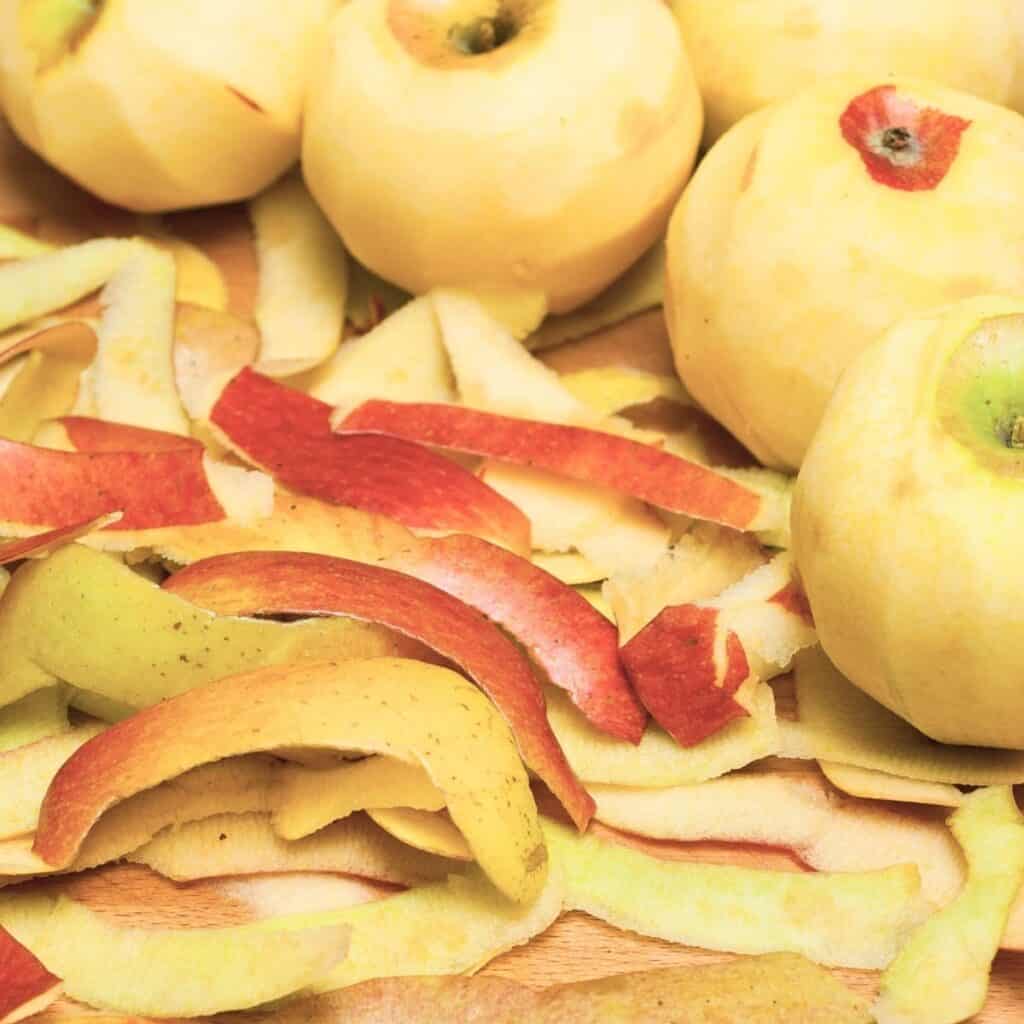
Peel and core the apples.
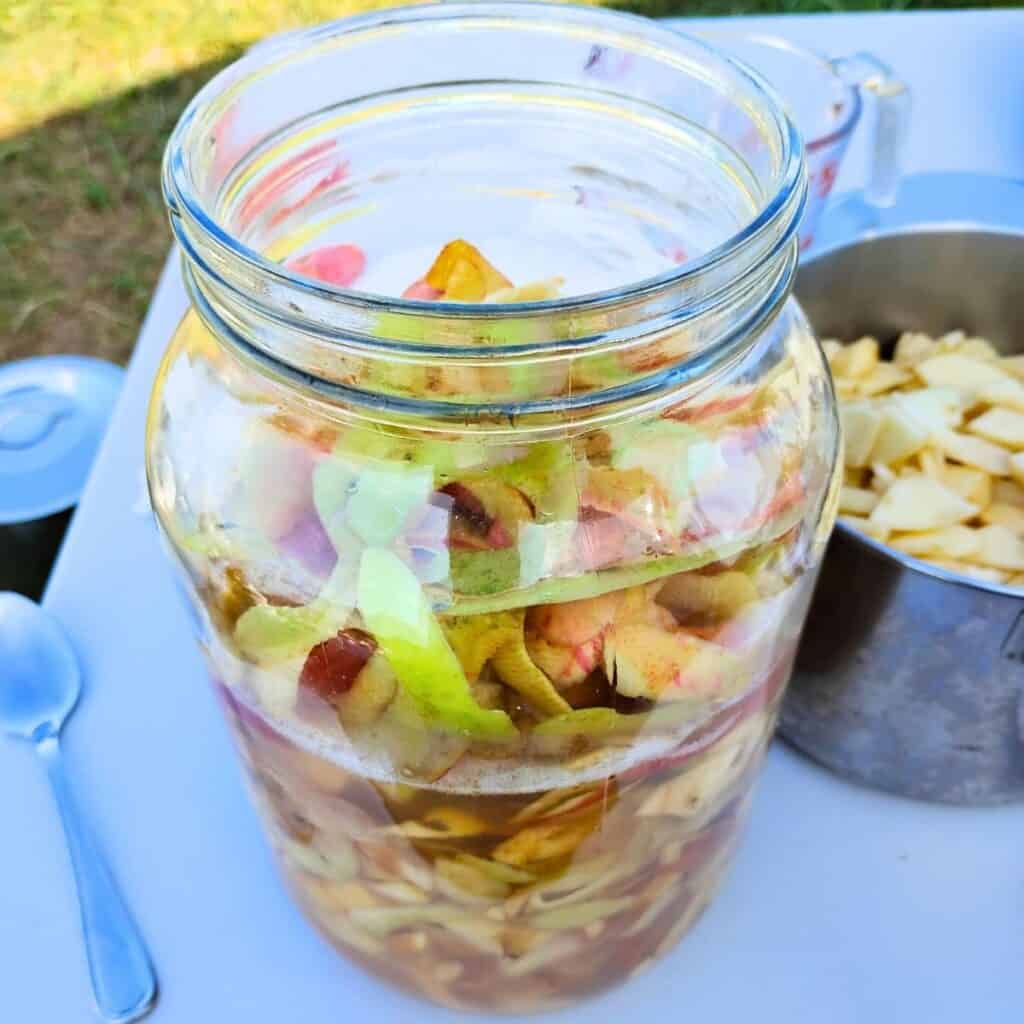
If your apples were unsprayed, you can save the scraps to make vinegar.
Chop or thinly slice the apples and add them to the saucepan. Toss with the lemon juice as you go to keep them from browning.
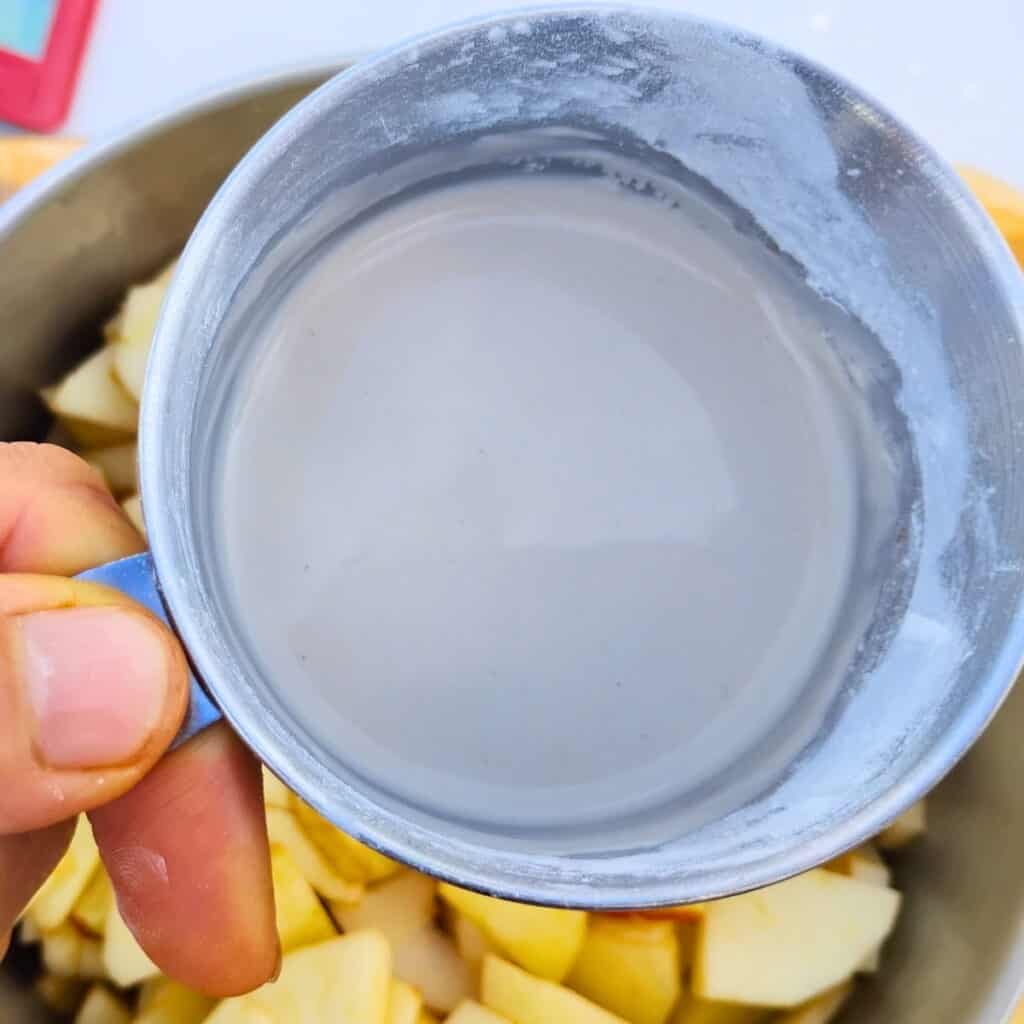
Make a slurry with the arrowroot and a quarter cup of water. Mix well to eliminate any lumps, and add it to the apples in the pot.
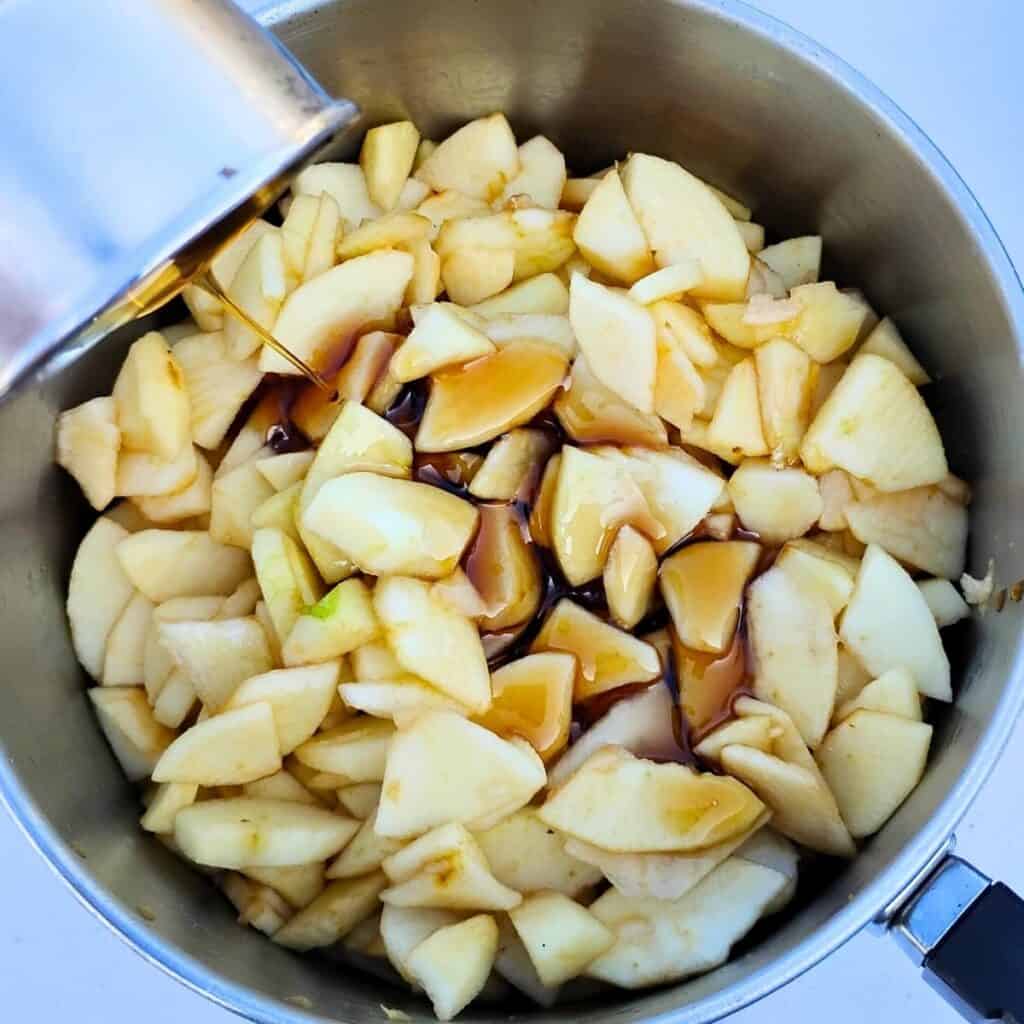
Add all the other filling ingredients: maple syrup, butter, cinnamon, and spices.
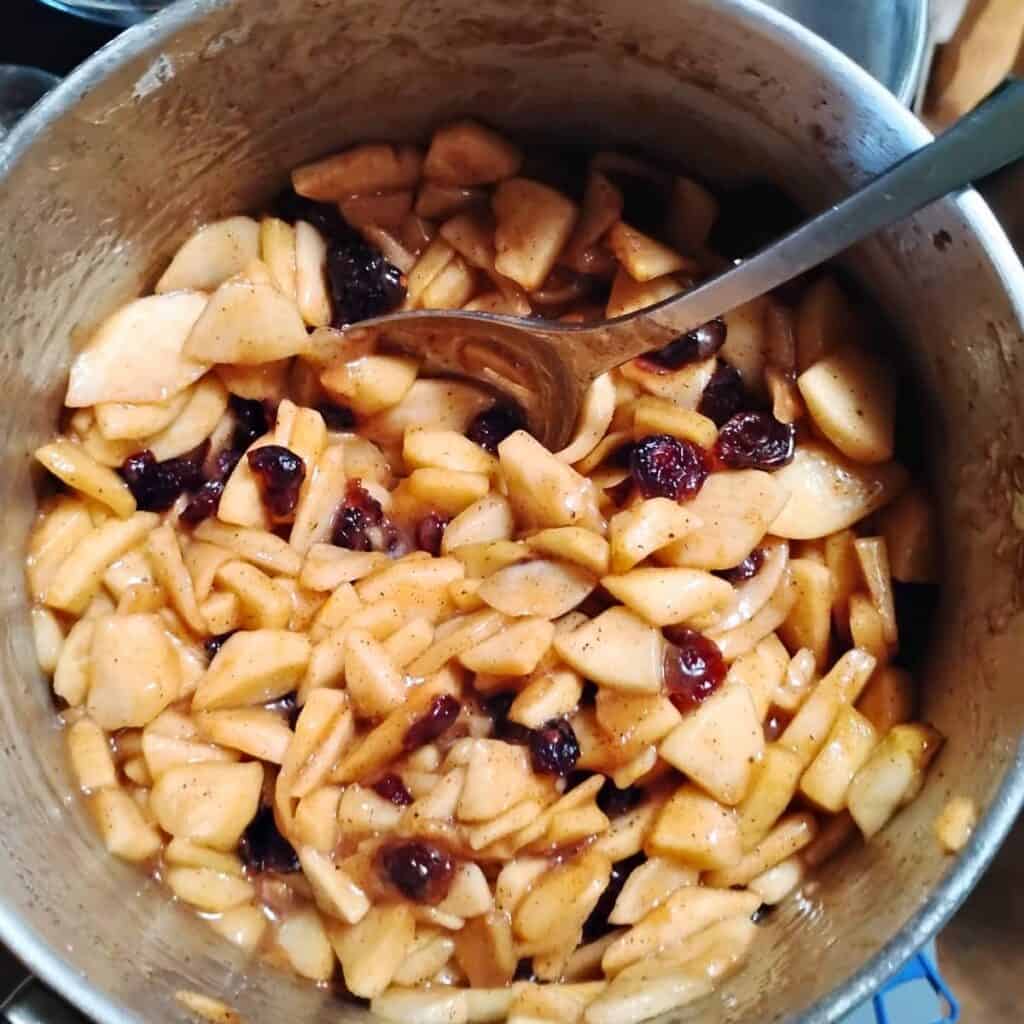
Cover with a lid, place on a burner and heat on gentle heat to a simmer. Stir occasionally, especially in the beginning, and simmer for 30 – 45 minutes or until the apples are soft. After about 20 minutes of simmering, add the cranberries if you’re using them then continue to cook till done. My apples took about 45 minutes. Don’t let them get mushy.
Take the pot from the burner, uncover and let cool for a few minutes before adding it to the cake.
While the filling is cooking, prepare the rest of the ingredients.
Prepare The Crust And Topping
First, preheat the oven to 350 degrees.
Then take the butter out of the fridge to melt it for the topping and crust. Use the microwave or melt in a small metal bowl or saucepan on the stove on very low. Once melted, remove and let it cool a bit before adding it to the rest of the ingredients.
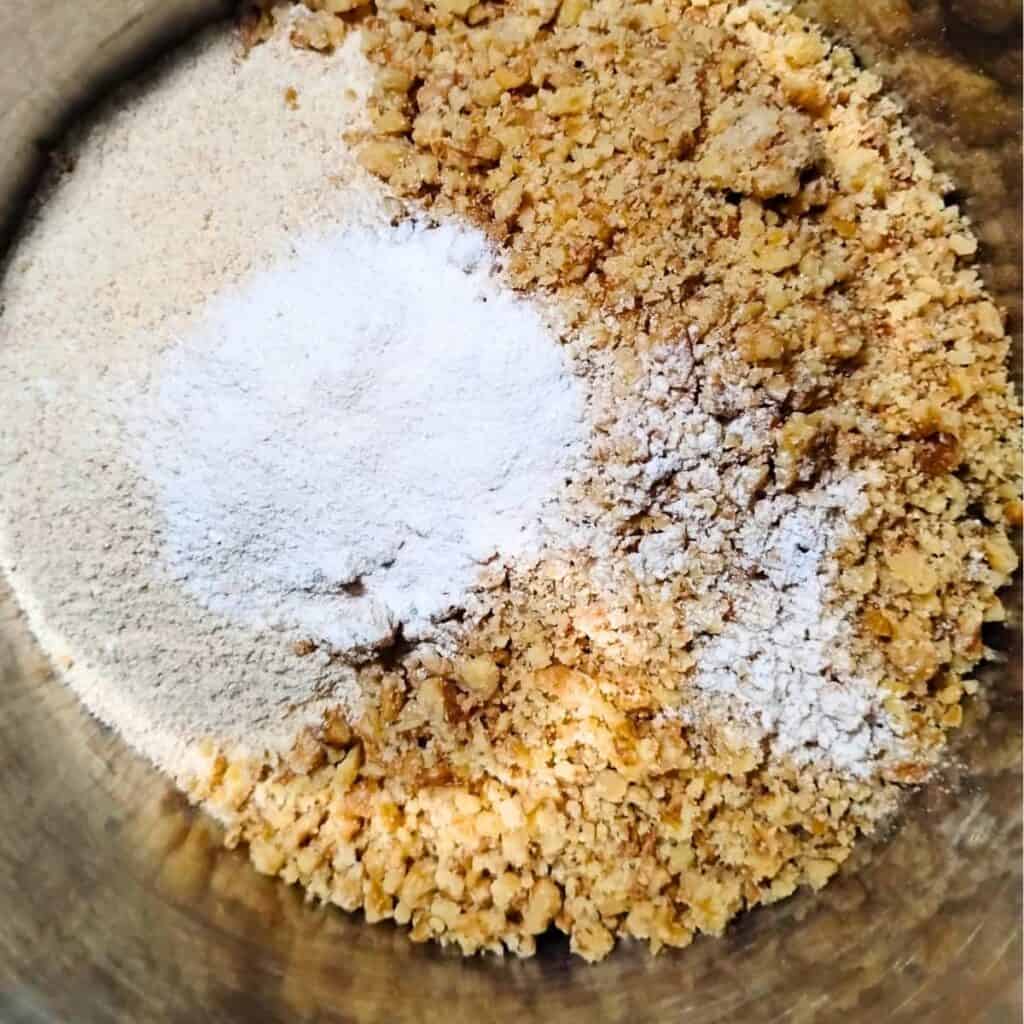
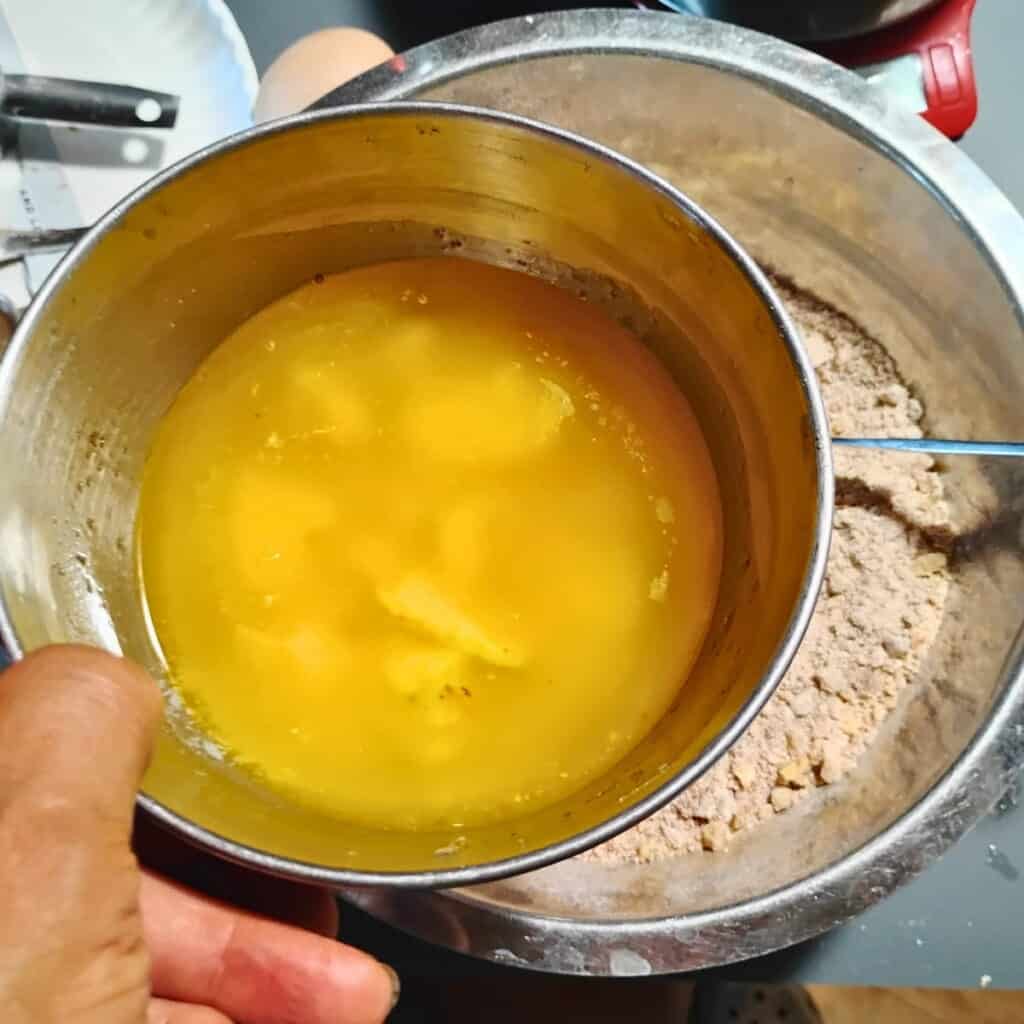
Grind your flour and measure it out. Place it into a medium sized bowl. Add the crushed walnuts, baking powder, cinnamon, ginger, sugar, and salt.
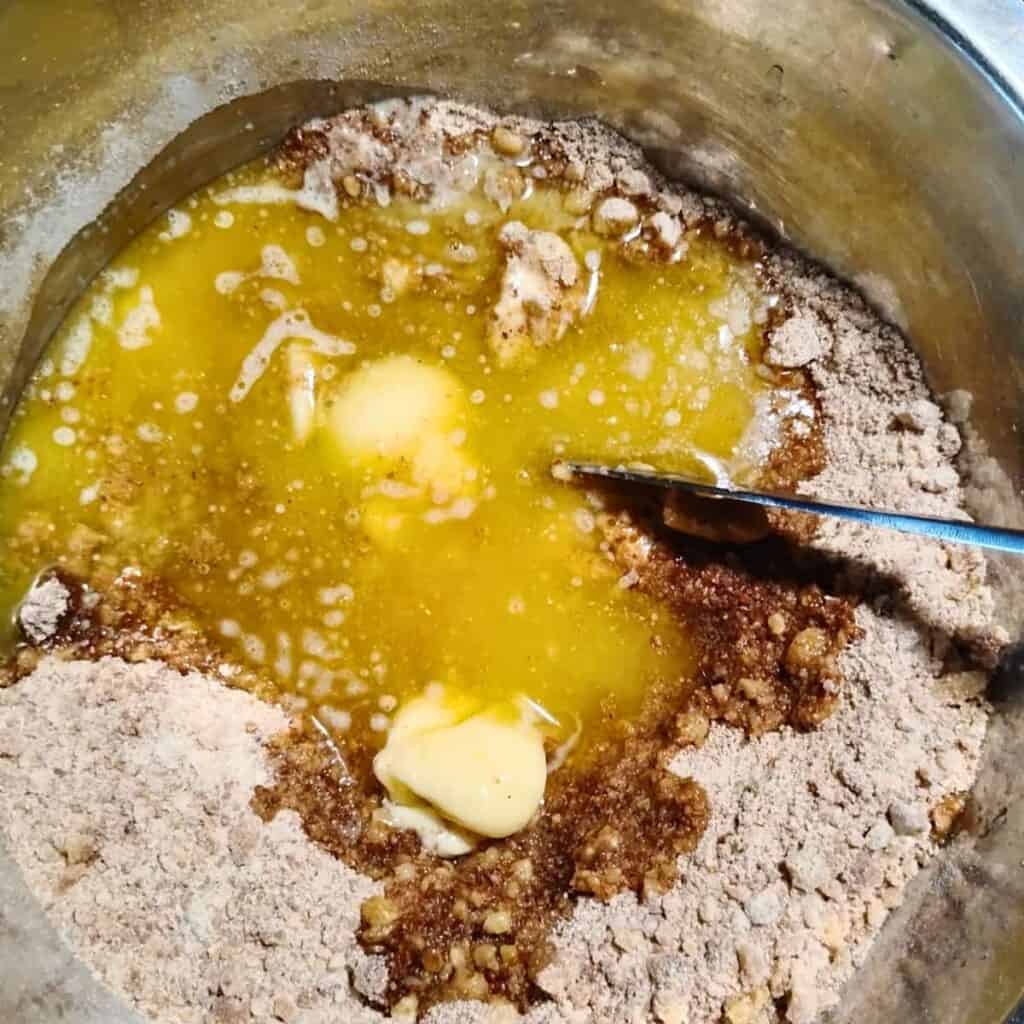
Dump the melted butter into the flour mix and mix well. Make a little well in the center.
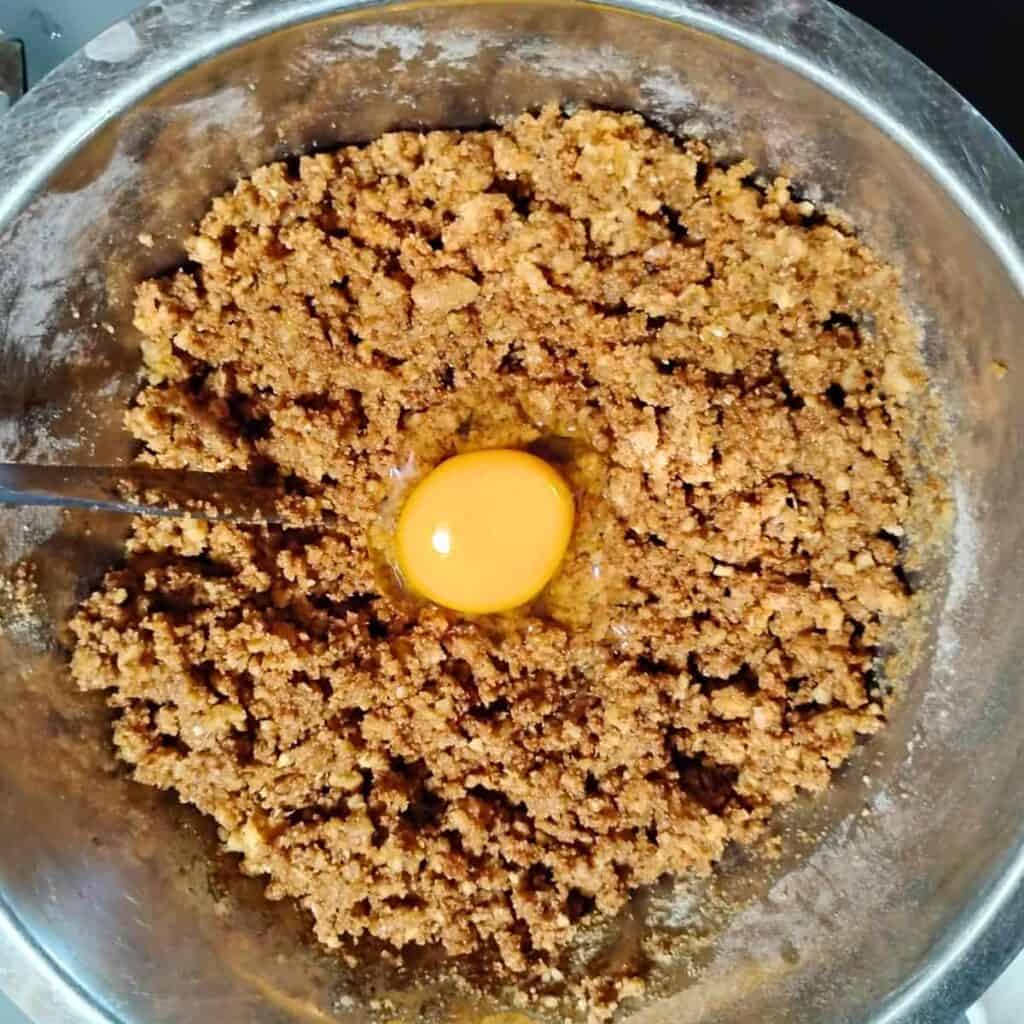
Add the egg to the well in the flour, and here I use a knife or fork to just break up the egg a bit before mixing it into the rest of the dough. Incorporate everything and set it aside for a few minutes so the flour can absorb the wet ingredients and fat.
Prepare the Cheesecake Layer
For the cheesecake layer you can either use a hand mixer if you have quark cheese, cream cheese or yogurt. Otherwise use a high speed blender to really break up the curds of cottage cheese, ricotta, and queso fresco. I used a blender today with my quark cheese, but normally I don’t.
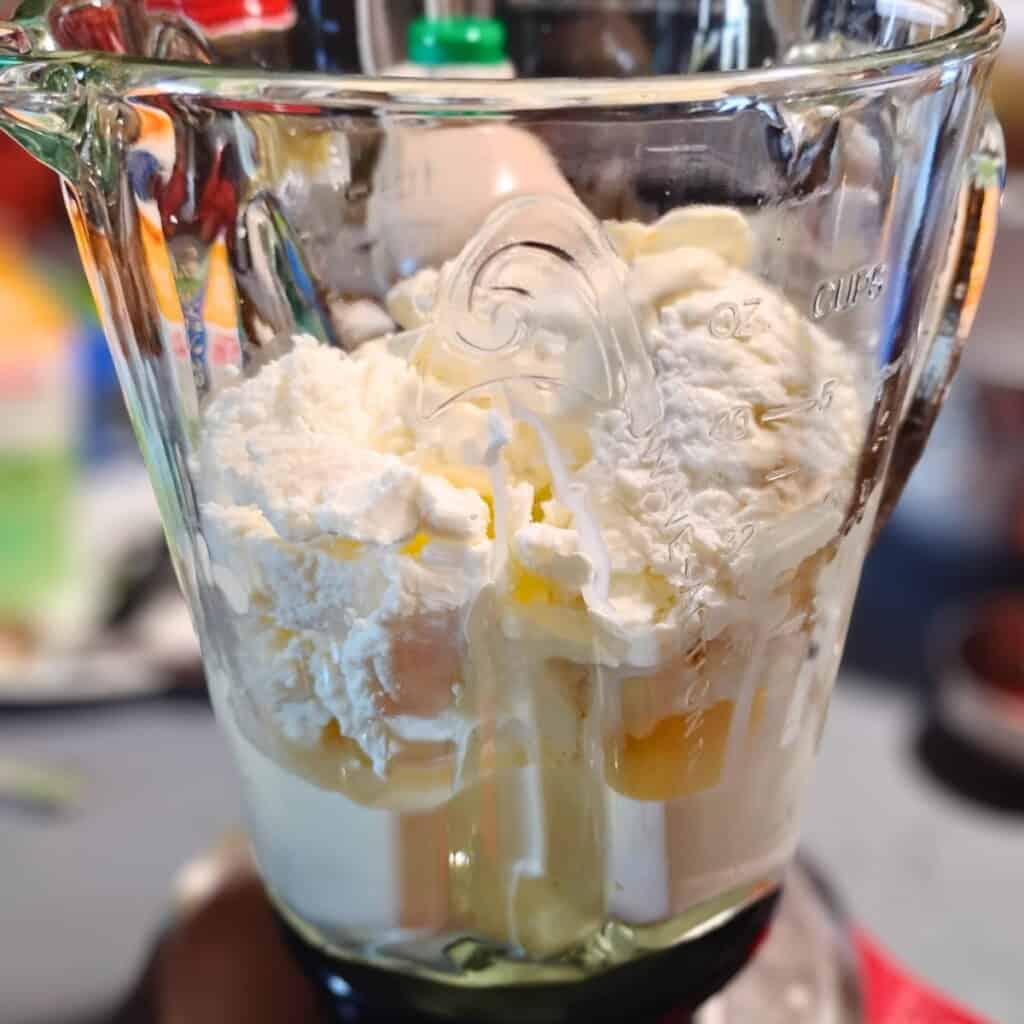
First add the maple syrup, heavy cream, eggs, vanilla, starch, lemon juice and zest, and salt. Dump the cheese in and start blending.
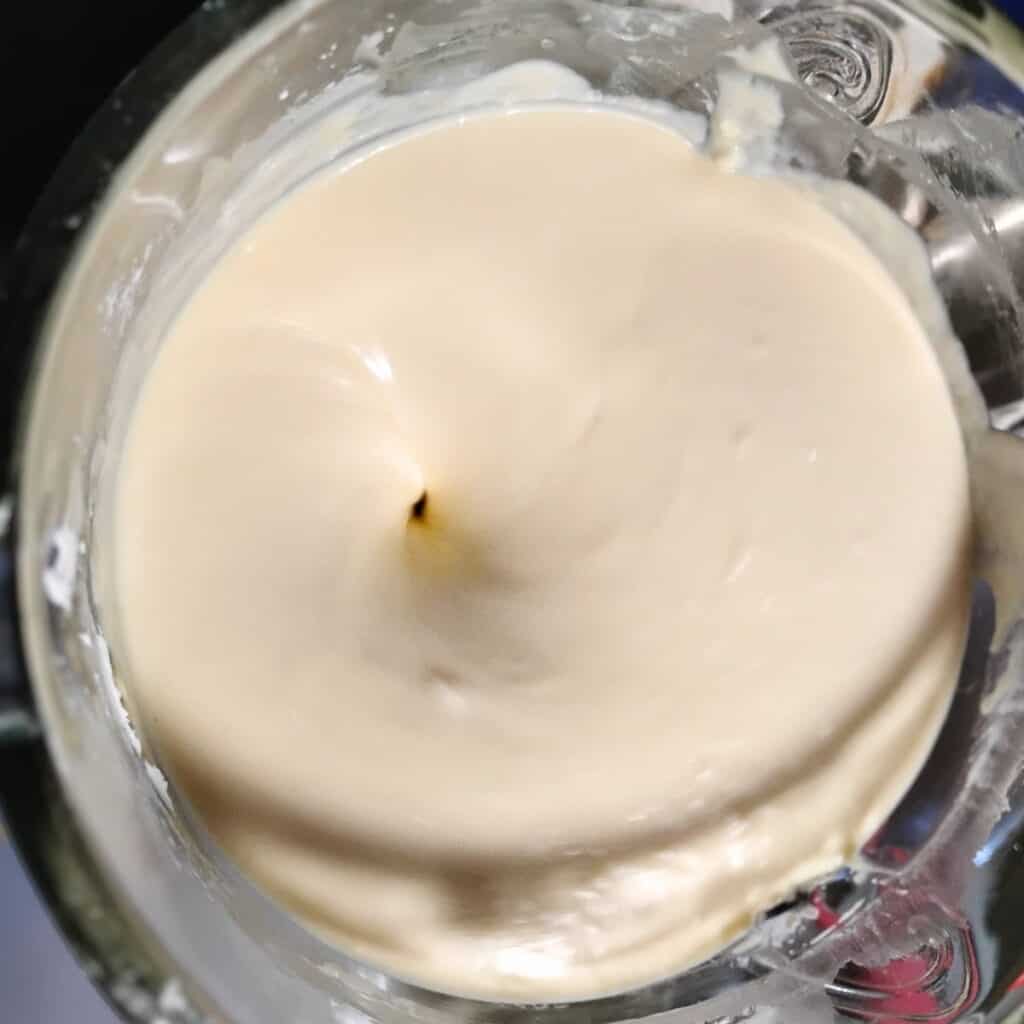
Blend until you’ve eliminated all lumps and all the ingredients are incorporated.

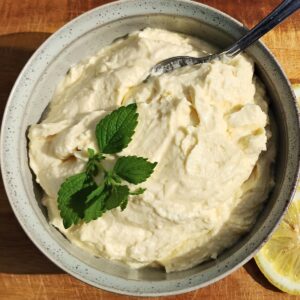
Quark cheese and cream in a bowl for mixing with a hand-mixer.
If you’re using a hand mixer instead of the blender, mix the cheese and cream first, making sure to break up all the lumps, then add the rest of the ingredients
Assembly
Grease your baking pan.
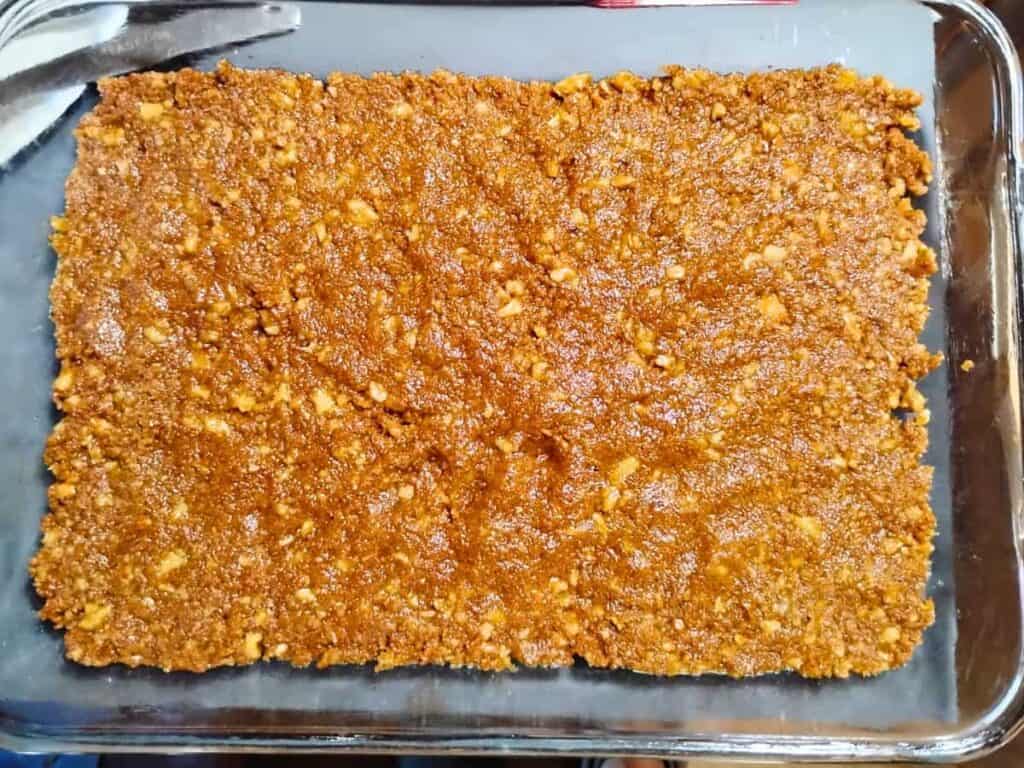
Take half of the crust mix and evenly press it into the baking pan bottom. I use a measuring cup to press down on it, or you can use a glass with a flat bottom to get it more even.
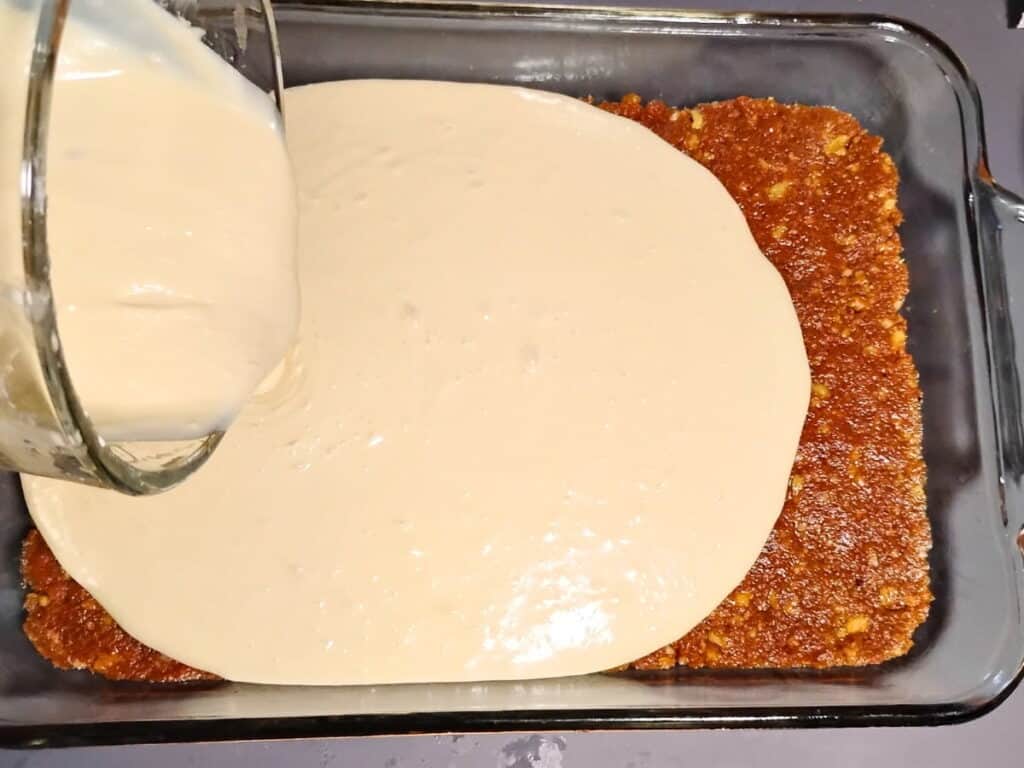
Pour your cheesecake filling over the crust.
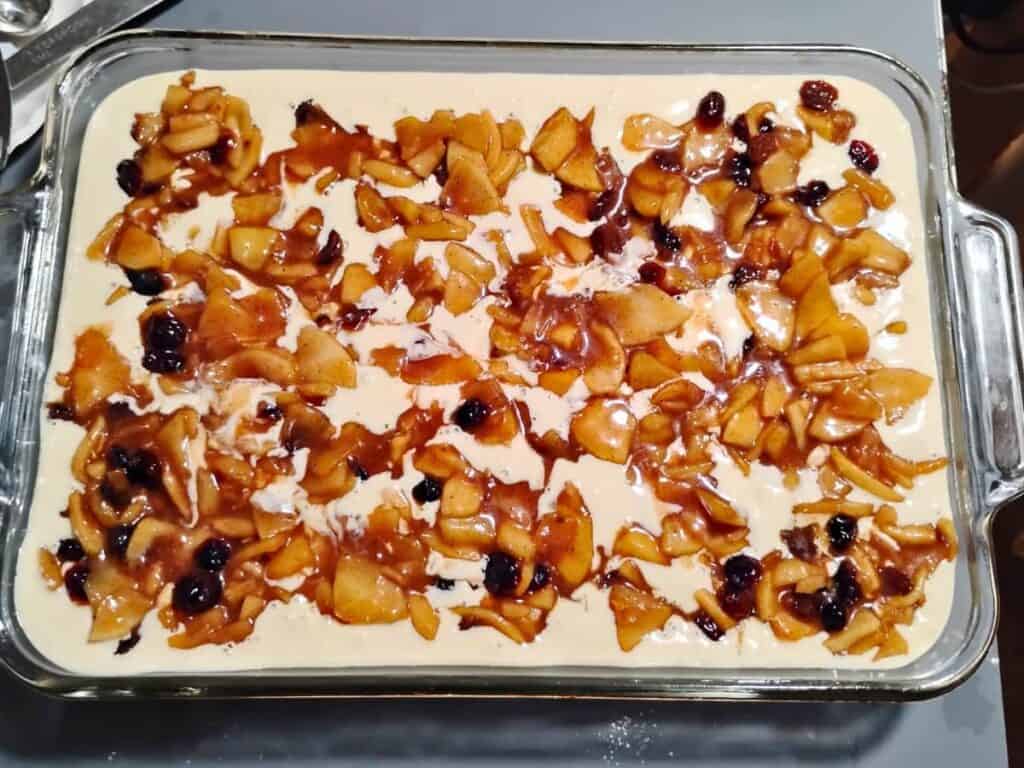
Spoon the apple pie filling over the cheesecake layer evenly. If you blended your cheesecake ingredients, the consistency will be runny and the apple pie filling will sink, so just be sure to distribute your spoonfuls evenly. Don’t mix it.
If you’ve used the hand mixer, you’ll get a bit thicker cheesecake and your apple filling will likely stay on top. If you’d like it to sink a little, just use a spoon to gently lift up on the cheesecake layer in a few places to allow the apple pie filling to sink. Do as you prefer.
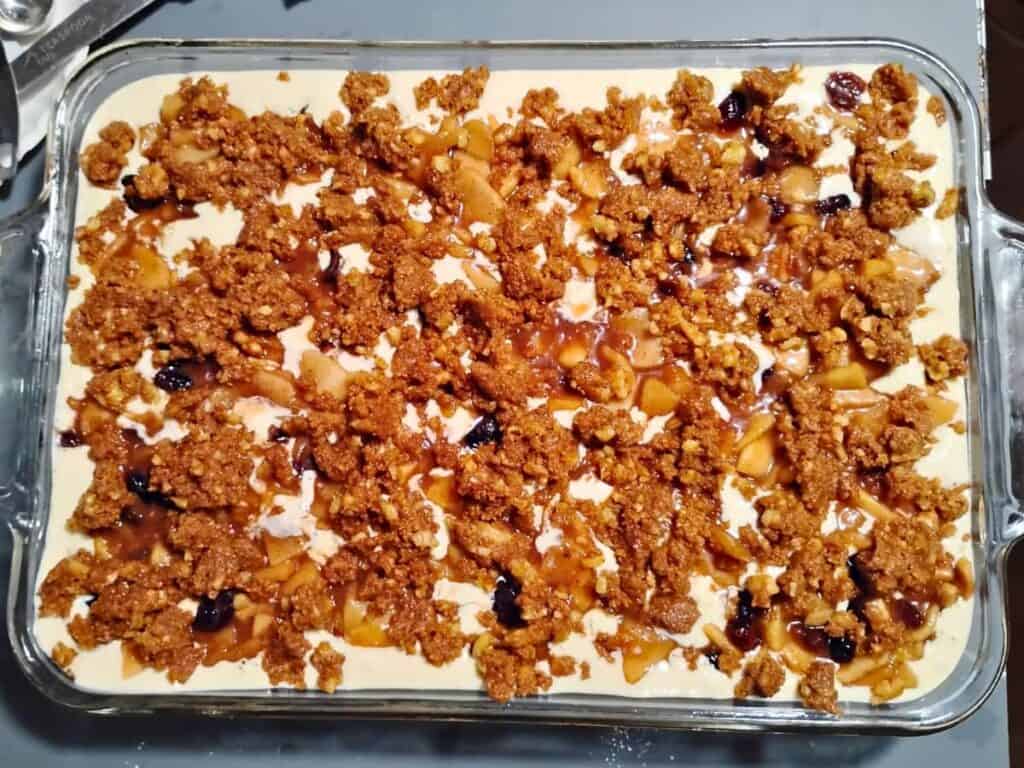
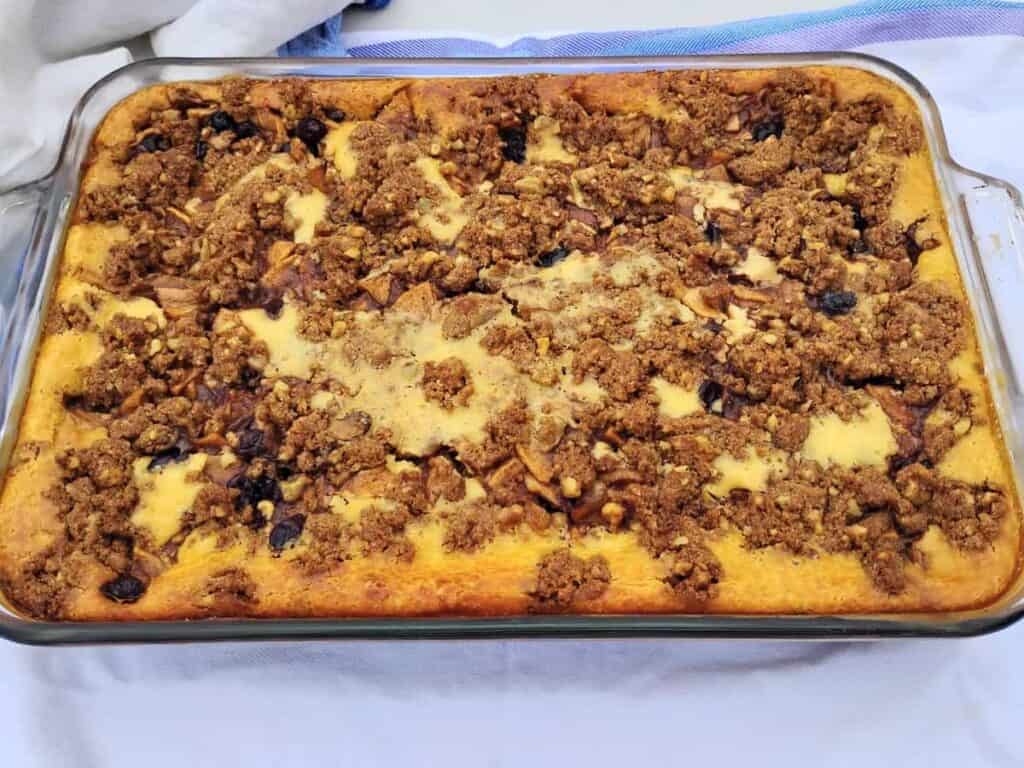
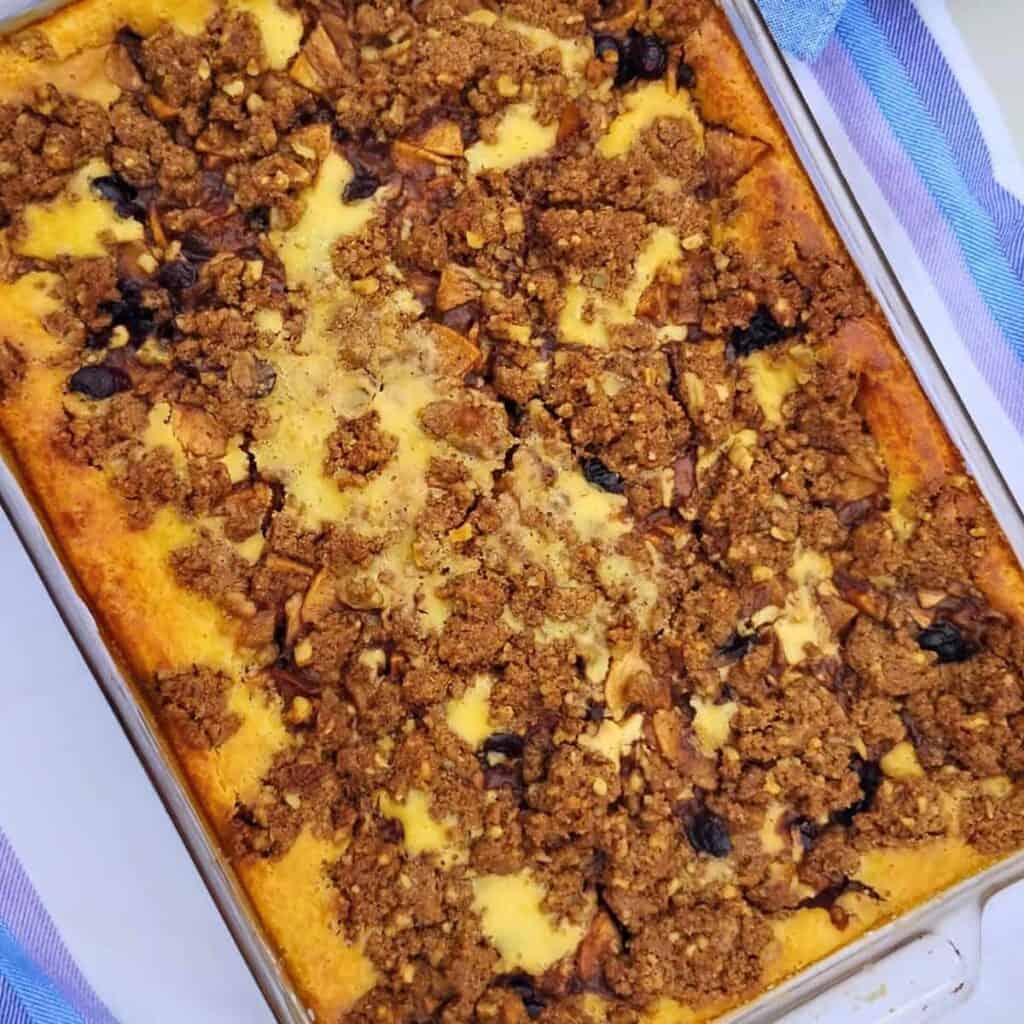
Take the rest of the crust mix and crumble it evenly over the top.
Bake at 350 degrees for 60 minutes or longer if needed. You’ll want to bake it fairly low and slow. Test for doneness by pressing on the center. Once it resists pressure, it’s done.
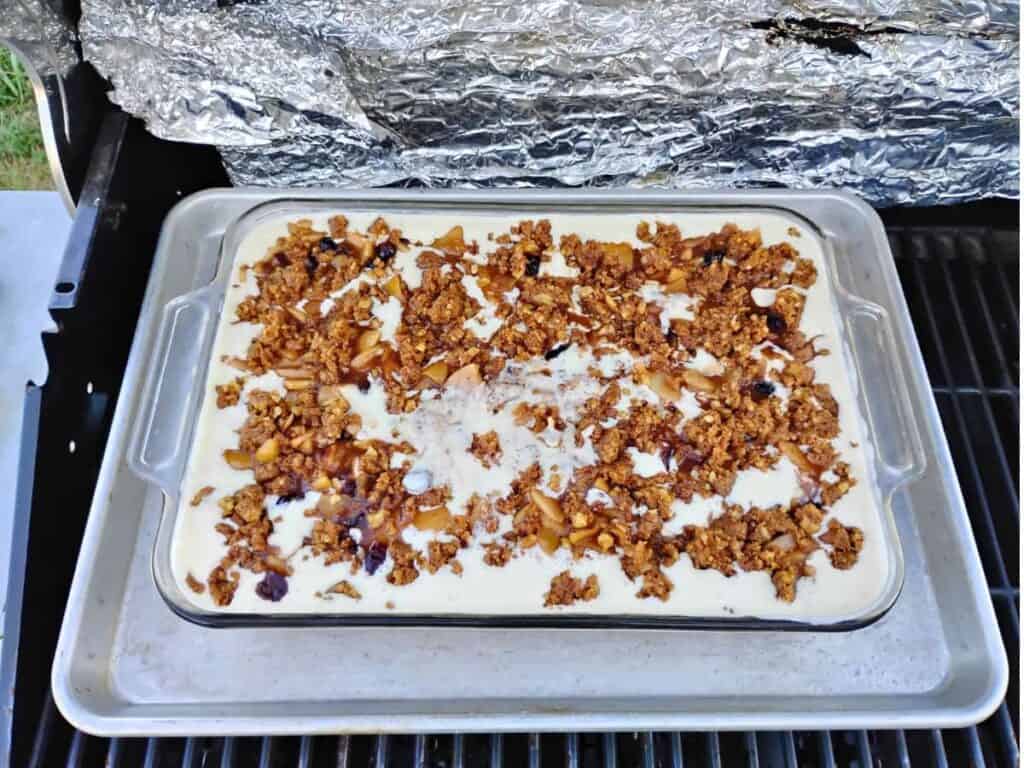
If you’re cooking this cake on the BBQ, note that it took about an hour and a half in my grill. If I turn the burners too high everything burns, so my temperature is probably less than 350 with two burners on, using the low setting. I set the baking sheet on a cake ring and put my cake baking dish on top to get a little bit of distance from the burners.
Once the cake is done, turn off the oven and open the door a crack. Leave your apple cheesecake in the oven with the door cracked open for half an hour or so to cool.
After that, place it on a rack to finish cooling and then refrigerate, or eat some right away, yumm!

You can eat it at any point, it tastes great warm, but I like mine chilled for a few hours.
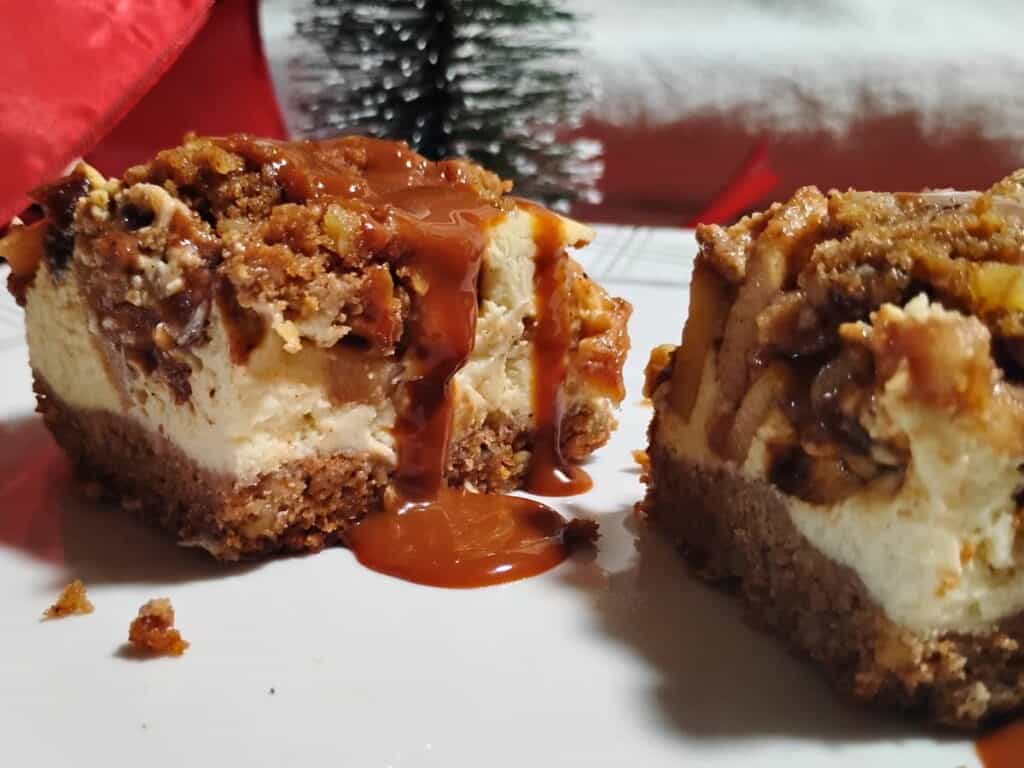
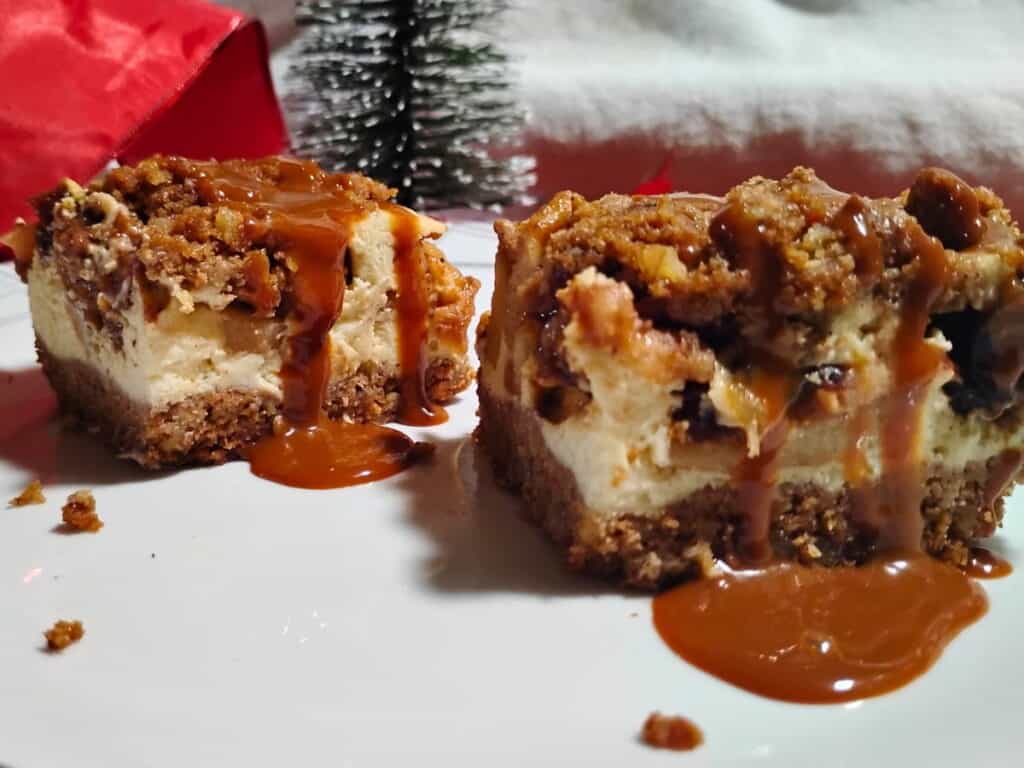
If you’re serving it for a fancy occasion or for the holidays, you can drizzle the top with caramel sauce, cajeta, or a maple glaze. Here I used cajeta (goat’s milk caramel). Now you’ve got caramel apple pie cheesecake 😊!
This cake will keep for a week and still be really good, but I think it tastes best for up to 4 days. Freeze portions of it wrapped tightly in cling wrap and foil or in a freezer dish. It will keep for a few months this way. Defrost in the refrigerator.
Tips for Making The Awesomest Apple Pie Cheesecake
How To Make A Layered Cake
To make a layered cake, you will need to make a firm filling. Here are some tips for doing this:
- Use cream cheese, Greek yogurt, queso fresco, or quark cheese that has been well drained. Cottage cheese might work if you wash the curds and drain it really well. I don’t think ricotta cheese would work for this, it’s just too soft.
- Use a hand mixer instead of the blender if possible, it will help keep the cheese more firm.
- Separate your eggs and blend the egg yolks into the cheese base, but whip the whites separately till very firm. After mixing all the other ingredients, gently fold your stiff whites into the batter. This should yield a slightly firmer texture overall.
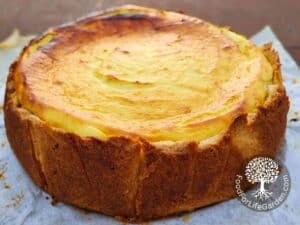
- Use a smaller sized pan with high sides (I used a 8×10 deep dish, which worked great, or you can use a 10″ spring form. Line the bottom with parchment paper.
- When layering, press about 2/3 of your crust into the bottom of the pan. If you’re using a spring form, you can go up the sides too for a nice presentation once the sides are removed.
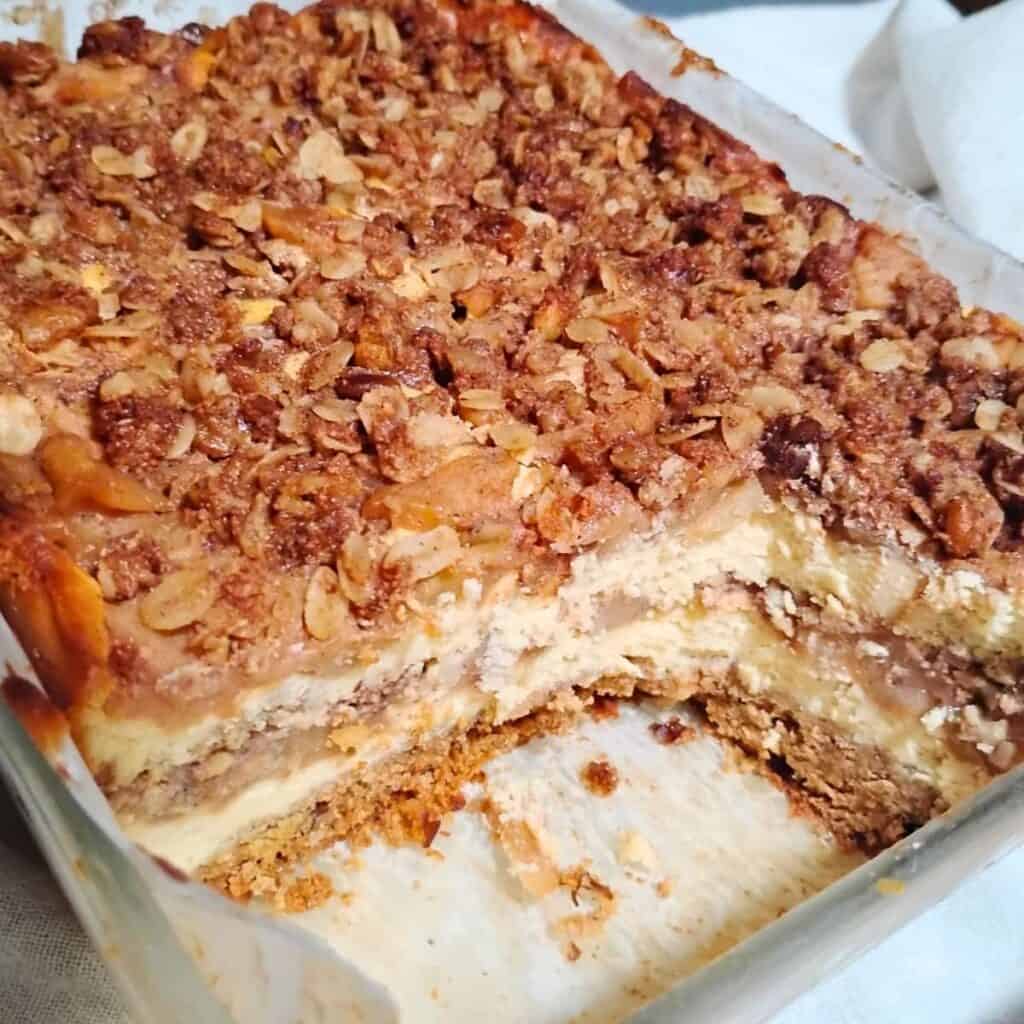
- Spread half of the cheesemix over the crust, then half of the apple filling, half of the remaining crumbles and repeat.
- This will take longer to bake. Just keep an eye on it and cover with aluminum foil if it gets too dark on top before it’s done. Press the middle to check for doneness. You should feel resistance.
- Chill for several hours before cutting into it.
Variations
Serve with a caramel sauce or cajeta (goats milk caramel) to make a caramel apple pie cheesecake.
Make a maple glaze and drizzle over the whole pan if you’re serving it as bars at a party or potluck. Whip 3 Tbsp melted butter, 1/2 cup powdered panela sugar or evaporated cane sugar (use a coffee grinder), 3 Tbsp maple syrup, and a pinch of salt. Add a little more cinnamon if you like.
Use raisins instead of cranberries if you like.
Replace the walnuts with oatmeal if you can’t eat nuts. Or if you like different nuts, try it with pecans or chopped hazelnuts.
Toast your nuts before crushing to make them more flavorful.
Use fresh cranberries instead of the dried if you can get them, just increase the amount a little to your liking, up to 1 1/2 cups.
Enjoy This Amazing Apple Cheesecake Recipe
You’ll be so glad you made this apple cheesecake! It’s super delicious and real treat without sacrificing your healthy food goals. You’ll get an awesome mix of flavors from the apples, cinnamon, walnuts and cranberries, all enveloped by the creamy cheesiness of the cheesecake layer. Wow, what’s not to love?
This is plenty sweet in my opinion, but it doesn’t suffer from getting a thin drizzle of maple glaze for a special occasion or use just plain maple syrup or cajeta if you really need it a bit more sweet and for a caramel apple flavor. This is the ultimate fall and holiday dessert, but hey, if you want some healthy indulgence any time, I won’t try to talk you out of it. Right now, I am savoring mine in the middle of a hot spell in August. Yes, life is good…
I’d love to hear about it if you get to make this delicious apple cheesecake. And tell me, what’s your favorite apple dessert? And please don’t hesitate to ask in the comments if you have any questions!
Join the Food For Life Garden Community for more great recipes and homestead tips and ideas. I’m always adding new content. Don’t miss any new posts and learn more about my off-grid farm life.
Other Recipes You Might Like
Make German Quark cheese – Make authentic German Quark, also called Topfen. A versatile fresh, soft cheese that is a staple in German cooking.
Make Cheese With Sourdough Starter from scratch. No raw milk required!
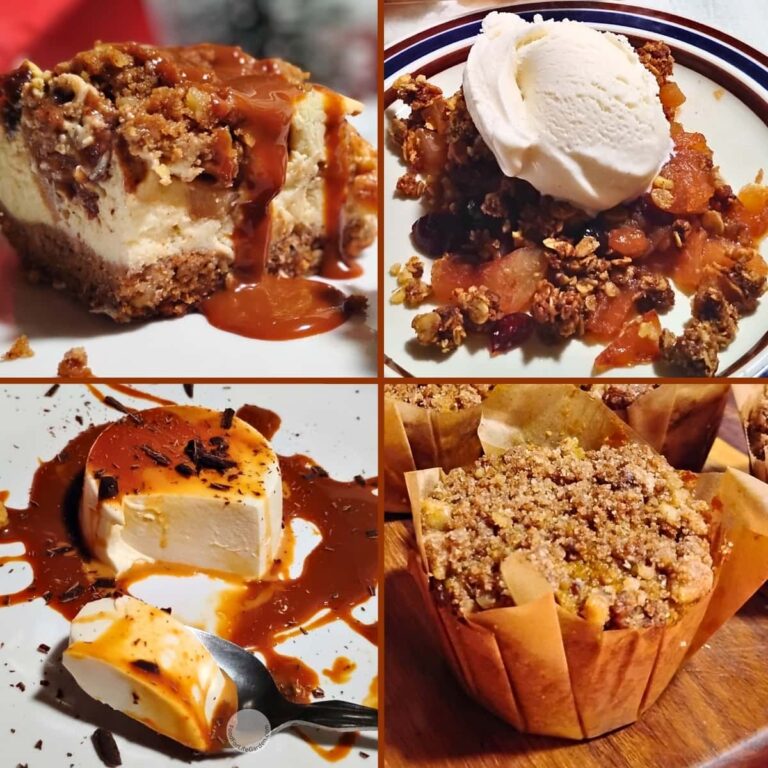
Ginger Spice & Cranberry Healthy Apple Crisp – This most delicious, comfy and cozy fall and holiday dessert will warm you up on a chilly day and fill your home with the delightful scents of apples and spice and everything nice.
Linzer cookies – Delicious sandwich cookies with a cute peekaboo window, revealing the filling. Perfect for any or no occasion!
Sourdough Pumpkin Apple Ginger Muffins – A fantastic fall breakfast muffin, full of wholesome goodness to start your days on a healthy foot during cold and flu season.
Sourdough Pumpkin Cake with Apple, Ginger and Pecan Streusel – Super delicious breakfast cake, coffee cake or teatime cake. Or a great snack for any time. Cozy fall flavor!
Vanillekipferl are delicate German almond and vanilla crescent shortbread cookies, a favorite to bake for Christmas cookie platters.
Zitronenherzen (Lemon Hearts Cookies) – Try these delightful gluten-free iced almond and lemon hearts cookies, for Christmas cookie plates, gifting, and perfect for Valentine’s day too!
Healthy Cranberry Orange Salad Or Sauce – The ultimate, incredibly delicious, cranberry sauce or molded salad to serve as a side with Holiday dinners. It’s great for dessert too served with probiotic Panna Cotta.
Probiotic Panna Cotta – Serve this delicious clabbered and congealed cream dessert with your favorite berry sauce or with cranberry orange sauce.
Blackberry Cheesecake Streusel Bars – A must make dessert for blackberry season. Creamy, easy, and berry delicious!
Preserved Lemon Confit – Preserving lemons is not just a great way to add storage life to citrus, and it transforms the humble lemon into a delicacy. Great for flavoring beverages too!
Probiotic Ginger Paste – A convenient way to have ginger on hand when you need some, either as seasoning in cooking or baking, or to use this powerful ally in your daily health routine.
Queso Fresco cheese recipe – The quickest, easiest cheese you’ll ever make and so versatile!
Lemon Blueberry Cheesecake Bars – Creamy, with a buttery crust, this cheesecake dessert is bright, tangy, easy, and perfect for summer gatherings, or any sweet cravings!
Creamy Quark Dessert With Oranges – Use unsalted queso fresco in place of quark cheese a delicious German dessert, a creamy, luxurious mousse, healthy enough for every day desserts, but fancy enough for special occasions.
Classic German Cheesecake (Käsekuchen) – How to make an incredibly delicious German cheesecake using Quark. Must try this!
Pin This Recipe For Later
Shop This Post
Grain mill
Blender
Vitamix
10″ round springform
Spatula
Hand mixer
Scale
3 qt saucepan
Maple syrup
Honey
Panela sugar
Evaporated cane juice
Coconut sugar
Redmond’s real salt
Himalayan pink salt
Celtic sea salt
Organic vanilla on Amazon
Organic vanilla extract from Azure Standard
Einkorn berries
Einkorn flour
To Make Apple Cheesecake Bars
Equipment
- A few bowls
- 3 qt saucepan
- Scale – optional but highly recommended.
- Blender. – used for processing cottage cheese, ricotta and queso fresco, you'll need it to break up the curds.
- Hand mixer – used for processing quark cheese, yogurt, or cream cheese.
- Baking pan – You could make this in a 10″ round spring form, or a 8×10″ rectangular dish for a taller cake, and make it more festive using layers. But I prefer making this as single-layer bars in a 9×13″ baking dish with deep sides. It’s easier to eat that way and you can make smaller snack sized portions easily. For tips to make a deep layered cake, please read the notes at the end.
Ingredients
Apple Pie Filling
- 2 lbs apples (Granny Smith or other tart and sweet variety) – peeled, cored and chopped or sliced
- ¾ cup dried cranberries or 1 ½ cups fresh. I used applejuice sweetened dried cranberries.
- 2 tbsp lemon juice
- ¼ cup maple syrup
- 2 tbsp butter – salted or unsalted, but omit the extra salt if using salted butter.
- 4-5 tsp arrowroot flour or corn starch – if your apples aren't very juicy, you might just need 4 tsp or add a few tablespoons more water if it gets too thick. For fresh cranberries use the 5 tsp, if dried use 4 tsp.
- ¼ cup water
- 2 tsp cinnamon
- ½ tsp nutmeg
- ½ tsp cardamom optional
Crust/Topping
- 220 g walnuts (about 2 cups) – finely chopped or crushed.
- 280 g einkorn flour (about 2 ½ cups) – This volume measurement is for fresh milled einkorn flour. If you're using all-purpose or pre-milled flour in a bag, I'd use only 2 cups to start. Add more later if necessary.
- 2 tsp baking powder
- 1 tbsp cinnamon
- 2 tsp fresh grated ginger – or 1 tsp dried powder
- ⅔ cup panela sugar – or coconut sugar.
- 1 cup butter (2 sticks)
- ½ tsp Redmond real salt
- 1 egg
Cheesecake Layer
- 500 g quark cheese (2 cups) – or choose one of the substitutes listed in the notes
- 240 g heavy cream (1 cup)
- 100 g maple syrup (1/3 cup)
- 3 large eggs – 4 small
- 2 tsp vanilla extract
- 4 tbsp arrowroot flour or cornstarch
- 2 tsp lemon zest – or preserved lemon paste
- 1 tbsp lemon juice
- Pinch mineral salt
Instructions
Apple Cheesecake Bars Instructions
- First you'll want to get the apple pie filling started and while that is cooking, you'll have plenty of time to work on the rest of the recipe.
Apple Pie Filling
- Peel and core the apples and if your apples were unsprayed, you can save the scraps to make vinegar. Chop or thinly slice the apples and add them to the saucepan. Toss with the lemon juice as you go to keep them from browning.
- Make a slurry with the arrowroot and a quarter cup of water. Mix well to eliminate any lumps, and add to the apples in the pot.
- Add all the other filling ingredients: maple syrup, butter, cinnamon, starch, cranberries, and spices.
- Place on a burner and heat on gentle heat to a simmer. Stir occasionally, especially in the beginning, and simmer for 30 – 45 minutes or until the apples are soft. After the first 20 minutes, add the cranberries. My apples took 45 minutes. Don't let them get mushy.
- Take the pot from the burner, uncover and let cool for a few minutes before adding it to the cake.
- While the filling is cooking, prepare the rest of the ingredients.
Prepare The Crust And Topping
- Preheat the oven to 350 ℉
- First, take all the butter out of the fridge to melt it for the topping and crust. Melt in a small metal bowl or saucepan on the stove on very low. Once melted, remove and let it cool a bit before adding it to the rest of the ingredients.
- Grind your flour and measure it out. Place it into a medium sized bowl. Add the crushed walnuts, baking powder, cinnamon, ginger, sugar, and salt.
- Dump the melted butter into the flour mix and mix well. Make a little well in the center.
- Add the egg to the well in the flour, and now use a fork to just break up the egg a bit before mixing it into the rest of the dough. Incorporate everything, knead for a minute, and set it aside for a few minutes so the flour can absorb the wet ingredients.
Prepare the Cheesecake Layer
- For the cheesecake layer you can either use a hand mixer if you have quark cheese, cream cheese or yogurt. Otherwise use a high speed blender to really break up the curds of cottage cheese, ricotta, and queso fresco.
- First add the maple syrup, heavy cream, eggs, vanilla, starch, lemon juice and zest, and salt.
- Dump the cheese in and start blending. Blend until you've eliminated all lumps and all the ingredients have turned into a smooth batter.
- If you’re using a hand mixer instead of the blender, mix the cheese and cream first, making sure to break up all the lumps, then add the rest of the ingredients
Assembly
- Grease your baking pan.
- Take half of the crust mix and evenly press it into the baking pan bottom. I use a measuring cup to press down on it, or you can use a glass with a flat bottom to even it out.
- Pour your cheesecake filling over the crust.
- Spoon the apple pie filling over the cheesecake layer evenly. If you blended your cheesecake ingredients, the consistency will be runny and the apple pie filling will sink, so just be sure to distribute your spoonfuls evenly. Don’t mix it.
- If you’ve used the hand mixer, you’ll get a bit thicker cheesecake and your apple filling will likely stay on top. If you’d like it to sink a little, just use a spoon to gently lift up on the cheesecake layer in a few places to allow the apple pie filling to sink. Do as you prefer.
- Take the rest of the crust mix and crumble it evenly over the top.
- Bake at 350 degrees for 60 minutes or longer if needed. You’ll want to bake it low and slow. Test for doneness by pressing on the center. Once it resists pressure, it’s done.
- Turn off the oven and open the door a crack. Leave your apple cheesecake in the oven for half an hour or so to cool.
- You can eat it at any point, it tastes great warm, but I like mine chilled for a few hours.
- If you’re serving it for a fancy occasion, you can drizzle the top with caramel sauce, cajeta, or a maple glaze.
- This cake will keep for a week in the refrigerator and still be really good, but I think it tastes best for up to 4 days. Freeze portions of it wrapped tightly in cling wrap and foil or in a freezer dish. It will keep for a few months this way. Defrost in the refrigerator.
Notes
Substitutions For Quark Cheese
If you’re not into making your own quark cheese, here are a few dairy products that work as substitutes. Cottage cheese – Use a full fat, small curd cottage cheese with this recipe. It’s best to wash the curds and drain it well, but you can use it as is too, however, your cheese mix will be very runny. Ricotta cheese – If your ricotta cheese is a bit wet, you can drain it first for a better cheese consistency. But it works either way. Greek yogurt – Use the full fat, unflavored version. Cream cheese – Cream cheese will make a very dense and heavier cheesecake, but you can definitely use it. I’d mix it half and half with the Greek yogurt for a bit of tang and a similar consistency to quark cheese. Queso fresco – This is another homemade cheese, but it’s super quick to make. I’ve got instructions on my queso fresco cheesemaking page for that. You’ll need just milk and vinegar or lemon juice and it takes 15 minutes to make and about half an hour to drain. Done!Tips for Making The Awesomest Apple Pie Cheesecake
How To Make A Layered Cake
To make a layered cake, you will need to make a firm filling. Here are some tips for doing this:- Use cream cheese, Greek yogurt, queso fresco, or quark cheese that has been well drained. Cottage cheese might work if you wash the curds and drain it really well. I don’t think ricotta cheese would work for this, it’s just too soft.
- Use a hand mixer instead of the blender if possible, it will help keep the cheese more firm.
- Separate your eggs and blend the egg yolks into the cheese base, but whip the whites separately till very firm. After mixing all the other ingredients, gently fold your stiff whites into the batter. This should yield a slightly firmer texture overall.
- Use a smaller sized pan with high sides (I used a 8×10 deep dish, which worked great, or you can use a 9-10″ spring form. Line the bottom with parchment paper for easy removal.
- When layering, press about 2/3 of your crust into the bottom of the pan. If you’re using a spring form, you can go up the sides too for a nice presentation once the sides are removed.
- Spread half of the cheese mix over the crust, then half of the apple filling, half of the remaining crumbles and repeat, ending with crumbs.
- This will take longer to bake. Just keep an eye on it and cover with aluminum foil if it gets too dark on top before it’s done. Press the middle to check for doneness. You should feel resistance.
- Chill for several hours before cutting into it.
The perfect cozy recipe for fall!
Thanks so much, Alisha! I appreciate your comment and yes, I had fall in mind when I created it.
Oh boy, this looks absolutely spectacular!! I wish I had all the ingredients on hand and I could make it right now while my baby sleeps lol. Thanks for sharing this delicious treat 🙂
You’re welcome, Marta! I hope you get to try it! 😊
Holy moly this looks phenomenal!! I can’t wait to try it! I love how you break everything down with clear instructions. This may be my new fall favorite dessert! Thanks for sharing!
This looks delicious! I can’t wait to try it this fall.
All of my favorite desserts in one!? I love this!
Ha, right?! That was my thinking!
This is going on my fall list! Looks delicious! I love cheesecake and apples, but I have not yet had them together. Sounds like a match made in heaven!
I’m thrilled you want to give this a try. I think you’ll love it! I think it’s a great combination!
Beautiful layers. A perfect fall treat!
Thank you Laura!
Ohhhhh wow!! Total Fall vibes going ononThese bars look amazing!
Thanks, Penny!
This looks amazing! This is going on my list for fall baking!
How Awesome, Julie, thank you! I hope you’ll love it!
This is a perfect recipe for cozy season! Love this! Saving for later!
It’s pure comfort food! Hope you get to try it!
Two of my all time favorites combined, will be making this one for sure!
That’s awesome, Nikki, I’m glad you want to give it a try, and I’m sure you’ll love this!
Anooooother cheesecake recipe? Yes please!
I am 100% making one of these by the end of the year.
Haha, yes, we love cheesecakes around here. I do hope you’ll get to try one. They are all delicious!
I love your recipes! I have this one saved and hope to make it this coming week! Looks so delicious!!
Thanks Mara! This is super tasty, I hope you’ll get to make it and that you’ll love it as much as I do!
Oh nooo haha if it’s a cheesecake I already know I’ll like it but this one… You put every single good ingredient possible 😍 maple, apples, cranberries!! I really wish I had more time to try all your cheesecake recipes!!
I love your feedback, Ophelie! Thank you so much for that!