Fermented Ginger Paste with probiotics is preserved for long-term storage. Convenient whenever you need it, for health or as a seasoning!

This post contains affiliate links, which means I make a small commission at no extra cost to you if you click through and make a purchase. See my full disclosure here.
Here you’ll learn how to make a fermented ginger paste from the ginger rhizome, which you can store right in your fridge for whenever you need some. Use it either for health reasons or as a seasoning in cooking and baking. Fermentation not only helps it store for a long time, but it improves the benefits and properties of ginger and adds probiotics. It’s the only way that I store ginger long term, and in my humble opinion, it’s the best way!
Here are some ideas for using your ginger paste: I like it in recipes like Lemon Tahini Cookies, Zucchini Bread, Sweet Potato Bread, Sourdough Pumpkin Cake, Sweet Potato Spice Cookies, Apple And Ginger Muffins, and the like. For more Ginger recipes try making Fermented Ginger Honey for cold and flu season and make your own Ginger Beer, with a Homegrown Ginger Bug!
- Homemade Fermented Ginger Paste:
Homemade Fermented Ginger Paste:

Ginger paste is an essential ingredient in traditional Asian cuisine where we find it for example in Indian, Chinese, Thai, and Japanese dishes, but it should have a prominent place in any kitchen.
Ginger has so many health benefits! I listed those recently in the Fermented Ginger Honey post, be sure to check it out! But it’s also incredibly flavorful and makes a great seasoning for savory and sweet dishes.
Have you ever bought a hand of ginger, used a bit of it for a recipe and then left the rest in the fridge, only to discover that it has grown a blue beard by the next time you went to use it?
I know I have! Ginger stores for quite a while in a lightly damp paper bag in your refrigerator. But if you want to preserve it for a few months, why not grind, chop or grate it and ferment it. Then you’ll have it all ready to use in recipes any time you need some.
You might also be interested in growing your own ginger, it’s fun, easy, and rewarding and your ginger will be more potent when freshly harvested!
Ginger is a powerful ally for your health!
If you’re like me and have joint ailments, or if you have other health problems that can be helped with ginger, this is the perfect way to have it on hand so it’s convenient to use in your daily health regimen.
While all parts of the ginger plant are edible, we don’t usually find the leaves available in stores. They have many of the same benefits as the rhizomes. But the leaves are a bit tough for eating.
However, if you do come accross some, they can be chopped and used in stir fries or the bases can be pickled. And they can be used as a tisane or herbal tea. Here we are discussing the rhizome, which is sometimes referred to as the root.
You can refer to my posts Fermented Ginger Honey or Health Benefits of Ginger Beer to find out more about the many benefits of ginger for your health, as well as in my post to make fire cider.
Ginger is a powerful antioxidant and anti-inflammatory. It can help with joint pain such as that associated with arthritis, and pain as in menstrual cramps.
It can relief morning sickness and motion sickness, digestive issues, promote heart health and so much more. It’s a power partner for health!
Fermented Ginger paste is super easy to make. And it’s not just a powerful, important herb to have for it’s health benefits. But it’s super versatile and useful in cooking and baking.
This paste is a bit salty, so you’ll need to keep that in mind when you are adding it to dishes or baked goods. You may not need to add extra salt.
Disclaimer: Any material on this site is intended to be for general informational use and is not intended to constitute medical advice, medical diagnosis, or medical treatment. It constitutes my personal opinions and my own conclusions from life-long research and practice of home herbalism. You should consult your physician or other health care professional before making any changes in your diet. Always check with your health professional if you’re pregnant, taking medication, and have medical issues.
What you need to make fermented ginger paste:
Equipment
A Jar for fermenting the ginger paste – My favorite vessels for fermenting are plain wide mouth mason jars or the beautiful and very functional Bormioli Fido Jars. The Fido jars work really well because they do not have to be vented.
This eliminates maintenance during fermentation! In this recipe I used a pint size jar, but you can use any size that makes sense for you or the amount of ginger you have, just adjust the ingredients accordingly. More about that later.
Fermentation lid – While this is not essential for fermenting, and you can totally use a regular canning jar lid, it is super helpful.
When you use Fermentation lids or Airlocks, you can forget about your ferment for a few weeks. They will require no maintenance, unlike with regular lids. So I highly recommend investing in some of these if you’re going to ferment a lot.

Blender, food processor or grater – What you use depends mostly on how you prefer your finished paste consistency. An electric food processor or Manual chopper will finely chop it. So you’ll have a ginger paste with a noticeably granular texture.
Use a fine grater and it will be fairly close to a true paste, but it takes a lot of work to grate up a pint of paste. Therefore, if you want a quantity of a smooth paste fairly quickly, you’ll need to reach for your Blender or Vitamix.
I believe that most Asian people still use a mortar and pestle for grinding the ginger. Here is a suribachi style set that looks just like the one I have.
The reason for using a mortar and pestle is that it breaks down the fibers better and releases more juices and flavor. But I think when you ferment it, it will not matter so much. That’s because the juices are drawn out by the salt. And everything will become broken down by the microbes that cause the fermentation.
Pickle packer (optional but very helpful) – If you’ve followed me for some time, you’ll know that I love my Acacia wood pickle packer. It’s super useful for pounding the paste to coax out the juices and to press the paste into the fermentation jar.
Use some sort of tamper if you don’t have a pickle packer. I’m thinking that a tamper from a food processor will work ok. Or maybe a well sanded piece of 2×2.
Fermentation weight – Here again, the tools of the trade shine! While you can use a boiled rock, a baggie with salt brine or marbles, a small jelly jar, or an upside down food-save lid that fits, they all present some hassles or are awkward to use.
So I invested in some Glass weights for wide mouth mason jars. And they fit my Fido jar openings pretty good too. I think they are just the best for the job.
Funnel – optional – If you’ve done any canning or fermenting, or if you work with herbs, you’ll most likely have a wide mouth funnel to get ingredients into the jars without making too much of a mess, or spilling your precious ingredients. Another highly recommended optional item.
Scale – optional – Since I’m from Germany, I’ve always owned a Scale. Germans have kind of a reputation for being sticklers for precision and that is no different in cooking. If you’re cooking from a German recipe book, all the ingredients are listed in grams.
And, mostly for the sake of easy scalability, I have adopted the weight method for my fermentation projects too. This way, I can just weigh my ingredients, add the correct amount of salt, no matter how much ingredients I have, and not have to think too hard.
So while you can wing the salt most of the time, I feel that a scale makes it much easier to be consistent, which leads to successful fermenting.
Ingredients

Fresh Organic Ginger – Well, this is the Star of the show! One of my favorite spices! And we’ll be using a little less than a pound of it (about 14 oz) to fill a pint jar.
Make sure you’re getting organic ginger, so your fermentation will succeed, and who wants to eat pesticides, fungicides and radiation anyway. Those chemicals and treatments kill the microbes that we need to cause fermentation and grow your probiotics.
Try to get young ginger that is not too fibrous and don’t peel it, but remove any hard bits and questionable spots. My ginger was getting pretty fibrous, which doesn’t bother me, however, it will not make a super smooth paste. If you can’t find organic ginger locally, you can get it from Azure Standard.
Salt – My recommendation is to use Redmond’s Real Salt or Himalayan pink salt. You can also use unrefined sea salt.
With any salt, read the label! It needs to be free from any additives, and consequently that rules out table salt or any salt with anti-caking agents or added iodine. Careful, because even some kosher salt and sea salt have additives.
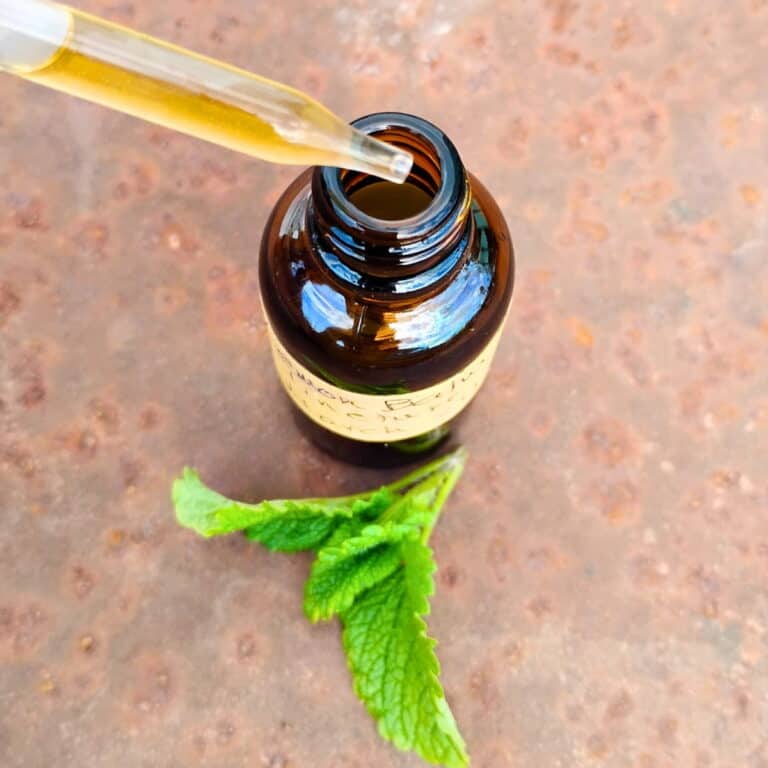
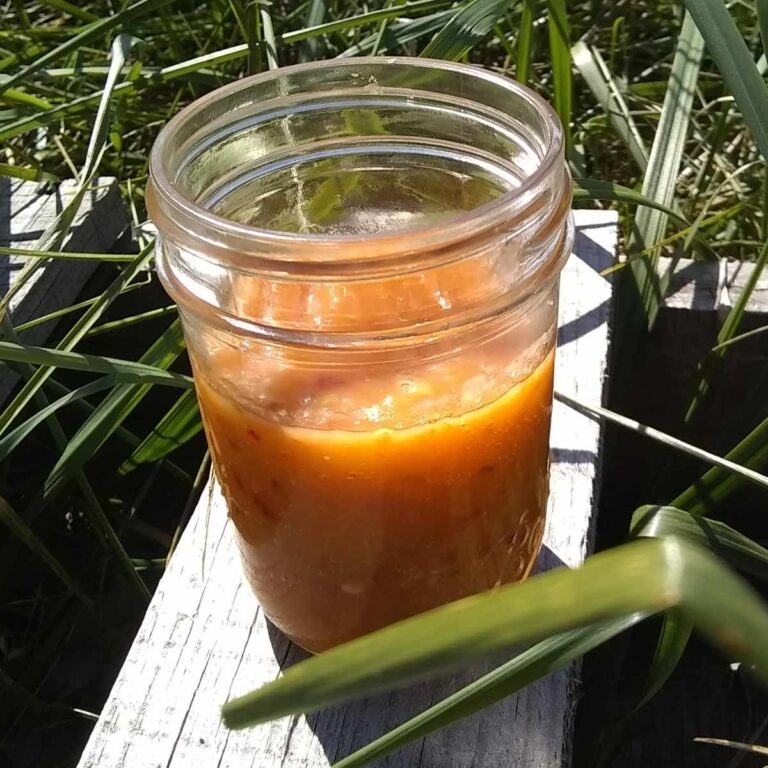
Raw Vinegar with the mother – It’s possible that your ginger paste will be on the dry side when you’re done fermenting. I like to add a few tablespoons of raw vinegar to cover the ginger paste after it’s done fermenting. This is extra insurance to keep it from getting moldy.
Instructions to make fermented ginger paste:
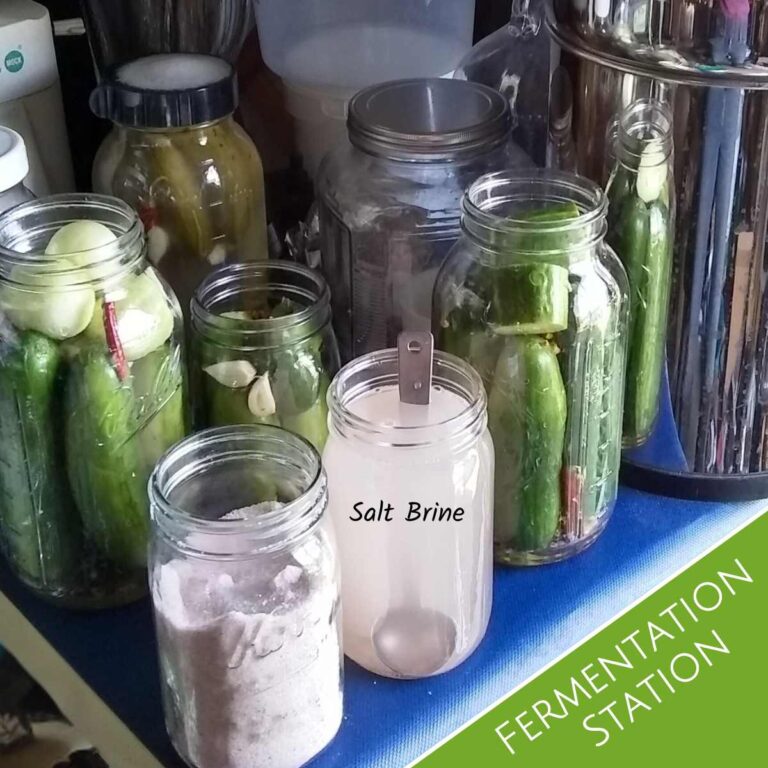
If you’re new to fermenting, and you have some questions or want to dive deeper into the specifics of fermentation, check out my post on Fermented Vegetables.
There you’ll find a pretty comprehensive overview on fermentation in general, what it is, how it works, and the science behind it and it should answer many questions. You can also leave a comment and I’ll be happy to help you get fermenting!
01. Process the ginger
Finely grate your ginger, if you’re using a grater.

Coarsely chop or slice your ginger to add to a blender or food processor. Finely chop if your using a mortar and pestle. Then process your ginger pieces into a finely chopped or smooth paste according to your preference.
02. Measure and add the salt

Weigh your ginger. You should have about 14 ounces of ginger mash to fill a pint jar, but use the gram setting for calculating the salt. Mine was just over 400g. Add 2.5% salt to this (400 x .025 = 10 grams). This is the standard formula for a dry salted fermentation.
You can use a little more or less though. It’s not completely scientific, since many factors play a role in fermentation, but basically, you want it to be enough to coax the juices out from the ginger and preserve the food till fermentation kicks in, but not so much that it inhibits fermentation.
If your room temperature is over 85 degrees for a prolonged time period, adjust to a 3% ratio.
But If you don’t have a scale, you can use the folk method here, which is 1.5 to 2 teaspoons of salt per pint.
03. Mixing the mash
Mix the salt thoroughly with the ginger paste. You can give the two a whirl in your processor or do it in a bowl. Then let it sit for about 10 minutes so the salt can start to draw the juices out. After that use a pickle packer or some type of food grade tamper to work the paste and press out some juices.
If you don’t get a lot of juices, add a little bit of filtered water to make more brine.
04. Packing the jar

With your funnel in the jar opening, scoop the ginger and salt mix into your fermentation jar. Fill to within an inch of the top. You’ll need a little room for expansion here, so don’t fill all the way.

Keep using your pickle packer to pack it in tightly and get the juices to cover the ginger.

05. Weigh down the ingredients

When done, use a glass fermentation weight (or something else) to weigh down the ginger paste so it stays submerged under the brine.
06. Seal the jar

It is ideal if you can cover this jar with a fermentation lid or airlock. Then it will not require maintenance. Likewise, a hinged top Fido jar will also self vent and can be left alone.
Otherwise, cover the jar with a tight fitting 2-piece lid, but don’t tighten it too much, so gasses can escape. Do check on it every day though in case it needs to be burped. You’ll know, because the lid will bulge when the gasses are trapped inside.
Just quickly loosen the band to let the pressure escape and tighten it right up again to keep any oxygen out.
07. Fermenting and Maintenance
Place your jar into a cool, darkish corner somewhere where it can bubble away for a few weeks. Slip a small plate or bowl under it to catch any overflow, just in case. And then just leave it to do its thing.
After 2-3 days it should start to make bubbles and you might see some seepage. Don’t forget to burp the jar daily if you’re using a standard canning jar lid and watch for kahm yeast (a crinkly greyish-white thin layer of yeast, that is not harmful).
You’ll want to skim that off occasionally so it doesn’t taint the awesome flavor of your fermentation. Leave it to ferment for about 3 weeks.
08. Storing Fermented Ginger Paste

After about 3 weeks, check on it. Smell it. If it smells fresh and looks good, taste it. Then you can seal it with a regular lid and place it into the refrigerator or root cellar to slow down the fermentation.
There it should last for at least a year if you don’t use it up first. Then just use a clean utensil to remove what you need and seal the jar back up.
A few tips on lids: If you’re using a metal lid, chances are it will start to corrode and that makes the lid and your hands smell pretty nasty when you handle it. I like to use the metal cover and instead of the screw band I’ll use a plastic lid.
This will keep it sealed, but it won’t corrode. You can also place a piece of parchment under the lid, which will keep it from corroding too. You could use just a plastic lid if you use the paste regularly.
Trouble shooting
If your ginger paste turns out very dry after your fermentation is done, you can add a bit of brine from another ferment, or, I like to just top it off with a little homemade probiotic vinegar. This will keep it from getting moldy on top. And always use a clean utensil to remove a portion of your ginger paste.
Your Questions Asked
What’s the best way to preserve fresh ginger?
If you want to use ginger for cooking and baking as well as for health, preserving it by fermentation is the best way in my opinion. Fermenting will increase the benefits of ginger, it will add probiotics for better digestion and bioavailability of the benefits, and it will be preserved fresh for a year or more. Other options are pickling in vinegar, freezing, making an alcohol extract, and drying.
Is fermented ginger the same as pickled ginger?
Yes and no. Pickled ginger is often made by preserving ginger in vinegar or a vinegar, salt, and sugar solution. This will preserve ginger for a few months in cold storage. It can also be canned to be shelf-stable. Fermented ginger is a way of pickling ginger as well, but it is done by using some salt to discourage undesirable bacteria to grow and encourages wild lactic acid bacteria. These begin digesting the sugars in the ginger and create lactic acid. Fermenting adds valuable probiotics. It will also have a pickled flavor, but with a different nuance and more health benefits. So fermented ginger is also a type of pickled ginger but uses a different method than the pickled ginger you get in shelf-stable glass jars.
Can ginger ferment without sugar?
Yes, there is no sugar added when fermented ginger, just salt. The wild lactobacilli feed on the natural sugars that are present in the ginger.
How to use fermented ginger?
Ginger can be fermented in small chunks or diced, slices, grated, or processed. Keep in mind your end use when choosing the method. I make ginger paste for convenience, which can be used in cooking, baking, salads, marinades, drinks and more. Just add by the spoonful. It will mellow a little over time and loose some of its pungency, so you can also try eating a little straight from the jar for its health benefits. I use grated ginger paste or diced fermented ginger a lot in baking when making sweet potato bread, pumpkin cake, and other quick breads, and cookies, muffins, apple crisp, and more. The sliced ginger can be used for sushi or in salads.
Is eating fermented ginger good for you?
Yes. Ginger has a lot of health benefits even just plain raw. Fermenting increases these health benefits and nutrients and adds valuable probiotics for better digestion, gut-health and absorption of ginger’s healthy compounds. So it is great for the gut, overall health, medicinally, and it supports immune functions.
Enjoy your awesome, healthy and tasty Fermented Ginger Paste!

Now you know how to make a ginger paste that keeps for a long time in cold storage, where it’s conveniently available any time you want to use it. It is great to have for cooking and baking, although you’ll loose the probiotic benefits that way.
Use it whenever ginger paste is called for in curries and other savory dishes. It is great in marinades such as for teriyaki, or stir fries. Or use it in sweet baked goods in place of dry or grated ginger (don’t add any extra salt then!). I like it in recipes like Lemon Tahini Cookies, delicious Zucchini Bread, spicy Sweet Potato Bread, cozy Sourdough Pumpkin Cake with Apple & Ginger Streusel, Pumpkin bread, spice cookies and the like.
But you can also enjoy it fresh in salad dressings, or smoothies. Stir some into a little warm water or milk with some honey and just drink it when you need a sore throat aid. Mix it into yogurt with some honey, or sprinkle over your oatmeal.
If you’re taking it for health reasons, then I’m sure you’ll find all sorts of ways to add this fresh fermented ginger paste to your daily routine. Do check out my fermented honey ginger as well. Made with raw honey, this works great for just taking a daily spoonful for immune support. It will help you stay healthy, or use as a soothing syrup when you’re sick. And it tastes amazingly good too!
If you have any questions, leave me a comment and I’ll do my best to answer quickly. Let me know how it went, if you’ve made this recipe, and how you are using fermented ginger paste!
Don’t forget to sign up for more recipes like this as well as homesteading tips and ideas and you’ll get notified by email as soon as I get new information posted!
More Recipes you might like:
Fermented Ginger Honey – Keep this potent fermented health food on hand. Use the powers of Ginger and Honey in a tasty syrup form that you’ll love.
Switchel Recipe – A refreshing electrolyte drink for hydration during summer activities.
Ginger Spice & Cranberry Healthy Apple Crisp – This most delicious, comfy and cozy fall and holiday dessert will warm you up on a chilly day and fill your home with the delightful scents of apples and spice and everything nice.
Fermented Garlic and Honey – A powerful combination of two all-star infection and sickness fighters. Make this easy remedy today and be ready for cold and flu season!
Fermented Turmeric Paste – Make this convenient fresh turmeric paste for your wellness and as a convenient seasoning for your curries and other foods. Turmeric has so many benefits, find out all about it and why fermenting it makes it even better.
Fermented Garlic – Lacto-fermented garlic paste is kind of a special food. It’s the ultimate convenience food and health supplement. But besides that, it gets better as it ages. Just like a fine wine.
Prepared and Fermented Horseradish – Make your own prepared horseradish with homemade vinegar or ferment it. Bonus recipe: horseradish tincture. Great for digestion and sinus infections.
Preserved Lemon Confit – Preserving lemons is not just a great way to add storage life to citrus, but it transforms the humble lemon into a delicacy that will perfume and flavor any dish with the lively mix of lemon’s tartness and zest with indescribable umami notes that must be experienced! Great for flavoring beverages too!
Fire Cider Recipe – Get your fire cider recipe and make this tonic to be ready for cold and flu season!
Health benefits of ginger beer Learn all about the awesomeness of ginger.
Best ginger beer recipe: fizzy, delicious, healthy! Create your own probiotic ginger beer.
Ginger bug recipe puts exciting fizzy sodas on your table! Meet my friend the ginger bug and learn how to get one started for yourself.
Healthy Ginger Ale Recipe for a quick refreshing pick-me-up! Learn all about the awesomeness of ginger. Health benefits you can gain for your body when you include this versatile plant into your daily health regimen. Improve your well being get healing with many chronic issues.
Fermented Onions – You’ll love these tasty, tangy onions. Try them plain or spiff up any sandwiches, salads and burgers with a ready supply of these onions sitting in your fridge.
Sourdough Pumpkin Cake with Apple, Ginger and Pecan Streusel – Super delicious breakfast cake, coffee cake or teatime cake. Or a great snack for any time. Cozy fall flavor!
Pin for later!

Shop This Post
Wide mouth funnel
Blender
Vitamix
Manual chopper
Electric food processor
Scale
Fermentation tops
Airlocks
Redmond’s Real Salt
Himalayan pink salt
Celtic sea salt
Bormioli Fido Jar
Glass weights
Ceramic weights
Acacia wood tamper
Azure Standard – get organic ingredients here

Homemade Fermented Ginger Paste For Convenience and Long-term Storage
Equipment
- Jar for fermenting the ginger paste – I recommend a wide mouth pint size mason jar or Bormioli Fido Jar
- Fermentation Lid – You can use a regular canning lid, but I recommend use of a Fermentation lid or Airlock.
- Blender, food processor or grater – Your preference will determine the best tool for chopping your ginger: An electric food processor or Manual chopper will finely chop it, grating will produce close to a paste, but if you want a smooth paste, you'll need to reach for your Blender or Vitamix. Or use a suribachi style mortar and pestle set.
- Pickle packer (optional) – I use an Acacia wood pickle packer.
- Fermentation weight – optional – A Glass fermentation weight is recommended.
- Funnel – optional – very helpful! Use a wide mouth funnel such as the kind that is used in canning.
- Scale (optional). – a Scale is super useful for fermenting and makes scaling your recipes so easy!
Ingredients
- approx 14 oz Fresh Organic Ginger – Fresh Organic Ginger can be purchased in bulk at Azure Standard.
- 1½ – 2 tsp Salt – I use Redmond's Real Salt or Himalayan pink salt, but you can use an unrefined Sea Salt with no additives. Don't use table salt for this.
Instructions
- Process the gingerProcess into a finely chopped or smooth paste according to your preference, or slice the ginger.Options: Finely grate your ginger with a grater. Or Coarsely chop or slice your ginger by hand or with a food processor. You can also mash the ginger with a mortar and pestle as is traditional. If you have a good blender, you can also try to make a smooth paste with the blender.
- Measure and add the saltWeigh your ginger, you should have about 14 ounces of ginger mash to fill a pint jar, but use the gram setting for calculating the salt. Mine was just over 400g. Add 2.5% salt to this (400 x .025 = 10 grams). This is the standard formula for a dry salted fermentation. You can use a little more or less though. It's not completely scientific, since many factors play a role in fermentation, that are not cut and dry. But basically, you want it to be enough to coax out the juices of the ginger and preserve the food till fermentation kicks in, but not so much that it inhibits fermentation. If your room temperature is over 85℉ for a prolonged period, adjust to a 3% ratio.If you don't have a scale, you can use the folk method here, which is 1.5 to 2 teaspoons of salt per pint.
- Mixing the mashMix the salt thoroughly with the ginger paste. You can give the two a whirl in your processor or do it in a bowl. Then let it sit for about 10 minutes so the salt can start to draw the juices out. After that use a pickle packer or some type of food grade tamper to press out as much of the juices as possible.
- Add filtered water if necessaryIf you don't get much brine from dry salting, add a dash of filtered water to your mash.
- Packing the jarPack the ginger and salt mix into your fermentation jar. Fill to within an inch of the top. You'll need a little room for expansion here, so don't fill it to the top, leave 1-2 inches of space at the top. Keep using your pickle packer to pack it in tightly and get the juices to cover the ginger. When done, use a glass fermentation weight to weigh down the ginger paste. You'll want it submerged under the brine.
- Seal the jarIt is ideal if you can cover this jar with a fermentation lid or airlock. This will not require maintenance. Likewise, a hinged top Fido jar will also self vent and can be left alone. Otherwise, cover the jar with a tight fitting 2-piece lid, but don't tighten it too much, so gasses can escape. Do check on it every day though in case it needs to be burped. The lid will bulge when the gasses are trapped inside. Just quickly loosen the band to let the pressure out and tighten it right up again to keep any oxygen out.
- Fermenting and MaintenancePlace your jar into a darkish corner at around 70-80 ℉, somewhere where it can bubble away for a few weeks. Slip a small plate or bowl under it to catch any overflow, just in case. And then just leave it to do its thing. After 2-3 days it should start to make bubbles and you might see some seepage. Don't forget to burp the jar daily if you're using a standard canning jar lid and watch for kahm yeast (a crinkly greyish-white thin layer of yeast, that is not harmful). You'll want to skim that off occasionally so it doesn't taint the awesome flavor of your fermentation. Leave it to ferment for about 3 weeks.
- StoringAfter about weeks, go ahead and get it ready for storage. Smell it. Does it smell good, look good? Is it a good consistency? Now taste it, and if all looks good, then you can put a regular lid on it and place it into the refrigerator or root cellar to slow down the fermentation and there it should last for at least a year if you don't use it up first. Just use a clean utensil to remove what you need and close the jar back up.
- TroubleshootingIf your ginger paste turns out very dry at this point, (mine bubbled over a lot, because I had the jar a little too full, and I lost a lot of liquid) add a little finished brine from another ferment before storing, or, I like to just top it off with a little homemade probiotic vinegar, to keep it from growing mold on top.
You’ll love this fermented ginger paste for it’s convenience! And don’t forget, if you have any questions, you can ask me right here in the comments section and I’ll get back to you as fast as I can!
I do not even know the way I ended up here, but I assumed this post was great. I do not know who you are however certainly you are going to a well-known blogger for those who are not already 😉 Cheers!
Thank you for visiting and for your comment.
Thank you so much for visiting and for your comment.
Hello. Does the ginger taste very salty after fermentation?
Hi Susanna, there is certainly a little bit of saltiness to it, but I find it subtle and not excessive. I have used it to make drinks and appreciate the little bit of extra minerals in my drinks, but they never taste salty because of adding the ginger.
Hello
Thanks for this very comprehensive post on making ginger paste!
Question: after the fermentation process is complete and the paste goes into the frig do I need to make sure the paste has a layer of liquid on top to prevent spoilage?
Also, can I use ginger that has been frozen?
Thanks,
Susan
Hey Susan, For long storage you’ll want to keep a layer of liquid on top of the paste. Otherwise it may get moldy. I just cover it with a little ACV or brine from another ferment if I need to. The ginger is pretty dry and so it helps to add a little liquid if necessary. I have not tried making it with frozen ginger. I’m not sure how that would turn out. My guess is, that you would need to add a starter to it to ensure fermentation happens, in case the native bacteria are not active anymore after freezing. I’d add a quarter cup or so of an existing fermentation liquid from another active ferment to get it started. I can’t imagine that it wouldn’t work, but I can’t say what the consistency would be. I’d love to hear about it if you get to try it.