Homemade apple cider vinegar with the mother is easy to make and a great way to use apple scraps or extra apples! Try other fruits too!

This post contains affiliate links. As an Amazon affiliate I make a small commission at no extra cost to you if you make a qualifying purchase. See my full disclosure here.
If you have been following my blog, you know that I love to ferment things. When I have to preserve anything, the first thing I think of is to ferment it. And most of the time it works beautifully. Fermenting preserves, yes, but it also enhances the nutrients in food, makes them more bioavailable, and adds probiotics. Wow, what’s not to love about that!
So, of course, when I find myself with extra apples, or some not so perfect ones, or just scraps of apples from making pies, canning sauce, or apple preserves, I ferment them. And the result is delicious, versatile and amazingly healthy apple cider vinegar. It’s a beautiful thing. Let’s get into making this wonderful health food.
Homemade Apple Cider Vinegar For Health, Cooking, And More!

So before we start making apple cider vinegar, let’s get the following cleared up. Apple cider vinegar, as the name suggests, is made from pressed apple cider, which is the juice from the apples.
And while this probably makes a superior vinegar as far as flavor is concerned, I am perfectly satisfied with my apple vinegar from scraps. It still tastes phenomenal, has all the benefits, and is so much easier to make. Plus it makes good use of what some would call ‘waste’.
So let’s not waste these scraps and make a super healthy vinegar from them. And we can leave our pressed apple cider for fresh drinking and for making delicious wine!
You might like these recipes that use homemade vinegar: fire cider, prepared horseradish, switchel sports hydration drink
Why Should You Make Your Own Apple Cider Vinegar?

Regular Commercial apple cider vinegar is not super expensive in the grocery store, but if you use it a lot, it can add up quite a bit. However, if you’re health conscious and want to buy the premium kind, like the raw, organic, version that comes with the mother, it can start to cost you some serious bucks.
- So an obvious reason for making homemade apple cider vinegar is to save some money!
- Another, and probably the most important reason, is that YOU control what goes in it! Use homegrown, or unsprayed apples from someone you know, and add a healthy sweetener. Now you can make a probiotic vinegar, that is superior for your health!
- You can use scraps from apples, which you are using for other purposes already. So no extra purchase is necessary. And you can use ugly apples, or windfall apples, which are often free if you don’t grow your own.
I see signs for free apples by the side of the road occasionally, when driving around. Some people just want their yard cleaned up for them. Lots of free apples! Sometimes you can just ask too when you see a lot of fallen apples around someone’s tree. It’s a great way to get some free pig food too.
- Making your own vinegar is a lot of fun! Seriously, it’s just so rewarding to watch this natural transformation take place and I value my homemade apple cider vinegar above store-bought, because I “created” it from scratch!

The Benefits Of Apple Cider Vinegar (ACV)
So, let’s talk about what is so great about ACV. As you’ll see in a bit, ACV has so many practical uses, but it is also praised for its many health benefits.
Some claims have been studied and are more or less validated in peer reviews. I don’t believe that we always need to know if something works in a laboratory, but it is nice to know when anecdotal claims can be proven scientifically, as they often are. Nothing wrong with that.
But it is not proof, that without scientific proof, it doesn’t work, if that makes sense!
To be honest, I don’t have much faith in science. Studies can be manipulated toward a certain desired outcome, many factors play into a situation and there is no way that they all can be controlled in a study. And not unusual is also dishonesty and bribery.
Anyway, that’s a discussion for another day. For now let it be said that not much has been validated by science and a lot of claims come from small volume or animal based testing. But I know some of these work for me because of my own experience with it.
Possible Benefits Of Apple Cider Vinegar:

Promotes Gut Health And Aids Digestion
The probiotics in ACV can possibly have a healing effect on the gut, promote a healthy gut microbiome, and improve digestion and nutrient absorption. A healthy gut directly affects everything in our body and especially the immune system too.
A study demonstrated the anti-inflammatory potential of ACV phenols on cell inflammation in the gut.
Raw ACV produces a ‘mother’. This is made up of enzymes, proteins and friendly bacteria. It is why raw ACV is cloudy and has darker strands floating in it. And it is also what brings forth the probiotic benefits.
Apple cider vinegar might help with heartburn and acid reflux if you take it diluted during a meal.
Antioxidant
ACV has antioxidants in the form of polyphenols, which are known to balance free radicals and reduce oxidative stress. This is especially important as we pass the 40s in age and signs of aging start creeping in. Oxidative stress causes cell damage, which can result in many chronic diseases, and it accelerates aging.
Weight Loss
Many claim that ACV helps with weight loss, and this has been validated in studies, however only in combination with a healthy diet and exercise. ACV can also possibly increase feelings of fullness and that might help to reduce calorie intake. It might also help reduce body mass index.
Blood Sugar Reduction
The strongest study results speaking for ACV are those associated with diabetes. It was found highly effective in helping to maintain healthy blood sugar levels. And there are studies showing that if ACV is taken before a meal, it can reduce blood sugar spikes after the meal.
And ACV can improve insulin sensitivity and insulin resistance. Blood sugar spikes are not good for your body even if you’re not diabetic. If you are taking medication for diabetes, be sure to consult with your health care practitioner before you increase your vinegar intake as it can possibly cause complications.
Antibacterial
ACV contains acetic acid, malic acid, chlorogenic acid, and others. These are primary active ingredients that are responsible for many of the vinegar’s benefits and its antimicrobial properties. Vinegar kills germs. Even resistant bacteria and E.coli.
Hippocrates, the ‘father of modern medicine’, used to treat wounds with vinegar to prevent infection. And this also makes it an excellent food preservative. The antibacterial properties can also help with acne. In ancient times, it was used to treat wound infections and insect bites.
Heart Health
Promotes healthy cholesterol, can lower ‘bad’ cholesterol and improve blood pressure.
Energy Boosting
ACV can provide an energy boost.
Anti-fungal
ACV has shown anti-fungal actions. It can help with athlete’s foot, candida, dandruff and other fungus based diseases.
Anti-inflammatory and Cooling
It can help relieve sore throat when diluted and is super effective on sunburn.
Hair And Skin
ACV can balance the pH and stimulate shedding of dead skin cells. It might also prevent fungal growth on the scalp, which can reduce dandruff.
Warts
ACV has been used to destroy warts when applied full strength.
Some Sources
Dosage For Apple Cider Vinegar
ACV can be safely consumed by most, as long as it is diluted and not more than a couple of tablespoons are taken each day. One tablespoon per day diluted with at least as much water seems to be the general recommendation. I usually take good dash, probably a couple of tablespoons and just add it to a bottle of water to drink throughout the day.
Do keep in mind that the acid in vinegar can contribute to erosion of tooth enamel. So it is recommended that you rinse with clear water after taking the Vinegar.
Apple cider vinegar should be diluted 50/50 with water for applications on the skin.
ACV can have an effect on blood sugar by regulating it, which is an awesome benefit, but if you’re taking insulin, it can interfere, so talk to your health care provider before using ACV therapeutically.
What are the Uses for ACV?
Glad you asked!
ACV is super versatile. Here are a few ideas for using your homemade apple cider vinegar:
- Marinade: Use it as a marinade for meats and fish
- Culinary Herbal Vinegars: ACV can be used as a solvent for extracting the benefits and flavors from herbs. It is then used as a seasoning with flavors such as rosemary, thyme or a mix of french herbs for example.

- Make Medicinal Herbal Extracts: You might have heard of alcohol based tinctures. Well, if you despise using alcohol or you can’t have it for some reason, you might give vinegar based extracts a try. It is a great alternative and is just as effective, although you might need a little more.
Vinegar is actually the best choice, over other solvents, for extracting some herbal properties. And vinegar extracts are shelf stable too, but not for as long as alcohol. Famous herbal vinegars are the four thieves vinegar and fire cider!
- Make Switchel! The famous ‘sports drink’ of our forefathers, ginger switchel, or haymaker’s punch. This is a very refreshing hydration drink, and it is a healthy version of a sports drink with electrolytes. This is also great with dehydration during illness and to regain strength and energy.
- Make Pickles: If you can test your vinegar and if it’s at 2.4 pH or lower (this is the equivalent to a commercial 5% vinegar), it can technically be used for canning pickles.
For testing you can use a pH meter or, much cheaper and easier, litmus paper. The Ball Canning Book does not recommend using homemade vinegar, but I wanted to throw it out there as an option, just be sure to test it first. If you can’t test it, but it tastes plenty sour, you can use it for refrigerator pickles in any case.
- Use As A Digestive Tonic: Dilute and drink some of it before and during meals.
- Lemon juice substitute: Use vinegar in place of lemon juice in some recipes. Like in apple pie, and many savory dishes. Probably not in lemon curd though 😉. And dips, salad dressings, and so much more!
- Traditional Culinary Uses: Make marinades for Sauerbraten, and acidify traditional dishes such as Borscht and German Red Cabbage. Recipes are coming, stay tuned!
- Leavening: ACV is used as a leavening aid in baking soda recipes such as pancakes, cookies and cakes. It is also used in yeast bread for flavor and gluten development.
- Eliminate Phytic Acid: Soak your grains for 24 hours with water and a dash of ACV before cooking them to eliminate phytic acid.
- Mayonnaise: Make easy homemade mayonnaise with cider vinegar.
- Make Cheese: Use apple cider vinegar to make certain acid-based cheeses! Try making Queso Fresco! It’s easy and awesome! And you can use it to make Mozzarella and Ricotta. I don’t have the recipes up yet, but stay tuned and I will soon, that is, when I have milk coming in again 😊(as I’m writing this, the goats are getting a break before kidding 🐐)!
- Bone Broth: Use your apple cider vinegar for making bone broth! Vinegar will help extract all that goodness from those bones and ensure that your broth is rich and nutritious.
- Hair Rinse: Rinse your hair with ACV to combat dandruff, soften your hair, and restore pH balance. It works really good as a detangler too!! My hair is awful with tangling but after a vinegar rinse I can comb right through it.
- Window and Glass Cleaner: Use it in your final rinse water on windows and glass surfaces to eliminate streaks. It works for your fine glass dishes too.
- Canning Water Additive: Vinegar can help prevent discoloration on your canning pot and prevent mineral deposits on the canner and on the canning jars while processing. Add a generous dash before your start heating the water.
- Disinfectant: Pass on the toxic bleach and use vinegar! It is famous for making a great cleaner and you can use it to combat germs in the kitchen and bathroom! It will also kill surface fungus if you spray it on, such as on bathroom grout and window sills etc.
- Scale Remover: Get rid of mineral deposits in your coffee machine. I spray it on my water-glassed egg containers to get the limescale off easily. It works too on calcium deposits and milk stone. I use it in combination with baking soda in some cases, like when I want to remove burn spots inside the bottom of a pot.
- Sunburn: I always use a 50% diluted ACV if I get a sunburn. I find it the best remedy for this. It prevents blistering in most cases, cools the burn and helps with the pain. I find ACV works better for this than anything else I’ve ever tried if its applied right away.
- Kills Fungus: It really works for athlete’s foot. At least in my case it did, and fast! Make a solution of two parts water and one part ACV. This might help with nail fungus too. Sure better to try this first than the chemical fungicides IMO.
- Animal Health: Add some to your goats’ water for health benefits.
- Pesticide: It supposedly repels ants, and other small insect pests like aphids. Be careful when you use it on plants, dilute at least 50/50 with water to avoid harming the plants.
- Herbicide: ACV is a pretty effective herbicide and it’s much safer for the environment than those chemical ones from the garden store! Do use it judiciously though. Use it straight up as a herbicide. It might take a more concentrated vinegar for some tougher and older weeds, but your homemade can work on younger plants. If you do get the higher concentrations be extremely careful, it can cause severe burns on the skin.
Here is what the Department of Agriculture has to say about this: “The researchers found that 5- and 10-percent concentrations killed the weeds during their first two weeks of life. Older plants required higher concentrations of vinegar to kill them. At the higher concentrations, vinegar had an 85- to 100-percent kill rate at all growth stages. A bottle of household vinegar is about a 5-percent concentration.
Canada thistle, one of the most tenacious weeds in the world, proved the most susceptible; the 5-percent concentration had a 100-percent kill rate of the perennial’s top growth. The 20-percent concentration can do this in about 2 hours.”
Wow, impressive how useful vinegar is. And just the more reason to make your own, because if you want to start using it more, you’ll save a lot of money by making it. It will cost pennies on the dollar compared with store-bought premium raw apple cider vinegar.
If you end up buying your vinegar, you can definitely use the cheap kind for cleaning, don’t waste the premium vinegar for that. Save the premium vinegar, such as Bragg’s raw vinegar ‘with the mother’, for where probiotics matter.
Homemade Apple Cider Vinegar Recipe

Equipment:
A glass container – such as a half gallon mason jar. Or a 2 gallon vessel for a larger batch. You could also make a really big batch in a 5 gallon food-save bucket, but glass is the healthier choice.
Tightly woven cloth – this is primarily to keep bugs and debris out. So use something like a handkerchief, old pillowcase or a piece of a flour sack towel and a rubberband to secure it.
Regular grocery store cheesecloth is too loose and fruit flies can get in. You could also use a coffee filter or paper towel (use a canning lid band to secure it). Do not use a sealing lid. Oxygen is necessary for vinegar to form.
A fine mesh strainer – for straining out the solids. Or you can use a flour sack towel or even better, an unbleached organic flour sack towel.
Optional heat mat: If it’s cold in your kitchen and you don’t have a warm spot for your vinegar to ferment, consider using a plant heat mat with a thermostat to set your jar on.
Ingredients:
Apple scraps – try to get unsprayed apples if possible, otherwise, don’t use the peels. Collect your cores and peels and any bits and pieces that are not ruined with bugs or brown spots. You can certainly use apples that are unappetizing for fresh eating, and just cut out the maggot tunnels and brown spots.
If you have just a few scraps here and there, you could collect them in a freezer bag and freeze them until you want to make vinegar. Let them defrost in some water (to prevent browning). Once it’s up to room temperature, add a bit of raw existing vinegar starter, a mother, or add some fresh apple skins to inoculate your fresh batch with the healthy live bacteria you need.
Filtered water – You can use well water or filtered water. If you have only chlorinated water available, do not use it unless you keep it on the counter in an open container for at least 24 hours, or boil and let cool with the lid off. This will get rid of the chlorine, which would otherwise kill your fermentation.

Sweetener – I like to use organic sucanat or evaporated cane sugar. Try to avoid regular white sugar as it is likely made from GMO Beets. And cane sugar, if it’s not organic, tends to be high in pesticide content. Honey is another great choice.
Use 1 Tbsp of sweetener per cup of water as your basic formula. It is food for the microbes. If you don’t add it, you might still end up with vinegar, but it will be weaker and not as highly probiotic. The little critters eat the sugar, turn it into alcohol and eventually into vinegar.
Optional – A mother or a splash of organic raw vinegar ‘with the mother’ can serve as a starter culture. This is not optional if you’re making your vinegar with all frozen apples. Just add a quarter cup of the starter to your half gallon jar after the apples are defrosted.
Instructions:
Making vinegar uses a two step process. First it undergoes fermentation, where the microbes turn the sugars into alcohol. After that, the fruit gets strained out and the resulting wine will now go through a process that turns it acidic.
Steps:
Fill you jar a little more than half full with apple scraps.
Pour measured water into the jar to about 2-3 inches below the edge of the jar.
Now add the sweetener. For every cup of water you used, add one tablespoon of sugar or honey.
Fermentation:
Place a cloth over the top, secure with a rubberband and keep the full jar in a warm place for the next 2-3 weeks, where you don’t forget it. It should not be kept in direct sunlight. It does need to be warm! About 75 ish degrees is perfect. You can use a heat mat, place it near your wood stove or just keep it on the counter if the temperature in your kitchen quite warm.

Stir it every day to keep the apples on top from growing mold. You can also place a weight on top of the ingredients to keep them submerged and not stir. Stirring, or pushing the ingredients back under the surface, prevents mold or other undesirables to grow on the surface.
Strain: After 2-3 weeks, the fruit should settle to the bottom. It’s time to strain the vinegar. Just pour it through a fine mesh strainer or a tightly woven cheesecloth and squeeze out what you can. At this point you have created a wine.
Acidification
If you have a mother, or some ACV with the mother, now is a good time to add it as a kick starter towards acidification.
Replace the cloth cover and let it acidify for another 4 weeks.
Taste your vinegar. It should have a pleasant vinegar smell and taste quite acidic. If you like it at this point, you can bottle it and place a tight cap on the bottle. Store in a cool, dark place until you need it. It should keep indefinitely.
What to do with the scraps
After straining your vinegar, you’ll be left with the scraps. It is great to mix into pig food if you have them. Otherwise it makes an excellent compost accelerator.
The Mother

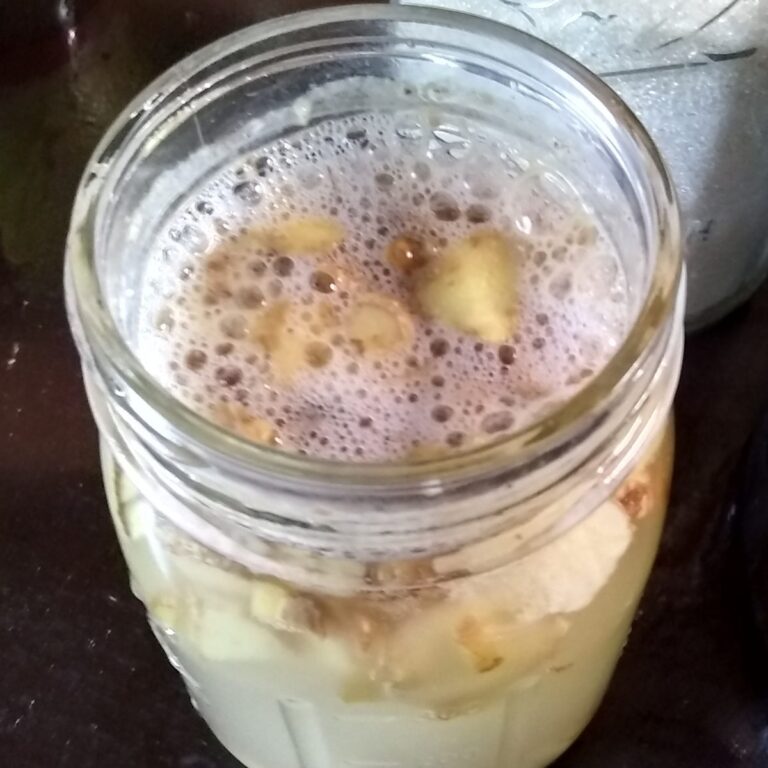
You might get lucky and grow yourself a vinegar mother! Congratulations! This is a very nutritious ‘cake’ that forms from strands of enzymes, proteins and friendly bacteria. It often accumulates at the top of the vinegar as a gelatinous disk.
If you’re familiar with kombucha, it’s similar in appearance to a scobie. Sometimes it settles on the bottom too. And sometimes you’ll just see strands of the mother floating in the vinegar. It’s all good and desirable.
This is valuable for future vinegar production, so store it in a jar with a little vinegar until you make your next batch of your homemade! Then add the mother after straining your apples out.
This promotes quicker acidification of the virgin vinegar and over time, your vinegars become more valuable and you’ll be growing you own heirloom strain.
If you don’t want to keep the mother, consider that it makes a super nutritious food for animals and it is great as a compost accelerator.
Your questions answered:
What is that grayish skin that’s covering my vinegar?
This could be 2 things. It could be a mother forming and then it will be a bit jelly like and not break up too easy.
Or it could be kahm yeast, which is a strain of yeast that favors the natural sugars in fruits. It looks like a thin, wrinkled skin that breaks up into little floaty flakes when you touch it. You can just skim it off. It’s harmless.
Does apple cider vinegar need to be refrigerated?
No it doesn’t. It is completely shelf stable but cool temperatures are preferred for long-term storage. A spot in a cool corner of your house near the floor would be great or the root cellar or basement. Just keep it from freezing. It does have a slightly lower freeze point than water (-2℃ or 28℉).
Can you make apple cider vinegar without the mother?
You sure can! The mother helps to make vinegar a little faster. You can also add a splash of existing probiotic vinegar such as Bragg’s raw vinegar ‘with the mother’, but you can make successful vinegar without it.
What is the sediment at the bottom of the vinegar?
This is mostly apple bits, that might have escaped your strainer, and spent microbes. It’s fine to consume.
Can I use other fruit to make vinegar?
Absolutely, and, in fact, I encourage you to experiment once you get making your first successful vinegar under your belt. I’ve made vinegars from lots of things:
A cleaning vinegar from citrus peels
Nasturtium vinegar for a hair rinse
Blueberry vinegar
Blackberry vinegar
Strawberry vinegar
Plum vinegar
Pear vinegar
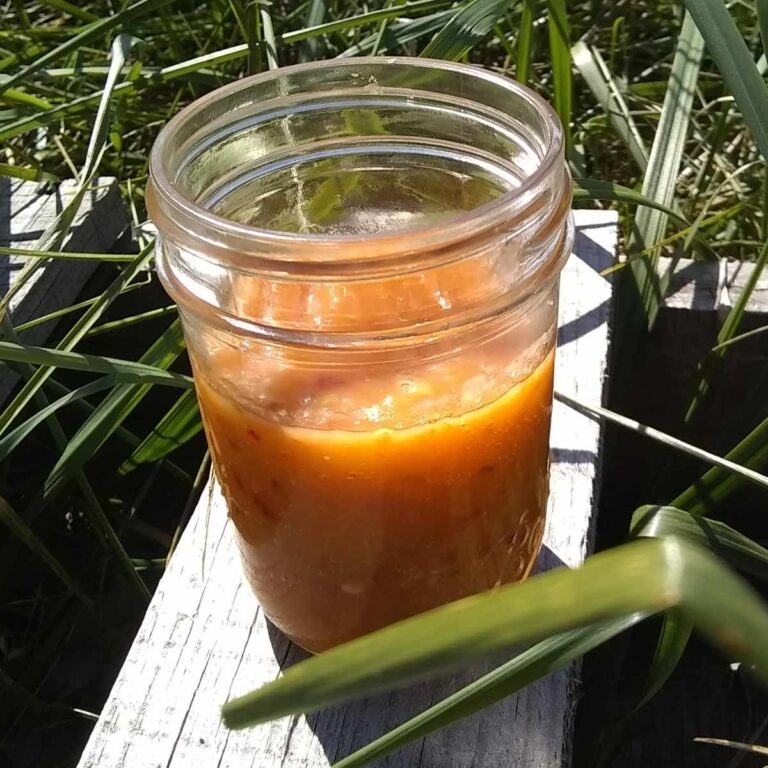
Cantaloupe and watermelon vinegar
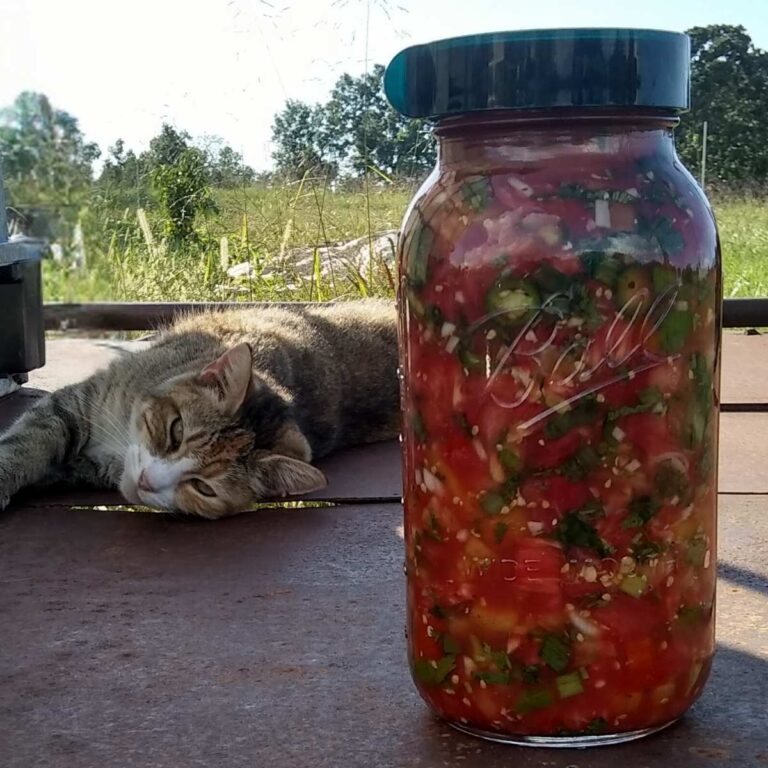
Tomato vinegar
Grape (wine) vinegar
…

Stone fruits and blueberries tend to be more prone to being colonized by kahm yeast, but their vinegar still comes out great. The blackberry vinegar tastes super dramatic, lots of flavor!

I also made mixtures of vinegar during harvest season, where I just threw a bunch of scraps from processing my harvest into the jar arbitrarily. Those aren’t always great for food or drinking, but they are still great for cleaning and disinfecting, and it puts those scraps to good use.
I also made vinegar from natural, unsulfured apple cider a few years ago that was left in the fridge at my work for two weeks after a christmas gathering.
I asked if I can take it home, and since it wasn’t the freshest anymore for drinking, I added a little sugar, shook it up a bit and just let it sit with a cloth cover for about 6 weeks. It turned out super good!
Congratulations! You’ve learned a new Skill!

And a super handy one too! But you didn’t only learn how to make a very versatile homemade apple cider vinegar. You’ve just learned a new self-sufficiency and survival skill! In the absence of a doctor or medicine, vinegar alone can possibly help fight infection and be used on wounds as an antiseptic and more (see the list of benefits).
If you keep sugar stocked up or are keeping bees, you can turn many fruits and scraps into vinegar. This way you can preserve the nutrients of the fruits and grow probiotics for a healthy tonic.
But you can also use this vinegar to preserve other vegetables and meats and make powerful herbal medicinals. And you can live healthier by soaking your grains and beans before consuming them. Homemade apple cider vinegar (or apple scrap vinegar) can be your best friend going forward!
Well done!
If you’d like to learn more old-fashioned, homesteading and survival skills, I invite you to join my food for life garden community. Sign up today and get notified of new content as soon as it is available.
And I’d be grateful if you spread the word and share my pages. Let me know in the comments below if you’ve made your own vinegar and what your favorite fruits are for making vinegars. If you have any questions at all, let me know and I’ll answer them!
Disclaimer:
While opinions vary widely about different herbs, I am writing about my own experiences with herbs and what I found through years of research. I am not a doctor and am not giving medical advice. You’ll find here how I use herbs and what I feel confident to present for informational content.
Be aware that anyone could potentially have an allergic reaction to a new food or herb, and so start using a new herb in small doses and watch for any signs of discomfort. Also, do consult with your health practitioner if you take any medication, have a serious condition, or are pregnant or nursing.
More content like this
Fire Cider Recipe – Get your fire cider recipe and make this tonic to be ready for cold and flu season!
No-fail Homemade Mayonnaise – Make mayonnaise from scratch with this easy recipe, which includes a fermenting option to preserve it for long-term storage.
Switchel Recipe – A refreshing electrolyte drink for hydration during summer activities.
Prepared and Fermented Horseradish – Make your own prepared horseradish with homemade vinegar or ferment it. Bonus recipe: horseradish tincture. Great for digestion and sinus infections.
Fermented Garlic – Lacto-fermented garlic paste is kind of a special food. It’s the ultimate convenience food and health supplement. But besides that, it gets better as it ages. Just like a fine wine.
Fermented Ginger Honey – Keep this potent fermented health food on hand. Use the powers of Ginger and Honey in a tasty syrup form that you’ll love.
Fermented Ginger Paste – A convenient way to have ginger on hand when you need some, either as seasoning in cooking or baking, or to use this powerful ally in your daily health routine.
Fermented Turmeric Paste – Make this convenient fresh turmeric paste for your wellness and as a convenient seasoning for your curries and other foods. Turmeric has so many benefits, find out all about it and why fermenting it makes it even better.
Fermented Garlic and Honey – A powerful combination of two all-star infection and sickness fighters. Make this easy remedy today and be ready for cold and flu season!
Black Walnut Tincture – Black walnut has been used as a deworming tincture for a long time. Make your own with my recipe. I like to use it as part of my goat deworming routine with great results so far.
Pin This Post

Shop This Post
Ball’s half gallon jar
2 gallon glass vessel
Bragg’s raw vinegar ‘with the mother’
Litmus paper
Sucanat
Evaporated cane sugar
Honey
Flour sack towels
Organic flour sack towels
Planting heat mat with a thermostat
Ball Canning Book
Organic Ingredients – get organic ingredients at Azure Standard. They also carry bulk ingredients for a great price break, such as panela sugar.

Apple Cider Vinegar Recipe
Equipment
- A glass container – such as a Ball's half gallon mason jar.
- Tightly woven cloth – this is primarily to keep bugs and debris out. So use something like a handkerchief, old pillowcase or a piece of Flour sack towel and a rubberband to secure it. You could also use a coffee filter or paper towel. Do not seal with a lid.
- Optional heat mat – if it's cold and you don't have a warm spot for your vinegar to ferment, consider using a planting heat mat with a thermostat to set your jar on.
- A fine mesh strainer – for straining out the solids. Or you can use a flour sack towel or even better, an unbleached organic flour sack towel.
Ingredients
- Apple scraps – try to get unsprayed apples if possible. You can use cores and peels and any bits and pieces that are not ruined with bugs or brown spots.
- Filtered water or well water – or use bottled water. Use chlorinated water only after letting it sit out for 24 hours without a cover so the chlorine can evaporate. I use Berkey water filter for all my drinking water.
- 1 tbsp Sugar or honey per cup of water – I like to use organic sucanat or evaporated cane sugar as a healthy choice. Honey is another great choice.
- ¼ cup Starter culture – Optional – if you like, you can use a mother or a splash of organic raw vinegar 'with the mother' to serve as a starter culture.
Instructions
- Fill you jar a little more than half full with apple scraps
- Measure your water when you pour it into the jar to about 2-3 inches below the edge of the jar.
- Add the sweetener. For every cup of water that you added, add one tablespoon of sugar or honey.
- Stir it well.
Fermentation
- Cover – Place a cloth over the top, secure with a rubberband and keep the jar in a warm place for the next 2-3 weeks, where you can see it. Keep it out of direct sunlight. It does need to be warm! About 75 ish degrees is perfect. You can use a heat mat, place it near your wood stove or just keep it on the counter if you keep a warm temperature in your kitchen.
- Stir it every day to keep the apples on top from growing mold, or just push the apples back under the surface. You can also place a weight on top to keep the ingredients down. Your objective is to keep the fruit submerged as good as possible and prevent undesirables to grow on the surface.
- Strain: After 2-3 weeks, the fruit should settle to the bottom. It's time to strain the vinegar. Just pour it through a fine mesh strainer or a cheesecloth and squeeze out what you can. If you have a mother, or starter vinegar, you can add it now, but it is not necessary.
Acidification
- Replace the cloth and let it acidify for another 4 weeks.
- Taste your vinegar. It should have a pleasant vinegar smell and taste acidic. If you're happy with it, bottle it and place a tight cap on the bottle. Store it in a cool, dark place until you need it. It should keep indefinitely.

Making vinegar is a super useful skill for your homestead kitchen. You can try so many fruits too, like berries, peaches, melons and more. And if you have any questions, you can ask them right here in the comments. I’ll answer them as quickly as possible.
Love using scraps and no waste, great tips!!
Yep, it’s always so great to have a use for scraps! Thanks so much for your comment!
Wow!
What a great resource for info and the benefits of ACV! Thank you!
Hey Jo, Thank you for your kind comment! I appreciate that!
I haven’t thought of all the ways to use vinegar. Your list was extensive and I learned a great deal. I’m hoping our apple trees produce this year.
Hello Hayley! Thanks so much for your comment and I’m glad if this was helpful. My apple trees here at my new place are not old enough yet, but a friend is kind enough to share hers with me for now!
How did I not know making apple cider vinegar was this simple?! Thanks so much for the recipe— a staple in my kitchen,
You’re so welcome! And thank you so much for visiting!
Wow you always have such great recipes and so informative as well. Thank you so much!
I got so excited when I saw this! MY daughter in law & I are totally rocking this apple cider vinegar recipe! FYI…I love your content!
Hey Penny, I’m so excited that you love my content, thanks for saying so! And hey, I’d love to hear how it went! Have fun!
Thank you, Nicole! I appreciate your comment, and you’re welcome!
This is so informative, as all your articles are! I love to use scraps for useful purposes too. And I use a lot of ACV for all sorts of things. Lately I have been having a bit before bed and sleeping really well. Maybe a blood sugar thing?
I have to laugh in understanding of your comments about science. I don’t have a lot of confidence in, either. Well, I love to learn real science, just not the version that is compromised by other interests and not exactly honest. “Studies” aren’t always what they seem… and there isn’t much advantage to doing expensive studies on cheap natural health strategies. Except to the health of ordinary people. We might benefit a whole lot.
Thanks so much for commenting, Rachel. I love that ACV helps you sleep. That’s so cool! And I appreciate that we have some thoughts in common too!
Great post Heidi! Thanks for showing how easy it is to make ACV!
You’re so welcome, Kara! I’m glad you stopped by for a visit!
Love natural remedies that are inexpensive! Great info!
Thanks so much for your comment, Alisha!
The Mother reminds me of kombucha! My husband using ACV while grilling or smoking brisket, & homemade ACV would take it to the next level.
Hey Jenni, thanks so much for your feedback. I think homemade ACV would be great to use for grilling.
Great info! I tried making my own a few years ago and it got moldy. I am inspired to try again! So fun to ferment at home and so many good health benefits!
Thank you for sharing!
Oh no, I’m sorry about that. I’ve had that happen a few years ago when I wasn’t keeping an eye on it. Hope next time works out beautifully.
I have never thought about making this myself! Very excited to try this.
I hope you get to try it Hailey! It’s super easy and don’t hesitate to ask if you have any questions.
Excellent article!! Very thorough and well explained. I will definetly refer to it again in the future. Thank you
Thank you for visiting Ophelie. I appreciate your comment and I’m glad if you find it helpful.
I’ve tried once before and failed miserably. Your instructions are much more detailed, and there’s tons more info. Excited to try again!
Sorry your last vinegar didn’t work out. I would be so excited if this helps you succeed with the vinegar making and I’d love to hear how it went!
I’ve been wanting to make ACV! I’ve been saving my apple scraps, now I’ll be saving this recipe to refer back to. Looks to simple!
It is really easy. Just follow the few steps and you should have some fantastic ACV real soon!