Fermented garlic, a convenient and healthy way to have garlic ready to use when you need some. Prepared once, it keeps for a year or more!

This post contains affiliate links, which means I make a small commission at no extra cost to you if you click through and make a purchase. See my full disclosure here.
If you’re like me, garlic goes into just about everything and in generous amounts. Because I believe it keeps me from getting sick (and I rarely get sick), I eat at least a clove of raw garlic every day besides what goes into my cooking. And I take a shot of fire cider with garlic as well.
There are several ways you can get raw garlic easily without having to chop it fresh each time, which I do a lot also, but today we’ll focus on one of my favorite convenience foods, lacto-fermented garlic. Be sure you don’t miss the tips on easy garlic peeling below!
And check out my other favorite way to eat raw garlic for cold and flu season with this garlic honey recipe!
So how is fermented garlic a convenience food? Well, read on…
May I suggest other fermented recipes? For all the basics of fermenting, visit my article Fermented vegetables, an introduction. Check out Fermented Coleslaw, a cabbage and roots medley with fabulous coloring and awesome flavor! Here are some more garlic recipes: Garlic Scapes Pesto, Fermented Garlic and Honey, an easy remedy for cold and flu season! And make Fermented Garlic Scapes. Learn how to Grow Big, Beautiful Garlic!
Lacto Fermented Garlic as a convenience and health food

I always have a jar of fermented garlic in my refrigerator, ready to use for cooking or to sprinkle over my dinner as others would salt and pepper. Raw garlic has so many health benefits and if you can keep it convenient and ready to use, you’re probably more likely to use it regularly.
Here is why you will love fermented garlic:
- It’s ready to use any time you need it.
- It keeps for a year or much longer in your refrigerator.
- You’ll have the mess of chopping garlic once and then it’s done and you can put your knife away.
- The allicin in garlic is a powerful antioxidant and immune supporter and can help prevent sickness.
- It’s good for your heart and may lower blood pressure and cholesterol levels.
- Garlic lowers blood sugar levels.
- It’s anti-inflammatory and might help relieve muscle and joint inflammation.
- Garlic has antibiotic properties, and can inhibit and destroy parasites and fungus.
- It is said to protect the liver.
- Garlic may help make your bones stronger.
- It is considered a brain food that can help with cognitive functions.
- Garlic contains vitamins C and B6, manganese, and selenium.
- Fermenting garlic will increase some of these benefits plus it will add probiotics that form during the fermentation process.
- If you let it age for a while (I recommend, you make two batches and leave one to age!), it enters a gourmet level with a flavor that is hard to describe, but once tasted, you’ll savor and nurse it like a prized wine. Amazing! Try it with some aged cheese and prociutto, two worthy companions, and do serve it with some aged wine as well. You’ll find yourself in gourmet paradise.
When I make fermented garlic, I make a pint at a time. Which lasts me for a long while. It takes about a pound of garlic to make a pint of fermented garlic. You’ll have a bit of a mess that one time, but after you’re done, it’s all convenience.
You can just scoop a spoonful out of your jar whenever you need some garlic. And it is a great way to use garlic up if you have a bumper crop and are worried that they won’t all store till you harvest the next season’s crop.
How to prepare the garlic
Now I know what you’re thinking. Peeling a pound of garlic does not sound like fun 🙁. But remember, you only need to do it once a year and after you get that part out of the way, it’s all convenience.
This year I actually cheated. I didn’t have a huge garlic harvest since I only moved here the end of last October and had to build a quick garden bed while I was still unpacking just to get some garlic planted in early November.
It wasn’t super big and the dirt wasn’t great, I just bought a few bags of raised bed soil. I’ve got enough for fresh use, but not any extra. So I ordered organic, already peeled garlic from Azure Standard and used that. It seems to work, my garlic is fermenting!

Garlic peeling Tips:
If you have to peel your own garlic, I will tell you about a cool trick here: This works better for some types of garlic than others, but it always makes peeling easier.

First my tip for separating the Cloves: Whack the heads on your table with a board and they will come apart easier.
Next make yourself a Garlic Shaker Peeler:

Take two large bowls of approximately the same size rim. Separate the garlic heads into cloves and put them in one of the bowls. Next place the second bowl upside down over the one with the garlic cloves.
Then shake it like mad in an up-and-down motion for a few seconds. Now when you open it, you should find most of the cloves peeled. If some aren’t, they are easier to peel after being bruised.
I learned about this many years ago from my cousin and found a nice little video for you that shows how to do it. It really works, though not always as perfect as this guy makes it look:
Ok, now you have no more excuses not to make a big batch of fermented garlic! Even if you want to peel your garlic by hand, the benefits greatly outweigh a little bit of aggravation.
What you need to make fermented garlic:

Equipment:
A lot of the equipment for fermentation is optional, however, after years of fermenting with and without, I can say without hesitation, that they are super helpful.
So definitely don’t let the lack of optional equipment stop you, but if you’re going to ferment a lot, I recommend investing in some of these. Or put them on your wishlist for Santa, 😜 wink!
Two large bowls (optional) – For peeling the garlic. Stainless steel bowls work best and they should have approximately the same size rim.
A food processor or knife – Use a blender or Vitamix for a smooth blend, or you can more coarsely chop the ingredients with a food processor, which is what I like. I used my super handy manual food processor this time, because I was low on stored electricity and it was cloudy out.
It works really well. Of course, you can just chop with a knife too. If you do, I would also crush the garlic with the flat of your knife a little, so it will release juices more readily, or smash them with a tamper after salting.
A pint mason jar – A regular pint canning jar works well. But if you have a hinged-top Fido jar or similar, you can use that. It makes fermenting easy and the cool thing is that you’ll have a great way to store it later without the need for another lid. In general, avoid anything metal, corrosive, or non-food grade plastic for a fermentation container.
Fermentation weight (optional) – I recommend using a fermentation weight to keep your contents submerged under the juices. I have used other things, because I found myself short on glass weights. On this garlic batch, I used an upside down food-grade regular mouth plastic lid to push the ingredients down. It just fits into the opening.
Avoid anything non-food-grade, or corrosive. A rock or a baggie filled with salt-brine are good options too, especially if your jar is not full. Placing filled baggie on top can reduce the airspace that oxygen could occupy. (brine: 1 tbsp salt per pint of water).
Fermentation lid (optional) – Highly recommended if you’re fermenting in a standard wide mouth mason jar! A fermentation lid or airlock is not essential, but I’ve come to view them as such. It makes fermenting so much easier and if you ferment a lot, they are definitely worth the money in my opinion.
If you don’t have one, don’t let it stop you though. Use what lid fits your jar and if it’s a tight seal, burp the jar once a day to let the pressure escape, but don’t take it off.
If it’s not a tight seal, keep an eye on your fermentation daily, and skim off any yeasts that might form on top (a thin greyish-white ripply layer). This is not mold, but it can affect the flavor of your fermentation if you leave it there.
A scale (optional) – Not essential, but good to have if you’re fermenting a lot and especially if you’re fermenting in larger vessels. It helps with keeping the food to salt ratios correct when up- or down-scaling. Here is a very inexpensive scale with great reviews that looks exactly like my cheap one.
A pickle packer tamper (optional) – What would I do without my acacia wood pickle packer! I love that thing for stomping sauerkraut and packing chopped veggies into jars. But it is optional, you could use a spoon as well, or maybe a tamper that comes with your blender.
A wide mouth funnel (optional) – A wide mouth funnel is very helpful when adding your ingredients into the fermentation jar.
Ingredients:

1 pound of garlic cloves – If you can, get organic garlic. You’ll have better chance of success with organic vegetables for any fermentation.
In the case that your vegetables were treated with pesticides or antibacterial sprays, those treatments could have killed the bacteria you need and can inhibit the growth of the lactic acid bacteria, which are essential in fermenting.
Salt – My favorites are Redmond’s Real Salt, Himalayan pink salt, or Celtic sea salt, but any unrefined sea salt or pickling salt will work.
Beware of additives and read the labels of the salt container. I have found both, sea salt and kosher salt with additives and definitely don’t use regular table salt.
Steps to make fermented garlic:
01. Take your garlic heads and break them into cloves

I like to give the heads a good whack with a cutting board. This separates them easily. Collect your unpeeled garlic cloves in one of the bowls.
02. Assemble your garlic peeler shaker

Cover your bowl that contains the garlic with another bowl that is upside down. Hold the bowls together with your hands and shake them vigorously, in an up and down motion. You’ll find most of your garlic cloves peeled and the rest are easy to peel after being bruised.
03. Separate the garlic cloves out

Separate the garlic cloves from the skins and place them in your clean bowl. Peel any that didn’t get peeled. They should be really easy to peel now that they have been bruised. Cut off the little hard root ends if needed.
04. Weigh your garlic

Put your food processor bowl with the knives in place on the scale and tare it on the gram setting, so it reads zero. Place the peeled garlic into the bowl of your food processor and record the weight to calculate the amount of salt you need.
You will need 2.5% of your garlic weight in salt. (Example: if your garlic weighs 500 grams multiply that by .025 to find out the amount of salt to add. The result is 12.5 grams).
05. Add the salt
Zero your scale again (hit tare) and add the amount of salt you calculated.
Tip: If you don’t own a scale, you can also just add two teaspoons of salt per pint of garlic, which will be close enough for a pint of fermented garlic (one teaspoon of salt weighs approximately 6 grams)
06. Process the garlic and salt

Process the garlic into small bits. The smaller, the better, so it will make some juice. If you use a blender, it will be a smooth paste or use a food processor to get some more texture. I prefer the latter.
07. Stuff the jars

Place the garlic into your pint jar and press down on it with a spoon or a pickle packer. Keep adding garlic till the jar is full. Be sure to keep pressing down on it as you go. You want to get all the air pockets out and coax some of the juice out the garlic. Stop adding garlic when you are within an inch max of the top rim.
08. Weigh down the ingredients

Place a fermentation weight on top (or do as I did, I used an upside down food-grade, non-corrosive plastic lid, since I ran out of fermentation weights. I’ve got to remember to get some more!!).
Press down on it to get all the ingredients submerged. If you don’t have a lot of juice that’s ok too. In my experience it will still work fine as long as you fill the jar up pretty full to keep air space at a minimum, but you will need at least an inch of airspace, because your fermentation will expand.
If you used a blender and your garlic is a sauce, the weight may not work, but your fermentation should work fine if you use a sealing lid and keep any oxygen out.
09. Seal your jar with a lid

A fermentation lid will almost guarantee success, if you leave it in place for the whole duration of fermenting. If you don’t have one and are closing it with a 2-piece canning jar lid, make sure that you burp it once a day and keep an eye on the top to make sure it doesn’t start to change color on top or grow mold.
10. Let it ferment for 3 weeks
Now place your jar on a plate or into a bowl and put it in a warm, darkish spot in your kitchen. The best fermentation temperature is between 70 and 80℉.
This is most important during the initial 3-4 days of fermenting. A bit of fluctuation is ok, but if it’s too cool or too warm consistently, you might run into issues. Check out my post on lacto-fermented vegetables to get more info on the details and the reasons why.
11. Keep an eye on your fermentation

After about 3-4 days, you should see some active fermentation going on. There will be bubbles and possibly some juices oozing out of the jar. It will also change color a little bit, to a light golden brown.
If you’re using a 2-piece lid, or other sealing lid, burp it once a day to let the pressure escape. Just loosen the band enough till you hear that whizz and tighten it right back up again to keep oxygen from getting in.
In the case that you have kahm yeast growing on top (greyish-white, ripply layer), which is rare with a sealing lid, but more common when you cover with a cloth, be sure to remove it every couple of days, while making sure to keep your ingredients submerged.
I like to let it ferment for about 3 weeks. After that, I open it and taste it. If it’s good, it goes into the fridge with a sealing lid. My favorite way to cover any fermented foods for storage is with a flat metal canning jar top and then I screw on one of those plastic canning jar lids that I get from walmart.
I prefer them over the metal band, because they don’t rust and it will keep your jar rims clean and you won’t have that rusted metal smell on your fingers when you use it. The flat metal piece usually doesn’t cause a problem and it keeps the contents well sealed.
How you can use fermented garlic

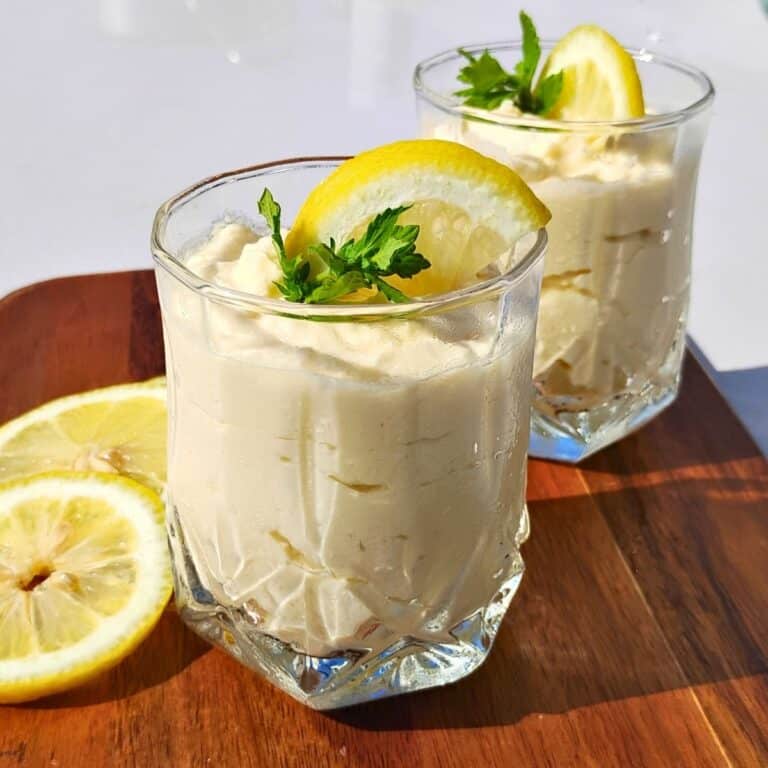
You can use it raw, sprinkled on foods, mixed into a salad dressing, a dip, a cold sauce, a savory yogurt smoothie, or anything else you can think of. It tastes great spread on a sandwich or cracker with cheese or smoked ham too.
If you want, you can also use it in your cooked foods, just like fresh garlic. But once you cook it, you’ll lose the health benefits that you get from raw garlic as well as the probiotics that come with the raw fermented garlic.
But it is a great way to have garlic ready to use. Much better than what you get in those jars from the store that contain preservatives or who-knows-what.
Keep the garlic fresh in your refrigerator for a year or longer or even in a root cellar. It will keep at a coolish room temperature as well, but not as long. I haven’t tested it, but it should keep for several months that way before it starts to turn. The colder it is above freezing, the longer it will keep.
And I think it even gets better as it ages. Fermenting gives garlic a bit of a caramel flavor after a while. It ages beautifully and will taste almost like roasted garlic after several months, and it will become milder than fresh chopped garlic.

I have a jar that I made about 3 years ago and it’s still amazing and tastes almost like caramelly and mild roasted garlic with slightly tangy and nutty notes. At this point I use it like a gourmet food. I use my fresh fermented garlic for every day use, but this one I savor as someone would a prized wine.
And voilà, you have the ultimate convenience food!

Now you can just use it as needed. No more peeling and chopping garlic every time you want to use some, how convenient is that?
Just grab a scoop out of your jar in the fridge, and you have a healthy topping for your foods that will even keep the colds and flus away. I swear by that, but it is my personal opinion and experience, whether or not it’s “proven” by science. In any case, it is a tasty condiment that is so easy to use and will stay fresh in your refrigerator for a year.
I think you will love this fermented garlic, so let me know in the comments if you make some and how you like it. And don’t forget to subscribe if you like my posts. You’ll get regular newsletters from foodforlifegarden.com with notices of new posts and helpful hints about gardening, homesteading and off-grid living.
And for a limited time, get some FREE “Life is better in the Garden” prints to download! You can use these as wall art, gift cards, or frame and give to a friend. It is my Thanks to You for Subscribing!
More things to ferment:
Recipes for Garlic Scapes and Bolted Onion Greens – There is much you can do with garlic scapes and bolted onions. I’m sharing my favorite ways to use them and how to make a delicious pesto sauce.
Fermented Garlic and Honey – A powerful combination of two all-star infection and sickness fighters. Make this easy remedy today and be ready for cold and flu season!
Fermented Garlic Scapes – Preserve your extra garlic scapes and gain a lot of health benefits by fermenting them. They make delicious, tangy pickles with lots of uses.
How To Grow Garlic – What to do to get big and healthy garlic bulbs. When and how to plant and harvest.
Fermented Coleslaw – A cabbage and roots medley with fabulous coloring and awesome flavor. Packs nutritious punch and probiotic diversity.
25 Essential Herbs To Plant – Start your home apothecary garden with these 25 powerful allies for your health. Learn their benefits, how to grow them and where to source them.
Prepared and Fermented Horseradish – Make your own prepared horseradish with homemade vinegar or ferment it. Bonus recipe: horseradish tincture. Great for digestion and sinus infections.
Fermented Chili Paste – Here is a great way to preserve your end-of-the season harvest of green peppers. This paste will last all year in your refrigerator to use as a condiment, seasoning, or topping.
Fermented Jalapenos – Make these for convenient taco, sandwich and burger toppers. Chop into potato salad for some zest or make a spicy creamy cheese spread.
Fermented vegetables – How to ferment your summer’s bounty to enjoy it all year long and with the added benefit of improving your gut health with probiotics. Learn the basic skill of fermenting any kinds of vegetables, learn about the benefits of fermentation and get the science behind it too.
Lacto fermented sauerkraut – Famously healthy and so tasty! Make your own from scratch.

Fermented Garlic
Equipment
- Two large bowls – For peeling the garlic.
- A food processor or knife – Use a blender or Vitamix for a smooth blend, or a food processor, which is what I like. I used my manual food processor. You can also use a knife, of course.
- A pint size mason jar – A hinged-top Fido jar or similar works great for fermenting.
- Fermentation weight – I prefer a glass fermentation weight to keep your contents submerged under the juices. But use what you have on hand to do the job.
- Fermentation Lid – For a mason jar, a fermentation lid or airlock works best, but a regular mason jar 2-piece lid is fine to use.
- A scale – Optional. Here is a very inexpensive scale if you want to purchase one.
- A pickle packer tamper – Optional but very helpful is this acacia wood pickle packer
- A wide mouth funnel – Optional. A wide mouth funnel for getting your ingredients into the jar.
Ingredients
- 1 pound of garlic cloves
- Sea salt, unrefined I use either Redmond’s Real Salt, Himalayan pink salt , or Celtic sea salt, but any unrefined sea salt or pickling salt will work. Do not use any salt with additives.
Instructions
- Take your garlic heads and break them into cloves, which you'll collect in one of the bowls.
- Cover your bowl that contains the garlic with another bowl that is upside down.
- Hold the bowls together with your hands and shake them vigorously for about 20 seconds, in an up and down motion.
- Separate the garlic cloves out from the skins and peel any that didn’t get peeled.
- Put your food processor bowl, with the knives in place, on the scale and tare it on the gram setting, so it reads zero.
- Place the peeled garlic into the bowl of your food processor and record the weight.
- Measure out 2.5% of that weight in salt. (Example: if your garlic weighs 500 grams multiply that by .025 to find out the amount of salt to add. The result is 12.5 grams).
- Zero your scale again (hit tare) and add the amount of salt. If you don't own a scale, you can also just add two teaspoons of salt per pint of garlic, which should be close enough. I like the scale method because it's easy to adjust to all kinds of amounts.
- Process the garlic into small bits. The smaller, the better, so it will make some juice.
- Place the garlic into your pint jar and press down on it with a spoon or a pickle packer. Keep adding garlic till the jar is nearly full. Be sure to pack it tightly as you go. You want to get all the air pockets out and coax some of the juice out of the garlic. Stop adding garlic when you are within an inch max of the top rim.
- Place a fermentation weight on top (or do as I do, I used an upside down food-grade, non-corrosive plastic lid, since I ran out of fermentation weights. I’ve got to remember to get some more!! Press down on it to get all the ingredients submerged. If you don’t have a lot of juice that’s ok too. In my experience it will still work fine as long as you fill the jar up pretty full to keep air space at a minimum, but you will need at least an inch of airspace, because your fermentation will expand.
- Seal your jar with a lid. A fermentation lid will almost guarantee success, if you leave it in place for the whole duration of fermenting. If you don't have one and are closing it with a 2-piece canning jar lid, be sure that you burp it once a day and keep an eye on the top to make sure it doesn't start to change color on top or grow mold.
- Now place your jar on a plate or into a bowl and put it in a warm, darkish spot in your kitchen. The best fermentation temperature is between 70 and 80℉. This is most important during the initial 3-4 days of fermenting. A bit of fluctuation is ok, but if it's too cool or too warm consistently, you might run into issues. Check out my post on lacto-fermented vegetables to get more info on the details and the reasons why.
- After about 3-4 days, you should see some active fermentation going on. There will be bubbles and possibly some juices oozing out of the jar. It will also change color a little bit and turn golden.
- I like to let it ferment for about 3 weeks. After that, I open it and taste it. If it's good, it goes into the fridge with a permanent lid. My favorite way to cover any fermented foods is with a flat metal canning jar top and then I screw on one of those plastic canning jar lids that I get from Walmart. I prefer them over the metal band, because they don't rust, it will keep your jar rims clean, and you won't have that rusted metal smell on your fingers when you use it. The flat metal piece usually doesn't cause a problem and it keeps the contents well sealed.
Notes
Pin This Post

Shop This Post
Wide mouth funnel
Manual chopper
Electric food processor
Blender
Vitamix
Scale
Fermentation tops
Airlocks
Redmond’s Real Salt
Himalayan pink salt
Celtic sea salt
Bormioli Fido Jar
Fermentation weight
Ceramic weights
Acacia wood tamper
Azure Standard – get organic ingredients here
[pt_view id=”1f957233lv”]

We love garlic and this covers everything!!
Thanks for commenting! Gotta love garlic!
Oooh I’m inspired to try this! We ferment a lot of things with garlic included, like pickles, and everyone likes to eat the garlic! Hadn’t considered fermenting JUST garlic! Will absolutely be doing this, thanks!
I’m so glad you found this inspiring! Fermented garlic is one of my favorite ferments and it’s so convenient when you want a quick bit of garlic! Thanks for stopping by my page and happy fermenting!
This is awesome! Thank you for explaining every step. I can’t wait to make this!
I’m sure you’ll love it! Thanks for stopping by my page!
Oh thank you!! I’ve been wanting to try this!
You’re welcome! Enjoy!
That’s incredible it can last that long! And having crushed garlic on hand would be super handy when cooking!
This is one of my favorite ferments. It truly does improve with age and it is so convenient to have on hand. Thanks for stopping by here!
Thank you for this post. I love fermented foods and having garlic readily available sounds wonderful! Thank you also for the tips on peeling.
You’re welcome. I do love my fermented garlic and it is so great to have this easily accessible every day. Thanks for hanging out on my page!
I made some fermented garlic last year or the year before but I used whole coves.. Why didn’t I think to mince it?! It would be so much easier!
It is very easy to use when it’s already minced! I’m excited to hear that you like to ferment as well!
Well, I need to try your tip for peeling garlic. I do not enjoy that and end up buying the peeled kind. Fermenting it is a great idea, though. Especially for something like a salad dressing, but I can see that going into all sorts of things. Interested to see what it tastes like!
I hope this way of peeling garlic will work for you. I am not much of a fan of peeling such a lot of garlic. But it’s a one-time effort and then I have ready to use garlic for the rest of the year. Hope you love it!
I’m loving this blog!! Finally, someone as passionate about fermentation as I am. Fermented garlic is awesome! Thank you for sharing about your 3 year old vintage:) Sounds delectable!
Haha, I wasn’t planning on keeping it around so long, but some things ended up in the back of a shelf in my root cellar. And it proves that fermentation is a truly awesome preservation method. Hey I’m glad to have found another fermentation lover. Welcome to my blog!