Soft Feta cheese is a delicacy that’s so easy to make at home. Learn how to make delicious soft feta from scratch with natural wild cultures.
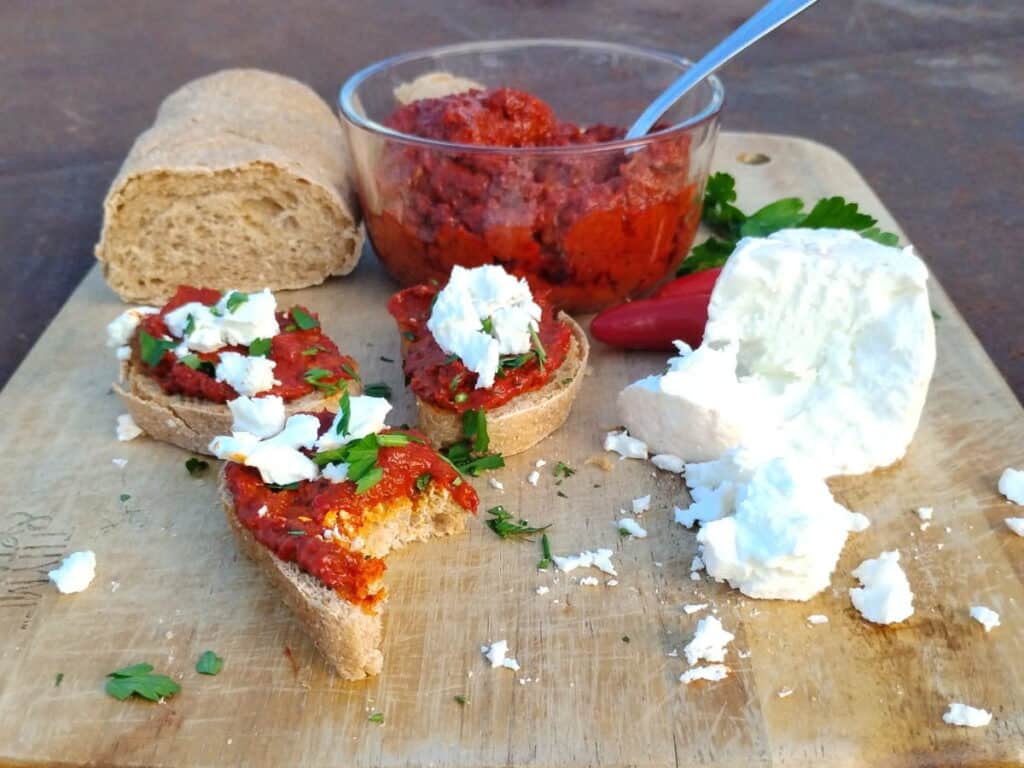
Do you just love feta cheese? Like on everything? I totally get it. It’s so delicious on a salad, whipped as a dip or on baked potatoes, crumbled or sliced and served over an Ajvar topped pita, or in a savory omelette. Oh and there is so much more and no room to list it all. How about I tell you that this cheese is super easy to make and much superior to a lot of cheeses you get in the store? In fact, you’ll be hard pressed to find creamy soft feta in stores at all!
And you can make it from scratch without a cheese press, special equipment, or costly starter cultures. Read on for instructions to make your own awesome soft feta cheese and be surprised at how easy and fun it is! In fact, it’s perfect for beginners. I’m excited to finally share this recipe with you. It’s been on my list for a long time, and I can’t put it off anymore, because you need to know about this and make some for yourself. Let’s do it!
Learn how to make your own Cheese Starter Cultures from raw milk. If you love this soft feta, you might also like to try my pressed feta cheese, a Bulgarian Sirene. And for all you goat cheese lovers, I’ve got a great recipe for Chevre Cheese from scratch. Discover Clabber Cheese, the original cheese, and my favorite, German Quark Cheese to make outrageously delicious and healthy desserts and awesome cheesecakes. If you’d like an easy all-around slicing, grating and melting cheese, take a look at my Bel Paese Cheese recipe! You’ll love it! New: Learn how to make a Cheese Culture With Sourdough Starter from scratch. No raw milk required!
- How To Make Soft Feta Cheese From Scratch
- What Is Soft Feta Cheese?
- Why You’ll Love This Recipe
- Tips For Making The Best Soft Feta Cheese From Scratch
- Rennet
- Starter Culture Options
- How To Make The Best Soft Feta Cheese
- Storage
- How To Use Soft Feta Cheese
- Troubleshooting
- Your Questions Answered
- Enjoy Your Awesome Soft Feta Cheese!
- Other Recipes You Might Like
- Pin This Recipe For Later
- Shop This Post
This post contains affiliate links. As an Amazon affiliate, I make a small commission at no extra cost to you if you make a qualifying purchase. See my full disclosure here.
How To Make Soft Feta Cheese From Scratch

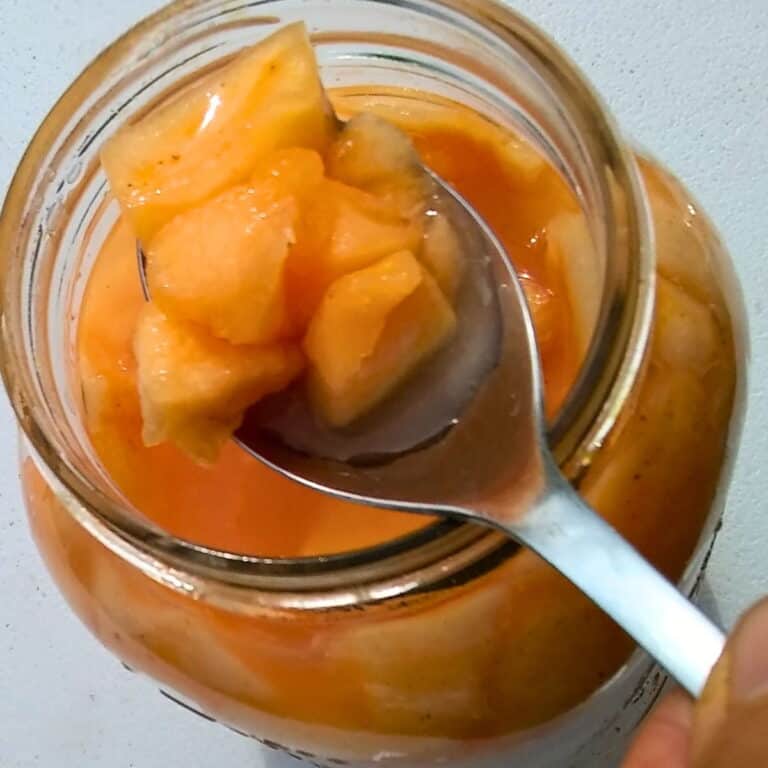
When I have a dinner or salad that’s a little boring or bland or lacking protein, the first thing I think of to help spruce it up is feta cheese. I have a big jar filled with brine and chunks of feta cheese right in the fridge. These delicious salty morsels are always ready break into crumbled feta to spruce up a dish or to star as the main feature.
It’s such a perfect topping for countless meals and salads, and it’s never a bad idea to place a plate piled high with feta cubes or crumbles tucked into a charcuterie board. Whip it up with some greek yogurt and olive oil and top with garlic and herbs and you’ll have an easy, superb dip for crackers, pita chips or to top a toasted bagel. It’s never boring. And it fixes everything that is boring! A perfect little condiment that quietly lives in the back of the fridge and begs to be used.
What Is Soft Feta Cheese?
For starters, the word Feta is actually protected as a PDO (protected designation of origin). And it refers to a white brined cheese from a specific region in Greece. This has to be made with either all sheep’s milk or a blend of sheep’s and up to 30% goat’s milk. Anything else is technically not feta cheese.
But because feta is the word that everyone uses when referring to this type of cheese, which is actually called a white brined cheese in most mediterranean countries, we’ll just use it here for easier identification purposes. Many countries don’t honor the PDO protection of the name feta cheese and call their brined cheeses feta even if it’s made with cow’s milk.
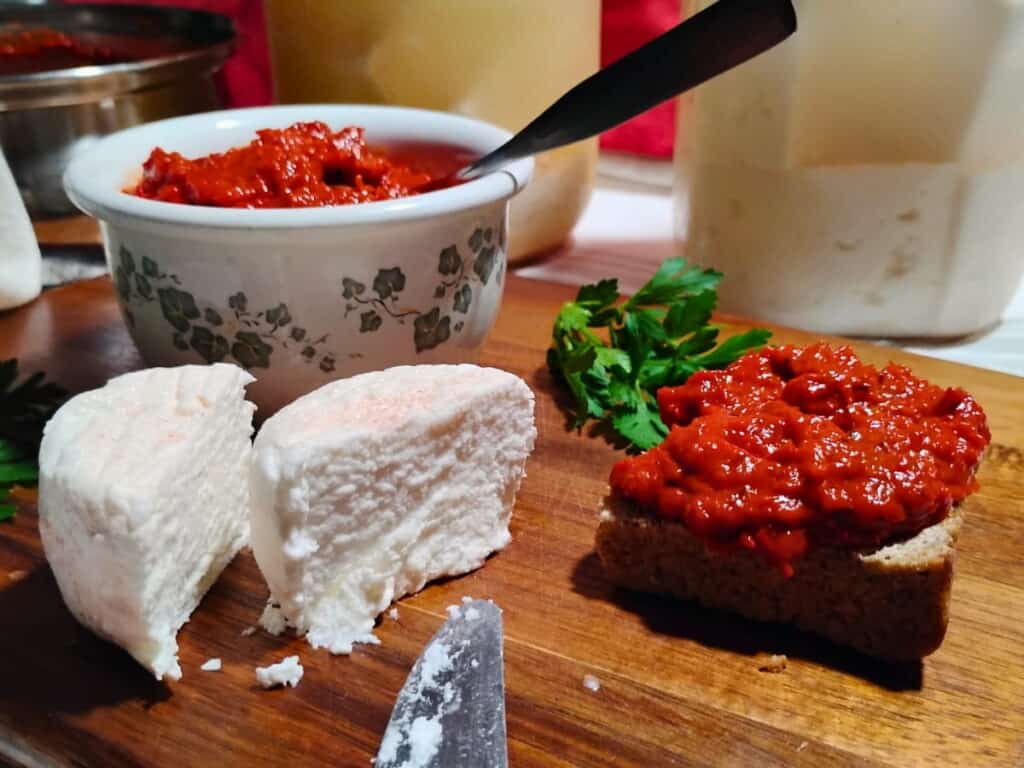
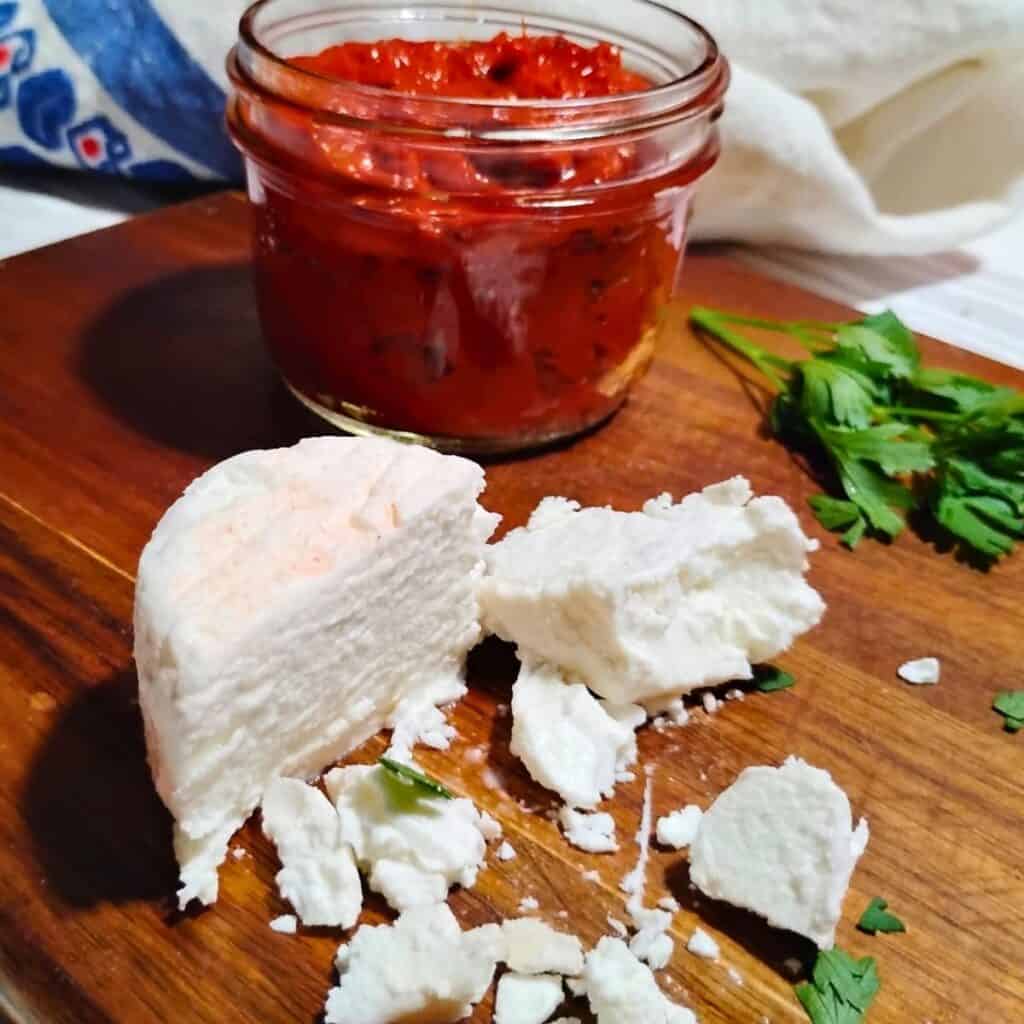
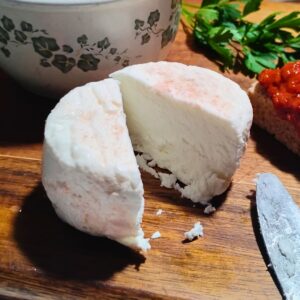
Today we’ll make an easy soft feta cheese that has a more creamy texture than regular traditional feta and it is so delicious. You can crumble it, but it’s not like those dry crumbles you get from commercial cow’s milk feta and if you use goat’s milk or sheep’s milk, it will have a much more intense and interesting flavor too, especially after aging it. I’m convinced that you’ll love this awesome cheese and that you’ll appreciate how easy it is to make.
The equipment you need is minimal, you’ll need a drainage basket or two, and a few things you likely have already in your kitchen. The only specialty item for cheesemaking (and you’ll need this for most cheeses, so might as well have it on hand), is rennet.
Rennet coagulates your milk and takes it from a spreadable clabber to a firmer, sliceable or crumbly cheese. Rennet is best purchased, since it’s quite a process to make your own. But it’s easy to purchase on-line and a bottle will last you a year if you are a casual cheesemaker.
You don’t need a cheese press or expensive cultures and it certainly takes no fancy recipes with complicated formulas. This is a peasant homestead cheese made the traditional way and the result is a gourmet cheese with personality and terroir.
Why You’ll Love This Recipe
- Because it’s Feta! Seriously, who doesn’t love feta, and this one is a bit more creamy and softer than what you normally get in the store and it’s full of delicious flavor.
- This cheese can be made from scratch with wild fermented cultures, no expensive freeze-dried packets are needed.
- It’s so easy to make!
- This soft feta cheese is a probiotic cheese and easier on your digestive system than uncultured milk. It contains living bacteria that help with digestion and populate your gut with beneficial microbes. These microbes consume lactic acid, which is offensive for many people, and this can make the cheese tolerable for lactose-sensitive individuals too.
- Long-term storage: It can last for many months in your refrigerator or root cellar.
- No fancy equipment needed. You can diy the draining baskets easily from old yogurt or cottage cheese containers too. And if you have no other option, you can hang the cheese to drain it in a bag made from butter muslin or a tea towel.
- Makes a great gift! Once you make a few for yourself, keep making them and use them as gifts! Everybody loves Feta (I think).
- Good source of calcium and other minerals. It makes a nutritious addition to meals that needs some extra protein too.
- Use of clean ingredients. One of the perks when making your own cheese is, that you get to choose your ingredients and clean options are available. 80-90% of cheese made in the US is made with genetically modified organisms or GMO-ingredients. I’ll list clean options below so you can make an informed decision on what ingredients to choose.
- Easy to dress up as an appetizer: roll some cubed feta in herbs and marinate in olive oil. Then you can take this to a party and take an extra jar as a gift for the host.
- Easy to scale! While you could make it from less than a gallon of milk, it’s hardly worth the trouble. However, scaling up and using several gallons of milk makes a lot of sense. It’s basically the same work, the same mess, but more cheese! All you need is a bigger pot and a few extra draining baskets.
Tips For Making The Best Soft Feta Cheese From Scratch
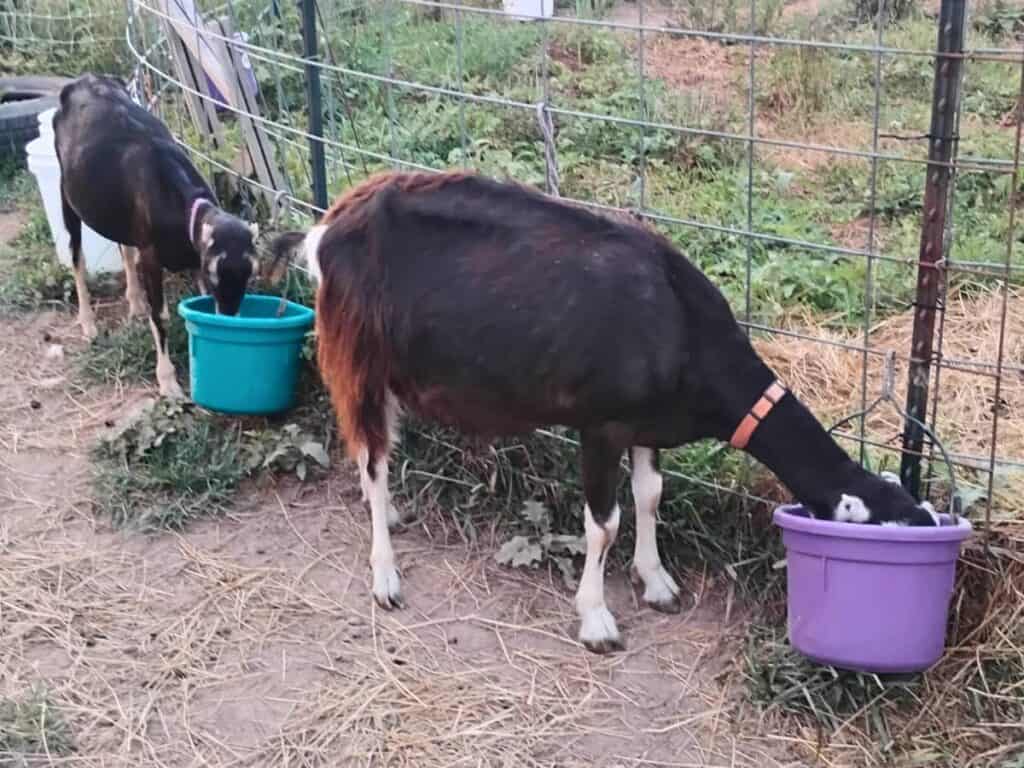
- If you have access to raw milk from pasture raised animals, definitely use that. It’s so much better for your health and it makes the best cheese. Plus you’ve got the material for the best starter culture for cheese making. Goat’s or sheep’s milk will give you that distinct flavor of traditional feta, while cow’s milk will be much milder.
If you want the cleanest milk, choose milk from grass-fed animals that graze on unsprayed pastures or have been supplemented with organic grains. 100% grass-fed is best, but hard to find in the dairy world. I supplement with small amounts of organic grain when feeding my goats, for extra energy, since the pastures and grasses here are not very nutritious. If you buy milk, I’d go for organic milk but be careful, because all the organic milk in my local stores are ultra-pasteurized and that doesn’t work for cheesemaking.
- If you can’t get raw milk, you’ll need to be sure that the milk you choose is pasteurized and NOT ultra-pasteurized. Ultra-pasteurized milk will not coagulate with rennet, and won’t work for anything other than soft spreadable cheese.
- Cheese needs to have warm room temperatures to culture and drain properly. Go for about 72-85 degrees if you can. Wrap your pot well in a thick towel during incubation.
- Be sure to follow my brine-making instructions carefully. Feta cheese can fail if your brine does not have the correct acidity, salt content, temperature, or calcium content. The brine recipe is just as important as the cheese recipe. Fortunately it is actually super easy to make, you just need to follow a few rules.
- Calcium chloride should be added to pasteurized milk. If you have trouble getting pasteurized milk to set up, you might want to add a dose of calcium chloride. Unfortunately pasteurization doesn’t just kill the beneficial microbes in the milk, but also denatures (breaks) calcium and proteins. Adding a little calcium chloride will help bring the calcium levels back up to where they should be and this will strengthen the curd. This is not needed when you use raw milk! Raw milk is perfect on its own, however, it can increase the yield for making cheese even in raw milk.
- Lipase powder is very optional. If you’re using cow’s milk, you’ll lack that stronger piquant flavor that milk from goats or sheep imparts on the feta. You might prefer the milder flavor, but if you would rather experience the bold flavor of goat and sheep milk feta, you can help your cow’s milk a little by adding some lipase powder at the time you’re adding the culture. Be sure to hydrate it first, before you start. Lipase powder is animal based in most cases, but can be microbial as well. It is not normally made with GMOs
Rennet
Use organic animal rennet if possible. Avoid “Vegetable” or “microbial” rennet also called Fermentation Produced Chymosin (FPC). In the U.S. it is most often made with genetically modified organisms, molds, or fungi that are lab-grown on GMO soy or corn bases. In fact, 80-90% of cheese you buy in the store is made with genetically modified, manufactured microbial rennet.
Regular animal rennet is most often clean, but can also be made with genetically altered or manufactured materials, and the label does not need to reveal any of this. Honestly, I’d stick with organic or at least a non-GMO product.
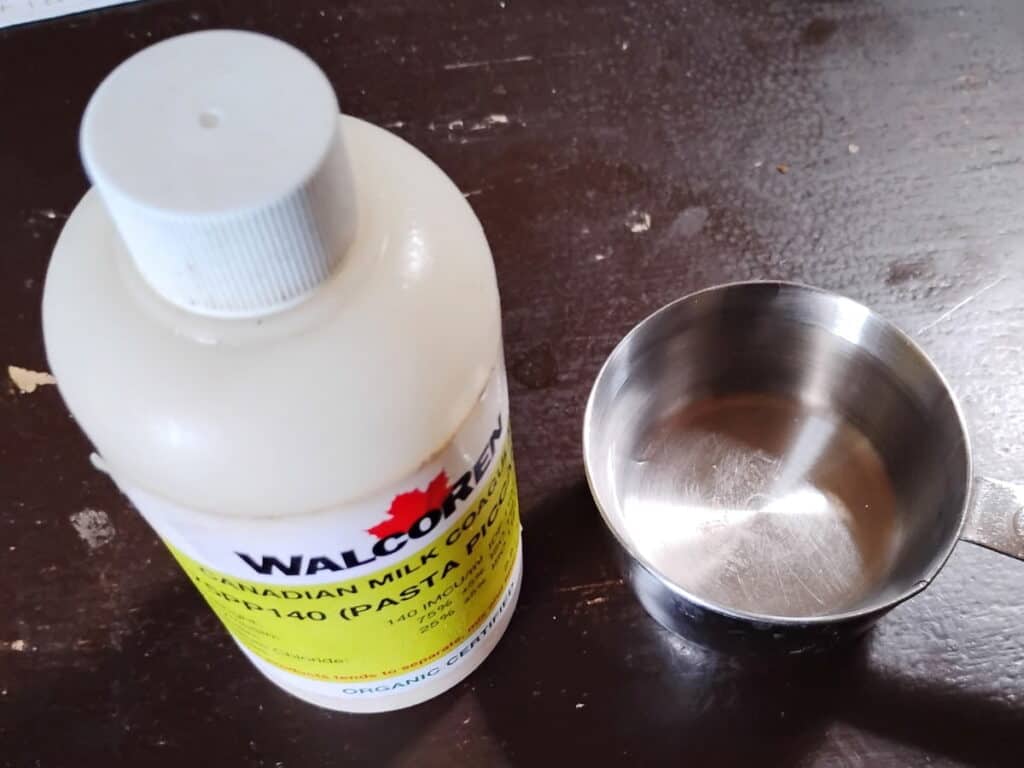
My go-to rennet is from Walcoren. It’s made the old-fashioned, traditional way from kid or sheep abomasum and it’s all natural and organic. You can find it in liquid or tablet form. I use the Walcoren Organic Kid Rennet and they also make Lamb Rennet. I have had mine for years and it still works. One jar will last a very long time in your refrigerator and if you plan to make cheese regularly, it’s a must-have item.
Another option is this clean-ingredient, no-GMO animal rennet. It’s a high quality rennet in smaller size bottle and therefore cheaper. I have used this for many years in the past.
Aged cheeses are best made with animal rennet and not vegetable rennet, since vegetable rennet can impart off-flavors as the cheese ages. If you must go with vegetable rennet you can try a thistle based rennet that is made with clean ingredients, or make your own from bull thistle stamen, but be aware that your cheese might turn out bitter, especially if you use cow’s milk or age your cheese for more than a couple of months. Here is an Organic Microbial Vegetable Rennet, which is lab made and fungus based, that you could try.
Starter Culture Options
There are many natural options for starter cultures for this soft feta cheese and I’m adding a non-GMO freeze-dried option in case you prefer purchased cultures
- If you have access to raw milk, you can make clabber, turn it into a mesophilic culture (medium temperature loving starter culture), and use that to make soft feta cheese. Learn how to do that in my Natural Cheesemaking Process article it’s very easy.
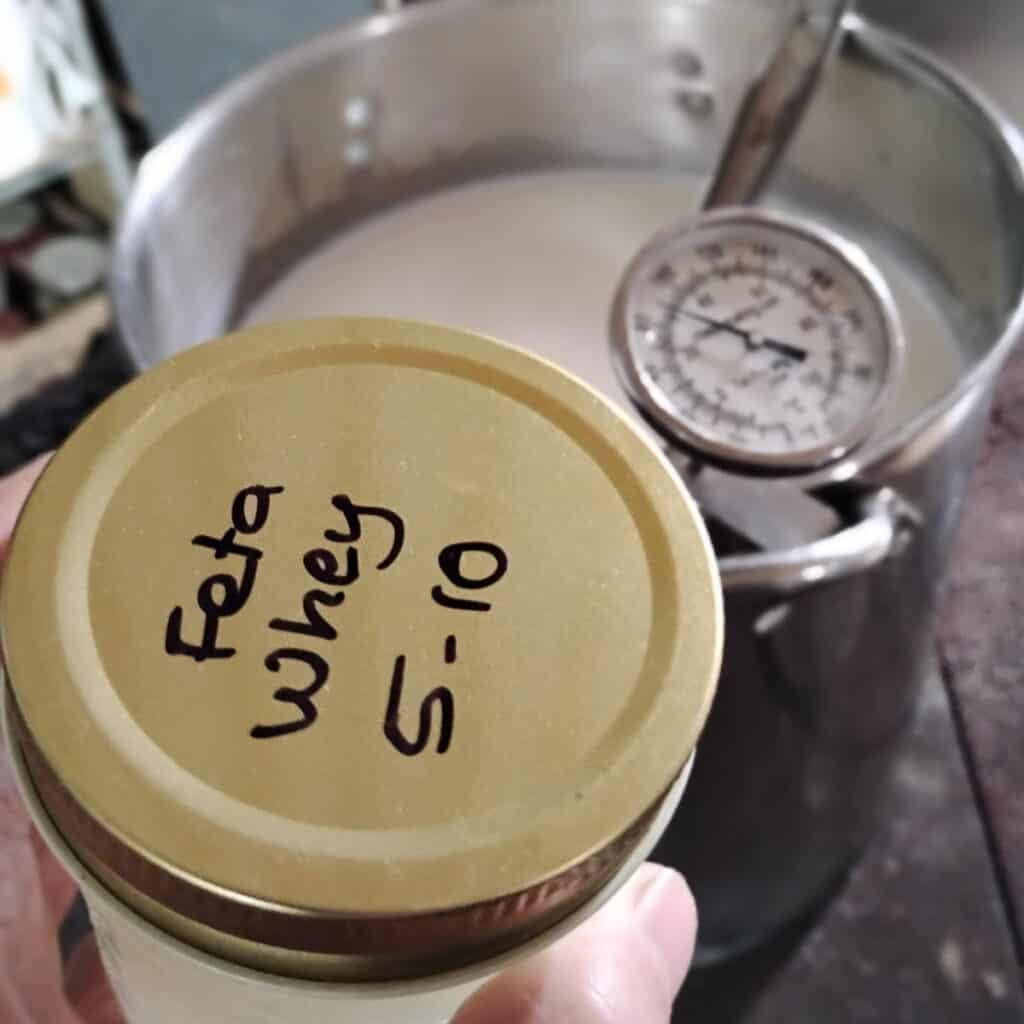
- Whey: If you’ve been making cheese, just use some of your latest whey from your last cheesemaking project.
- Kefir: If you’re keeping milk kefir grains, you can use your milk kefir as a starter culture. It is what I used for years.
- Buttermilk: You could buy some cultured buttermilk from the grocery and use it (be sure it contains live bacteria).
- Make cheese starter from either sourdough or fermentation juice as described in How To Make Cheese Culture From Sourdough this requires that you have an active sourdough or any raw fermented food in your fridge. Or take a few days and make some! You basically need to capture some wild live lacto-bacilli and introduce it to pasteurized milk, which is dead milk and needs some help to acidify and come back to life.
- Finally, if you prefer to use purchased, freeze dried cultures, you can use a small sprinkle of Flora Danica, which is non-GMO, an my preference for any soft cheeses. Use the recommended dose. You can use any mesophilic culture for this cheese.
How To Make The Best Soft Feta Cheese

If you like a firmer feta cheese, go to my Bulgarian Sirene cheese page. Bulgarian feta is pressed and much firmer than this one. This cheese yields a soft, almost spreadable feta that can crumble, but it’s not a dry crumble. This is a bit more creamy, but super delicious and very easy to make.
You’ll find live links to equipment and ingredients at the end of this post under Shop This Post.
Equipment
A large 6 quart stainless steel pot – for culturing your cheese if you’re making a one gallon batch. For a two gallon batch, use a 12 quart stock pot
Draining baskets – I normally make 2 gallon batches and that requires two medium draining baskets plus two to four small chevre forms (I like the little mini loafs these make). One draining basket is about the size of a cottage cheese container. You can use 3 of those with some holes poked into the sides and bottom (I’ve used a hot nail before, or you can use a Metal BBQ skewer, pushed through from the inside to the outside), or a couple of quart sized yogurt containers, or several small yogurt containers.
Stainless steel wire rack – this is to set your draining baskets on. If you like, you can just suspend it over a sink and put a pot or roaster under it to catch the whey to save it. Or if you don’t have a sink you can try my setup: A baking tray with a deep lasagna glass pan or a non-reactive roasting pan in it. Then suspend the rack over it. Be sure to empty the lasagna pan after the first few minutes so it won’t overflow on you.
2 quart size mason jars with lids – You’ll need one to mix the brine and one to layer your cheeses for brine-curing. That one needs to have a wide mouth opening. Old, empty pickle jars would work really well too, especially if they have a wide mouth.
Long frosting or bread knife – To cut the curd.
Thermometer – optional. You can just warm the milk to ‘baby-bottle’ temperature, so it feels comfortable and equal temperature on the inside of your wrist.
Skimmer – optional. My favorite tool for stirring and ladling cheese. Or use a spoon, or slotted turner for stirring and a ladle for scooping.
Stainless steel ladle or large measuring cup – For scooping the curd and filling your drainage containers.
Measuring cups and spoons – Use these to measure out the starter culture, rennet, and salt.
Flowersack towel or fly screen – optional but helpful for keeping flying insects out of your cheeses.
Sushi mats or dehydrator rack with fine mesh insert, or a basket – This would help with drying the cheese after draining for extra airflow.
Ingredients
Try to get organic raw milk from pastured animals if possible. If that is not an option, you can use pasteurized milk, but avoid ultra-pasteurized milk. Because this cheese uses rennet to coagulate, ultra-pasteurized milk won’t work.
The recipe card at the end of this post will have exact measurements.
Raw milk – or pasteurized milk but not ultra-pasteurized.
Cheese starter culture – Use your choice of raw milk clabber, kefir, cultured buttermilk, whey from a previous batch of cheese, or cheese culture made with sourdough starter or fermentation juice. Read more about it in the ‘Starter Culture‘ section above.
Single strength rennet – I recommend Walcoren kid or sheep rennet, either as tablets (use 1/16 tablet for this) or a liquid. Be aware that most vegetable rennets do not contain clean ingredients. Animal rennet is safer to use if you’re trying to avoid genetically modified and otherwise un-clean ingredients. Find more info in the ‘Rennet‘ section. If you don’t have a 1/16 measuring spoon, just eyeball it by adding a half full 1/8 tsp or just under 1/8 tsp of the liquid rennet.
Filtered water – avoid tap water that contains chlorine. Bottled water that has been filtered or bottled spring water is fine too.
Salt for the brine plus extra for drying the feta chunks – I like to use celtic sea salt or another unrefined salt such as Redmond’s Real salt. Himalayan pink is great too, but it will make your cheese chunks have a pinkish rind. The ¼ cup of salt is used to make a 7% salt brine for aging the cheese.
Optional:
Calcium chloride – Mostly for use with pasteurized milk. Add the recommended amount to ¼ cup of un-chlorinated water before adding it to your milk at the same time when adding the culture. It can also help increase the yield of raw milk.
Lipase powder – This is very optional and used to add a more piquante flavor to the blander cow’s milk if that is what you’ll be using. Be sure to hydrate it first for about half an hour.
Instructions For Making Soft Feta Cheese
Heating The The Milk And Mixing In Additions
If you are using lipase powder, sprinkle it into a 1/4 cup of water, stir, and let it hydrate for half an hour before using it.
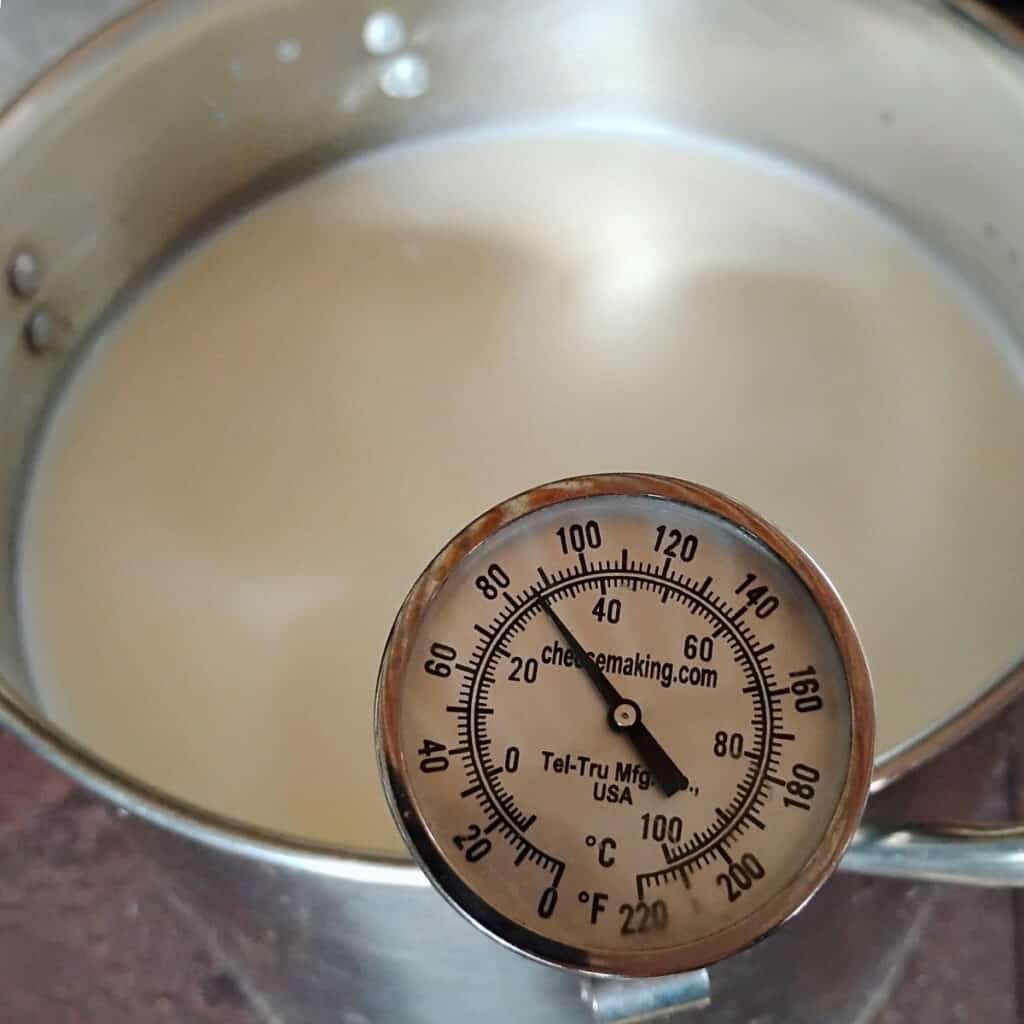
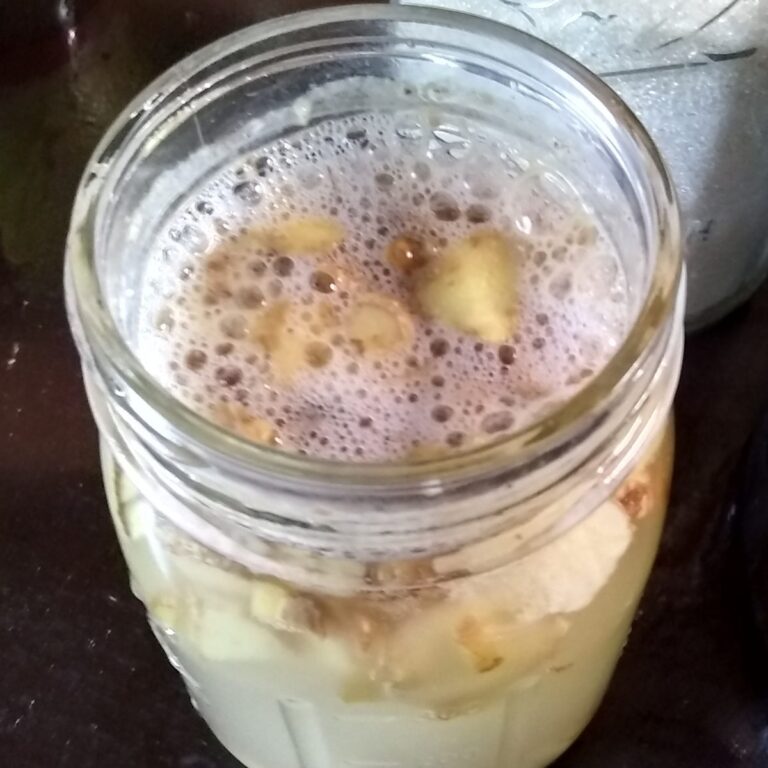
Pour the milk into the large pot and slowly warm it to 90 degrees, stirring occasionally. If you’re using raw goats or sheep milk, 85 degrees is best. If you’re using fresh milk straight from the animals, you don’t need to heat it.
If you’re using calcium chloride, dilute it with 1/4 cup of water and stir it into the warm milk with an up and down motion.
Stir the diluted Lipase into the warm milk, if you’re using it.
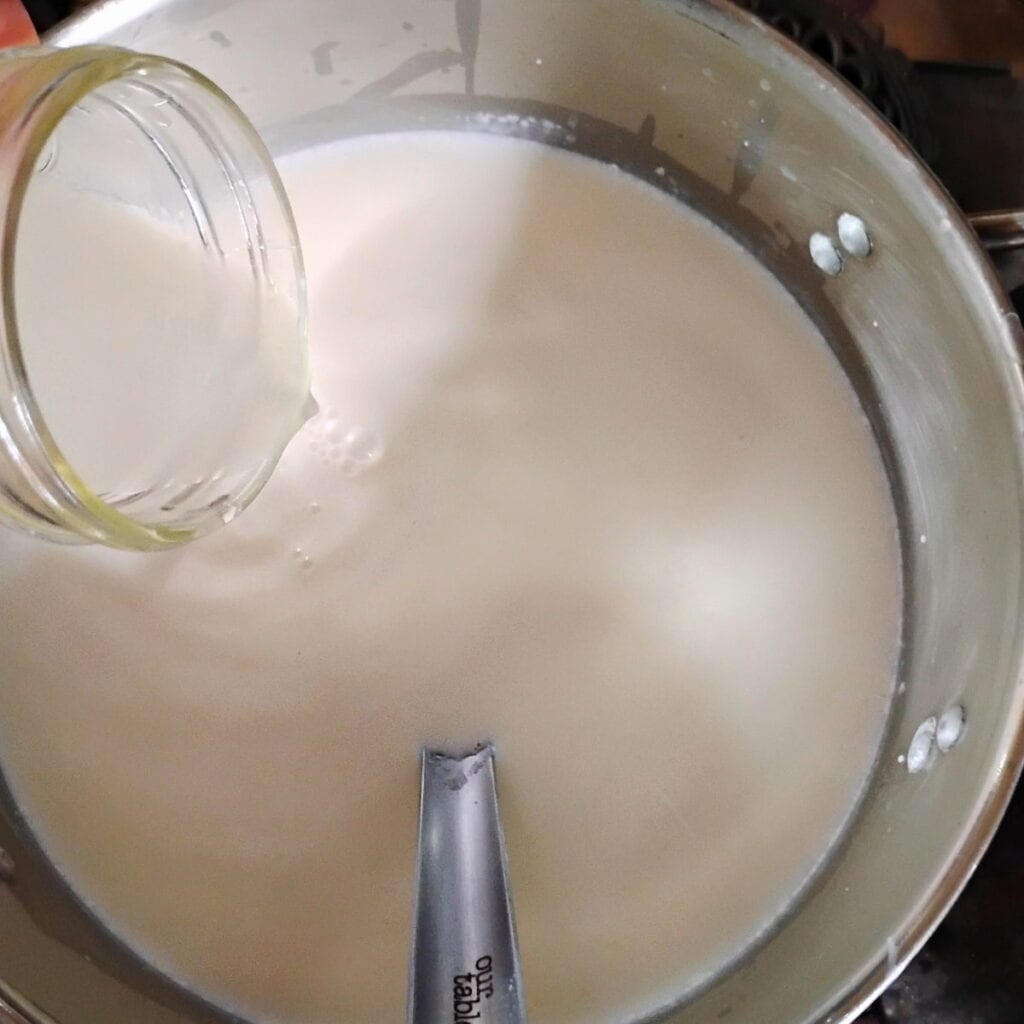
Add the starter culture to the warm milk and stir well.
Mix the rennet with 1/4 cup of non-chlorinated water to dilute.
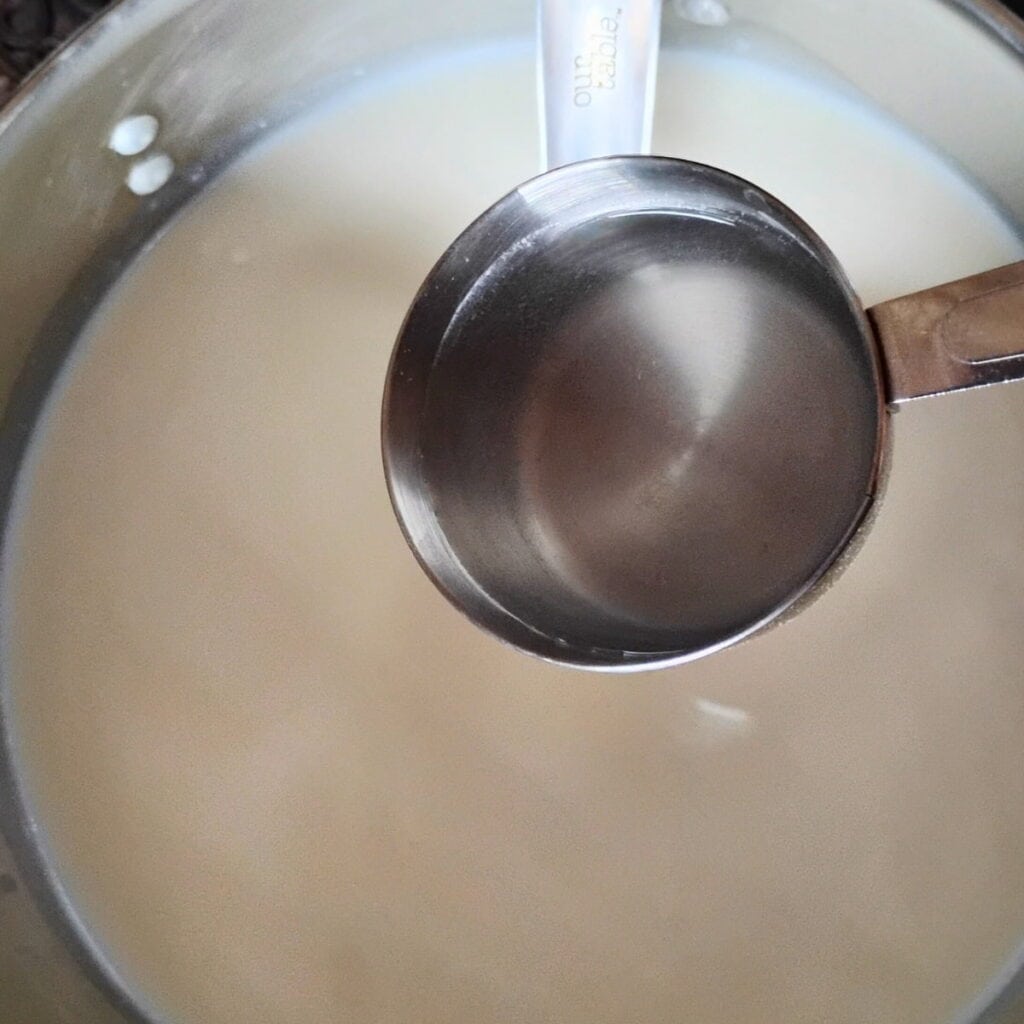
Add the rennet to the milk last and mix using 15-20 strokes in an up-down motion, try to stay below the milk surface with your utensil. After 15-20 strokes, use your spoon to stop the milk from moving and quit stirring.
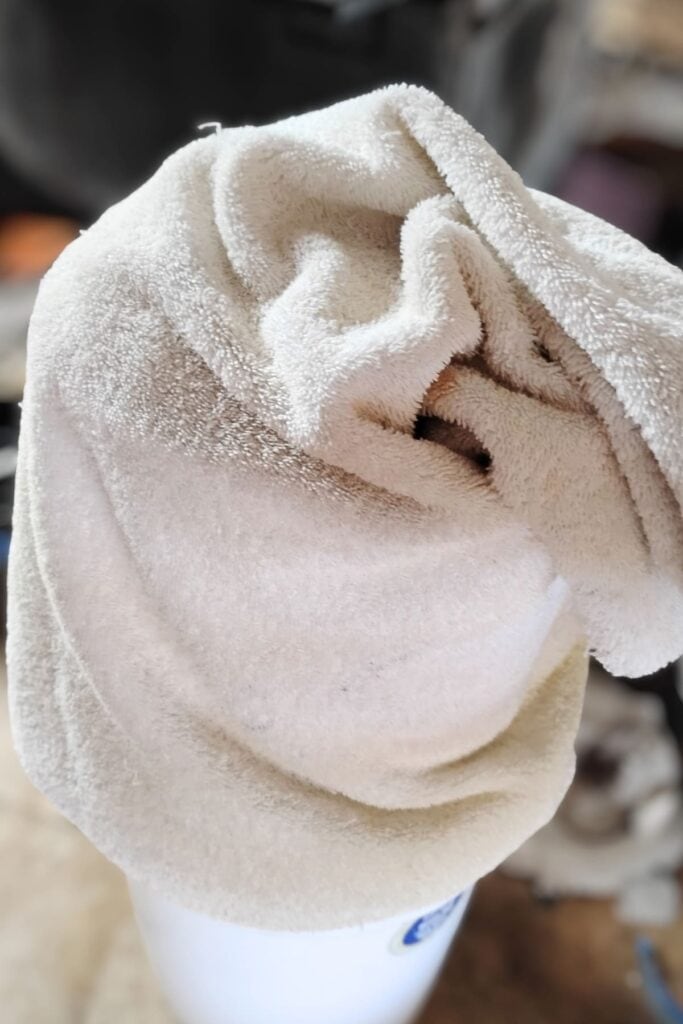
Put a lid on the pot and wrap it in a large, thick towel.
Incubation
Keep the pot in a warm place for 12-24 hours to incubate.
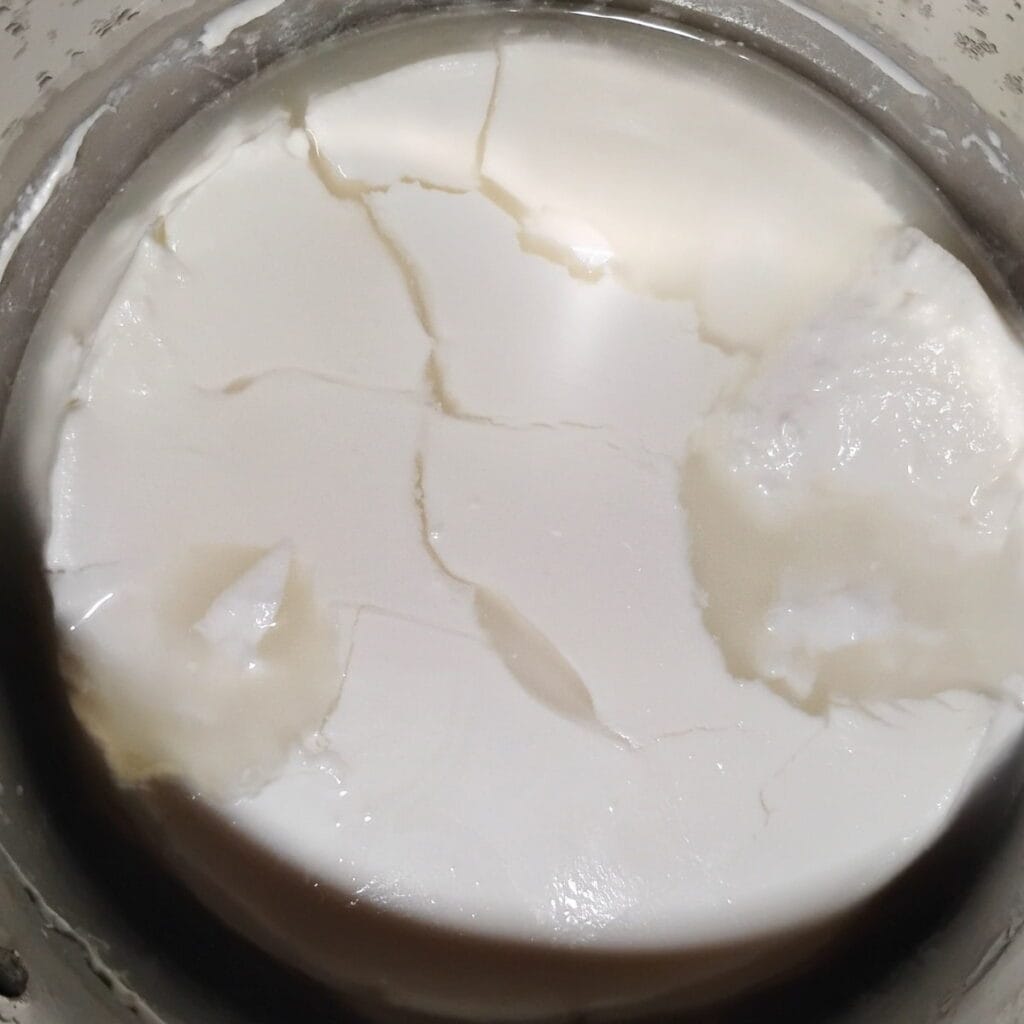
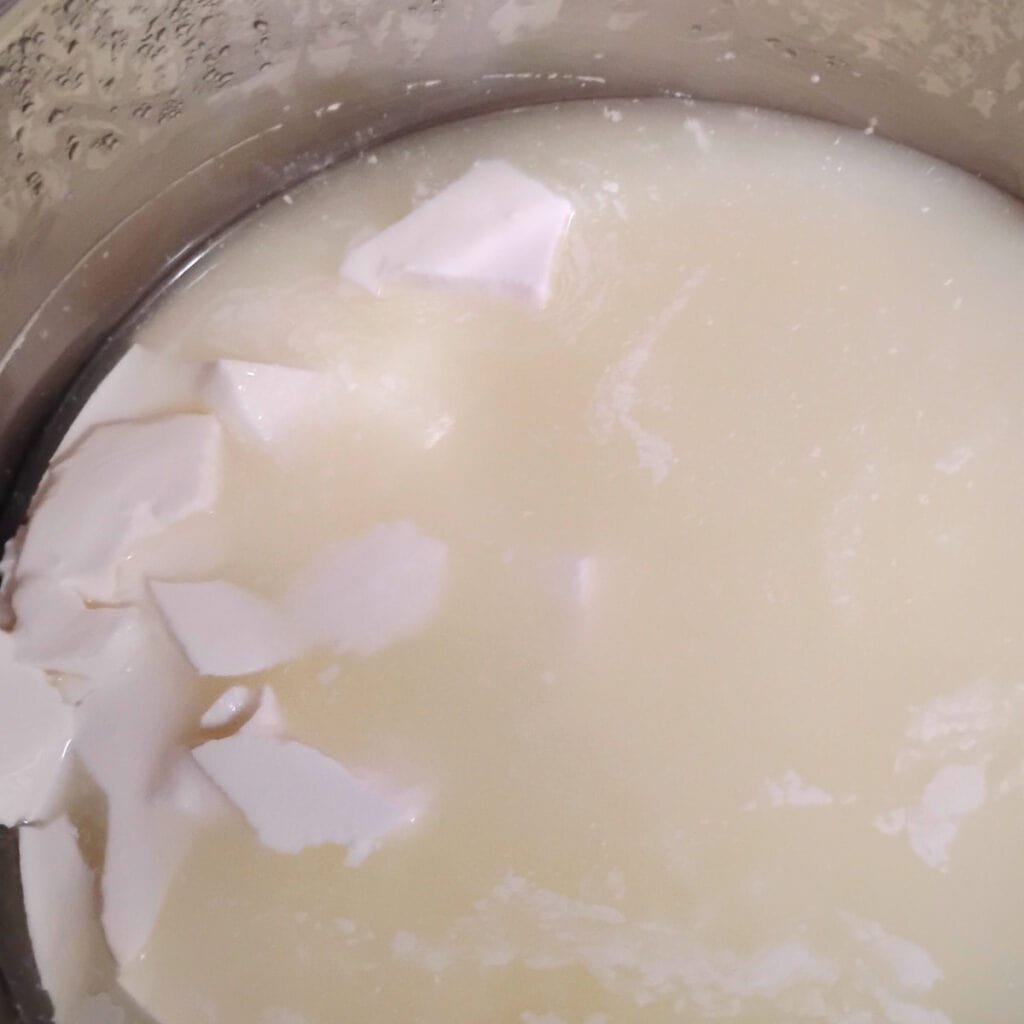
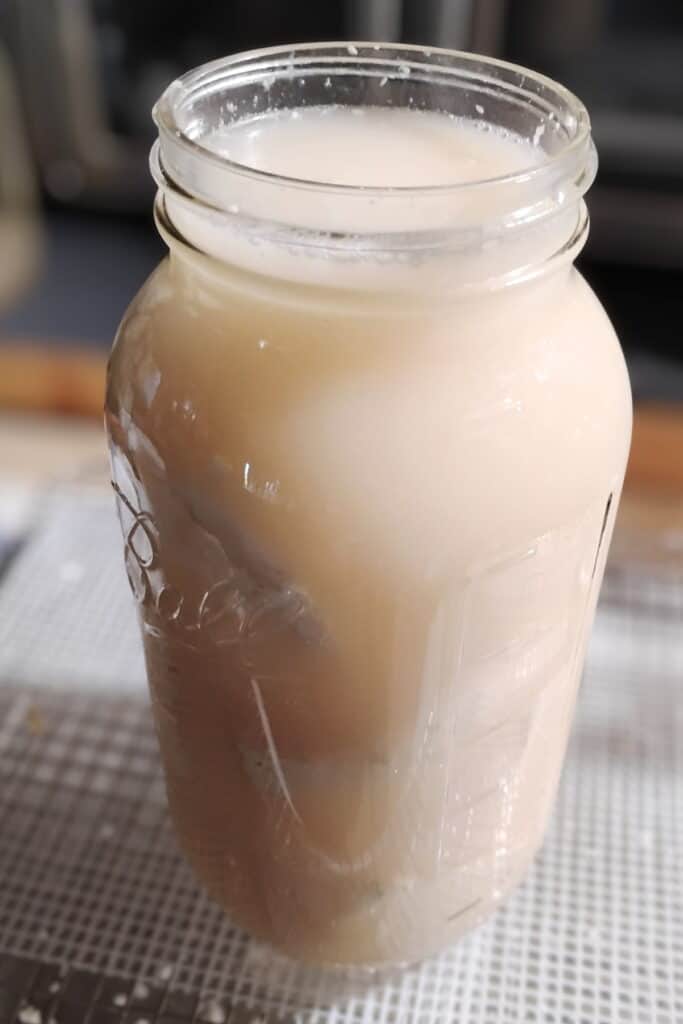
Next day, check on your cheese. Your milk should have clabbered and it should be firm enough to cut cleanly with a knife and break clean when pulled apart. This is called a clean break.
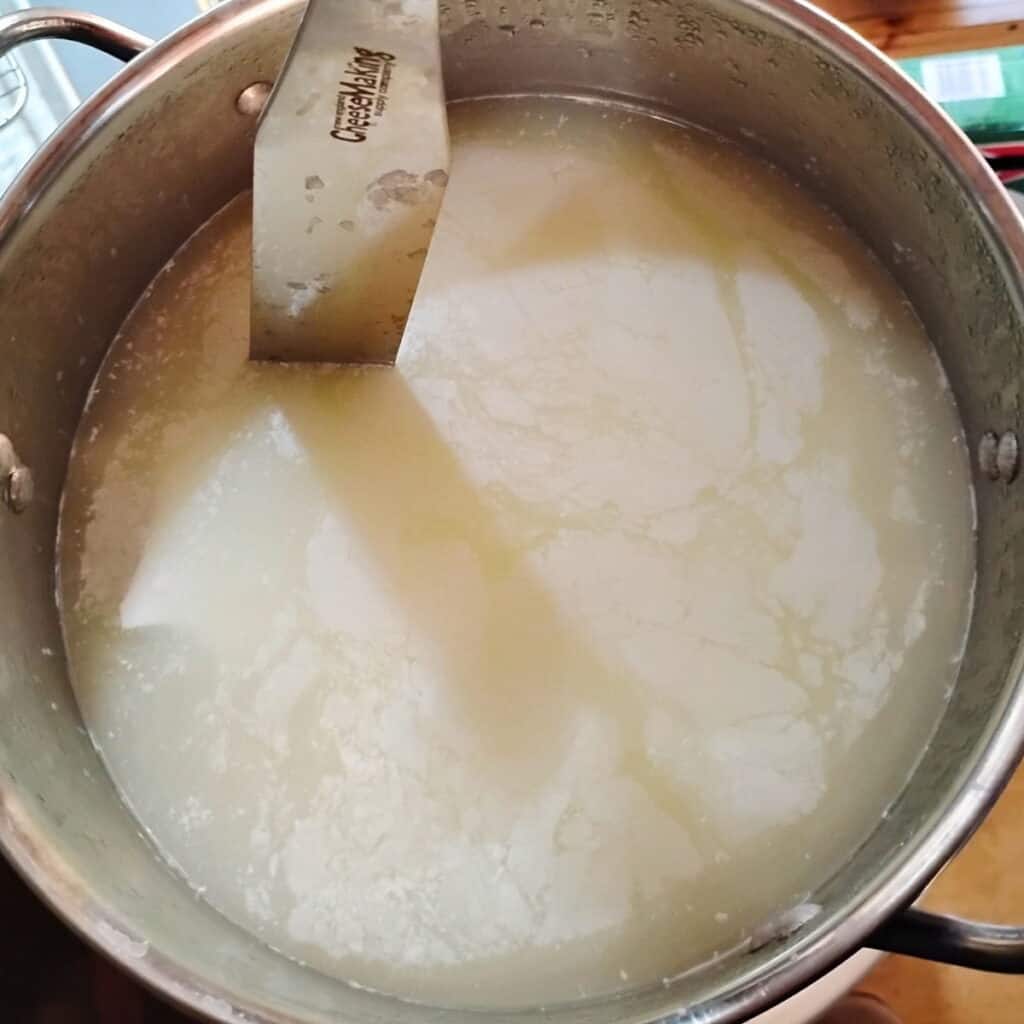
Use a long pastry or other knife and cut a criss cross pattern with lines about 1-2 inches apart.
Let the curd rest for a moment while you gather your draining equipment.
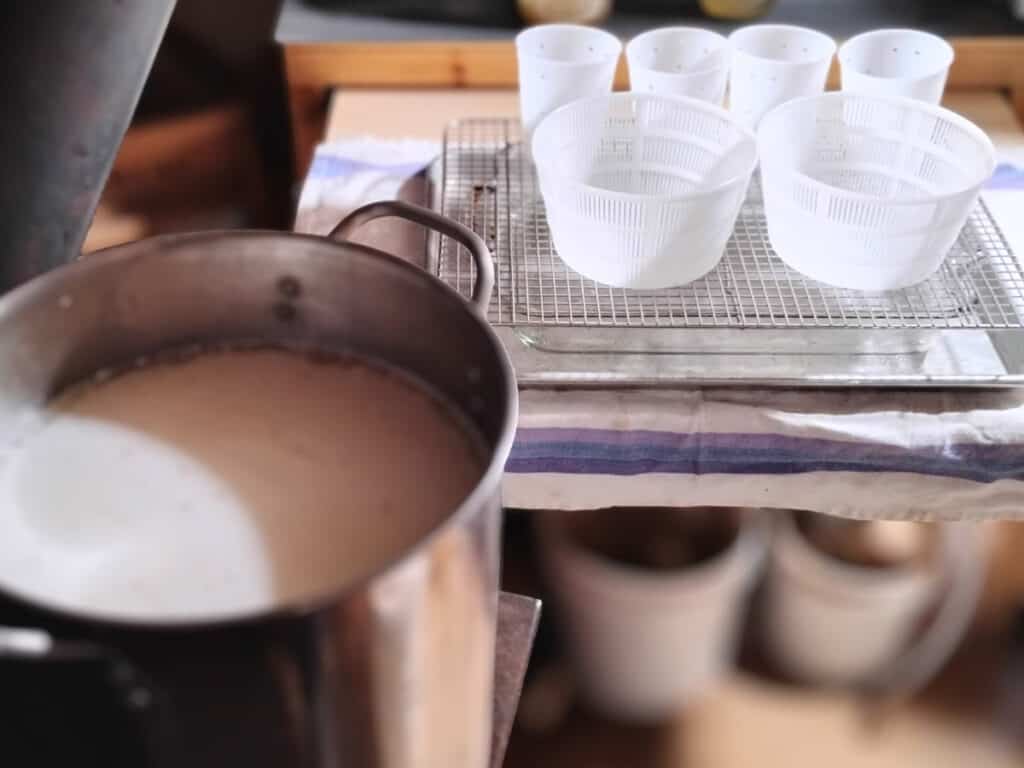
Set up your draining station and grab your clean draining baskets. Set everything nearby on the counter. (or your make-shift counter slide out shelf if you don’t have a kitchen, lol.)
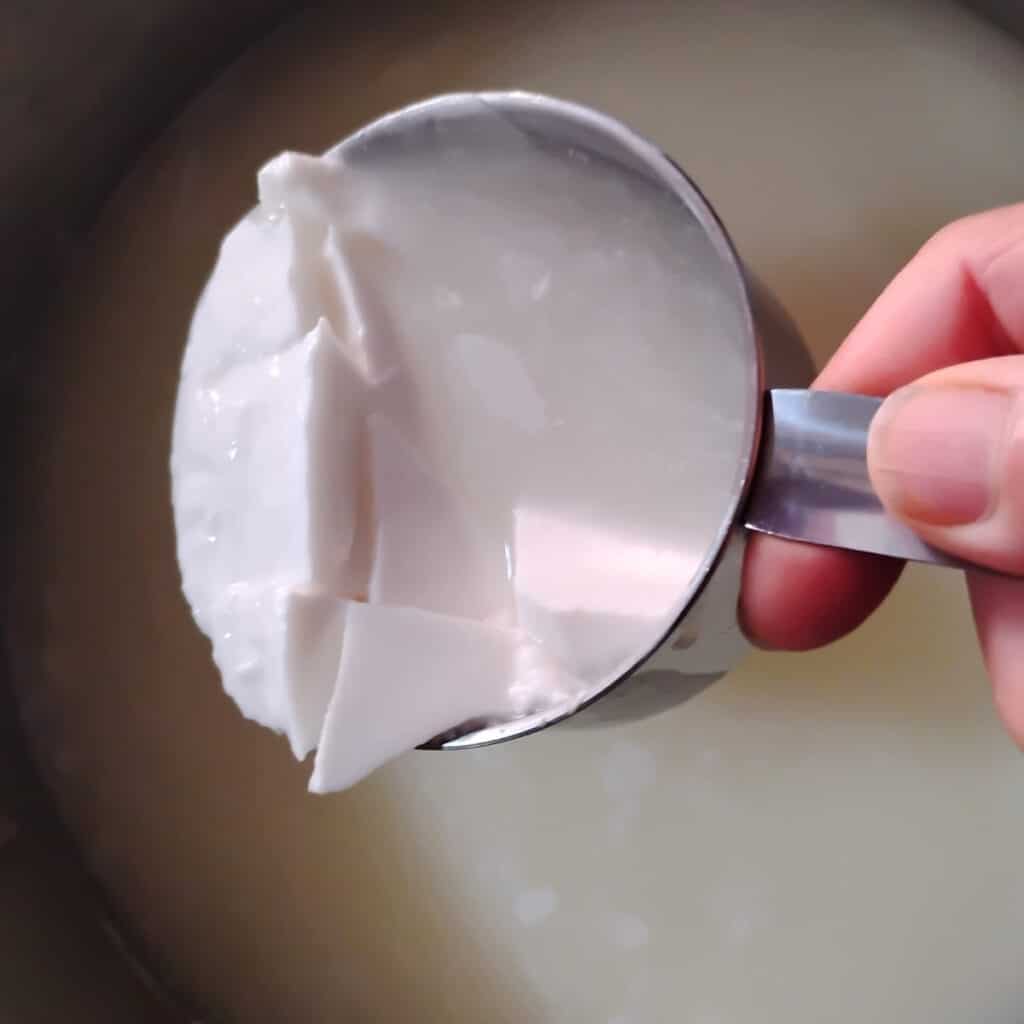
With a ladle or a large measuring cup, scoop slices of the curd from your pot.
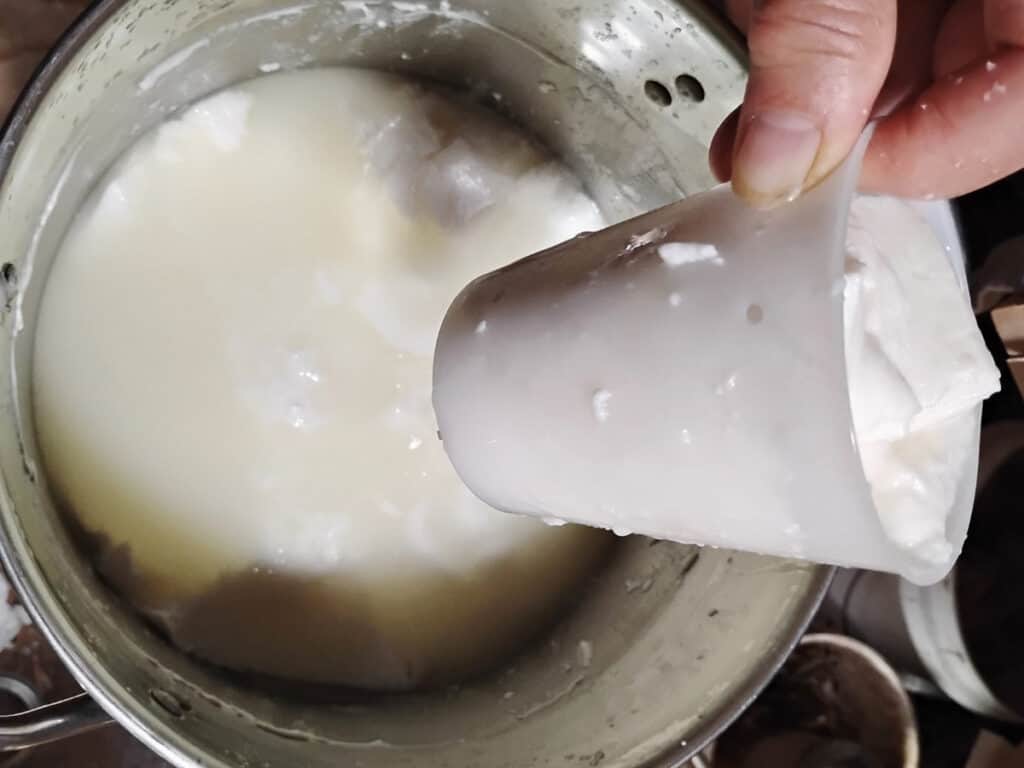
Slide them gently into one of the draining baskets.

Fill the basket all the way to the top. I hold the basket right over the pot and let the whey run back into it while I fill the basket.

Repeat for all the baskets. After you’re done, grab the first basket and top it off and do so with the rest of the baskets. Keep doing that until all your curd is used.
Set aside the pot with the remaining whey for later.
Draining The Curd In Forms
Arrange all your baskets on the draining rack. If you’re working with the no-sink method, dump out the whey in the lasagna pan if necessary. (It’s a little tricky, but you can figure out a way. I just place the rack on my whey pot for a moment, dump the whey out of the lasagna pan and into the pot and put everything back together for more draining time. CAREFUL when moving the rack with all your baskets on it, they slide oh so easily. Don’t tell me I didn’t warn you!!)
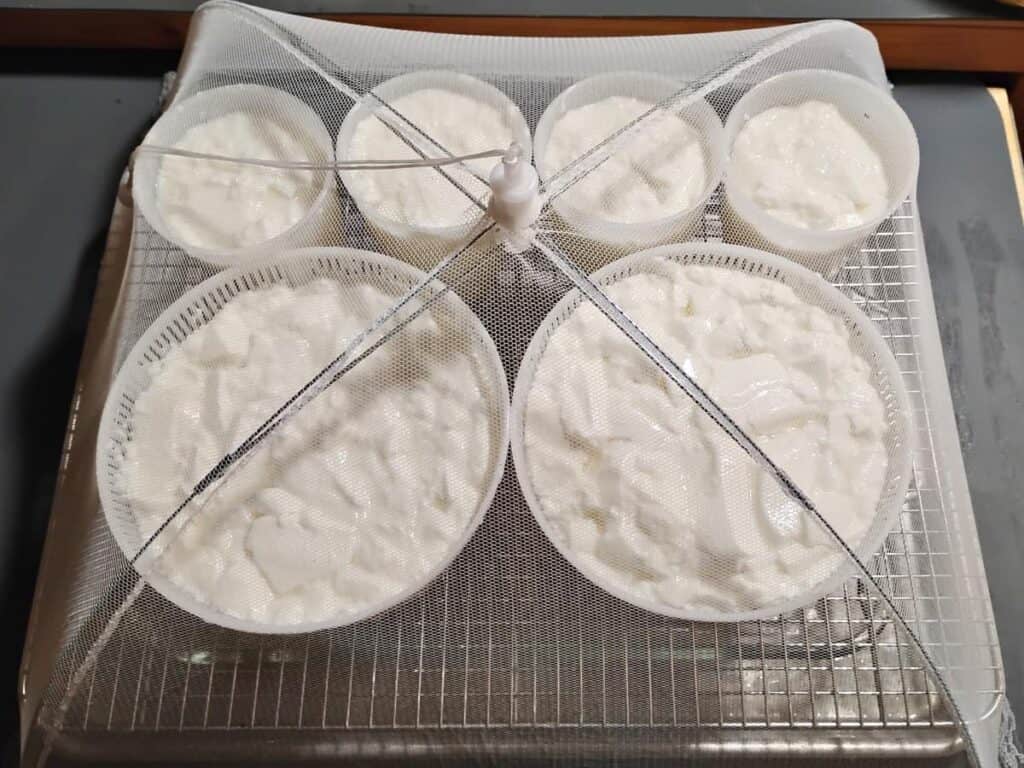
I would place a flyscreen over your setup or a light flowersack towel or something to keep any fruit flies or other critters from landing on your precious feta cakes. I’ve had a few fermented flies in my cheeses over the years. No big deal, just fish them out, but it’s not ideal and most of it can be prevented (fruit flies are super sneaky, a few seem to find their way into most anything that’s not hermetically sealed).
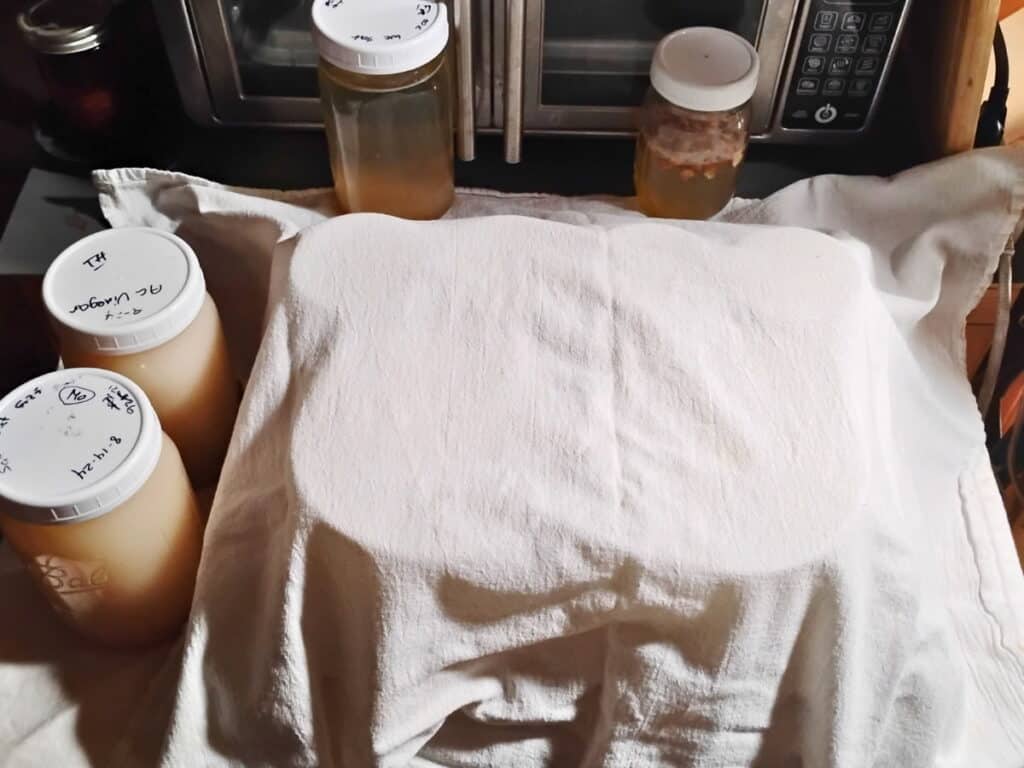
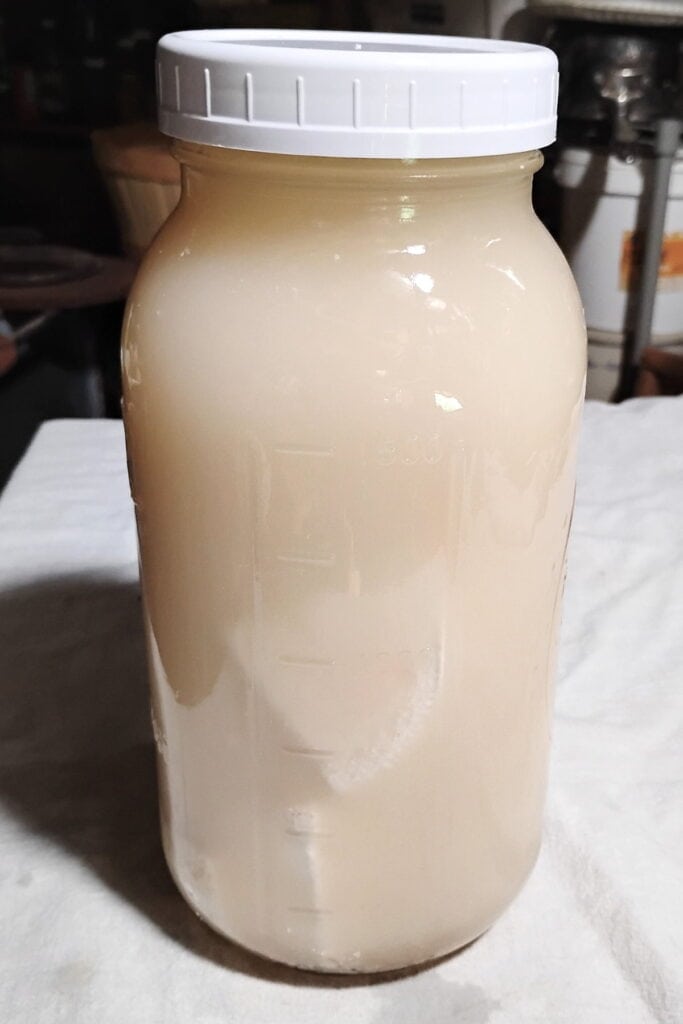
Pour some of the whey into your jar and leave it beside the cheese cakes. Save the rest for other Whey Uses.
Let the cakes drain for about 12 hours, then, very carefully, as they are soft, flip them and put them back into the forms and drain another 12-24 hours.

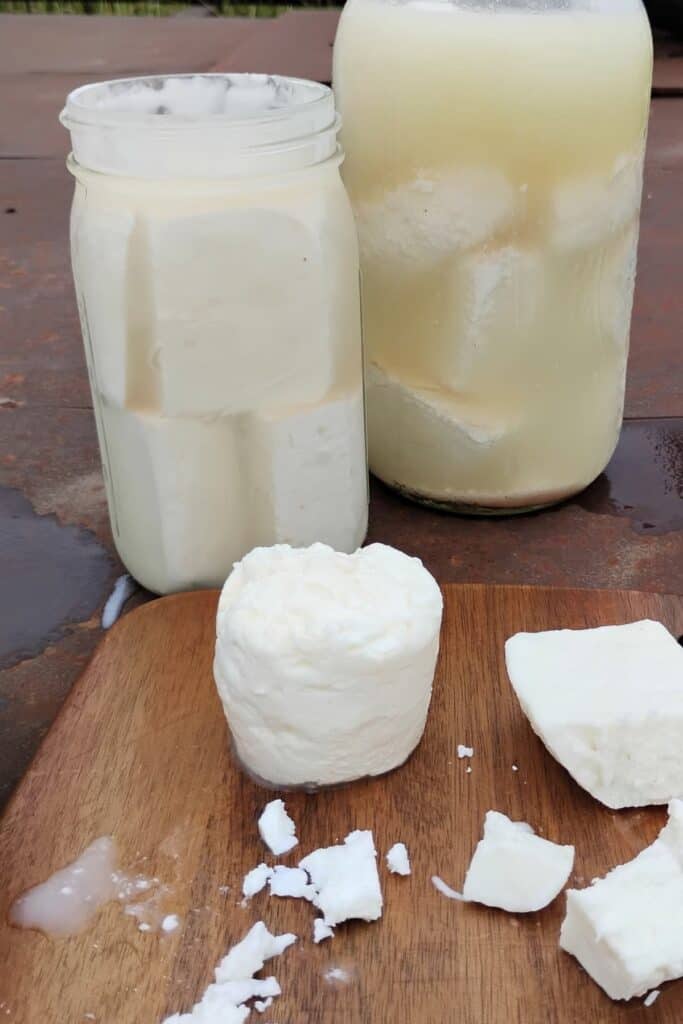
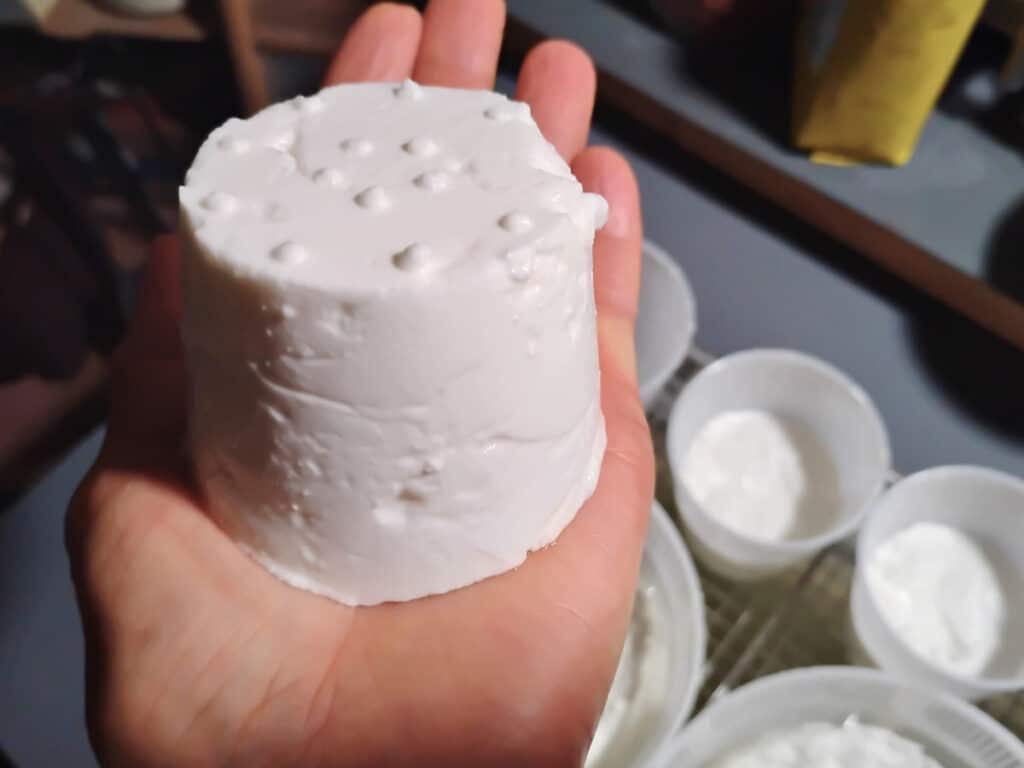
Once firm, carefully take them out of the forms and place them on a platter or wooden board.

If you have a dehydrator, you can use the rack with the thin perforated plastic mat that came with it. This would make a great surface to allow for a bit of airflow and easier drainage. Or use a basket or sushi mat for extra drainage. Or, just use your plate or a wooden board to drain them on.
Prepare The Brine And Salting The Feta
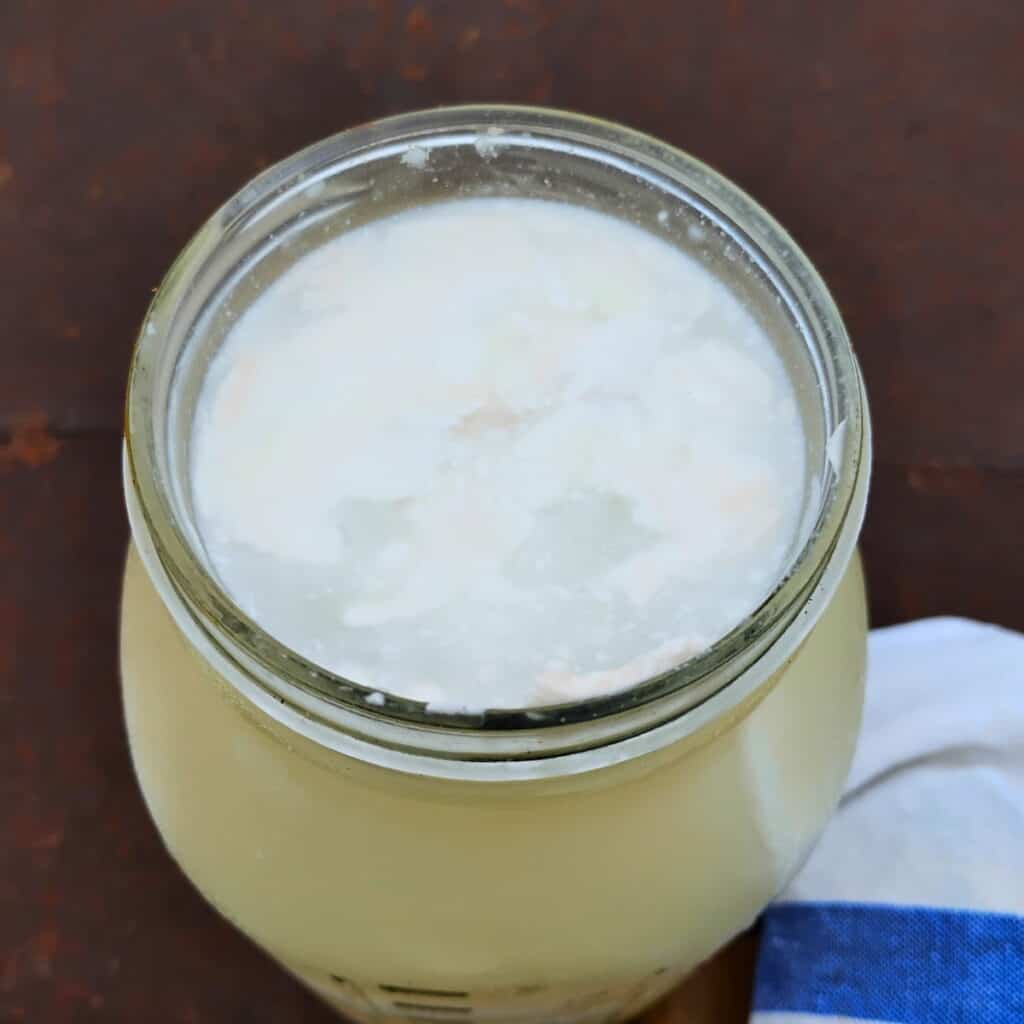
Now let’s prepare the brine. Place ¼ cup of salt into one of the quart jars. Take your saved whey and pour some of the whey over the salt. Fill it to the top. If there is a layer of cream swimming on top, skim it off. Put a lid on the jar and shake vigorously to dissolve the salt. It’s ok if it won’t all dissolve right away, just give it another shake whenever you happen to think about it over the next day.
Here is the important part: The brine and the cheese need to age at the same temperature for the same amount of time. This takes care of all the important things that make a perfect brine and allow for successful brining of the cheese later. The calcium content in the whey is just what is needed to keep the cheese from melting later when it is aging in it. The acidity also must be the same and when you age the brine and the cheese at the same temperature for the same amount of time, the acidity will match. Soo… after mixing your brine, set the jar next to the cheese cakes and keep it there until you’re ready to put the cheese in it.
Now the feta cakes need to be salted. Before you do, dump the whey from the lasagna pan and save it. Otherwise you’ll contaminate it with a lot of salt. That salted whey would make good bread baking whey if you forget. You can make some delicious rustic rye bread with it salted or not!

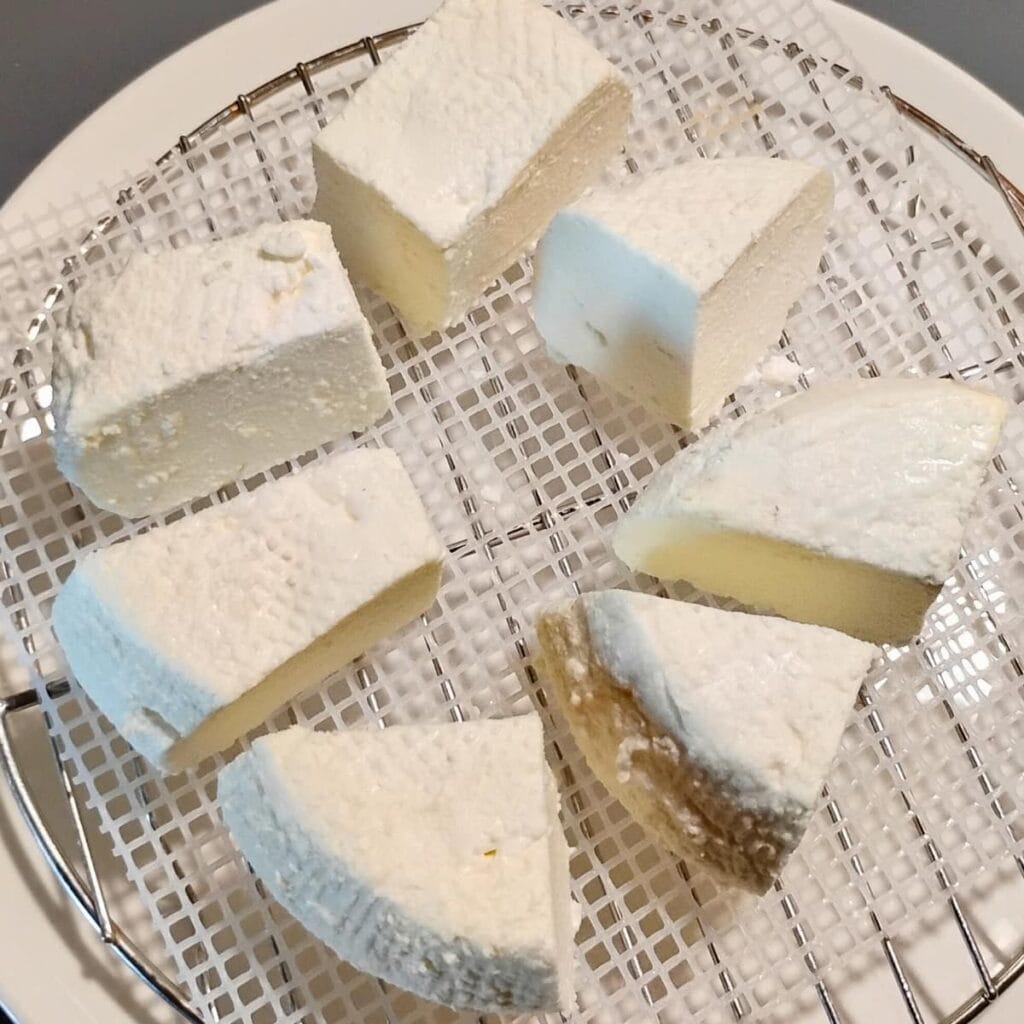
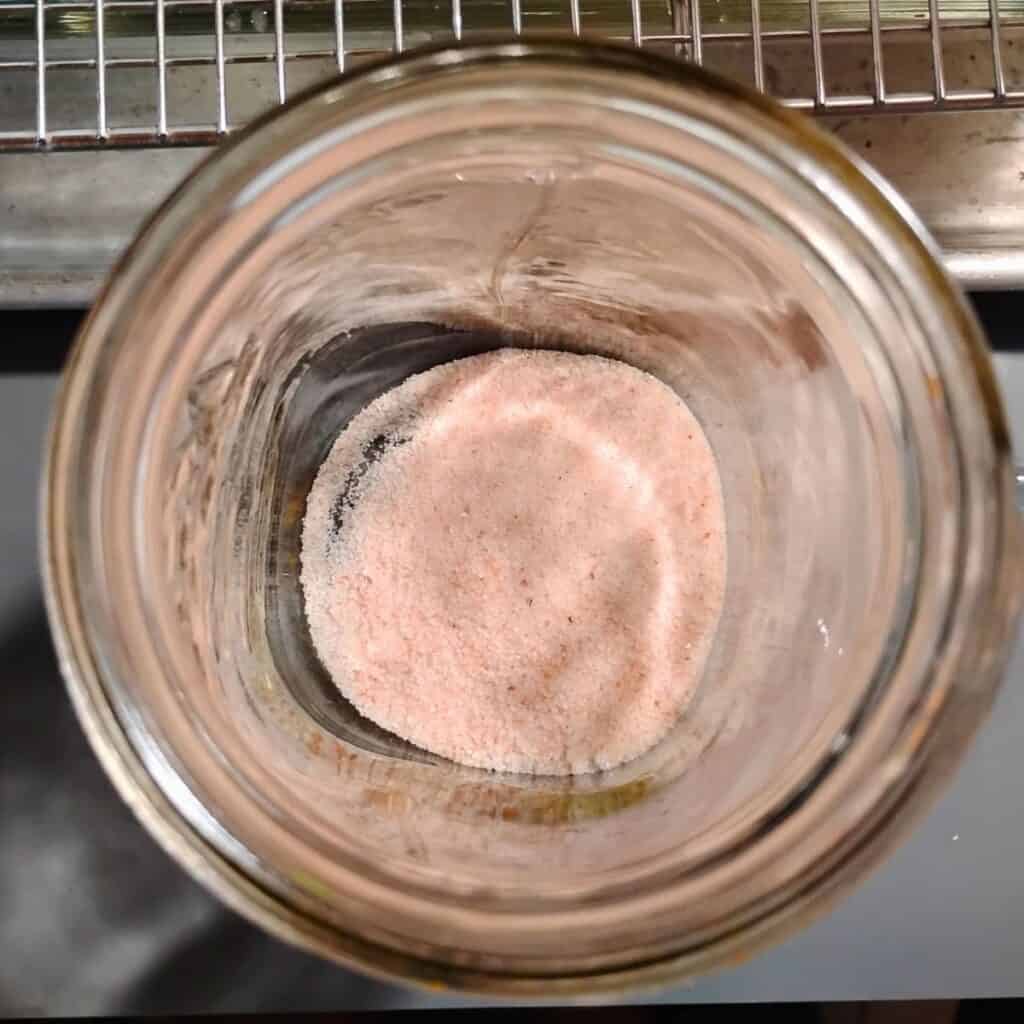
First look at your cheese rounds to see if they would fit into your canning jar opening. If they are too big, cut the bigger cakes into quarters. Sprinkle with salt all over all the surfaces, somewhat generously and place them on the plate or rack to drain. It’s important to cut them before salting because all the exposed surfaces need to be salted and dried and form a rind before brining.
Drying The Feta Chunks
After 12 hours, flip each of them over and put it back on your mats or onto a dry surface. Salt them again lightly. The goal is to develop the beginnings of a firmed-up ‘rind’ all around the exposed edges. This is important to prevent the pieces from dissolving in the brine.
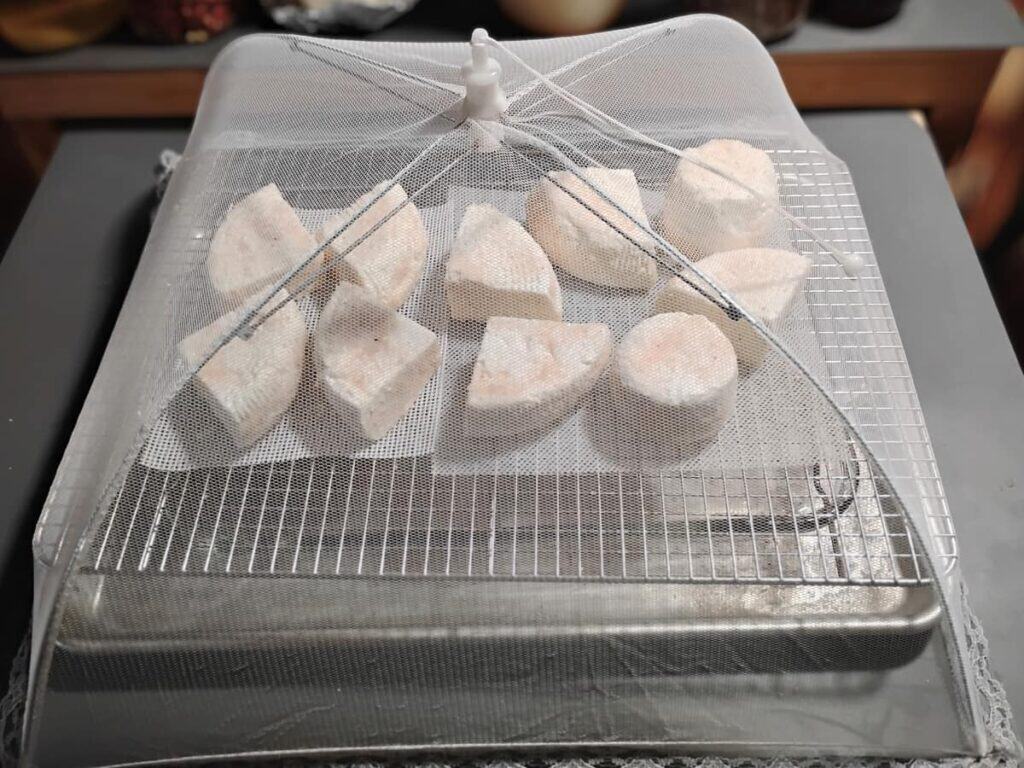
Let them dry for another 12-24 hours, flipping once or twice more and placing them on a dry surface each time. Drying the feta chunks can take up to 3 days.
Brining And Aging The Feta
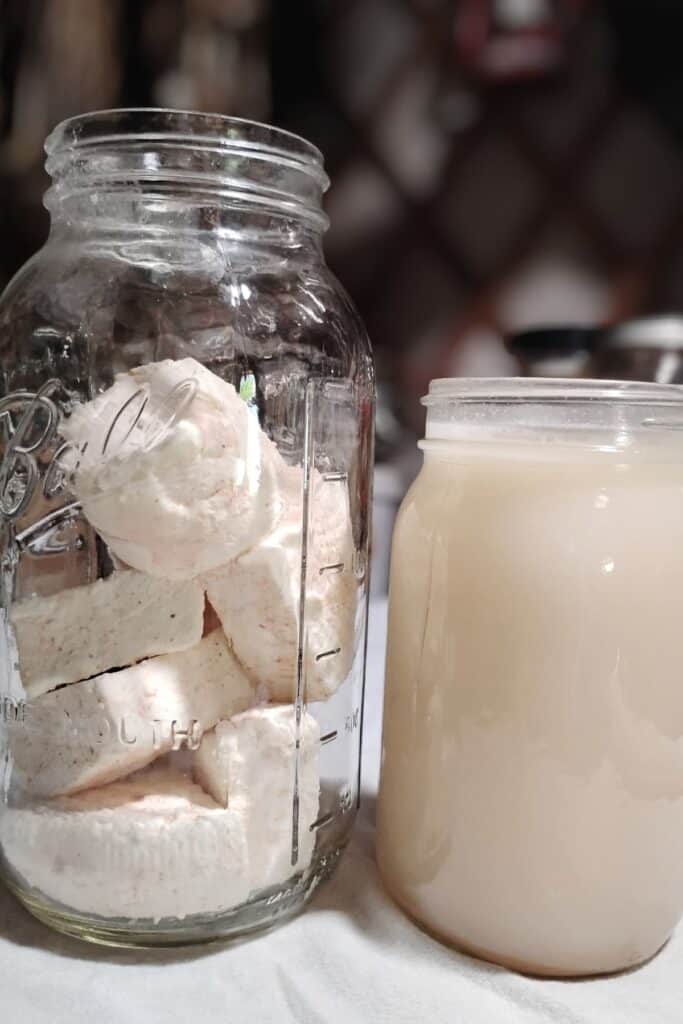
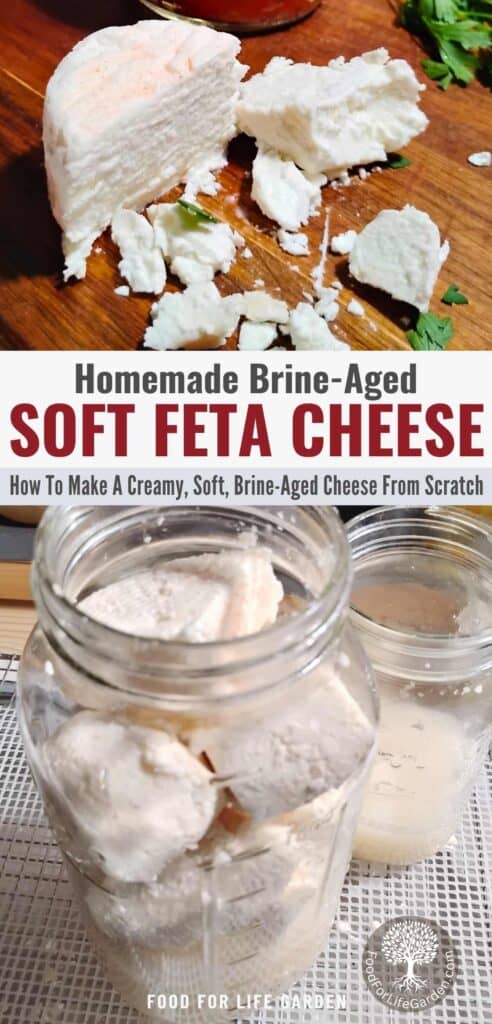
Once your feta chunks are firmed up a bit, it’s time to age them. Take the second mason jar and carefully place the chunks of cheese into it. (I used a large half gallon jar because I had made a double batch of this recipe)
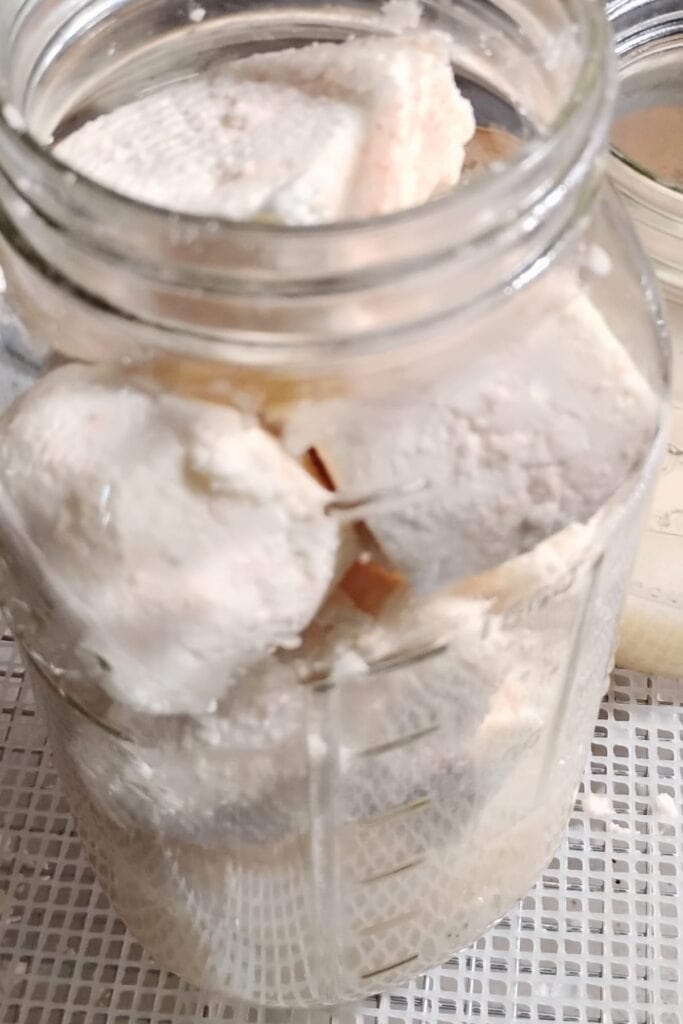
Now carefully pour the brine down the sides of the jar (don’t pour directly on the cheese). Fill the jar all the way up to the top. The chunks need to be submerged. Any that float to the top will get moldy and ruined. So if they want to float, place a glass fermentation weight on the chunks, or a boiled flat rock, Criss-crossed broken chop sticks, or some other non-corrosive object to keep the cheese down in the brine.
Now, ideally, you’ll want to age the cheese for 2 weeks at 50 degrees before placing it into the fridge, if you can. If not, just put it in the fridge. It will still age and taste great, just slower. Not everyone has a root cellar or a cheese cave. So if you don’t, placing the jar into the fridge immediately is just fine. Then let the cheese chunks age for 6-8 weeks.
If you want to eat some sooner it’s totally fine too, they are ok to eat now, but will need some time to mature into real feta. And be sure to let some age for 6 months for the best flavor.
Whenever you want to eat a chunk, use a clean utensil and lift a piece out of the brine, make sure there are no floaters, and seal the jar back up. Don’t put the piece you took out back later, just keep it in a separate container in the fridge and eat it within a week.
Storage
After the initial cheese-cave cure, you’ll be storing the chunks in the brine for as long as you want until they get eaten. I have had some 3 year old feta and it tasted phenomenal, however this soft feta might not hold together as well as a pressed feta would. So you’ll have to experiment on how long yours will last. If it starts to get softer or melt, I’d try to eat it up quickly, because it might be dissolving before long. I have not had that happen before, but it could.
This brine is not shelf stable, although you could try to keep it in a cold 50℉ root cellar. I have done that for a few years, but you’ll want to keep an eye on it. If it starts to get soft or stuff starts to want to grow on it, I’d rebottle it and put it in the fridge till it’s used up.
One of the reasons feta was originally brined, was because there was no refrigeration and this was a way to keep the cheeses preserved. However, the brines that are used for shelf-stable feta are much saltier than this one. You’d have to make a 26% brine to keep the cheese preserved at room temperature. The brine we made today was only a 7% salt brine.
In the countries where feta style cheeses originated, they were brined in the 26% solution at room temperature and the cheese would be soaked in clean water for a while to reduce the saltiness before eating it.
I prefer the 7% salt brine and storing it at cellar or fridge temps.
How To Use Soft Feta Cheese

It might melt into hot soups, which is great to make a soup creamy, but if you want chunks in your soup the firmer Sirene feta would be better suited. But soft feta is great on a baked potato because of its creaminess, and it would be great on a hot sandwich too if you don’t mind it a bit melty. It’s delicious on jambalaya too!

Soft feta cheese is delicious as a topping for salads and other cold dishes.
This Soft feta cheese is perfect when served with savory dips and scooped up with pita bread or crackers.
Soft feta is great whipped with some olive oil and served as a dip, or a topping.
Use soft feta cheese in any blended feta recipes such as salad dressings.
It is great for making a filling in savory baked goods such as hot-pockets or layered in greek savory pastries and similar dishes.
Troubleshooting
My cheese floated up and mold is growing on it
In this case, I would toss that top piece of cheese. If it touched the cheese below it, I would toss all of it. The problem is that feta is a very soft cheese and is easily penetrated by mold spores, so even if you don’t see any problems below the mold, it could be tainted. I’m not quick to toss anything, but I recently tossed a jar full of feta for that very reason. It does make great compost if that is a bit of consolidation. But it’s not worth risking your health and in the future, just try to keep all your chunks submerged.
There is mold on my brine
This can happen pretty easily. A lot of times there is a residue of cream in the whey that you use for the brine or a crumb gets loose from a chunk of cheese and floats to the top. Best practice is to keep an eye on your contents and to skim off the layer of cream when it rises.
Check occasionally for floaters too. And it really helps to leave as little oxygen as possible, so fill the jar to the very top when you first put it away to reduce any air space.
If you should find some floating mold, use your own judgment. I scoop it off and keep the rest of the jar going, but if the mold touches any cheese, I toss the cheese. Depending on how bad it is, I toss the whole jar. Regular inspection is your best guard against ruined cheese.
There is mold growing on my cheese during drying
This kind of mold is easily wiped off with a little of your salted brine or some vinegar. It is not normally dangerous if you keep wiping it as soon as you notice it.
My Soft Feta cheese is too salty
Feta cheese is always a bit saltier than many other cheeses and that is part of its character. If you find it too salty, you can rinse it off carefully before you eat it or soak it in some cold water for an hour or so before you cut into it. Soft feta falls apart easier than the hard feta, so you need to do this carefully. Salt is a preservative and helps to keep the cheese from going bad. For that reason it is necessary. You could try to use a little less next time, but I have not tried it and don’t know how well the cheese would be preserved for long-term with less salt.
Why is my feta getting slimy and soft in the brine?
There are several things that could be the culprit.
- Your brine is not acidic enough. If you didn’t age the brine along with the cheese for the same amount of time and at the same temperature, a difference in acidity could result, which can then cause your cheese to dissolve.
- If your brine’s calcium level isn’t the same as in the cheese, the brine could start to pull calcium out of your cheese and cause it to fall apart. Calcium binds the cheese and holds it together and if it leaches out the cheese can break down.
- Your cheese wasn’t dry enough before brining. If your cheese did not form a dry surface before it was added to the brine, it might start to dissolve too. So be sure to let it dry properly before brining it.
Your Questions Answered
What exactly is feta
Feta is the name for a specific type of white brined cheese that goes with rules and restrictions in order to be protected with the protection of designated origin label (PDO). In order for a cheese to be labeled feta cheese, it has to be from a certain region, contain only sheep’s milk and up to a certain percentage of goats milk, to be allowed the label name of feta. Many countries don’t honor this PDO of Greece and will call their cheese feta if it’s a brined cheese without any regards to the restrictions and rules of the protected feta. So when you buy feta here in America it could mean any sort of thing, but usually refers to a white brine-aged cheese.
Is feta ever made with cow’s milk?
It is very often made with cow’s milk, especially here in America, where goat’s or sheep’s milk is fairly rare. Even in balkan countries, it is often made with cow’s milk or with a mix of milk from cows, sheep and goats.
What is real feta cheese made of?
Real feta is made of sheep’s milk but it can also be a blend and contain up to 30% goat’s milk.
Enjoy Your Awesome Soft Feta Cheese!

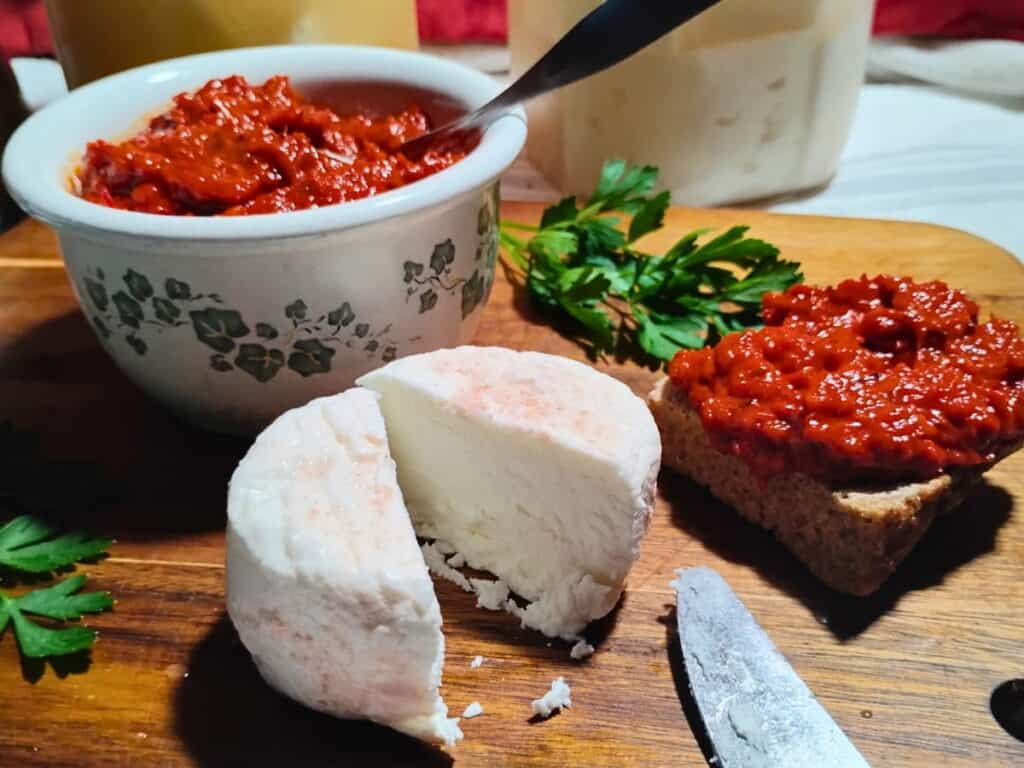
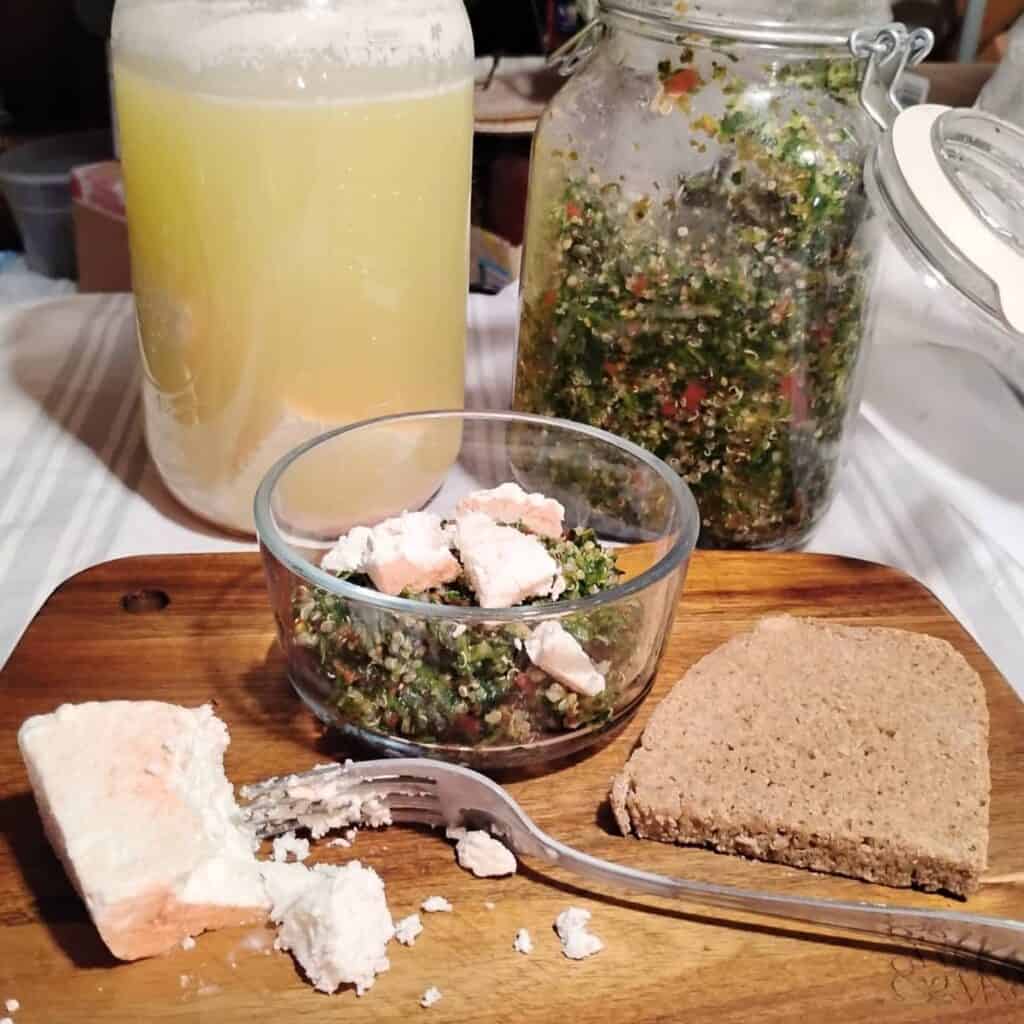
I sure hope that you will give this delicious cheese a try, and I think you’ll love it. It is basically like a chevre cheese, with a little extra rennet to make it more firm and then it is aged in brine. You’ll find many ways to use it. I love a slice of fried Kamut bread with a thick layer of ajvar and a generous slice or sprinkle of soft feta cheese, and it makes fresh or fermented tabouli salad or creamy cucumber salad taste incredibly awesome!
Have you made this recipe? I’d love to hear how you like it and please leave your ⭐⭐⭐⭐⭐ rating! And I’d love to hear your favorite ways to use feta cheese. And please don’t hesitate to ask in the comments if you have any questions!
Join the Food For Life Garden Community for more great recipes and homestead tips and ideas. I’m always adding new content. Don’t miss any new posts and learn more about my off-grid farm life.
Other recipes you might like
Make Cheese With Sourdough Starter from scratch. No raw milk required!
Bonnyclabber – What is clabber milk and its uses Learn to make bonnyclabber, the original cheese. Nature’s way of preserving milk. A tasty, creamy cheese that makes a really good frosting for einkorn zucchini bread.
Natural cheese making Process – Make your own mesophilic and thermophilic cheese starter and use it to make cheese the natural way. Make yogurt from scratch with your own homemade starter too.
Awesome Uses For Whey – Save the whey! And use it in dozens of ways. You’ll find something to do with whey for every single drop. It’s nutritious, versatile, healthy, and makes great fizzy sodas!
How To Make Sirene (Bulgarian Feta) -Try making your own feta-style cheese. Learn all about this wonderful and easy to make cheese and get the recipe!
Homemade Bel Paese Cheese – This could very well become your favorite all-purpose slicing, grating, or melting cheese. It’s easy to make and it’s perfect for so many applications.
Make German Quark cheese – Make authentic German Quark, also called Topfen. A versatile fresh, soft cheese that is a staple in German cooking.
Make your own chevre cheese from scratch – How to make super versatile creamy, spreadable cheese that is incredibly versatile. Replace store bought cream cheese with this healthy version!
Queso Fresco cheese recipe – The quickest, easiest cheese you’ll ever make and so versatile!
How to make your own sourdough starter – This forms the basis for any gut-healthy sourdough bread, that you can keep going for a hundred years or more.
The best Sourdough Rye Bread – Easy, lazy method that makes super delicious, moist, chewy rye bread to partner with your favorite cheese.
Sourdough Seeded Rye Bread With Spelt – If you are a fan of rye bread, you need to try this awesome seeded rye. Loaded with whole grain berries and seeds, awesome with cheese.
Make an ancient grain sourdough bread – The easiest sourdough sandwich style bread you can imagine. No kneading required and it bakes up nicely airy and chewy and tastes amazing.
Pin This Recipe For Later
Shop This Post
Equipment
Royal Berkey water filter unit
A large 6 qt pot
12 quart stock pot for larger batches
Flour Sack Towels
Organic Flour Sack Towels
Skimmer
Thermometer
Long Frosting Knife
Measuring Cups
Micro Measuring spoons
A set of basket forms
Quart Mason Jar
Micro Measuring Spoons
Glass Fermentation Weight
Mesh Food Covers
Sushi Mats
Ingredients
Redmond’s Real Salt
Himalayan Pink Salt
Celtic Sea Salt
Walcoren Organic Kid Rennet
Walcoren Kid Rennet Tablets
Walcoren Lamb Rennet
Animal Rennet
Vegetable Rennet
Live Kefir Grains
Flora Danica
Calcium Chloride
Lipase Powder
Recommended literature for Cheese making
The Art Of Natural Cheese Making, David Asher
Milk Into Cheese, David Asher
How To Make The Best Soft Feta Cheese
Equipment
- A large 6 quart stainless steel pot – for culturing your cheese if you're making a one gallon batch. For a two gallon batch, use a 12 quart stock pot
- Draining baskets – purchased, or use cottage cheese or yogurt containers with holes poked into it. (from the inside out()
- Stainless steel wire rack – this is to set your draining baskets on. Put over the sink or over a large roasting pan.
- 2 quart size mason jars with lids – You'll need one to mix the brine and one to layer your cheeses for brine-curing. That one needs to have a wide mouth opening.
- Long frosting or bread knife - – To cut the curd.
- thermometer
- Skimmer – optional. My favorite tool for stirring and ladling cheese, or use a spoon or a slotted turner.
- Stainless steel ladle or large measuring cup – For scooping the curd and filling your drainage containers.
- Measuring cups and spoons – Use these to measure out the starter culture, rennet, and salt.
- Flowersack towel or fly screen – optional but helpful for keeping flying insects out of your cheeses.
Ingredients
- 1 Gallon raw milk – or pasteurized milk but not ultra-pasteurized.
- ¼ cup cheese starter culture – Use your choice of raw milk clabber, kefir, cultured buttermilk, whey from a previous batch of cheese, or cheese culture made with sourdough starter or fermentation juice or a freeze-dried mesophilic culture.
- un-chlorinated water
- 1/16 tsp single strength rennet (use a scant ⅛ tsp if you don't have a 1/16) – I recommend Walcoren kid or sheep rennet paste or tablets (use 1/16 tablet for this). Dissolve or dilute in ¼ cup of un-chlorinated water.
- ¼ cup sea salt plus extra for drying the feta chunks – use only additive-free salt.
Optional:
- ¼ tsp Calcium chloride – mostly for use with pasteurized milk. Dilute in ¼ cup of un-chlorinated water.
- 1/16 tsp Lipase powder – optional for a more piquante flavor. Be sure to hydrate for about half an hour in ¼ cup of un-chlorinated water before you start mixing your ingredients.
- Sushi mats or dehydrator rack with fine mesh insert or a basket – This would help with drying the cheese after draining for extra airflow.
Instructions
Heat the milk and add the extras
- If you are using lipase powder, sprinkle it into a 1/4 cup of water, stir, and let it hydrate for half an hour before using it.
- Pour the milk into the large pot and slowly warm it to 90 degrees, stirring occasionally. If you’re using raw goats or sheep milk, 85 degrees is best. If you’re using fresh milk straight from the animals, you don’t need to heat it.
- Dilute the calcium chloride with 1/4 cup of water and stir it into the warm milk with an up and down motion.
- Stir the diluted Lipase into the warm milk.
- Add the starter culture to the warm milk and stir well.
- Mix the rennet with 1/4 cup of non-chlorinated water to dilute.
- Add the rennet to the milk and mix using 15-20 strokes in an up-down motion, try to stay below the milk surface with your utensil. After 15-20 strokes, use your spoon to stop the milk from moving. Put a lid on the pot and wrap it in a large, thick towel.
Incubate
- Keep the pot in a warm place for 12-24 hours to incubate.
Drain the curds
- Next day, check on your cheese. Your milk should have clabbered and it should be firm enough to cut cleanly with a knife, and break apart cleanly at the cut site. This is called a clean break.
- Use a long pastry or other knife and cut a criss cross pattern with lines about 1-2 inches apart. Let the curd rest for a moment while you gather your draining equipment.
- Set up your draining station and grab your clean draining baskets. Set everything nearby on the counter.
- With a ladle or a large measuring cup, scoop slices of the curd from your pot and place them gently into one of the draining baskets. Fill the basket all the way to the top. I hold the basket right over the pot and let the whey run back into it while I fill the basket.
- Repeat for all the baskets. After you’re done, grab the first basket and top it off and do so with the rest of the baskets. Keep doing that until all your curd is used.
- Pour some of the remaining whey into one of the glass mason jars and fill it. Set aside the pot with the remaining whey for other uses.
- Arrange all your baskets on the draining rack. If you’re working with the no-sink method, dump out the whey in the lasagna pan if necessary. (It’s a little tricky, but you can figure out a way. I just place the rack on my whey pot for a moment, dump the whey out of the lasagna pan and into the pot and put everything back together for more draining time. CAREFUL when moving the rack with all your baskets on it, they slide oh so easily. Don’t tell me I didn’t warn you!!)
- I would place a flyscreen over your setup or a light flowersack towel or something to keep any fruit flies or other critters from landing on your precious feta cakes.
- Let the cakes drain for about 12 hours. Then, very carefully flip them and put them back into the forms and drain another 12-24 hours. Once firm, carefully take them out of the forms and place them on some draining mats, a platter or something. If you have a dehydrator, you can use the rack with the thin perforated plastic mat that came with it. This would make a great surface to allow for a bit of airflow and easier drainage. Or use a basket or sushi mat for extra drainage. You can also use a wooden board to dry them on.
Prepare the brine and salt the cheese chunks.
- Now let's prepare the brine. Place ¼ cup of salt into the quart jars with the whey in it. If there is a layer of cream swimming on top, skim it off first. Put a lid on the jar and shake vigorously to dissolve the salt. It's ok if it won't all dissolve right away, just give it another shake whenever you happen to think about it over the next day.
- Here is the important part: The brine and the cheese need to age at the same temperature for the same amount of time. This takes care of all the important things that make a perfect brine and allow for successful brining of the cheese later. The calcium content in the whey is just what is needed to keep the cheese from melting later when it is aging in it. The acidity also must be the same and when you age the brine and the cheese at the same temperature for the same amount of time, the acidity will match. Soo… after mixing your brine, set the jar next to the cheese cakes and keep it there until you're ready to put the cheese in it. (If you are doubling this recipe, make 2 quarts of the brine!)
- Now the cakes need to be salted.
- First look at them to see if they would fit into your canning jar opening. If they are too big, cut the cakes into quarters. Sprinkle with plenty of salt all over all the surfaces and place them on the plate or rack to drain. It's important to cut them before salting because all the surfaces need to dry and form a rind.
- After 12 hours, flip each of them over onto a dry surface and salt them again lightly. The goal is to develop the beginnings of a firmed-up 'rind' all around the exposed edges. This is important to prevent the pieces from dissolving in the brine.
- Let them dry for another 12-24 hours, flipping once or twice more and placing them on a dry surface each time. It might take another day, up to 3 days total.
- Once your feta chunks are firmed up a bit, it’s time to age them. Take the second mason jar and carefully place the chunks of cheese into it.
- Now carefully pour the brine down the sides of the jar (don't pour directly on the cheese). Fill the jar all the way up to the top. The chunks need to be submerged. Any that float to the top will most likely get moldy and might become ruined. So place a glass fermentation weight on the chunks, or a boiled flat rock, a broken chopstick, or some other non-corrosive object to keep the cheese down in the brine.
- Now you'll want to age the cheese for 2 weeks at 50 degrees if you have a cheese cave, then move them to a 40 degree or below refrigerator. Or just put it in the fridge right away. It will still taste great. Let the cheese chunks age there for 6-8 weeks. If you want to eat some sooner it's totally fine, they are ok to eat now, but will need some time to mature into real feta. And they get better as they age! Allow for some to ripen for 6 months and compare the difference.
- Whenever you want to eat a chunk, use a clean utensil and lift a piece out of the brine, make sure there are no floaters, and seal the jar back up. Don’t put the piece you took out back later, just keep it in a separate container in the fridge and eat it within a week.
Storage
- You'll be storing the feta chunks in the brine for as long as you want until they get eaten. I have had some 3 year old feta and it tasted phenomenal, however this soft feta might not hold together as well as a pressed feta would. So you'll have to experiment on how long yours will last. If it starts to get softer or melt, I'd try to eat it up quickly, because it might be dissolving before long. I have not had that happen before, but it could.
- This brine is not shelf stable at room temperature, although you could keep it in a cold 50℉ root cellar or cheese cave if you have it. I have done that for a few years, but you'll want to keep an eye on it. If it starts to get soft or stuff starts to want to grow on it, I'd rebottle it, place a fresh lid on it, and put it in the fridge till it's used up.
- One of the traditional reasons for brining feta, was because there was no refrigeration and this was a way to keep the cheeses preserved in a warm environment. However, the brines that are used for shelf-stable feta are much saltier than this one. You'd have to make a 26% brine to keep the cheese preserved at room temperature. The brine we made today was only a 7% salt brine.
- In the countries where feta style cheeses originated, they were brined in the 26% solution at room temperature and the cheese would be soaked in clean water for a while to reduce the saltiness before eating it.
- I prefer the 7% salt brine and storing it at cellar or fridge temps.
Notes
Tips For Making The Best Soft Feta Cheese From Scratch
- If you have access to raw milk from pasture raised animals, use that. It’s so much better for your health and it makes the best cheese. Plus you’ve got the material for the best starter culture for cheese making. Goat’s or sheep’s milk will give you that distinct flavor of traditional feta, while cow’s milk will be much milder. If you want the cleanest milk, choose milk from grass-fed animals that graze on unsprayed pastures or have been supplemented with organic grains. 100% grass-fed is best, but hard to find in the dairy world. I supplement with small amounts of organic grain when feeding my goats, for extra energy, since the pastures and grasses here are not very nutritious. If you buy milk, I’d go for organic milk but be careful, because all the organic milk in my local stores are ultra-pasteurized and that doesn’t work for cheesemaking.
- If you can’t get raw milk, you’ll need to be sure that the milk you choose is pasteurized and NOT ultra-pasteurized. Ultra-pasteurized milk will not coagulate with rennet, and won’t work for anything other than soft spreadable cheese.
- Cheese needs to have warm room temperatures to culture and drain properly. Go for about 72-85 degrees if you can. Wrap your pot well in a thick towel during incubation.
- Be sure to follow my brine-making instructions carefully. Feta cheese can fail if your brine does not have the correct acidity, salt content, temperature, or calcium content. The brine recipe is just as important as the cheese recipe. Fortunately it is actually super easy, you just need to follow a few rules.
- Calcium chloride should be added to pasteurized milk. If you have trouble getting pasteurized milk to set up, you might want to add a dose of calcium chloride. Unfortunately pasteurization doesn’t just kill the beneficial microbes in the milk, but also denatures calcium and proteins. Adding a little calcium chloride will help bring the calcium levels back up to where they should be and this will strengthen the curd. This is not needed when you use raw milk! Raw milk is perfect on its own, however, it can increase the yield for making cheese.
- Lipase powder is very optional. If you’re using cow’s milk, you’ll lack that stronger piquant flavor that goat or sheep milk impart on the feta. You might prefer the milder flavor, but if you would rather experience the bold flavor of goat and sheep milk feta, you can help your cow’s milk a little by adding some lipase powder at the time you’re adding the culture. Be sure to hydrate it first. Lipase powder is animal based in most cases, but can be microbial as well. It is not normally made with GMOs
Rennet
Use organic animal rennet if possible. Avoid “Vegetable” or “microbial” rennet also called Fermentation Produced Chymosin (FPC). In the U.S. it is most often made with genetically modified organisms, molds, or fungi that are lab-grown on GMO soy or corn bases. In fact, 80-90% of cheese you buy in the store is made with genetically modified, manufactured microbial rennet. Regular animal rennet is most often clean, but can also be made with genetically altered or manufactured materials, and the label does not need to reveal any of this. Honestly, I’d stick with organic or at least a non-GMO product. My go-to rennet is from Walcoren. It’s made the old-fashioned, traditional way from kid or sheep abomasum and it’s all natural and organic. You can find it in liquid or tablet form. I use the Walcoren Organic Kid Rennet and they also make Lamb Rennet. I have had mine for years and it still works. One jar will last a very long time in your refrigerator and if you plan to make cheese regularly, it’s a must-have item. Another option is this clean-ingredient, no-GMO animal rennet. It’s a high quality rennet in smaller size bottle and therefore cheaper. I have used this for many years in the past. Aged cheeses are best made with animal rennet and not vegetable rennet, since vegetable rennet can impart off-flavors as the cheese ages. If you must go with vegetable rennet you can try a thistle based rennet that is made with clean ingredients, or make your own from bull thistle stamen, but be aware that your cheese might turn out bitter, especially if you use cow’s milk or age your cheese for more than a couple of months. Here is an Organic Microbial Vegetable Rennet, which is lab made and fungus based, that you could try.Starter Culture Options
There are many natural options for starter cultures for this cheese and I’m adding a non-GMO purchased option in case you prefer purchased cultures- If you have access to raw milk, you can make clabber, turn it into a mesophilic culture (medium temperature loving starter culture), and use that to make soft feta cheese. Learn how to do that in my Natural Cheesemaking Process article it’s very easy.
- Whey: If you’ve been making cheese, just use some of your latest whey from your last cheesemaking project.
- Kefir: If you’re keeping milk kefir grains, you can use your milk kefir as a starter culture. It is what I used for years.
- Buttermilk: You could buy some cultured buttermilk from the grocery and use it (be sure it contains live bacteria).
- Make cheese starter from either sourdough or fermentation juice as described in How To Make Cheese Culture From Sourdough this requires that you have an active sourdough or any raw fermented food in your fridge. Or take a few days and make some! You basically need to capture some wild live lacto-bacilli and introduce it to pasteurized milk, which is dead milk and needs some help to acidify and come back to life.
- Finally, if you prefer to use purchased, freeze dried cultures, you can use a small sprinkle of Flora Danica, which is non-GMO. Use only a quarter dose of what is recommended for making cheese.
How To Use Soft Feta Cheese
Soft feta cheese is perfect as a topping for salads and other cold dishes. It might melt into hot soups, which is great to make a soup cremay, but if you want chunks in your soups and other hot dishes, or pizza, the firmer Sirene feta would be better suited. But soft feta is great on a baked potato because of its creaminess, and it would be great on a hot sandwich too if you don’t mind it a bit melty. Soft feta is perfect when served with savory dips and scooped up with pita bread or crackers. Soft feta is great whipped with some olive oil and served as a dip, or a topping. Use soft feta in any blended feta recipes such as salad dressings. It is great for making a filling in savory baked goods such as hot-pockets or layered in greek savory pastries and similar dishes.Enjoy Your Awesome Soft Feta Cheese!
I sure hope that you will give this delicious cheese a try, and I think you’ll love it. It is basically like a chevre cheese, with a little extra rennet to make it more firm and then it is aged in brine. You’ll find many ways to use it. I love a slice of fried Kamut bread with a thick layer of ajvar and a generous slice or sprinkle of soft feta, and it makes fresh or fermented tabouli salad or creamy cucumber salad taste incredibly awesome!Shop This Post
Equipment
- Royal Berkey water filter unit
- A large 6 qt pot
- 12 quart stock pot for larger batches
- Flour Sack Towels
- Organic Flour Sack Towels
- Skimmer
- Thermometer
- Long Frosting Knife
- Measuring Cups
- Micro Measuring spoons
- A set of basket forms
- Quart Mason Jar
- Micro Measuring Spoons
- Glass Fermentation Weight
- Mesh Food Covers
- Sushi Mats
Ingredients
- Redmond’s Real Salt
- Himalayan Pink Salt
- Celtic Sea Salt
- Walcoren Organic Kid Rennet
- Walcoren Kid Rennet Tablets
- Walcoren Lamb Rennet
- Animal Rennet
- Vegetable Rennet
- Live Kefir Grains
- Flora Danica
- Calcium Chloride
- Lipase Powder
Recommended literature for Cheese making
- The Art Of Natural Cheese Making, David Asher
- Milk Into Cheese, David Asher


This is such a great recipe and comprehensive guide to cheesemaking! Thank you! Bookmarking to make next year when my goats are back in milk! 🙂
Thank you for sharing, Lisa! Hope you love it as much as I do!
I love soft cheese, thank you for making such a detailed post! Healthy and delicious!
Thank you for the kind words, Jamie!
This was such a fascinating read and I am so excited to try this. WE LOVE FETA!!! Thank you so much for the detailed directions!!!
You’re welcome, I’m sure that you’ll love it! And it is easy!
What a great recipe with detailed instructions! I love experimenting with cheese making. Thanks for sharing! 🙂
You’re welcome, Jennifer. I hope you get to try it. It’s super easy and fun to make.
Yuuuummmm. And as always, your thorough instructions are appreciated!
Thank you and you’re welcome Laura!
my mouth watered reading this and seeing the pictures. feta is one of my favorites! thank you for sharing.
You’re welcome Kayla! Feta is awesome!