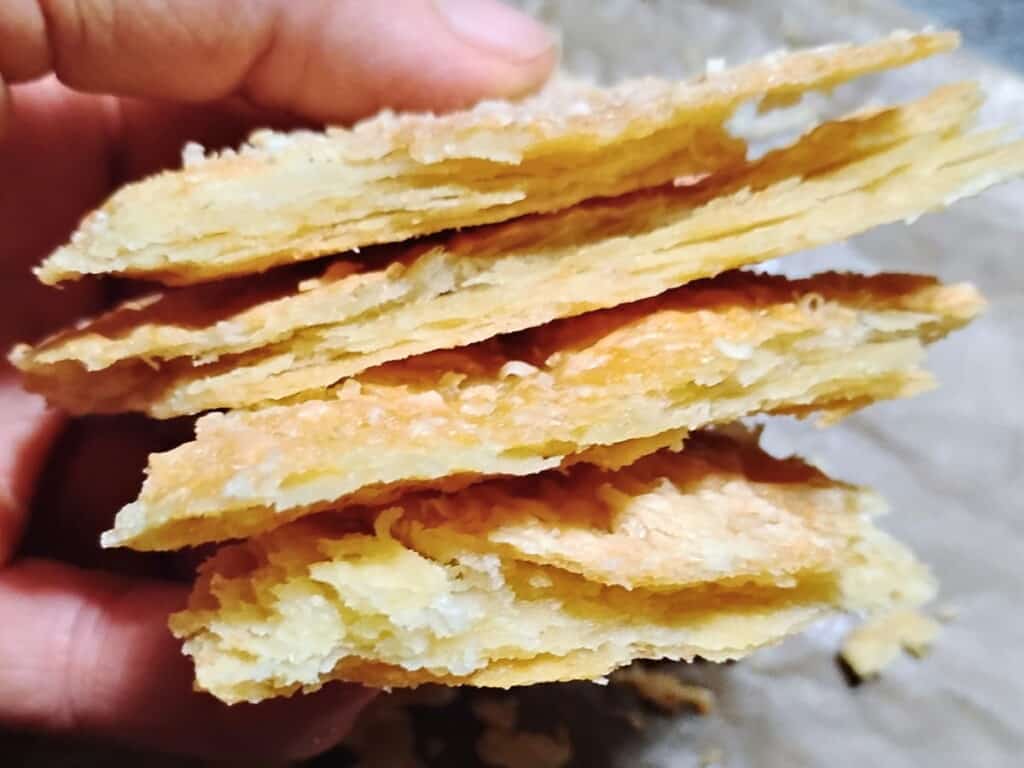
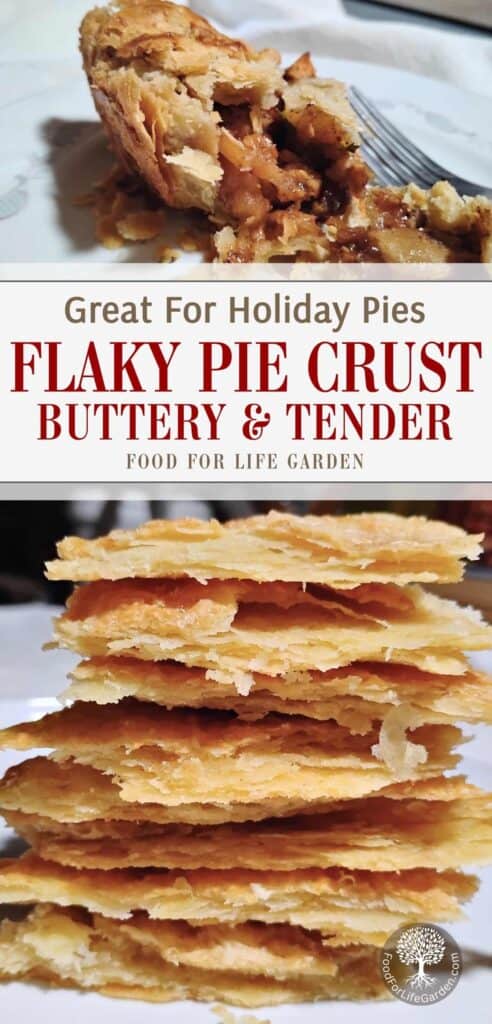
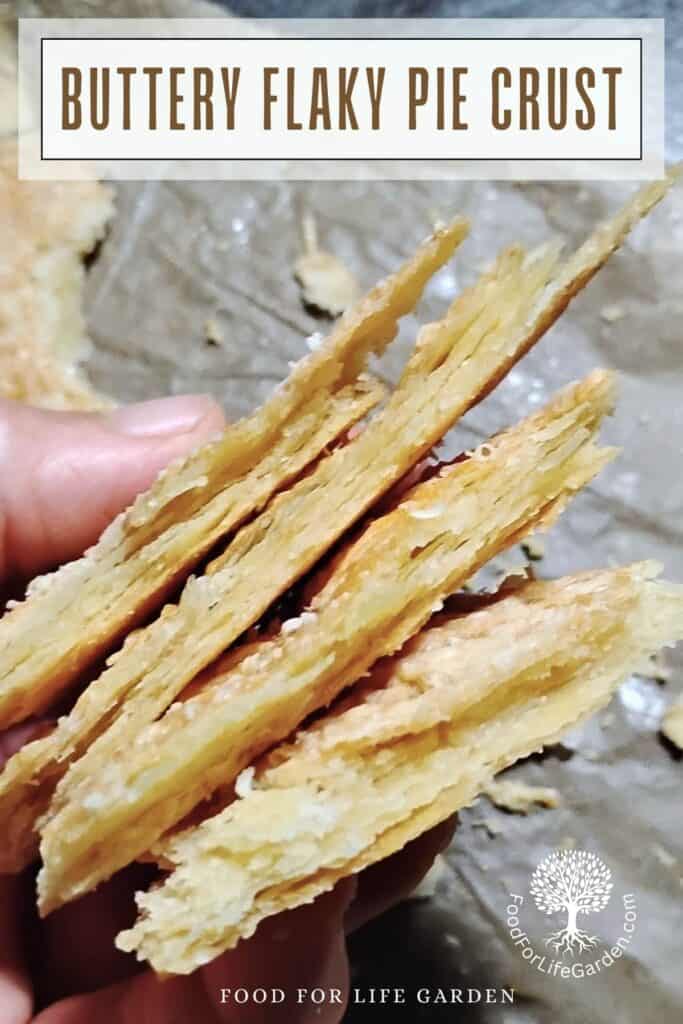
A delicious flaky pie crust with butter or lard, this is a must-try recipe! Rich, flaky, tasty, and easy, no electric equipment needed.
Here is a clean eating pie crust that uses no shortening (yes!) and is easy to make by hand. It’s based on my mom’s recipe, which I found recently. I made a little tweak to it and used some techniques which I learned way back before food processors were common.
And guess what! It makes the awesomest flaky crust that you would be happy to fill with your best ingredients for your most delicious pies. After trying many recipes with claims of a super-flaky crust, I only found it didn’t work for me. But I finally can say that I’ve found my perfect flaky pie crust recipe. And I am pretty certain that it will work for you too!
So let’s explore the secret to a buttery, flaky pie crust for the best garden harvest pies ever!
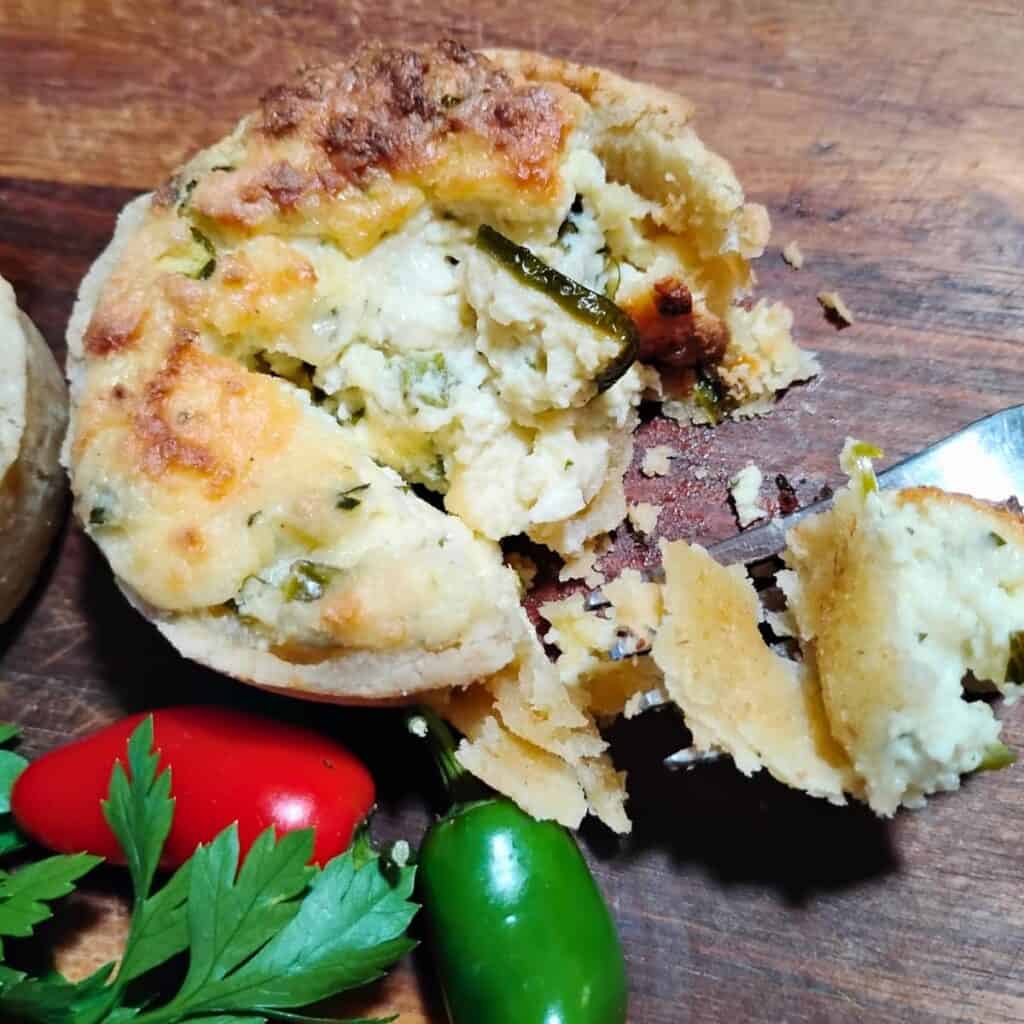
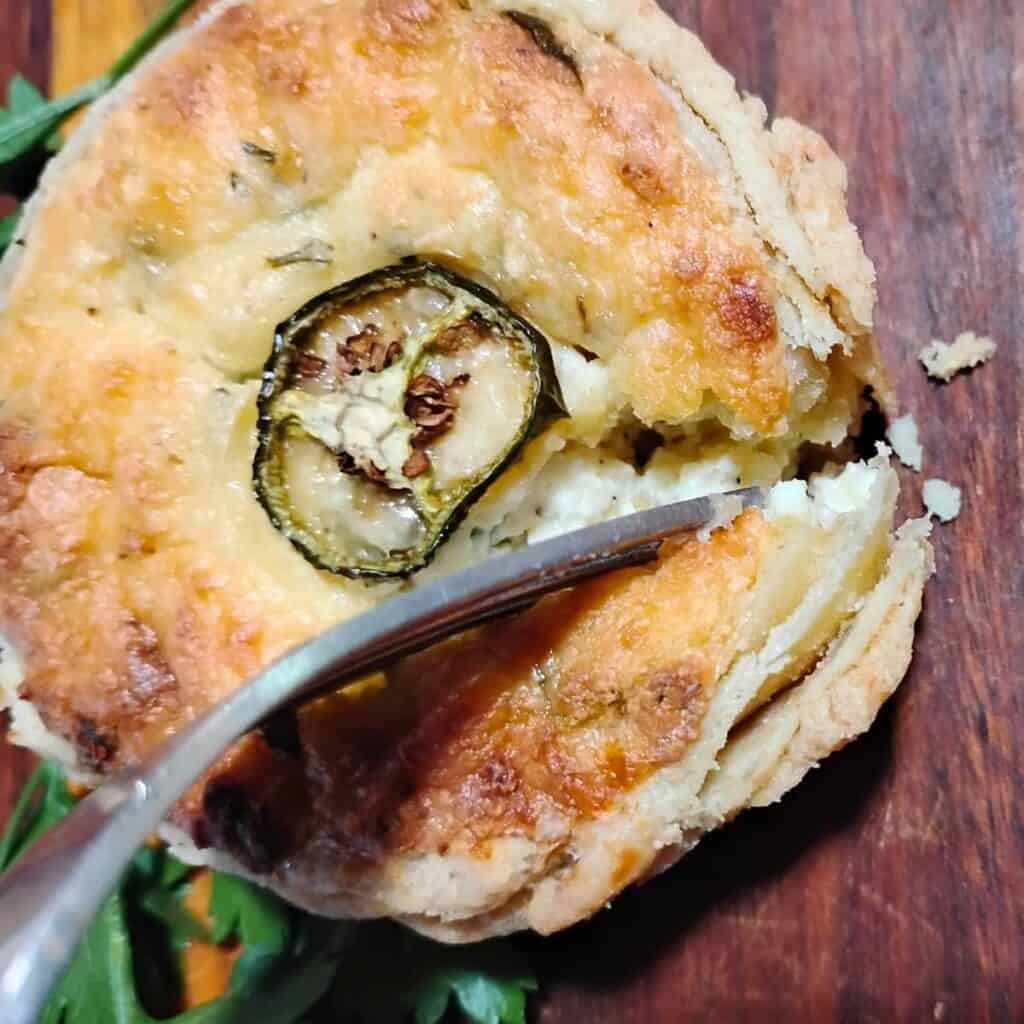
Try my Jalapeño Cheese Pie and Jalapeño Popper Quiche Cups with this flaky pie pastry! And if you like healthy treats, you’ll love my Apple Pie Cheesecake Bars! For guilt-free indulgence give my Lemon Cheesecake Mousse a try. And for more fruity and healthy recipes, check out my amazing Blueberry Cheesecake Bars and Blackberry Cobbler, a purely cozy comfort food. Here are more healthy fall and holiday treats I recommend: Sweet Potato Bread, a delicious Ginger And Cranberry Apple Crisp, and Spicy Lemon Tahini Cookies.
- My Best Flaky Pie Crust
This post contains affiliate links. As an Amazon affiliate, I make a small commission at no extra cost to you if you make a qualifying purchase. See my full disclosure here.
My Best Flaky Pie Crust

Have you tried to make flaky piecrust in the past and followed this ‘no-fail’ recipe or that ‘super-flaky’ piecrust, only to find that yours just didn’t behave the way it was supposed to? I know, for years I got excited about every pie crust recipe I found that claimed the above, except they were made exactly like the recipes I had tried in the past, which didn’t work for me.
Ice water, freezing the butter, grating the butter, food-processor method, and meticulous adherence to the recipe method. You name it, I tried everything. I rarely made pie crust anymore, because it was tedious and frustrating when all this fussing yielded no better results than my past failures. Sure the crust flavor was great, it had to be after using all the best ingredients, but flaky? Not.
My Most Recent Attempt At Making Flaky Pie Crust
So I remember my mother had a special pie crust recipe that everyone loved, and I decided to do some some deep digging in my recipe box and found it. She didn’t have a method for it written down, and so I did a bit of experimenting with the recipe.
I ditched the butter freezing and grating, and the food processor methods, all of which just seemed to over-process the butter and made the butter bits too small to yield the desired effect.
Besides, I ended up with a bunch of extra, hard to clean dishes, which is always a deterrent for me, especially since I don’t have plentiful or running water available. I decided to go back to my original way of making crusts, with my own hands. And so with my mom’s recipe, slightly tweaked, and a hands on approach, I ended up with the best flaky pie crust I ever made and not just once.
I’ve tried this recipe several times now and it works every time. So, that makes me think it might be worth sharing with the world, something I wouldn’t have dreamed of doing with my past attempts.
So here you go, my last ditch effort at making flaky pie crust brought back my excitement for pie making and you’ll find me posting some of my favorites here as time goes on.
Harvest time always calls for pies!
Fresh apples, pears, plums and peaches are just so delicious in a pie, and then there are savory cheesecakes, quiches, my long-loved jalapeno pie and other delightful delicacies that really benefit from a perfect buttery and flaky pie crust. Even my Zwiebelkuchen, a popular German onion pie can be made with a flaky pie crust instead of the yeast crust I normally use.
So I sing my praises to pies again and forget about those failed closet attempts that I would only eat myself and not dare to share. Now I can once again present them proudly at holidays, potlucks, parties, and picnics and not feel ashamed about a failed, dense crust anymore.
So I’m ready to share my pies with you all and a crust recipe that really works.
Disclaimer: I read so many pie recipes that claim they never fail, and reviews were always mixed. And I’m sure it worked for the writer, or they wouldn’t make such claims or even post it, but it just didn’t for me. So I don’t know if it’s a personal fit kind of thing, or whether there really is pie crust that always works. All I know is that this recipe works for me, and I’m quite convinced that it will for you too.
So, rather than I make a tall claim and promise that it’s fail-proof, I will only say that it has worked for me every time, even in hot 90 degree weather. So this is my pie crust success story and I sure hope it will be yours too, I think there is a pretty darn good chance it will. But hey, I’d love to hear about it in the comments either way!
Why You’ll Love This Flaky Pie Crust
- Well, the best thing is that it’s delicious.
- It’s made with all natural ingredients.
- It’s easy and no-fuss.
- No electric equipment needed, just one bowl. Off-grid friendly and great for minimal water use.
- Can be made ahead and kept in the fridge for 3-4 days, and it can be frozen for later use. This can be super helpful if you’re making a bunch of holiday pies. Make your crust pastries early in December before the last minute holiday rush.
- This recipe uses no ice-water. Water will act on the gluten and can cause it to develop, which is great for making bread, but will hurt a pie crust. So we’ll use other ingredients here to help bind the crust ingredients and to inhibit gluten development.
- This piecrust works for sweet and savory pies and pastries.
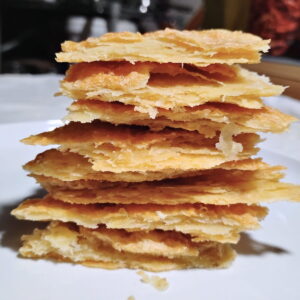
- Bakes up flakey every time.
- You can make it healthy by choosing healthy ingredients.
- You can do a long-ferment to reduce phyto-acids if you start with sour cream that contains live cultures (explained in the ingredient list) or you can use cultured quark or clabber. Keep it refrigerated after mixing it for 24-48 hours before you make your pies. It is not necessary to use sourdough to activate phytase, which breaks down phyto acids. Any cultured ingredient will give achieve that effect. But I had better results using cultured full fat dairy, when flakiness is the goal, especially sour cream. However, sourdough is delicious in pie crust if you want to use it instead of cultured dairy.
- Adaptable: Make this pie crust recipe with all-purpose flour, einkorn flour (you may need to reduce liquids by a few teaspoons), or whole wheat flour. It will also work with fresh milled flour, which makes the most delicious crust. Just grind it on the fine setting, and sift out the course bran for a flaky pie crust, otherwise it may end up crumbly rather than flaky. You can use the bran in bran muffins or sourdough bread.
- Perfect for sweet and savory pies. Add a little sugar if you like for your sweet pies.
Notes And Tips For A Perfect Flaky Pie Crust
Please note that the method matters as much as the ingredients, and no, I do not recommend using a food processor. It really kills the structure we’re after. I was never able to achieve much flakiness using a food processor. We’ll make this one by hand and it’s just as quick and makes awesome pie crusts.
Also, we’re not using ice water, because the water can promote gluten development, which can make a crust tough, rather than tender. Instead we’re using acidic and fatty liquids, which will break down gluten and coat the flour with protective fat molecules so moisture doesn’t get a chance at activating the gluten
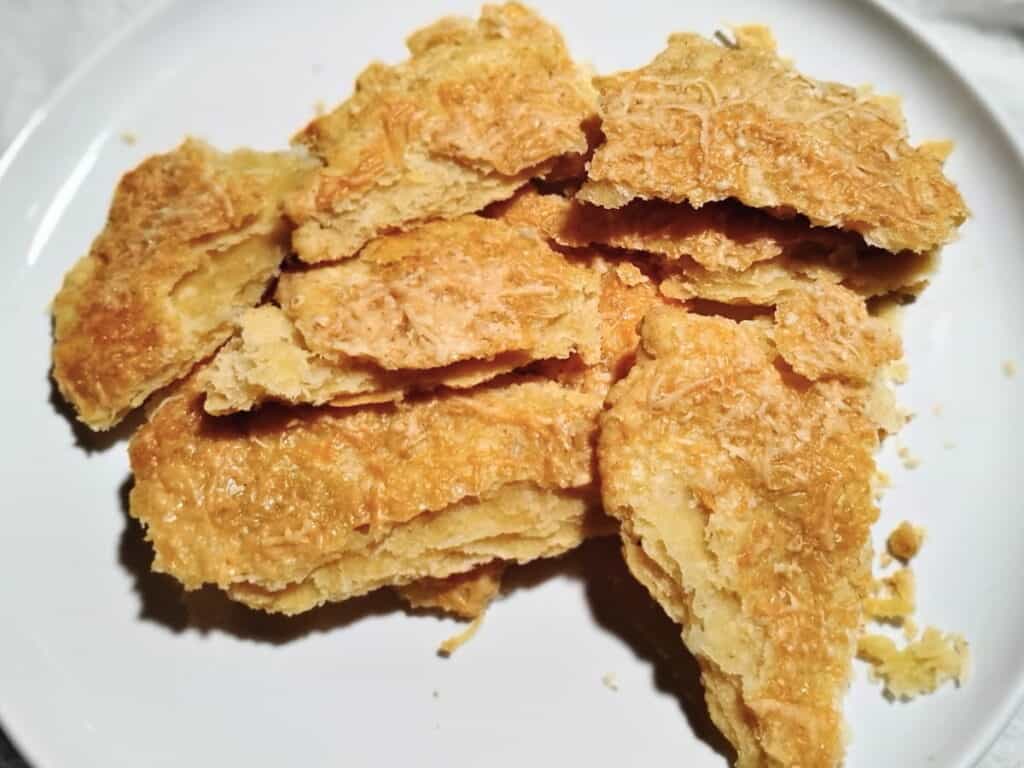
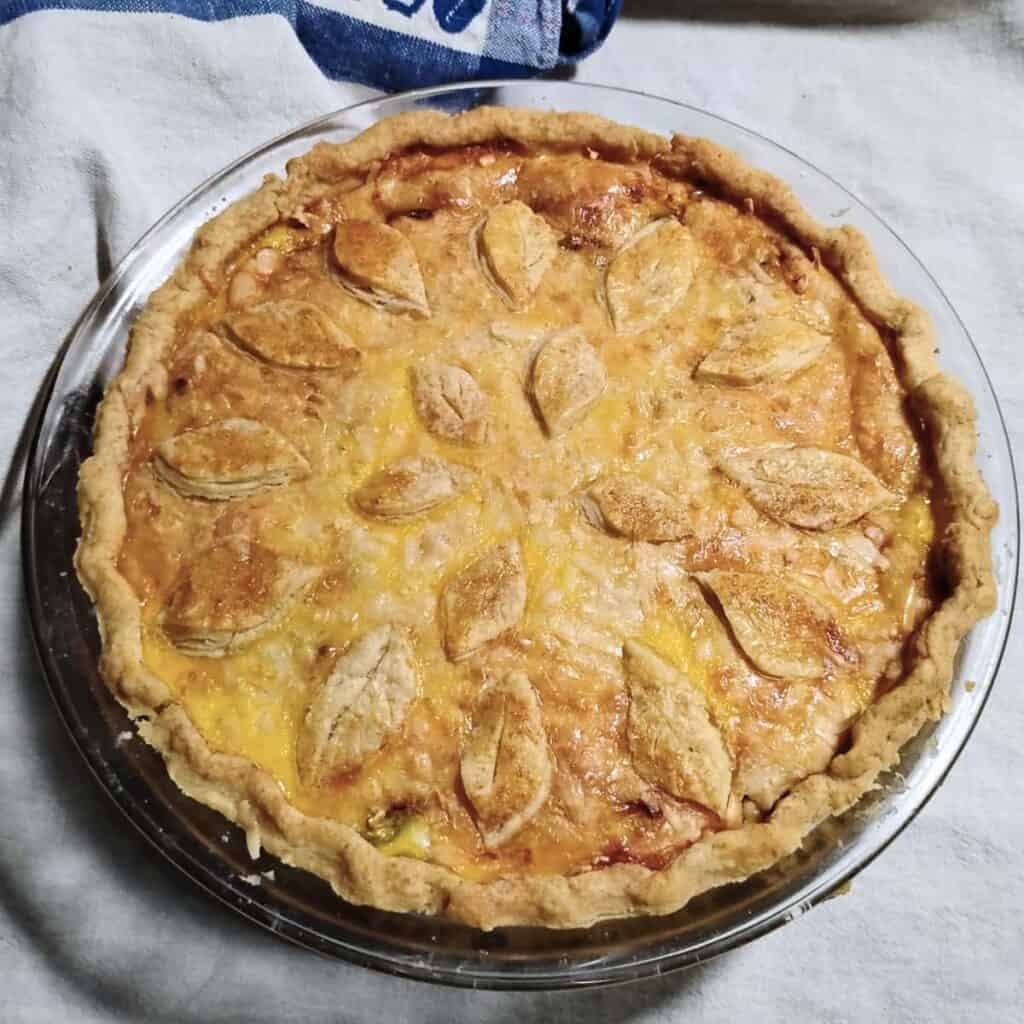
This will make a 9″ pie with lid or lattice, or a 10″ pie bottom with some dough leftover for decorative cutouts. You could also get 12 mini pies (use muffin tins) out of this recipe. And any leftover dough is delicious when brushed with beaten egg white or yolk beaten with milk, and sprinkled with either parmesan cheese or a bit of cane sugar, and then baked till golden.
If you use store-bought sour cream, after opening, store the container upside down to force the oxygen out and significantly prolong its life. I hope it won’t leak!
Keep all ingredients refrigerator cold and on hot days, be sure to chill the dough between steps as I outline in the instructions.
I have made this pastry with sourcream, quark, or clabber cheese. They all worked for me. But I think sourcream is the best bet. I also made it with sourdough, and found the flavor excellent, but it was not as flaky.
Use cultured dairy and refrigerate your pie crust for 24 – 48 hours for a long ferment. Do not leave it at room temperature, that can melt the butter and kill the flakiness.
A note when using sourdough: If you want to use sourdough for this crust, you can. Just omit the sour cream and add twice as much of your sourdough (discard or active). I had much better flakiness using cultured dairy, but I love sourdough crusts and if flakiness is not as important, you can sure use sourdough instead. I did get some flakiness, but not as good as with the cultured dairy.
How To Make A Delicious Flaky Pie Crust
Tools You May Need
A bowl – for mixing ingredients
A few measuring cups
Scale (optional) – I prefer weighing the ingredients for less dishes and accuracy.
Pie dish for baking – this recipe works for a 9″ pie dish double crust or 10″ single crust pie with some leftover dough for decorating. You can also use a 9×13″ baking dish if you make a slab pie, but you need to double the recipe. Use a baking sheet for a free-formed galette.
Rolling pin – Use any rolling pin to roll out your dough. I have a handled one, but I have this one on my wishlist :). If you don’t have one, try a smooth round bottle.
Parchment paper – for easier rolling of the dough, wrapping the dough to chill, and for baking if you’re making a gallette.
Ingredients
I use homegrown or store-bought organic ingredients. This is important for cutting down on the many toxins and harmful chemicals that are sprayed on our foods in industrial farming operations. And most soils are depleted of nutrients, which will make the food empty in nutritive value and only add lots of calories without nourishment. The best chance for nourishing food is from the garden your own animals, or from regenerative farms that use organic methods.
Fats
Butter or lard, both work great. I prefer a mix of half butter and half lard, when I have lard available. I wouldn’t buy lard in the grocery store. It’s got weird ingredients and does not taste right at all. I can only recommend using homemade lard or natural, pure, quality lard from a source you trust, preferably from organically raised, or even better, pastured pigs. Use leaf lard for sweet pastries so you don’t get a porky taint. On savory pies that porky taint is actually desirable, think bacon grease.
Flour
Use either all-purpose flour, purchased einkorn flour or whole wheat flour for the most flakiness. My own fresh milled flour isn’t as fine as store bought flour, because nothing is removed. And the texture is a bit sandy and more crumbly, but it still comes out quite flaky if I sift out the coarse bran bits first.
A fresh milled crust does taste the most delicious though! And it will have a really nice crunchiness. I love to choose fresh milled flour for rustic pies, its a perfect match.
While I never like to use all-purpose flour, I do prefer it in a few things, like my jalapeno pie. Since I rarely eat pies, I will make an exception and use white flour with some of them. Normally I like to make all my ingredients count, and so I’m definitely breaking my personal rules here, because white flour, in my opinion, doesn’t count for anything but adding calories.
Sour cream
This was my mom’s secret ingredient, and it works beautifully. I use this instead of ice water. It does need to be cold from the fridge, and it will add a subtle tanginess to the crust, but I can hardly tell, and it actually makes the crust more delicious in my opinion, much like sourdough would.
How to make cultured sour cream: I can’t get organic cultured sour cream around here, but I can get organic heavy cream for whipping. So, I just add a tiny bit of active whey, kefir, sourdough, or buttermilk to the heavy cream and let it sit in a warm spot for a few hours, and up to 24 hours, but it shouldn’t take that long unless your room temperature is cool.
This heavy cream will get nice and thick and slightly tangy. Just be sure to chill it before adding it to the pie. Cultured sour cream will help break down the gluten, phytic acid, add richness, and add the moisture to bring it all together. You’ll have an easier to digest pie crust if you leave the finished pie dough in the fridge for 24 – 48 hours. You can certainly use regular sour cream too to get a flaky pie crust.
Subs For Sour Cream: I also used clabber cheese and quark successfully. Be sure that it’s full fat for best results.
A Note About Using Sourdough: If you have dairy allergies and you prefer to use sourdough, just omit the sour cream and replace it with double the amount of sourdough. I do not get as much flakiness this way, but the result is delicious, and I love it for some of my pies, where I don’t mind the lesser flakes.
Vinegar
Vinegar also inhibits development of gluten in your pie crust, which will help contribute to a flaky and tender crust. It takes just a tiny amount and the final crust won’t taste like vinegar at all. This is one of my tweaks to my mom’s recipe and the only change to her ingredients. She did not include vinegar, but I find that it helps with creating more flakiness. Vinegar also preserves the light color of the crust and prevents graying, in case such aesthetics matter.
Eggs
Egg is a binder, adds richness, and also helps prevent gluten development, yielding a flakier, more tender crust that’s easier to roll. The recipe today is for a regular size pie and we’ll only use an egg yolk. If you’re making a double recipe for a slab pie or multiple pies, you can use the whole egg. If using just the yolk, you can save the egg white for brushing the crust later and it’s helpful when making a galette, to help fix cracks in the crust.
Salt
Salt is mostly for flavor, and it helps bring out the flavor of the other ingredients. But it also helps strengthen the structure and creates a more tender crust that’s easier to roll. I use Redmond’s Real Salt or Himalayan pink salt to benefit from the essential trace minerals it contains, many of which are not so easy to find in other foods.
Sugar (optional)
I really like a couple of teaspoons of sugar in my crust when I make it for sweet pies. I don’t with salty pies. Sugar is just for flavor, although it helps achieve a nice browning of the crust too. I use natural organic evaporated cane juice crystals.
Instructions
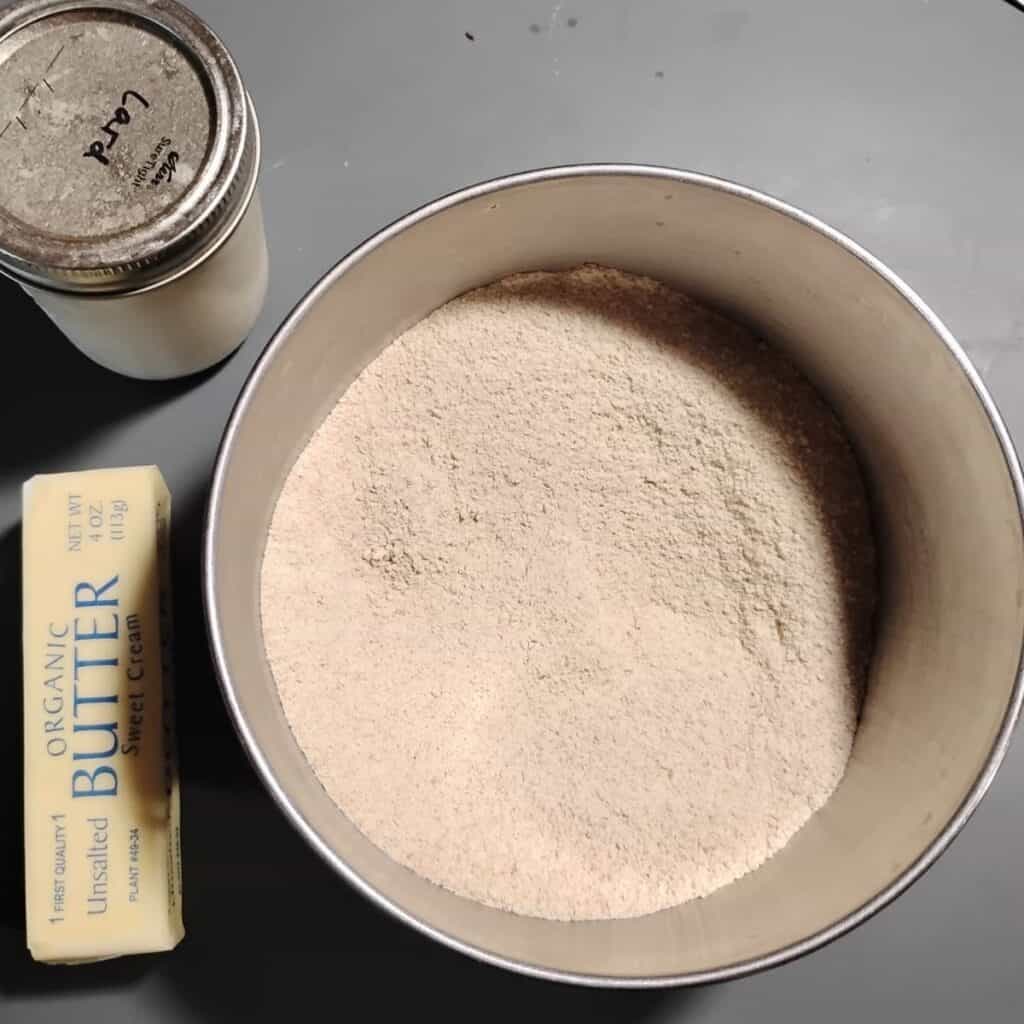
Dump the flour into a medium sized bowl.
Add the salt, and if you’re making a sweet pie, the sugar too. Mix it all together and place it into the refrigerator or freezer for a little while, especially if it’s a hot day.
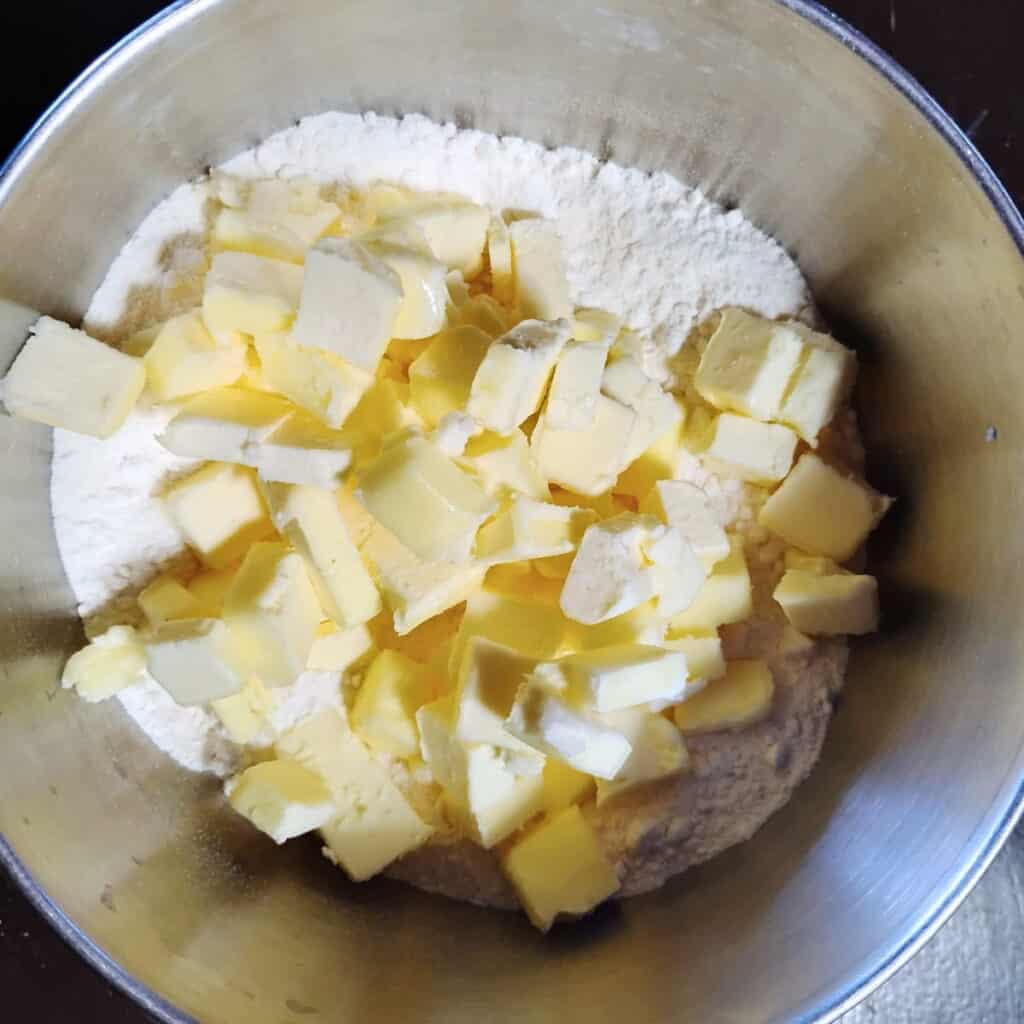
Cut the cold butter into small chunks (I quarter the sticks lengthwise, then I slice the skinny sticks into small cubes). Add to the flour.
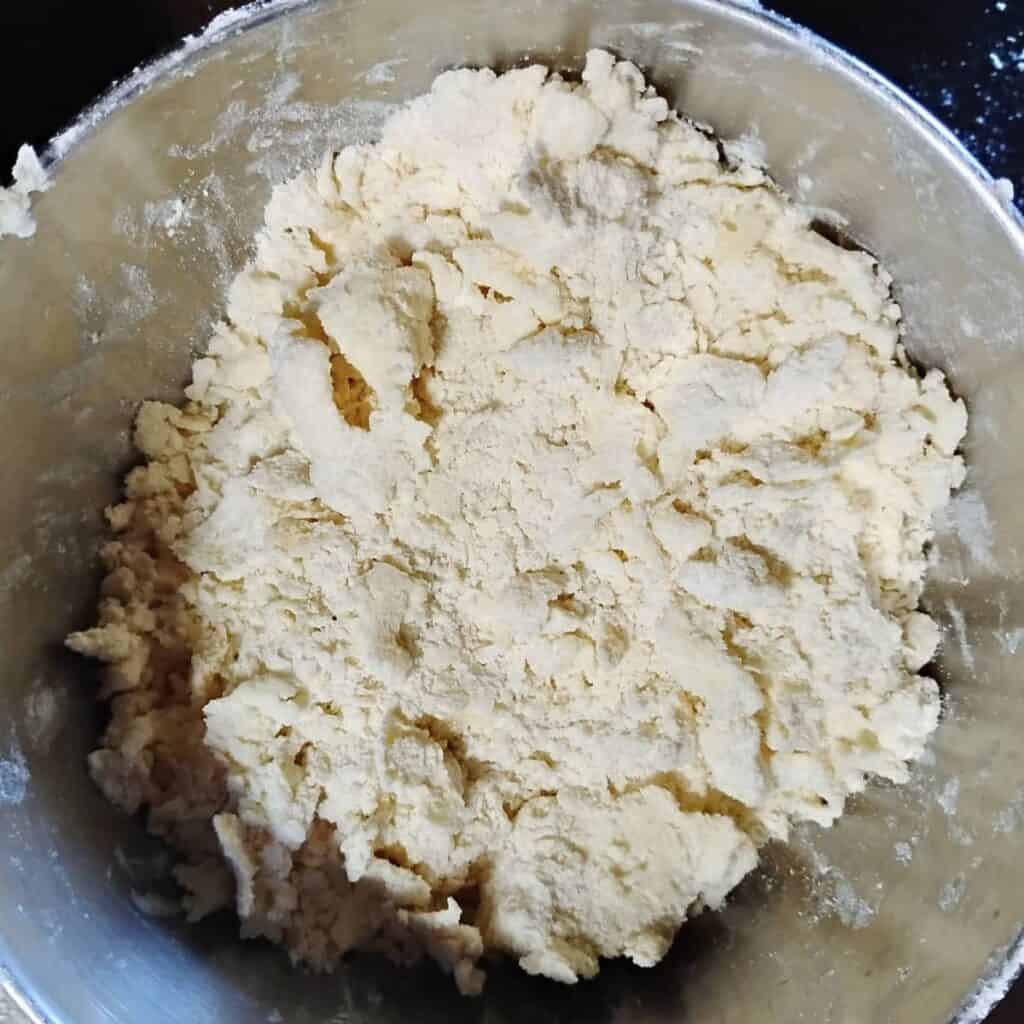
With a knife or your fingers, mix the butter into the flour, and then start working it with your fingertips. Try to do it quickly and be careful not to over process or melt the butter bits with the warmth of your hand. Just work swiftly to create flour coated flakes or disks by pressing the butter between your fingers. I like them quite coarse.
Once all the cubes are flattened, I like to place the bowl back in the fridge or freezer for a bit, especially when it’s in the 90s in my yurt. The goal is to keep the butter firm and from melting, which would be the death of flakiness.
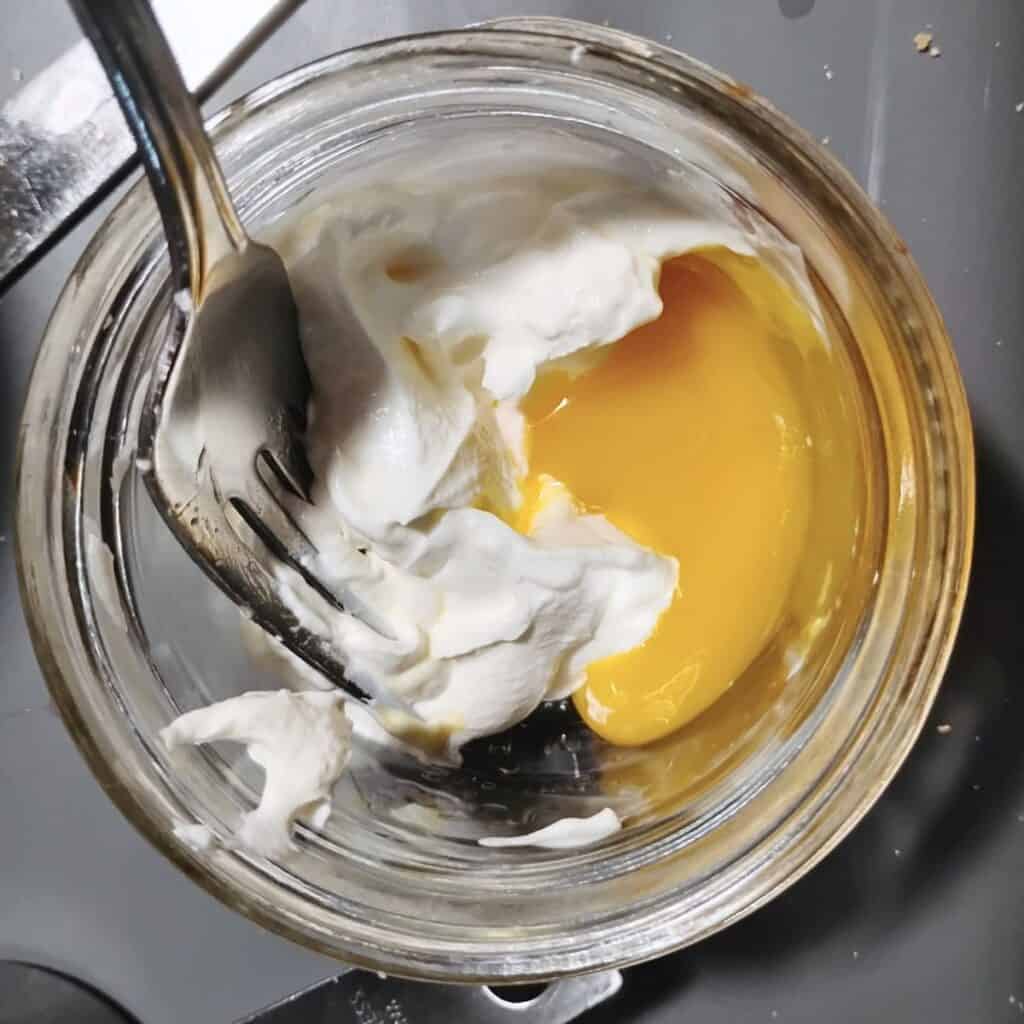
Make a well into the middle of the flour, add the cold egg, sour cream, and vinegar and mix it with a fork to combine before incorporating it in the dough. You can also mix the wet ingredients in a small separate bowl and pour it over the dry ingredients.
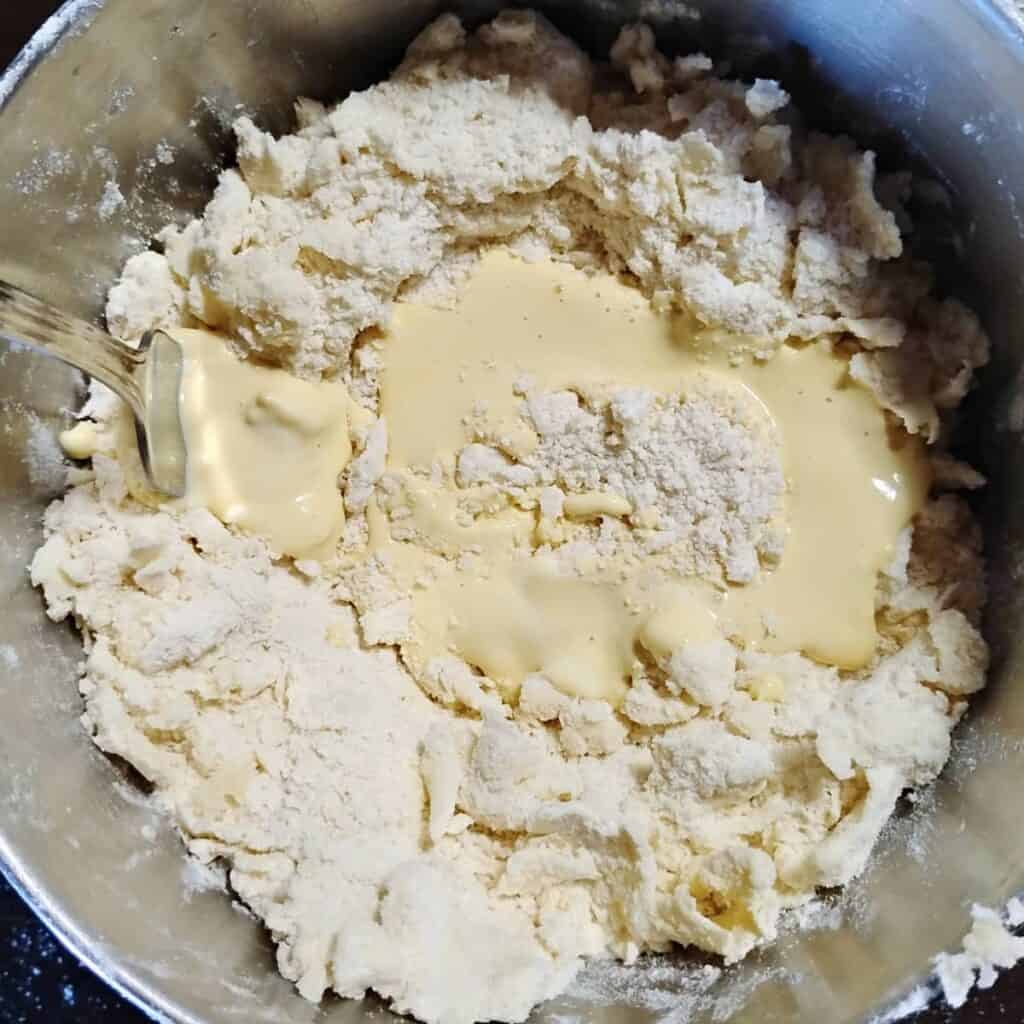
Use a fork to blend all the ingredients together. It will keep them cooler than when using your hands. Just toss everything around briefly, to dampen it evenly, but not too vigorously. Once all the flour has been wetted, press the dough together with your hands, flatten and fold it a few times and flatten again but make it brief so your hands don’t melt the butter. If you’re using whole wheat flour, the dough might be a bit sticky.

Form a flattened disk, or two if you’re making a double crust pie and place the dough into the fridge to chill it for about 2 hours and up to 4 days. I prefer to wrap mine in a piece of parchment, but plastic wrap works too if you don’t mind using plastic.
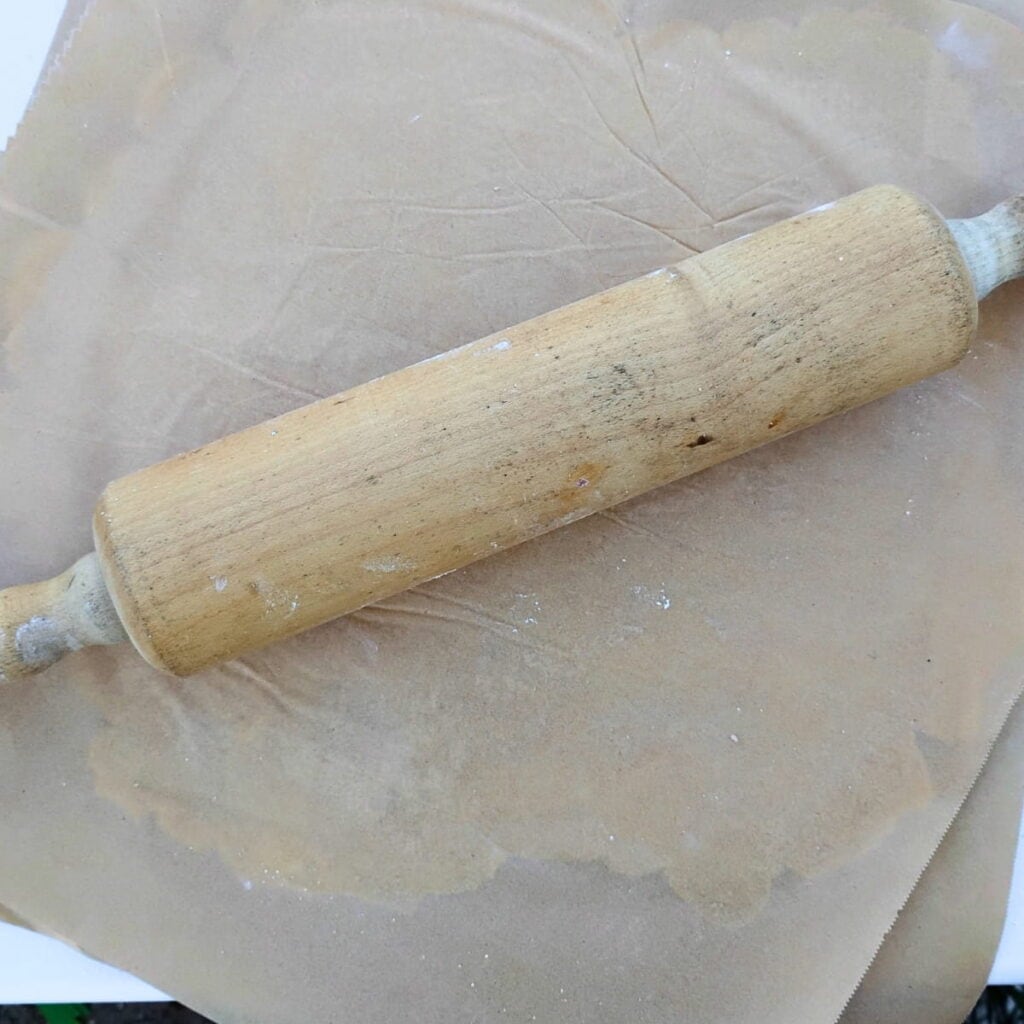
Now roll out the dough between 2 pieces of parchment. First sprinkle a light coating of flour over it and under it, roll it a little, lightly flour again and redo the parchment, roll it a little bigger, and keep going this way until it’s the right size.

Go easy on adding flour, but keep it from sticking.
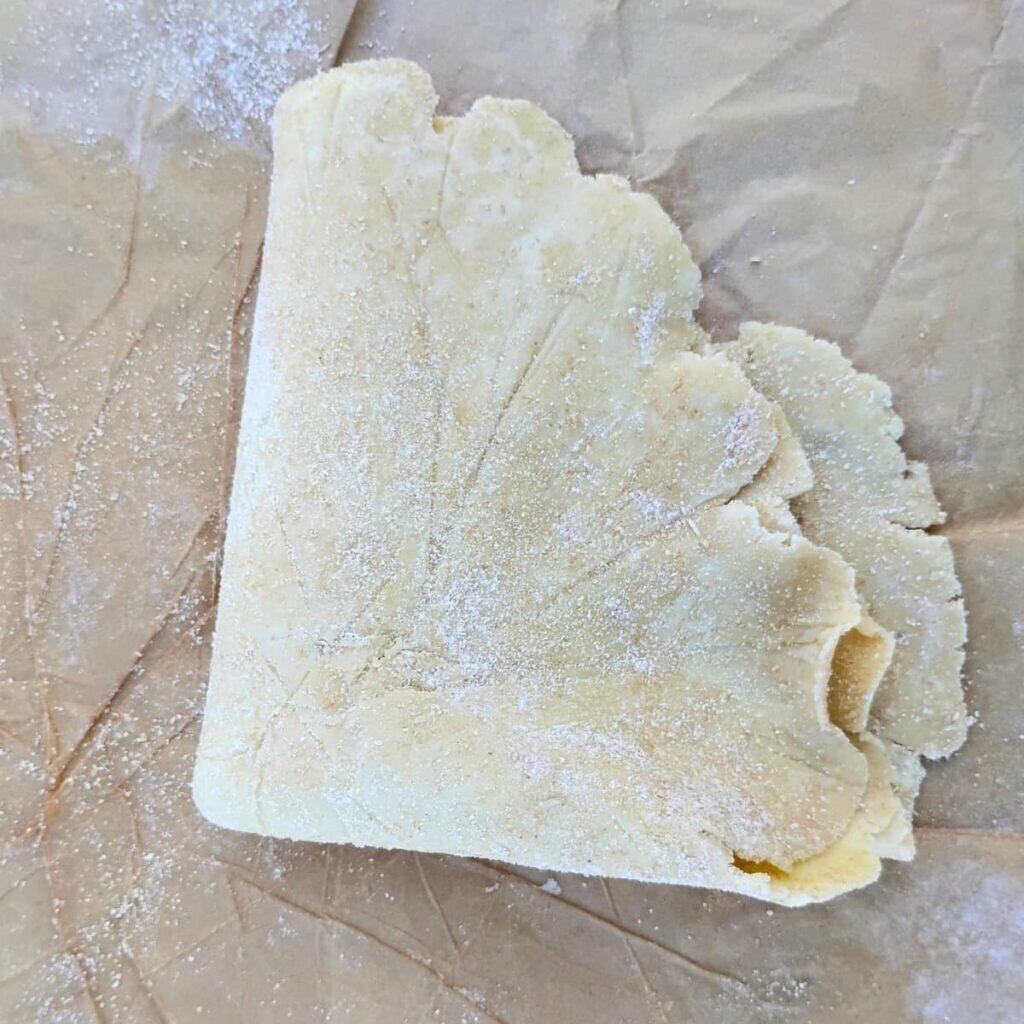
Once the crust is the desired size, flour the top lightly, fold it in half and then again in half. So it looks like a big pie wedge.
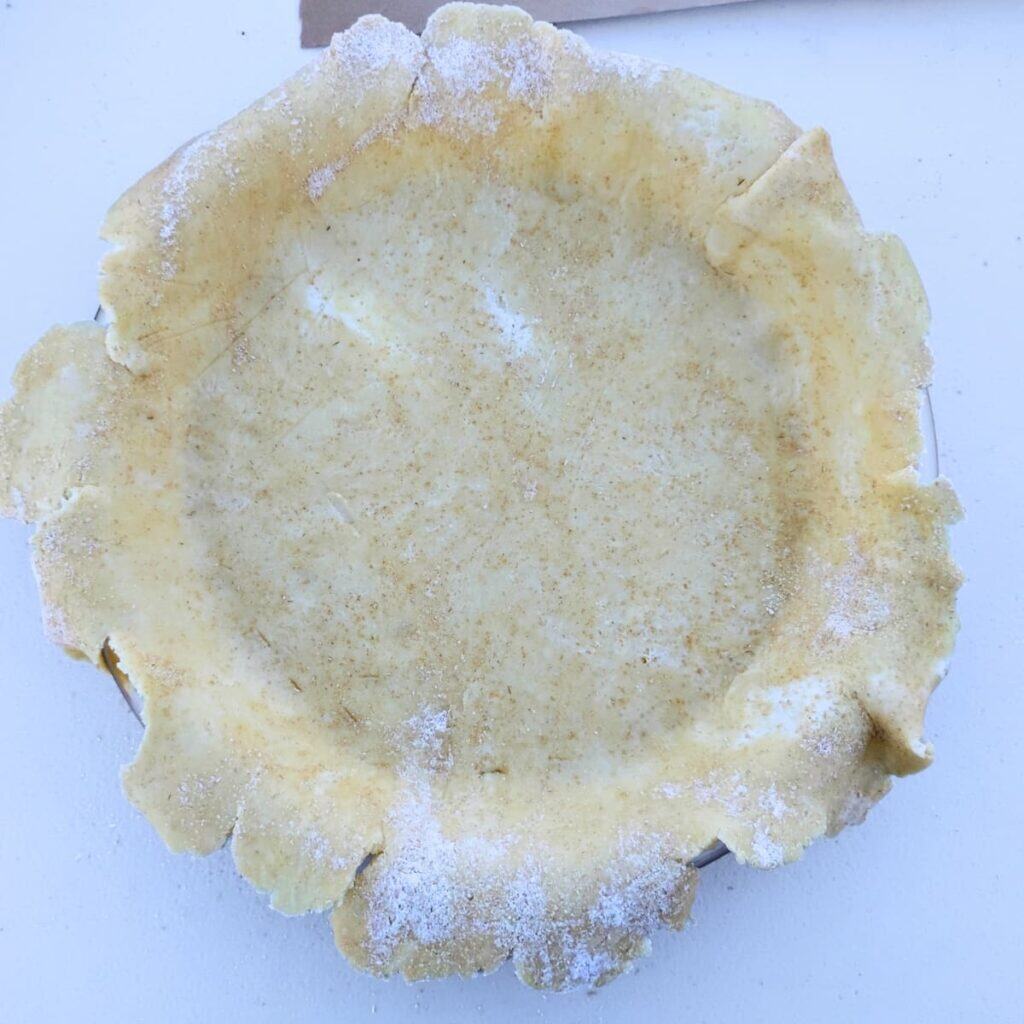
Lay the folded dough onto the pie plate with the point in the middle of the pie dish and unfold it for perfect placement.
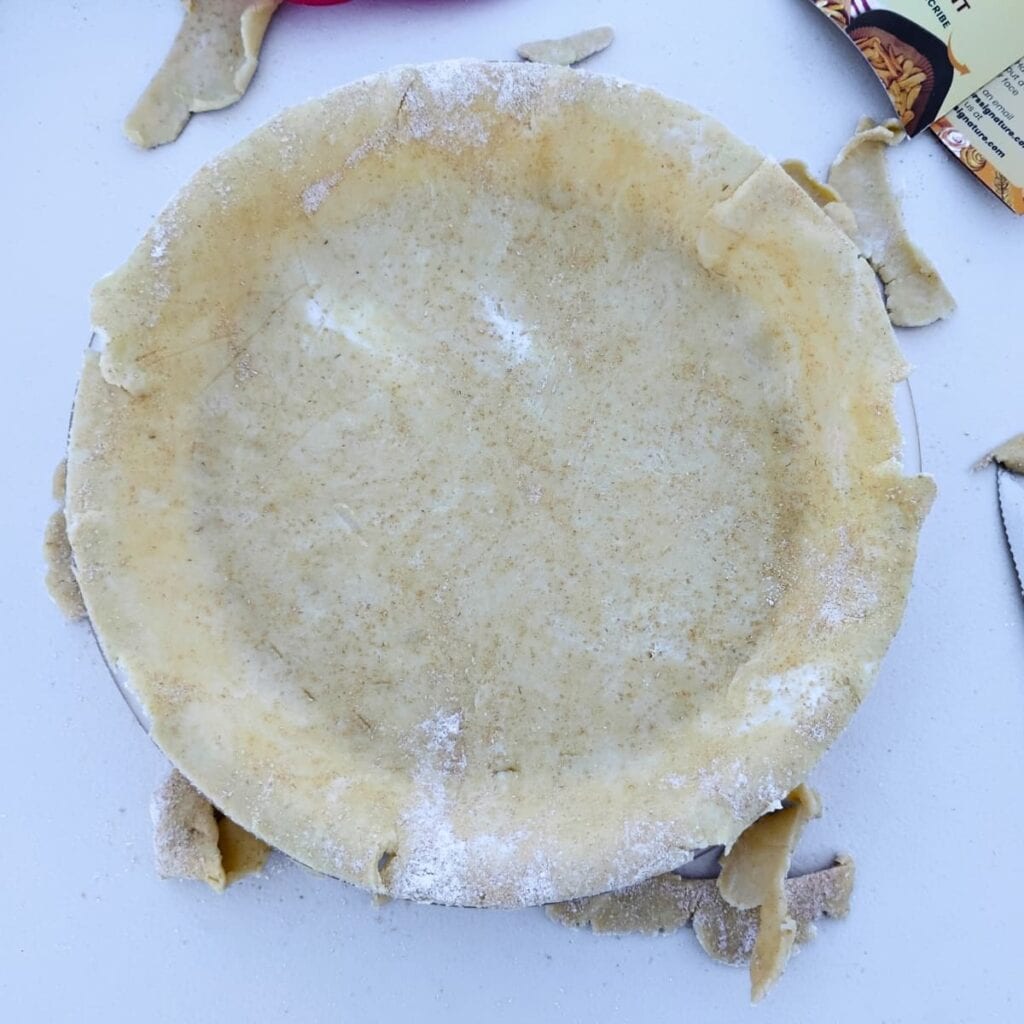
With a sharp knife, trim the excess around the edge.
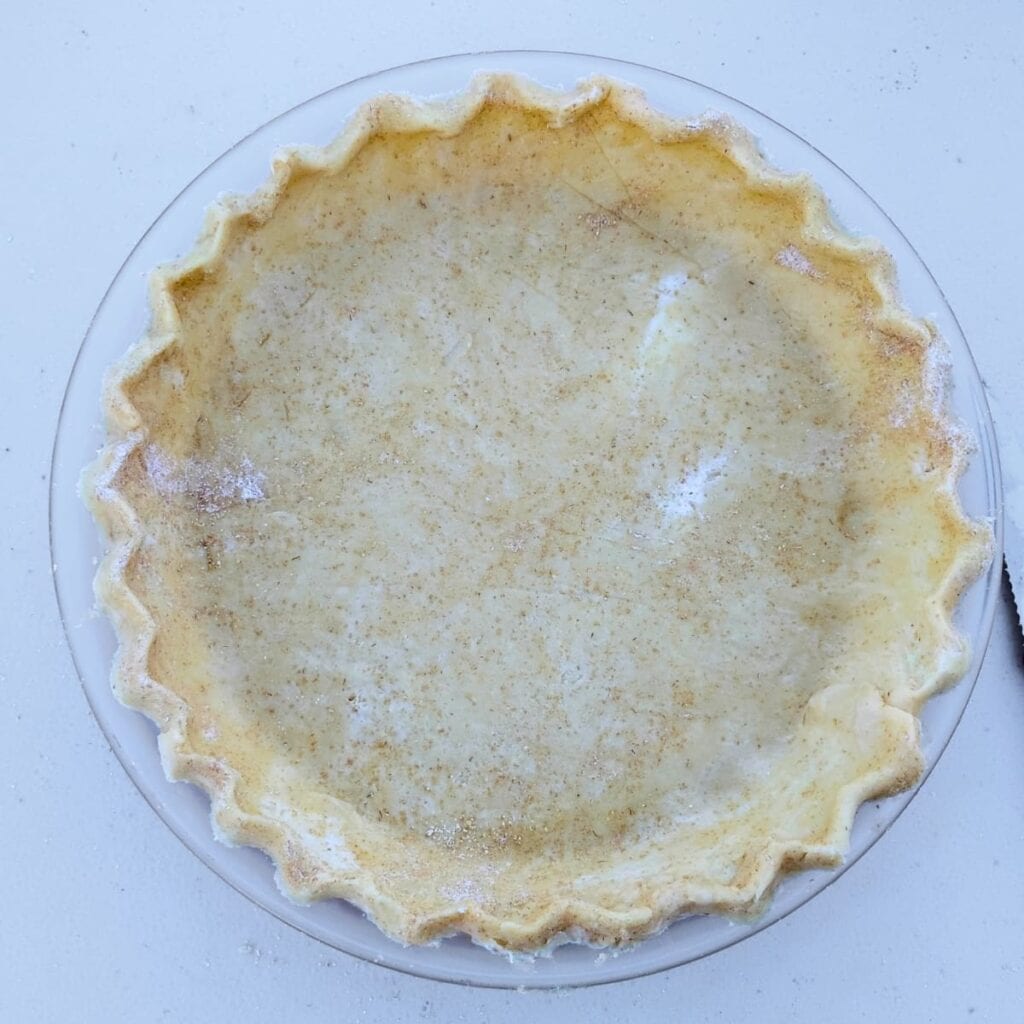
Now you can form a pretty scalloped edge if you want, or leave it rustic.
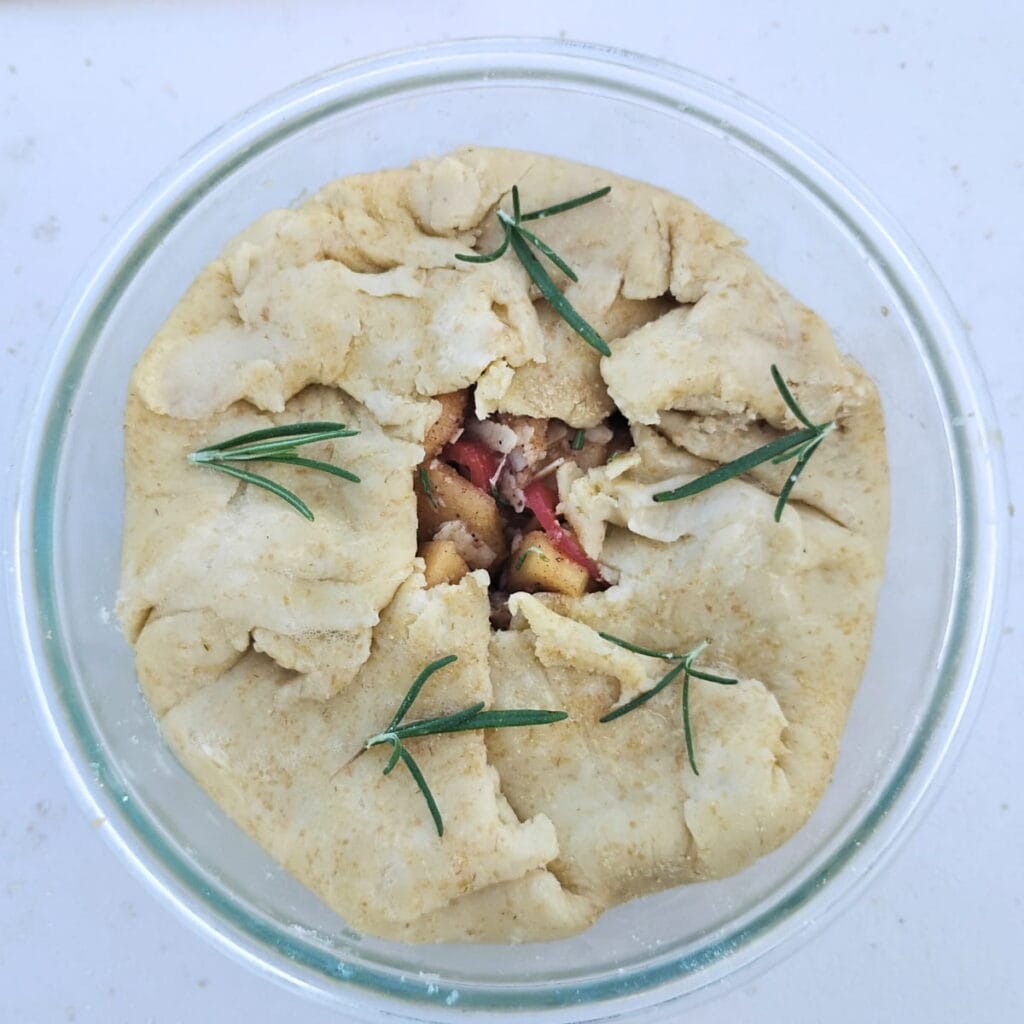
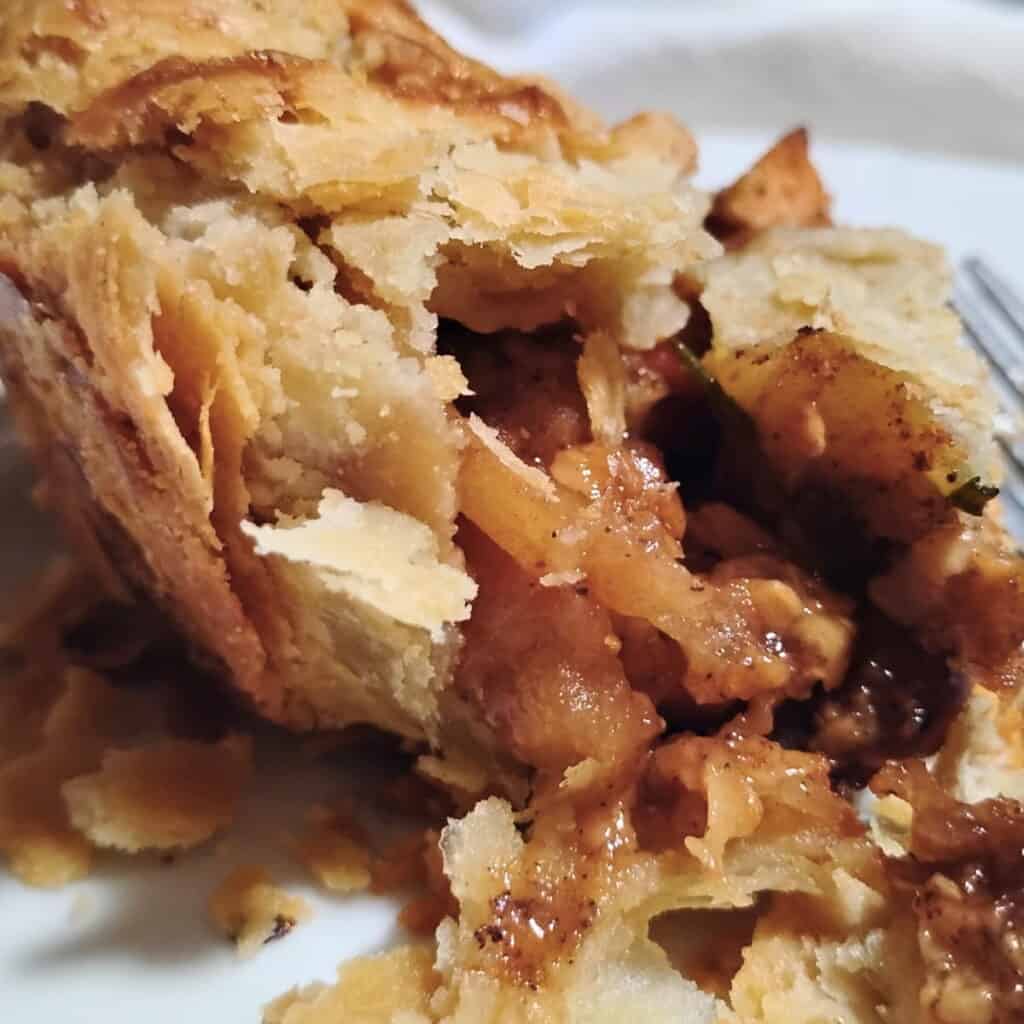
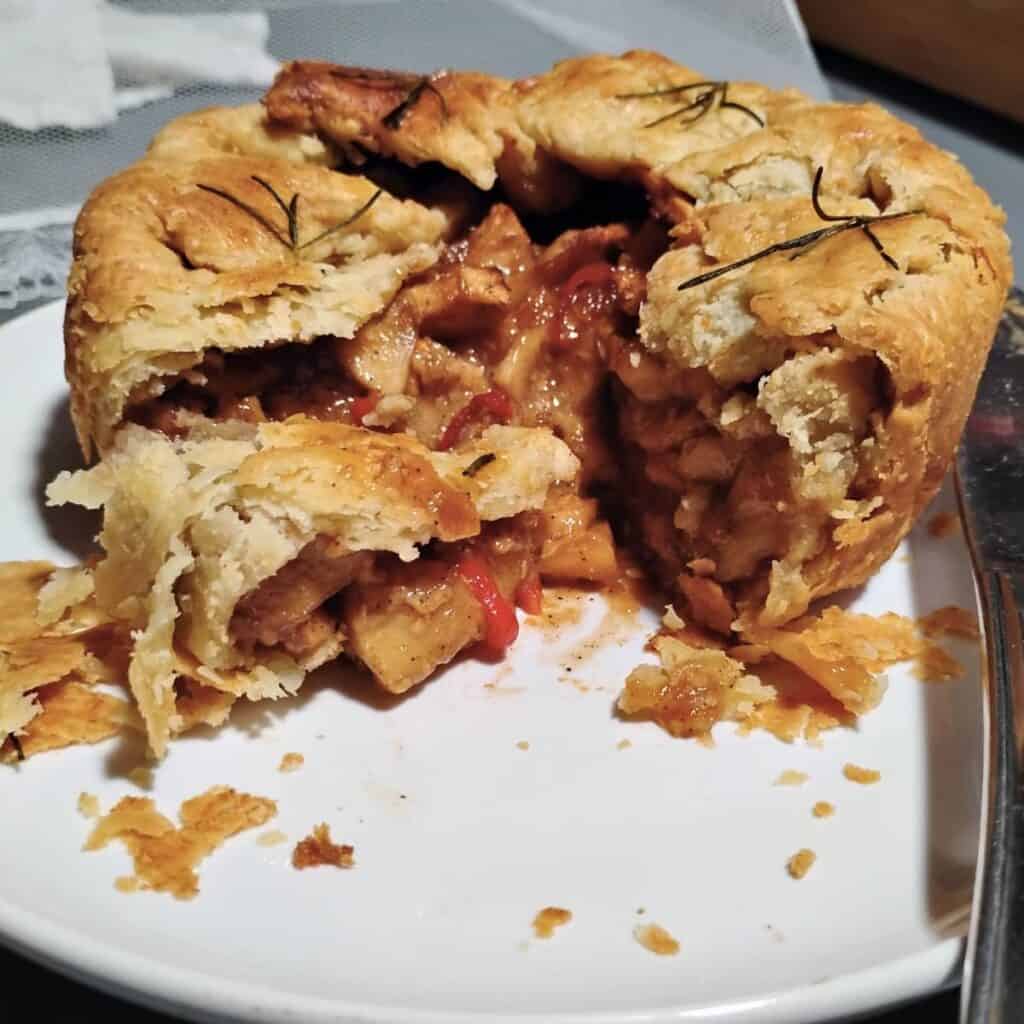
I sometimes like to fold the edges inward for a rustic look after filling like on this mini apple cheddar jalapeno pie.
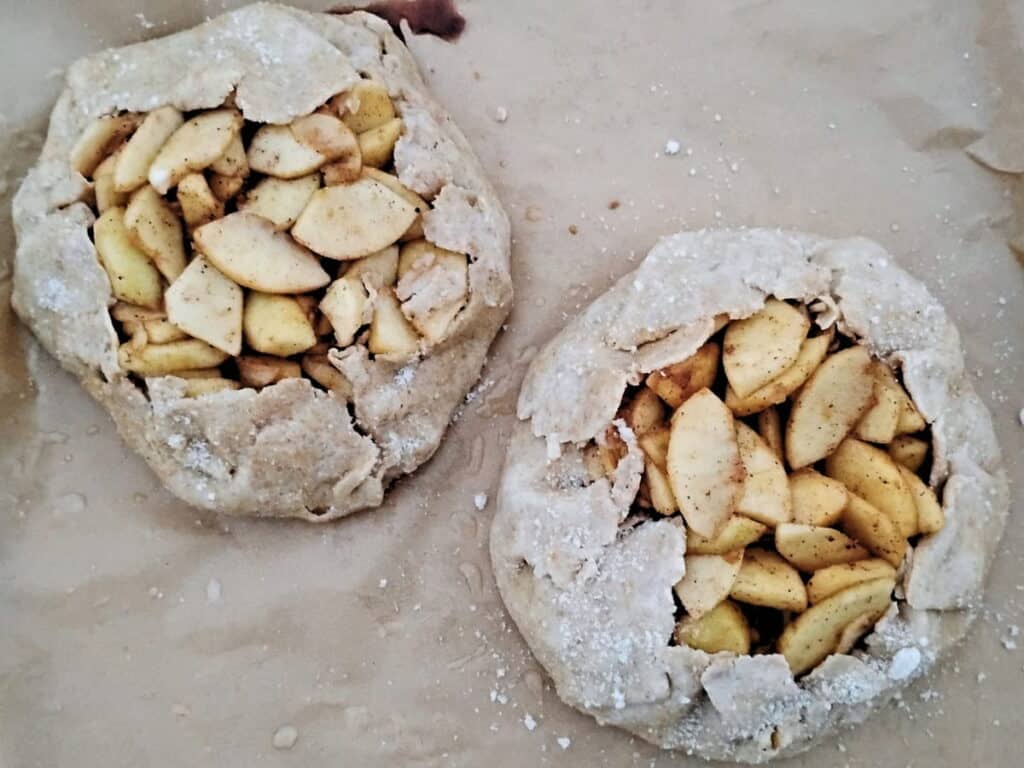
If you’re making a galette, place the dough on a parchment lined baking sheet. Fill the center and fold the edges over the filling, leaving the center open. Here is an example of 2 personal apple pies on a baking sheet. They are rough looking, but that adds to the charm 😊.
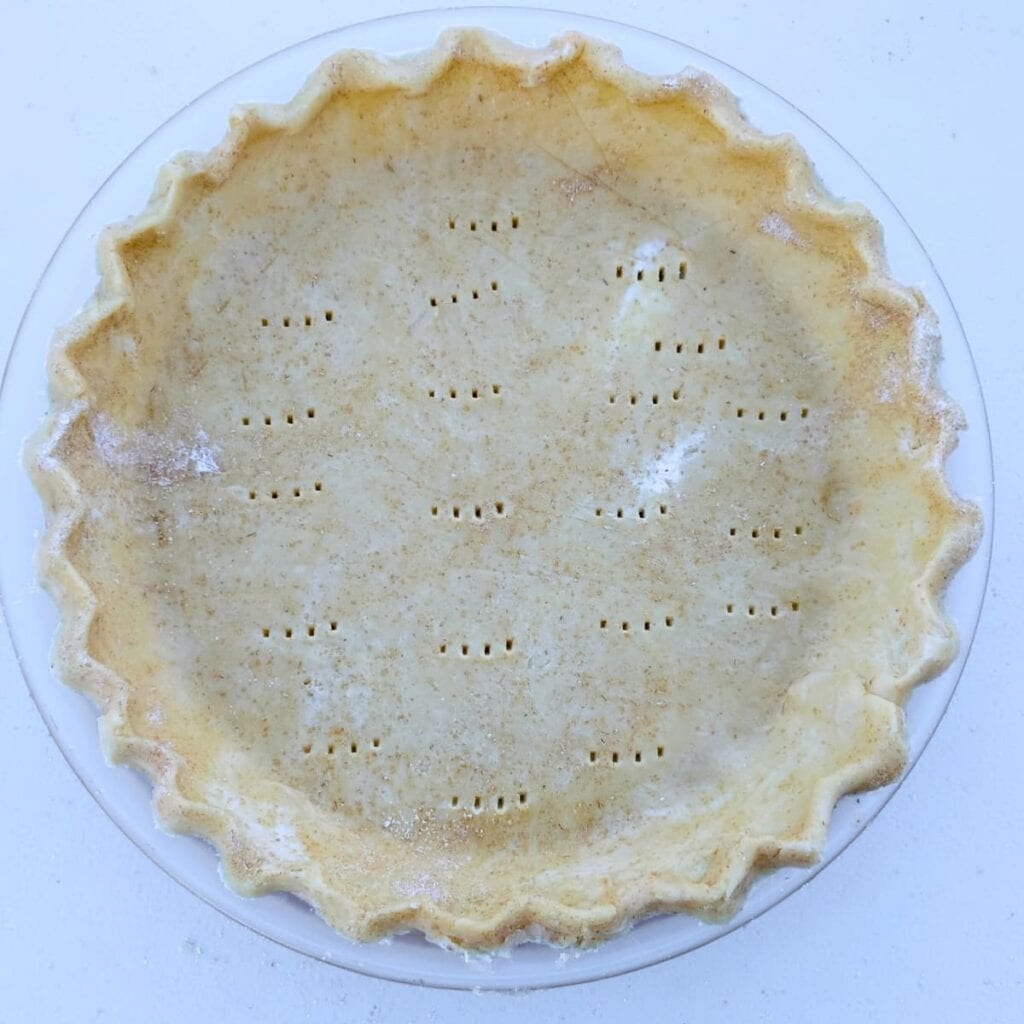
Use a fork to poke holes into the bottom of the crust so it won’t trap steam underneath and buckle or end up soggy.
I like to put my pie crust back into the refrigerator or freezer for a few minutes before filling, to keep the butter nice and cold, especially when it’s hot in here. And it will help increase the chances of flakiness. You can plan to make your fillings while the crust is chilling. Chill then fill!
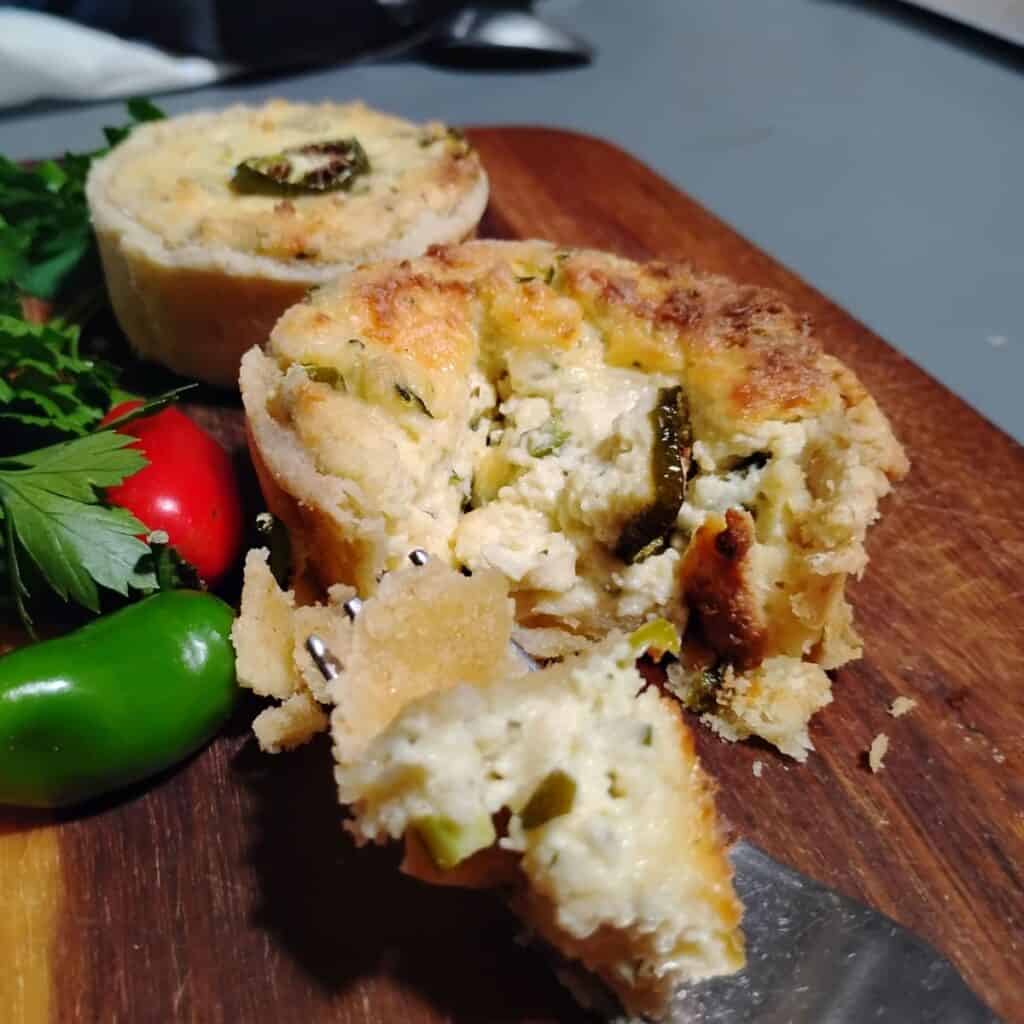
Fill your crust with sweet or savory pie fillings and bake it according to your recipe. Try my savory appetizer Jalapeño Cheese Pie with this flaky crust, next time you need a special treat for a party.
Pre-baked pie crust
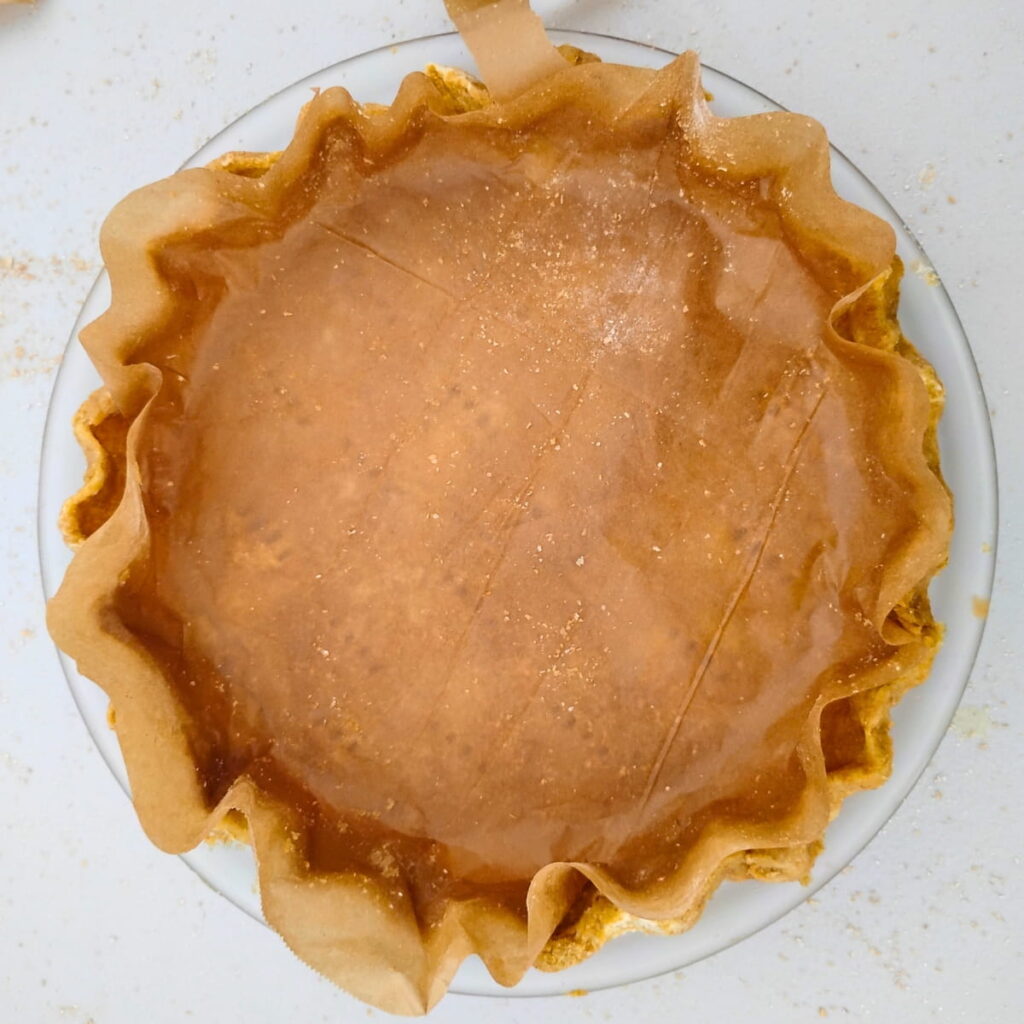
If your recipe specifies to use a pre-baked pie crust, you’ll want to blind bake your crust. Line it with a round piece of parchment after poking holes all over the bottom.
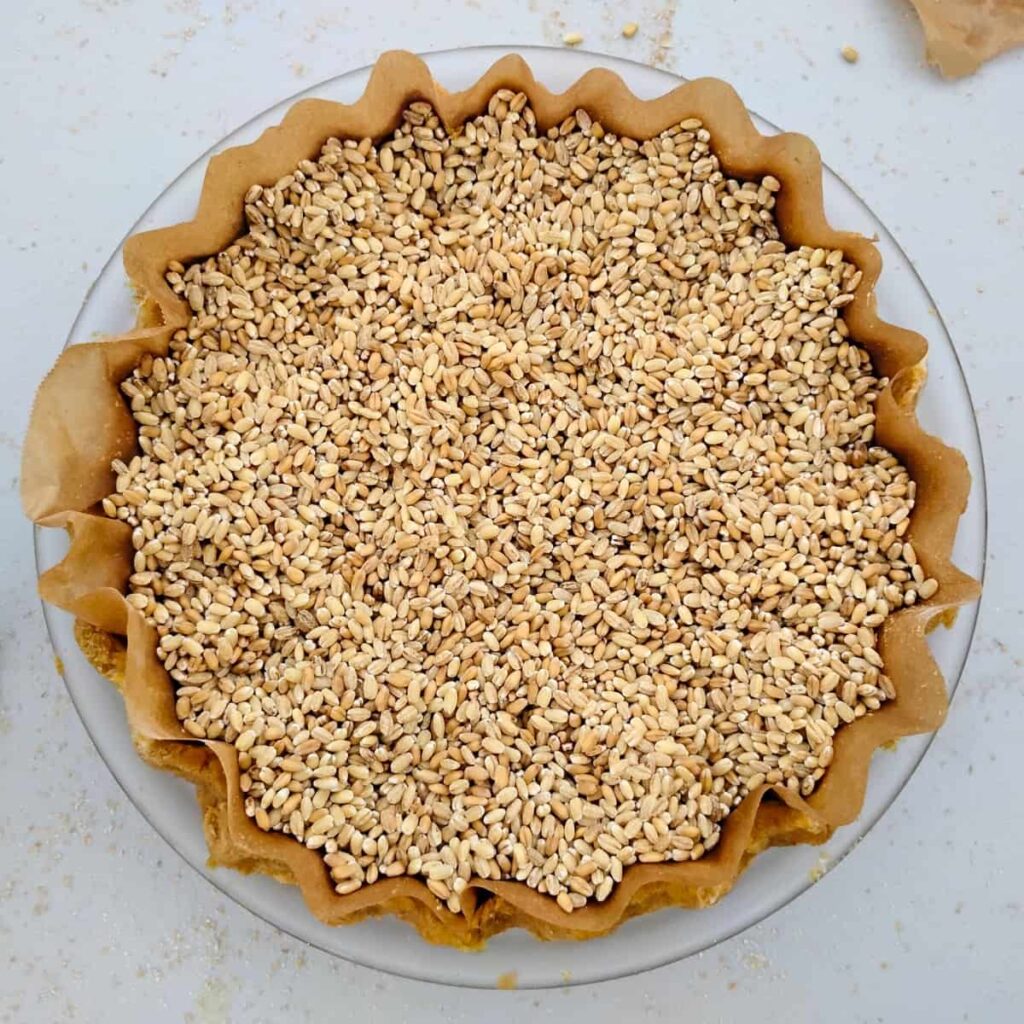
Fill the parchment with rice or small beans (about 1 quart or 2 pounds). I used barley, since I have a lot of it and I’m saving this barley for next time I need to pre-bake crust.
Be sure to press the parchment with your rice into every corner for best results.
Bake it for 20 minutes. Remove the rice or beans and parchment and bake for another 10 minutes. If you’re filling it with an unbaked filling later, be sure to bake the crust till it’s a golden color to assure that it’s baked through.
And that’s all y’all.
Your Questions Answered
Does this recipe make a double pie crust?
You can get a double crust out of it if you’re making a 9″ pie or smaller. For a 10″ pie, this recipe will make a bottom crust and you’ll have some extra dough for decorating, or to make a little flaky treat.
Can I freeze this pie crust?
Yes, it can be frozen for up to three months if well wrapped.
Can I use whole wheat flour?
Yes you can. However, if it is fresh milled, it will be more crumbly than with purchased flour. If you’re milling your own flour, I suggest that you mill it on the finest setting and then sift out the coarser bran parts with a fine sieve. Fresh milled flour (I like to use einkorn) will create the best tasting crust and it will have a really nice crunchiness!!
Is it ok to leave out the sugar?
It sure is. Only use it if you like a sweet crust for your sweet pies.
What does sour cream do to a pie crust?
Sour cream will help make the crust more flakey and a bit moist. The fat in the sour cream will surround the flour like a protective coating and keep the gluten from developing, yielding a more tender crust. It will also add a little bit of tang. I do like some tang to the crust. Sour cream will make the dough a little more pliable too, and easier to roll out. It replaces ice water that is commonly used in pie crusts.
Enjoy Your Tender, Flaky Pie Crust!
If you’ve struggled with making a nice, flaky pie crust, I hope you’ll give this one a try. And I sure hope that this will be your best pie crust too! I was so thrilled when I finally had flaky crusts enclosing my favorite fillings and I really hope that you’ll get to experience that too. It’s just very satisfying, even for a country bumpkin like me. And with the holiday season upon us, what better way to end a delicious meal than with a beautiful and tasty holiday pie with a buttery, flaky homemade crust. Enjoy!
Have you made this recipe? I’d love to get your feedback and your ⭐⭐⭐⭐⭐ rating! And I’d love to hear your favorite ways to use this pie crust. And please don’t hesitate to ask in the comments if you have any questions!
Join the Food For Life Garden Community for more great recipes and homestead tips and ideas. I’m always adding new content. Don’t miss any new posts and learn more about my off-grid farm life.
Other Recipes You Might Like
Jalapeño Cheese Pie – A long-time favorite dish of mine that I make each year when my jalapenos put out fruit in the garden. It’s an old recipe that makes an awesome appetizer, potluck dish, or game-day treat.
Jalapeño Popper Quiche Cups – Jalapeño popper quiche cups are little creamy savories in a flaky pie crust for parties, potlucks, holiday spreads, game day treats, snacks, or lunch. Great to make ahead and freeze!
Maple Walnut Cranberry Apple Cheesecake Bars – Fantastic flavor, wholesome ingredients, great holiday dessert.
Ginger Spice & Cranberry Healthy Apple Crisp – This most delicious, comfy and cozy fall and holiday dessert will warm you up on a chilly day and fill your home with the delightful scents of apples and spice and everything nice.
Sourdough Discard Blackberry Cobbler – A must for summer and blackberry season. Don’t have your vanilla ice cream without it. Super delicious and healthier than traditional versions too!
Blackberry Cheesecake Streusel Bars – A must make dessert for blackberry season. Creamy, easy, and berry delicious!
Lemon Blueberry Cheesecake Bars – Creamy, with a buttery crust, this cheesecake dessert is bright, tangy, easy, and perfect for summer gatherings, or any sweet cravings!
Lemon Cheesecake Mousse – A decadent, delicious, super healthy lemon dessert made with honey & lemon curd.
Creamy Quark Dessert With Oranges – Use unsalted queso fresco in place of quark cheese a delicious German dessert, a creamy, luxurious mousse, healthy enough for every day desserts, but fancy enough for special occasions.
Classic German Cheesecake (Käsekuchen) – How to make an incredibly delicious German cheesecake using Quark. Must try this!
Awesome Strawberry Quark Cheese Mousse – A delicious German quark dessert with pureed strawberries.
Linzer cookies – Delicious sandwich cookies with a cute peekaboo window, revealing the filling. Perfect for any or no occasion!
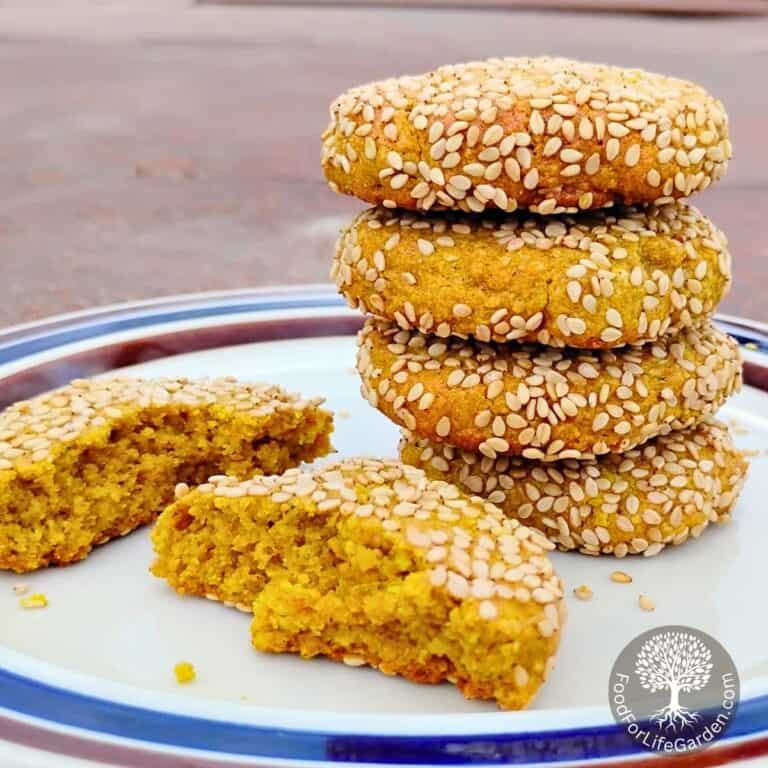
Lemon Tahini Cookies – Delicious, healthy spice cookies with lemon and honey. These spicy cookies are radical, especially if you love bold, complex flavors and healthy treats.
Vanillekipferl are delicate German almond and vanilla crescent cookies, a rich, buttery shortbread confections that’s a favorite to bake for Christmas cookie platters.
Pin This Recipe For Later
Shop This Post
Scale
9″ pie dish
9×13″ baking dish
Rolling pin
Rolling pin without handle
Parchment paper
Einkorn flour
Redmond’s Real Salt
Himalayan pink salt
Evaporated cane juice crystals
How To Make A Delicious Flaky Pie Crust
Equipment
- A medium bowl – for mixing ingredients
- A few measuring cups
- Scale (optional). – I prefer weighing the ingredients
- Pie dish for baking
- Rolling Pin
- Parchment paper
Ingredients
- 12 Tbsp butter, lard, or both, 6 Tbsp of each
- 2 cups all-purpose flour (230g) – I use either all-purpose white flour or einkorn flour. whole wheat flour is great too.
- ¼ cup sour cream (60g) – full fat!
- 1 tsp vinegar – I use Apple cider vinegar, but any works
- 1 egg yolk – if you double the recipe, use one whole egg instead.
- 1 tsp salt
- 2 tsp sugar (optional) – use for sweet pies or omit.
Instructions
- Dump the flour into a medium sized bowl.
- Add the salt, and if you're making a sweet pie, the sugar as well. Mix it all together and place it into the refrigerator for a little while, especially if it's a hot day.
- Cut the cold butter into small chunks (I quarter the sticks lengthwise, then I just slice them into small cubes). Add to the flour.
- Mix the butter into the flour, and then start squishing the butter. Try to do it quickly and be careful not to over process or melt the butter bits with the warmth of your hands. Just work swiftly to create flour coated flakes by pressing the butter between your fingers into flakes or disks.
- Once all the cubes are flattened, I like to place the bowl back in the freezer for a bit, especially when it's 90℉ out. The goal is to keep the butter firm and from melting, which would be the death of flakiness.
- Make a well into the middle of the flour, add the egg, sour cream, and vinegar and mix it with a fork to combine before incorporating it in the dough. You can also mix the wet ingredients in a small separate bowl and pour it over the dry ingredients. I prefer doing it that way.
- Use a fork to blend all the ingredients. It will keep them cooler than using your hands. Just toss everything around to coat evenly. Once all the flour has been wetted, press the dough together with your hands, flatten, then fold it, and flatten again a couple of times. But make it brief so your hands don't melt the butter.
- Place the dough into the fridge to chill it for about 2 hours and up to 4 days.
- Now roll out the dough between 2 pieces of parchment. First sprinkle a light coating of flour over it and under it, roll it a little, lightly flour again and redo the parchment, roll it a little bigger, and keep going this way until it's the right size. Go easy on your use of flour, but use enough to keep the crust from sticking.
- Once the crust is the desired size, flour the top lightly, fold it in half and then again in half. So it looks like a quarter pie wedge
- Lay the folded dough onto the pie plate with the point in the middle and unfold it for perfect placement.
- Use a fork to poke holes into the bottom of the crust so it won’t buckle.
- With a sharp knife, trim the excess around the edge and form a pretty scalloped edge if you want, or leave it rustic. I sometimes like to fold the edges inward for a rustic look after filling. If you're making a galette, place the dough on a parchment lined baking sheet. Fill the center and fold the edges over the filling, leaving the center open.
- I like to put my pie crust back into the refrigerator or freezer for a few minutes before filling, to keep the butter nice and cool when it’s hot outside.
- Fill your crust with pie filling and bake it according to your recipe.
- If your recipe specifies that you use a pre-baked pie crust, you'll want to blind bake your crust. Line it with parchment after poking holes all over the bottom. Fill with rice or small beans (about 2 lbs), and bake it for 20 minutes at 400℉. Remove the rice or beans and parchment and bake for another 10 minutes. If you'll be filling it with an unbaked filling, bake the crust till it's a golden color to be sure it's cooked through.
I love this crust recipe, and if you’re still looking for a great all-around pie pastry recipe that bakes up tender and flaky, you must give this a try. It’s so delicious too! Ask any questions in the comments below.
This looks incredible! I’ve never tried making pie crust with sour cream before. Must try!
Thank you! The sour cream is a game changer!
Love this! And love the ideas of using the crust in muffin tins!
I love making those muffin tin mini pies. They are so fun!
Love this recipe, perfect for savory or sweet!
Thank you, Ashleigh! It is a great all-purpose crust!
OH. MY. GOODNESS. This recipe takes flakey pie crust to the next level! Incredible!!!
Thanks Annabelle! It sure did that for me!
Love this recipe, who doesn’t love a good flaky, buttery pie! I made pie crust with lard one time only because it was sooo good I ended up eating it all lol. Thanks for sharing this, right in time for so many cozy fall pies!
Haha! I hear you! I love eating a good pie crust and lard makes pastry just so delicious!
Ohhh I’m excited to try this! Sour cream sounds delicious, and you really explained the food science well. It makes so much sense! I never got a flaky crust with water either, but I only ever heard of buttermilk. Sour cream sounds a lot better though 😏
Thanks for sharing Heidi!!
Thanks so much for your comment, Sarah! This crust recipe was a game changer for me and I hope you’ll love it as much!
Yay!! Im excited to try it as most call for shortening, thanks!
Right?! This works just as well or better than shortening and you aren’t left with that horrible greasy feeling in your mouth.
Nothing like flaky pie crust! Your picture is mouthwatering. Can’t wait to do some baking, thanks for sharing!
You’re so welcome, Kayla! And thank you for hanging out here for a bit. Have fun with the baking!