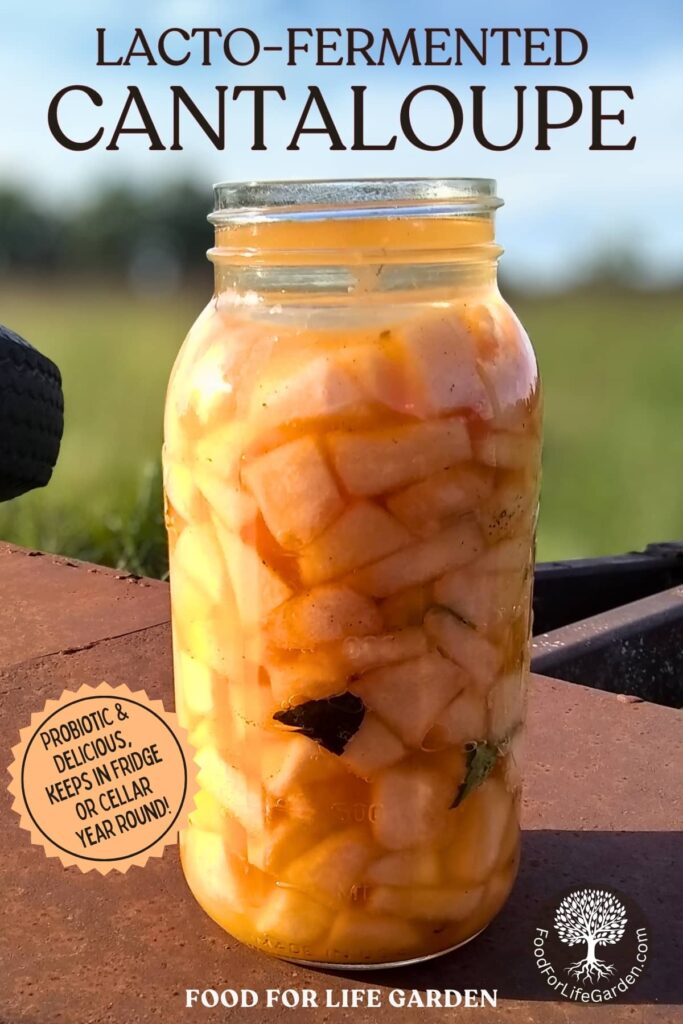
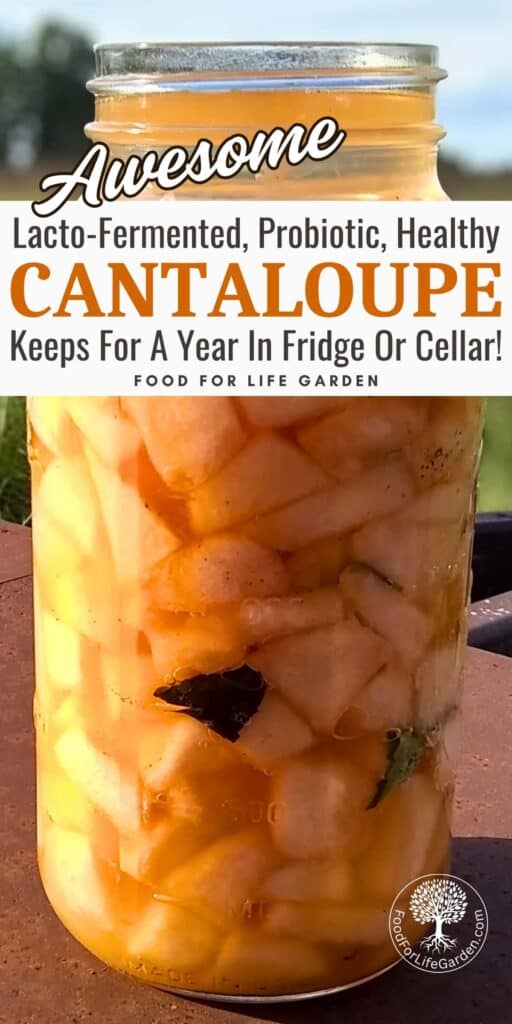
Preserve your summer’s bounty with this delicious fermented cantaloupe recipe. You’ll love this sweet, tangy and savory snack months later!
This post contains affiliate links. As an Amazon affiliate, I make a small commission at no extra cost to you if you make a qualifying purchase. See my full disclosure here.
If you have a glut of sweet melons this summer, you might wonder what to do with them all. Here is my suggestion: Ferment them! One of my favorite treats during the late spring and early summer, when I’m craving some fresh food and waiting for all those fruits to ripen, is fermented salsa and fermented cantaloupe.
Preserved at the height of their ripeness, fresh from the vine, they provide a burst of fresh flavors in their own unique, delicious way. I love eating these for a snack, knowing that I get more than just a great flavor. Fermenting increases the nutrients in cantaloupes and makes them more accessible for your body, plus it adds gut-healthy probiotics. What more can you ask for in a preserved food? It’s the ultimate treat. So lets’ go make some!
If you love fermented foods, try my Fermented Chili Paste, made from hot peppers of any color. Another cantaloupe recipe is this delicious Hot Sauce With Cantaloupe. And you’ve got to also try my tasty Fermented Onions. If you grow tomatillos, or if you have a lot of green tomatoes, use them in my Fermented Salsa Verde. Oh, and be sure to make some delicious Fermented Tomato Salsa Fresca!
Fermented Cantaloupe Goodness
Last year was my first year gardening in Missouri. And I was sorely disappointed in many ways about the outcome. One of the reasons was my fault, I got started too late with planting, since I had to put a new garden in from scratch. But then there were the bugs….
I can tell you that gardening in Washington is nothing like gardening here. Pest pressure has been phenomenal and because I garden organically, I’ve been spending much time looking up strange bugs that I’ve never encountered and what to do about them and still stay organic. This year has proved a lot better so far, thank God.
However, there were a few things last year that did go really well. So well, that it blew my mind. And I didn’t have to starve. I was blessed with an over-abundance of sweet potatoes, sun chokes, and melons.
The sweet potatoes supplied my greens in place of the decimated brassicas. And the tubers provided some starch for winter, when pumpkins succumbed to squash pests and the diseases they transmit.
Sunchokes came to the rescue when a sudden infestation of blister beetles killed my entire potato patch basically overnight. Never even heard of such creatures before, what a horror. Geesh.

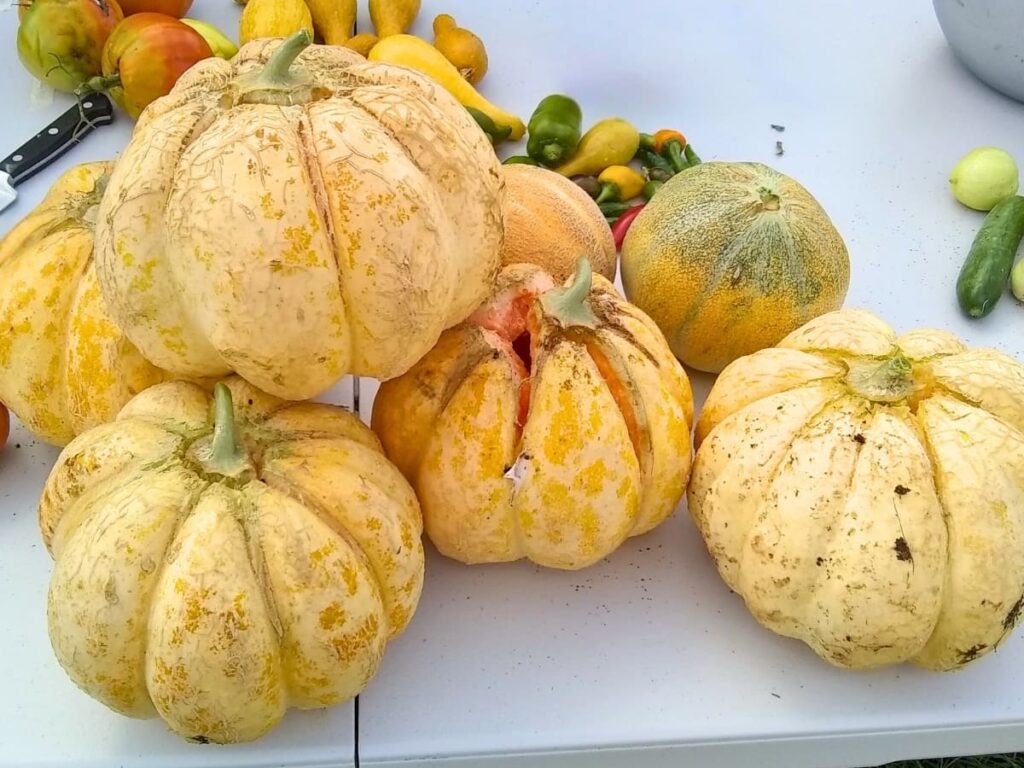
All the melons did awesome and supplied me with fruit for the season, which was great, since my trees are all still too young to bear. And, because I was never able to grow melons in the past up North, I planted a ton of little plants in hope for a few to make it, and they all decided to take off and thrive.
They supplied me with more melons than I could possibly eat. And I ate them fresh every day while they grew.
Some of the excess went into the freezer to make smoothies later, and others into jam, and the rest I fermented. The melons that didn’t look so pretty, went to feed the pigs who were just as ecstatic about melons as I was.
So I fermented cantaloupe salsa, made cantaloupe vinegar, cantaloupe hot sauce and just plain fermented cantaloupe. And it all turned out delicious. So let’s dive into making fermented cantaloupe…
Why you’ll love fermented cantaloupe
- An easy way to preserve extra cantaloupe.
- Great flavor after a long fermentation.
- Fresh fruit in winter and spring when you crave something fresh and your garden is not producing yet.
- Get all the nutrition of cantaloupe, but increased by the fermentation process.
- Fermenting makes all those nutrients more bioavailable and easier to absorb for your body.
- Your gut will be so happy about all the probiotic live bacteria in your fermented cantaloupe. These will help balance your gut’s microbiome and neutralize free radicals, to prevent oxidative damage in your body.
- Fermenting and the nutrients of the cantaloupe will help strengthen your immune system and provide protection from oxidative stress.
- Cantaloupe has a rich nutrient profile and is high in vitamins A, C, potassium and antioxidants. These can improve vision, support heart health, improve digestion and support immune function. Beta-carotene may help prevent asthma later in life and choline might help asthma sufferers now. Vitamin A and C can improve skin health and support natural collagen production to support hair, cartilage and skin. The high potassium content can help lower blood pressure. Folate can support the development of a healthy baby when eaten during pregnancy.
- Cantaloupe has phytonutrients which boost immunity and can help combat inflammation, this may help prevent diabetes, cancer, arthritis and other chronic illnesses and it can help slow the progression of arthritis if it is already present.
- Cantaloupe is rich in electrolytes to help restore lost minerals when you’re sweating a lot.
- This fruit is a great sweet treat for people with diabetes due to it’s low glycemic load.
Sources: WebMD, MedicineNet
Disclaimer
I am not a doctor or claim to be qualified in any way to give medical advice. I am self-taught and this article reflects just my opinions, and experiences with herbs and vegetables, and what I’ve learned from research and years of studying herbalism, herbs, foods and their uses and medicinal value. This article is meant as an entertaining source for ideas and reference, and to encourage interest in herbalism, choosing healing foods, and natural healing. It is my hope to help you get to know and appreciate herbs, vegetables and natural foods and their benefits and traditional uses. Please do not use any of this information to replace professional advice!
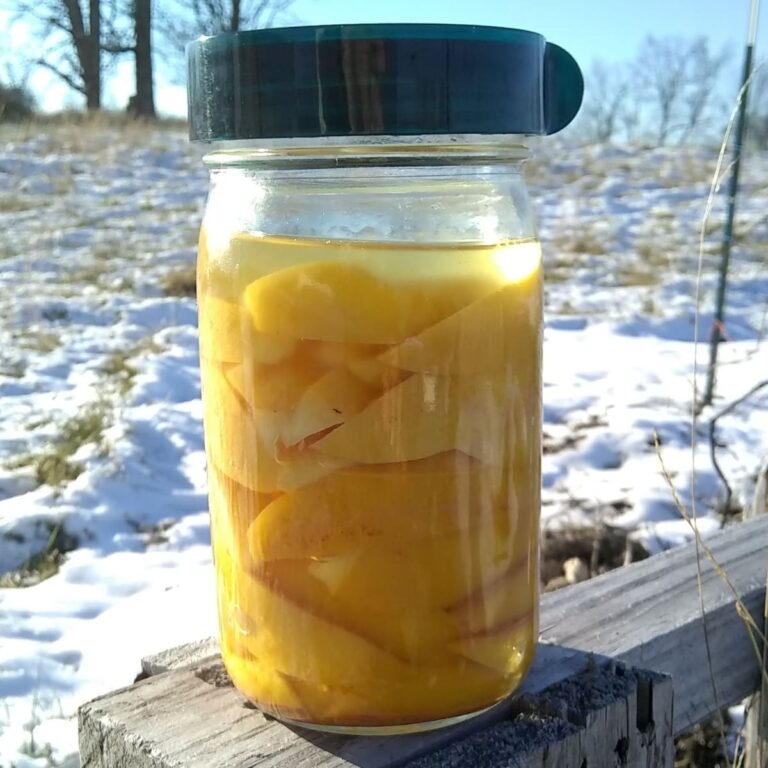
The Fermented Cantaloupe Recipe
As you can see, cantaloupe is loaded with good-for-you properties. And so is fermenting. So let’s put the two together and make delicious fermented cantaloupe.
Equipment
A quart size mason jar – for fermenting. You can also use a hinged top Bormioli Fido jar to ferment in, I love using those, they are self venting and you don’t need an extra fermentation lid.
Pickle packer (optional but very helpful) – I love using my Acacia wood pickle packer. It’s super useful for packing dry-salted ingredients into jars to eliminate air pockets and to coax out the juices. Use some sort of tamper or a spoon if you don’t have a pickle packer. I’m thinking that a tamper from a food processor will work ok. Or use your fist.
Fermentation weight – I recommend you use a glass fermentation weight. They are made for this job and do it well! If you don’t have one, use a clean, boiled rock, a baggie filled with brine, or some other food-save, non-corrosive item you have on hand, that will keep the ingredients submerged in the brine. This is crucial for fermentation success, especially if you don’t have a fermentation lid.
Fermentation lid – Another tool that I cannot recommend highly enough. A fermentation lid or airlock lid makes fermentation so easy and maintenance-free. However, as with most things, you can substitute. You can either just use a cloth, secured with a rubber band, or a 2-piece canning lid, or a plastic lid that is made to fit the jar.
I had mixed success with using cloth in the past, and so I don’t recommend it if you have other options. You have to be very vigilant about making sure nothing floats and keeping the kahm yeast skimmed. There is much less chance of that being a problem when you keep the oxygen out of the jar with a sealed lid. The gasses that build inside the jar will do a great job at keeping oxygen out if you can seal the jar.
Keep in mind that if your lid has a seal, you’ll need to burp it once a day to let any pressure from gasses escape.
With non-sealing lids or cloth keep an eye on your ferment. If there are any floaters that could grow mold, push them back under the weight, or if there is a thin layer of greyish-white, wrinkled kahm yeast, skim it off. It could taint the taste of your ferment even though it is not harmful.
If you’re using a hinged-top Fido jar, it will self-vent.
Chopping board and knife – use these to prep your melon.
Scale – We’ll be using a ratio of salt to the weight of ingredients, so you’ll want to measure the ingredients and the salt. Alternatively you can wing it by adding 1½ tablespoons of salt per quart jar.
Wide mouth Funnel (optional) – Not necessary, but very helpful. It helps to get your ingredients into your jar easily and without a mess (or less mess, if you’re like me).
Ingredients
I always recommend the use of organic ingredients. It is even more important in fermenting, where we don’t want to kill off the good bacteria that make fermenting a success. And clean food will go a long way towards better health! In this recipe we use melon and since we don’t use the skin, most likely conventional melon will still ferment fine.
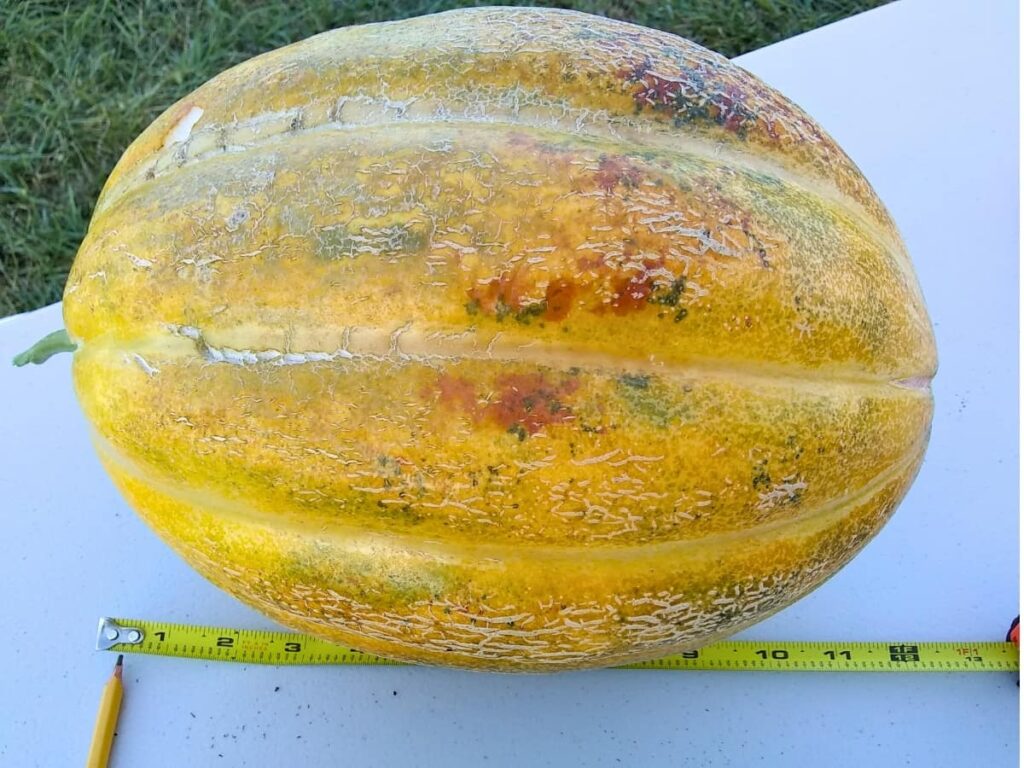
Cantaloupe – Use any melon you like. I’m using cantaloupe and have used charentais melons and Prescott fond blanc, but haven’t tried it with honeydew, because I ate them all fresh, but they should work just fine too.
Sea salt – I recommend Redmond’s Real Salt, Himalayan pink salt, or Celtic sea salt. They add valuable minerals to your diet that are absent in many other salts. You can also use unrefined plain sea salt or pickling salt. In any case, be watchful of additives. Table salt and even some brands of sea salt and kosher salt can contain additives, so check the box label.
Filtered water – I use stored well water or rainwater that I filter with my Berkey water filter. Don’t use straight municipal tap water. The chlorine and other additives can kill your fermentation bacteria. However, you can boil it for a few minutes uncovered, and cool it uncovered or leave it uncovered on your counter for 24 hours, to evaporate the chlorine. Filtered bottled water would be ok to use too.
Spices (optional) – You can use pumpkin pie spice mix, about two teaspoons per quart. Or just add what you have, I like fresh ginger if I have it, a little cinnamon or a cinnamon stick, a pinch of cardamom, nutmeg, and/or cloves. Or use a a teaspoon of whole cloves and a cinnamon stick. I found the spiced cantaloupe really delicious, but, honestly, my favorite is just plain cantaloupe with no other flavors to get in the way. Try both and see what you prefer.
Basil (optional) – Basil pairs well with cantaloupe and makes a great seasoning. I did really like the basil in mine and the basil flavor stays true even after almost a year of storage.
Cayenne pepper (optional) – Give your fermented cantaloupe a bit of a kick with a small or large whole cayenne pepper added, depending on your preference. Dried or fresh is fine. If fresh, make a small slit into the skin, or cut in half. Or add a sprinkle of the crushed kind.
Steps To Make Fermented Cantaloupe
01. Prepare the Melon
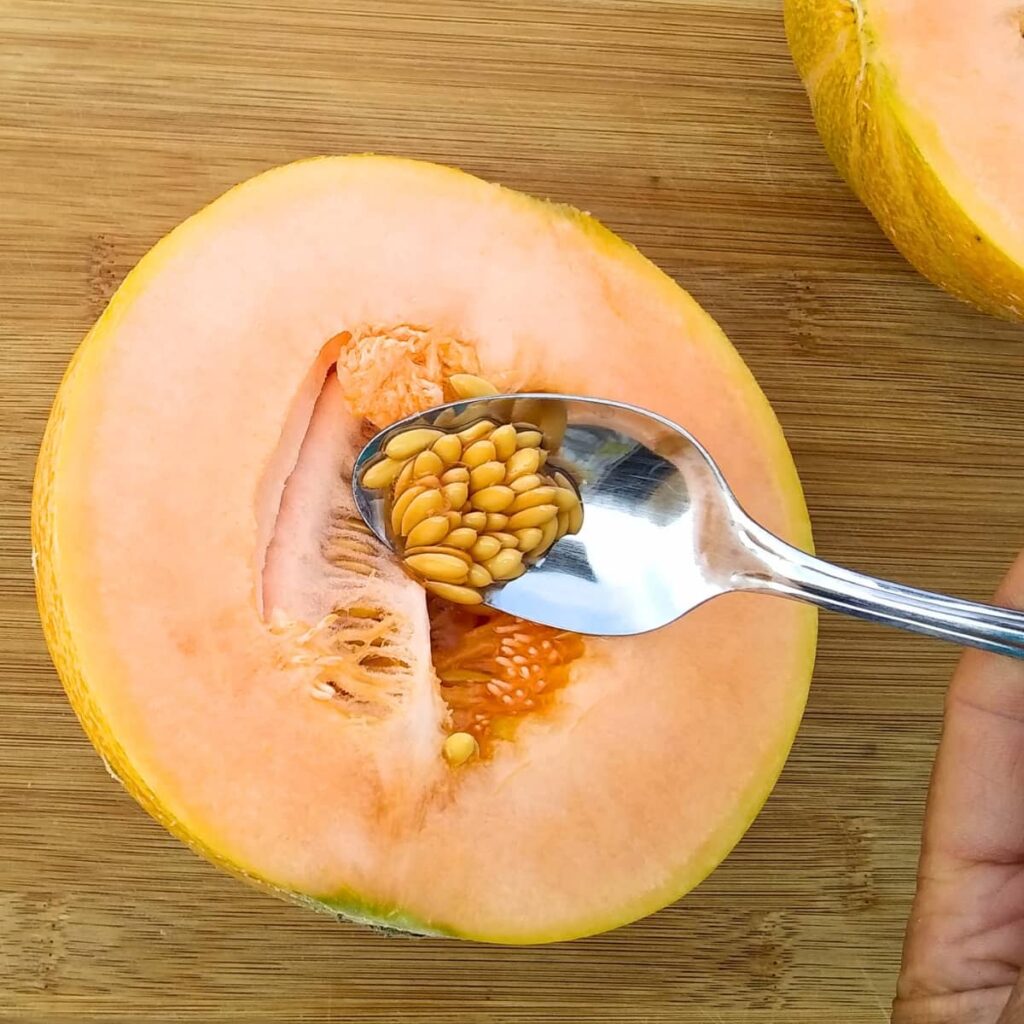
First, wash your melon. Then cut the melon in half and remove the guts.
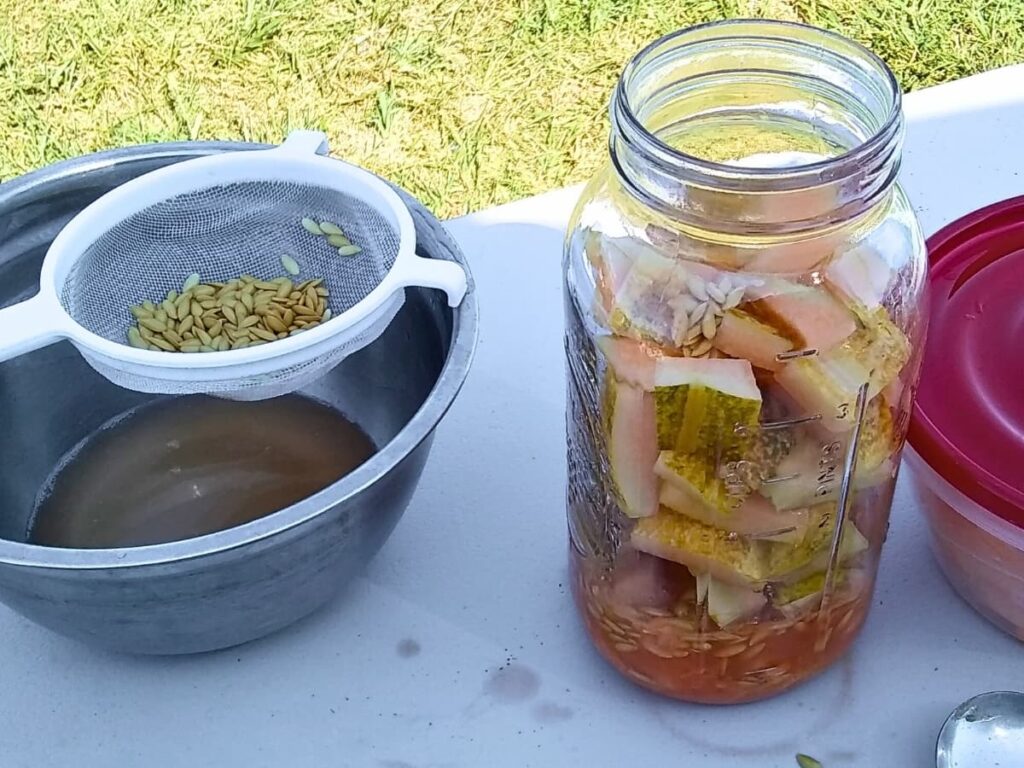
Be sure to save the pulp and seeds for other purposes. Three reasons: A) seeds for planting next year, B) seeds for roasting, and C) to put all scraps in a jar and ferment into vinegar. Follow my apple cider vinegar recipe!
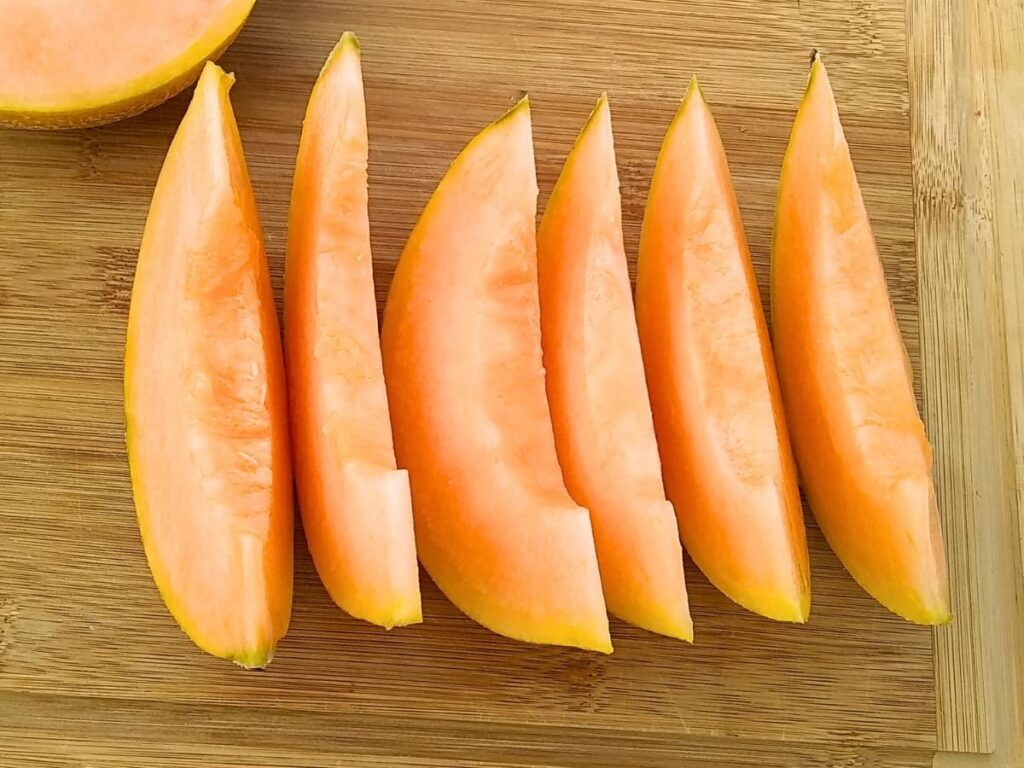
Slice the melon, remove the skin.
Save the skins too. They go into the separate vinegar making jar if you are also making vinegar. This works best with unsprayed melons. If you have only conventional store bought melons, you can try to scrub them and hopefully it will work just fine.
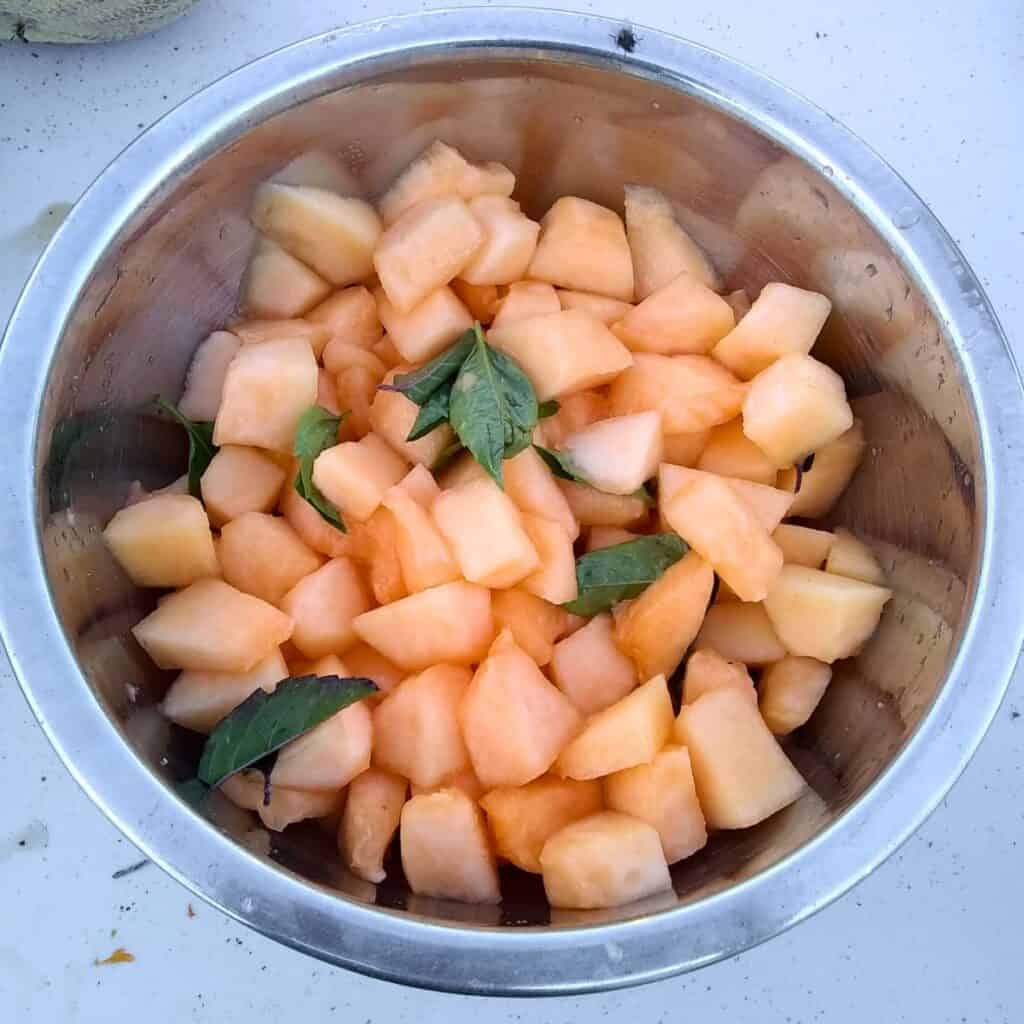
Cut the flesh into chunks and place them into a zeroed out bowl on your scale. (Put the bowl on the scale and turn it on so it reads 0 with the bowl on the scale). Toss with basil leaves if you want to use them.
02. Salt The Melon
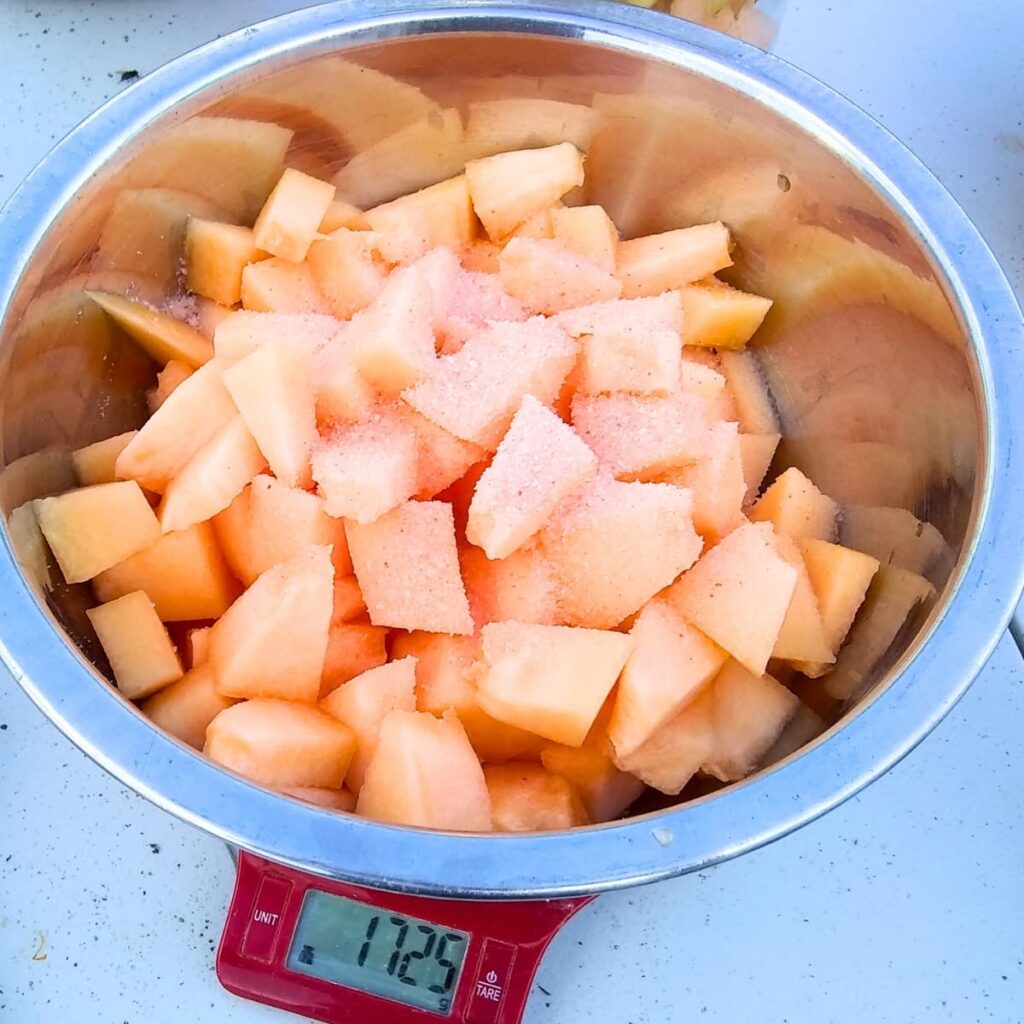
Weigh your melon on a scale using the grams setting. Calculate 2% of that weight for your salt ratio. If you have 500 grams, 2% is 10 grams of salt. Alternatively add 2 tablespoons per quart jar. Mix it all well and let it sit for 10 minutes or so to start drawing juices.
03. Fill your jar
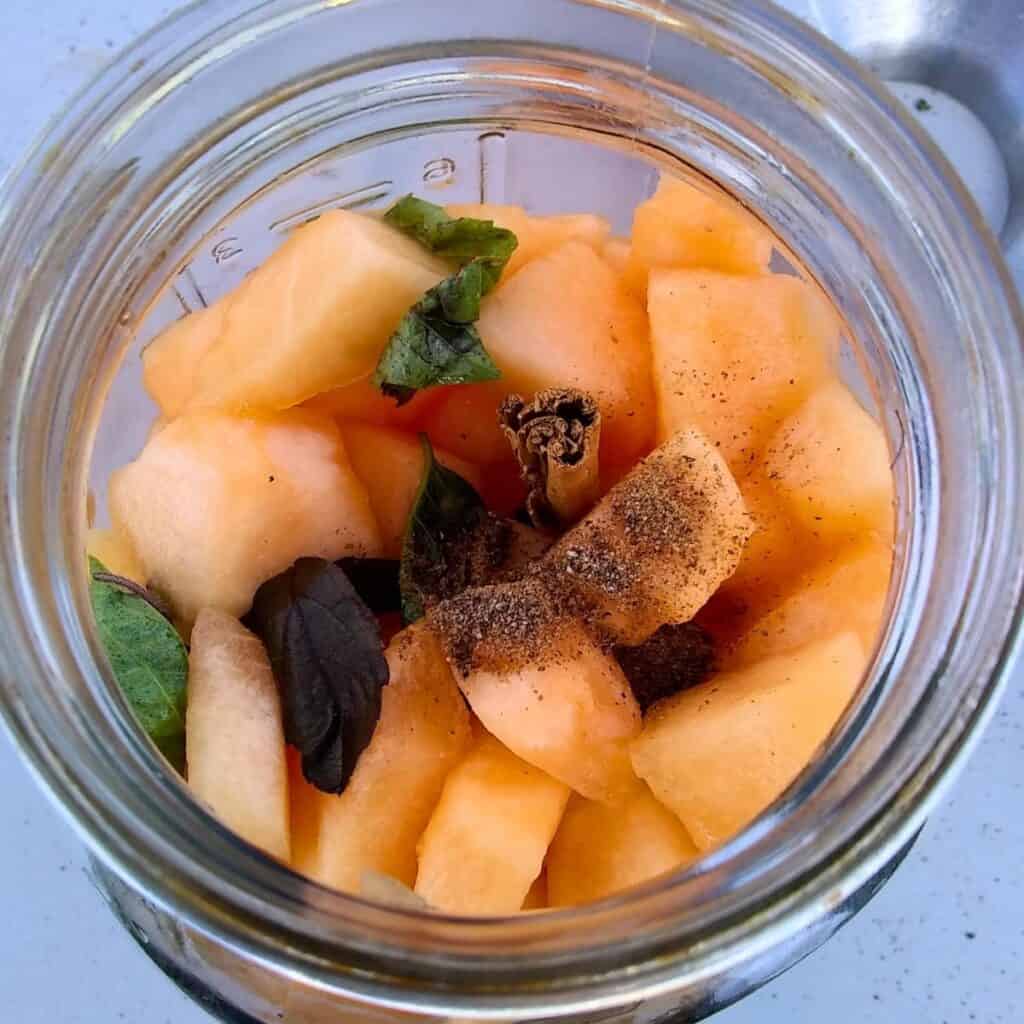
If you’re using spices, it’s best to add them first to keep them from floating up. I often forget and add them later, but don’t normally have a problem.
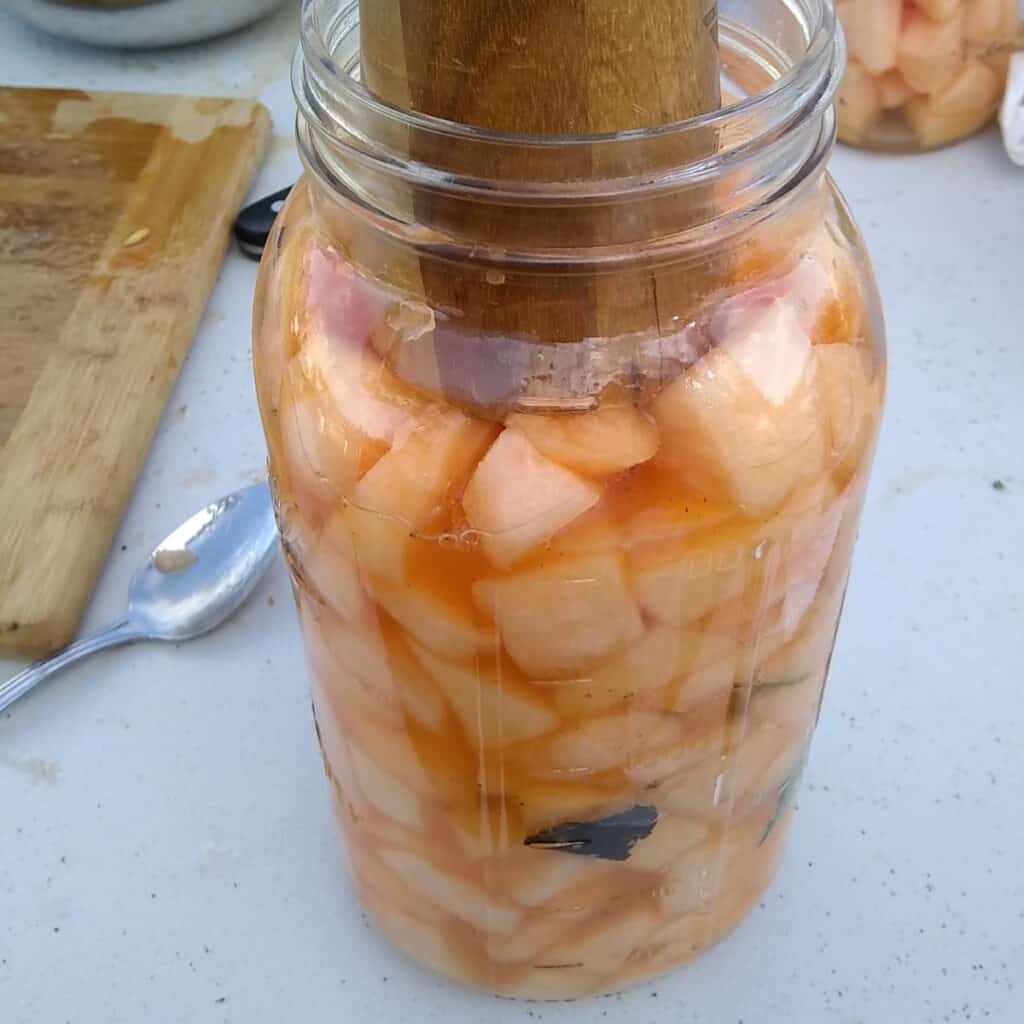
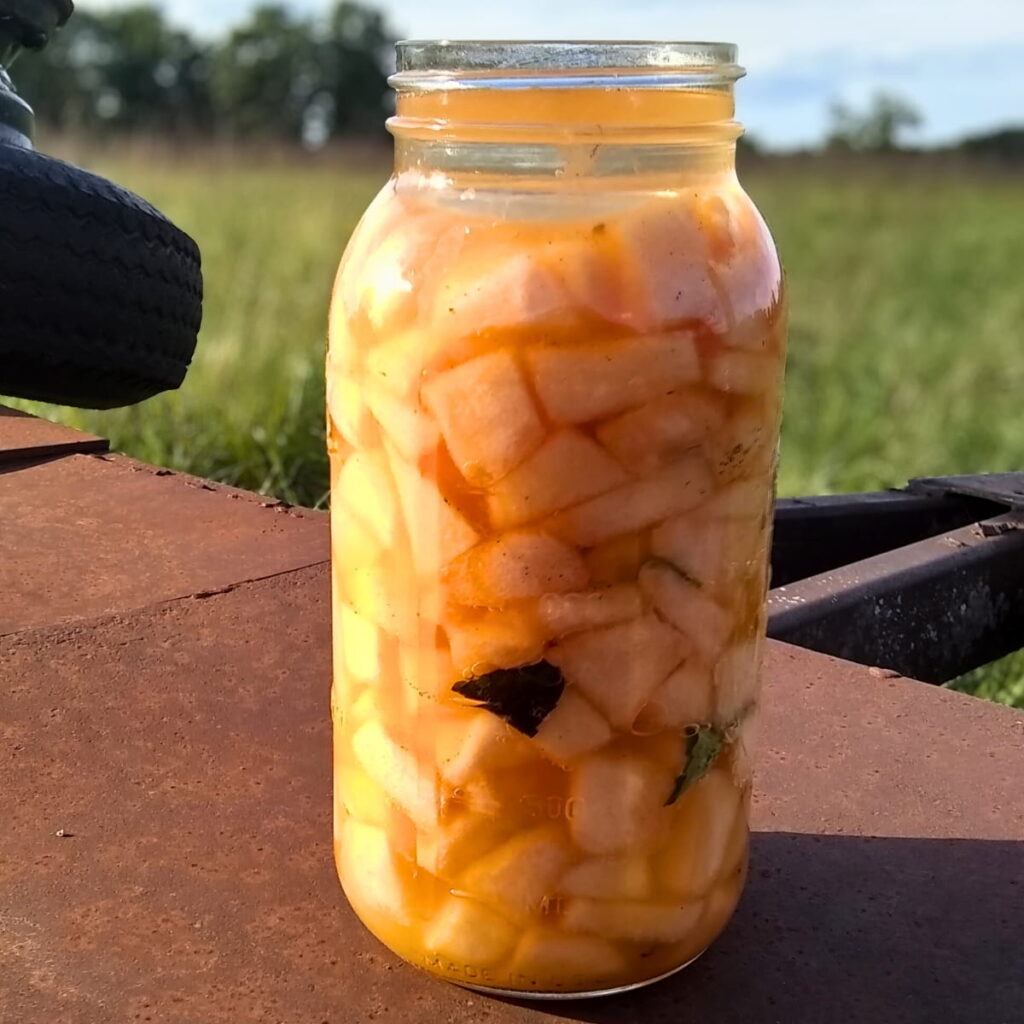
Pack the pieces into your mason jar. I like to use a pickle packer to pack everything well. The jar should be near full, to about an inch below the rim. This will compress a bit more once you add your weight.
04. Weigh down your Ingredients
Place a glass fermentation weight on your ingredients. If you don’t have one, you can use a boiled, clean rock, a baggie filled with marbles or brine, or some other food-save, non-corrosive item you have on hand.
07. Cover your jar
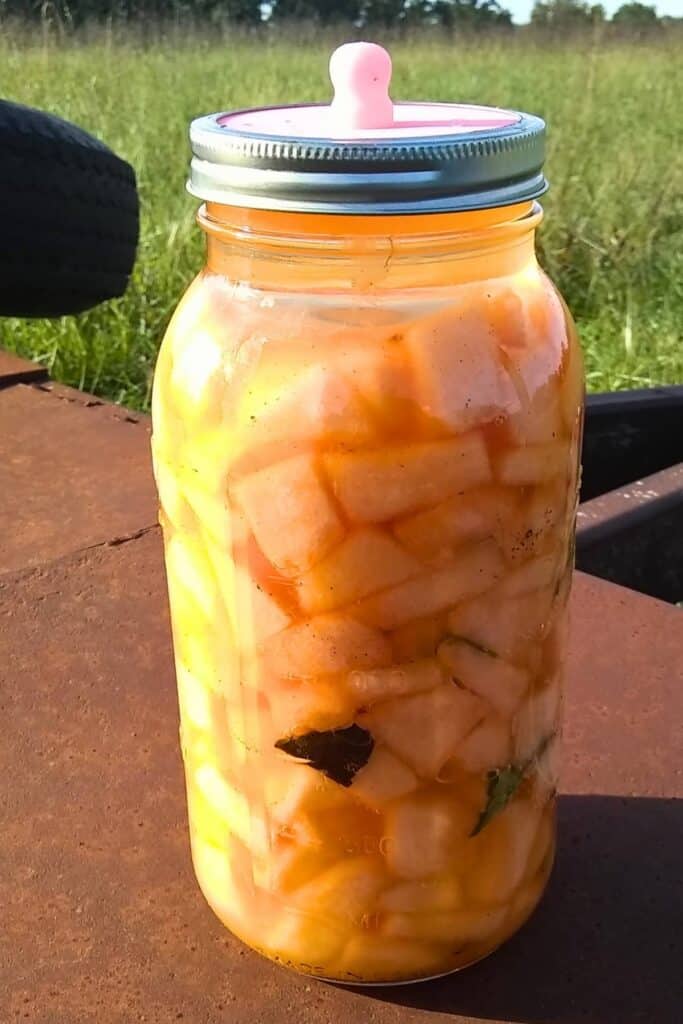
If you are using a mason jar, I highly recommend a fermentation lid or airlock. They are self venting and are so easy to use. No maintenance necessary. If you don’t have one, you can use a 2-piece mason jar lid. However, you’ll need to remember to burp the jar once a day.
Or you can try to screw the band on loose, so it can self vent. Without a fermentation lid, be sure to keep an eye on the fermentation to see if a yeast layer forms on top, which is harmless, but should be skimmed off or it can give your fermentation an off-flavor.
08. Fermentation
Place your jar in a dark place with a bowl or plate under it, at about 70-85 ℉. This temperature should be maintained over the course of the next 2-3 weeks. Some fluctuation is fine, but avoid prolonged lower or higher temperatures. For more details on fermenting and why this is important, visit my lacto-fermented vegetables page, a beginner course on fermenting.
09. Check Your Fermentation
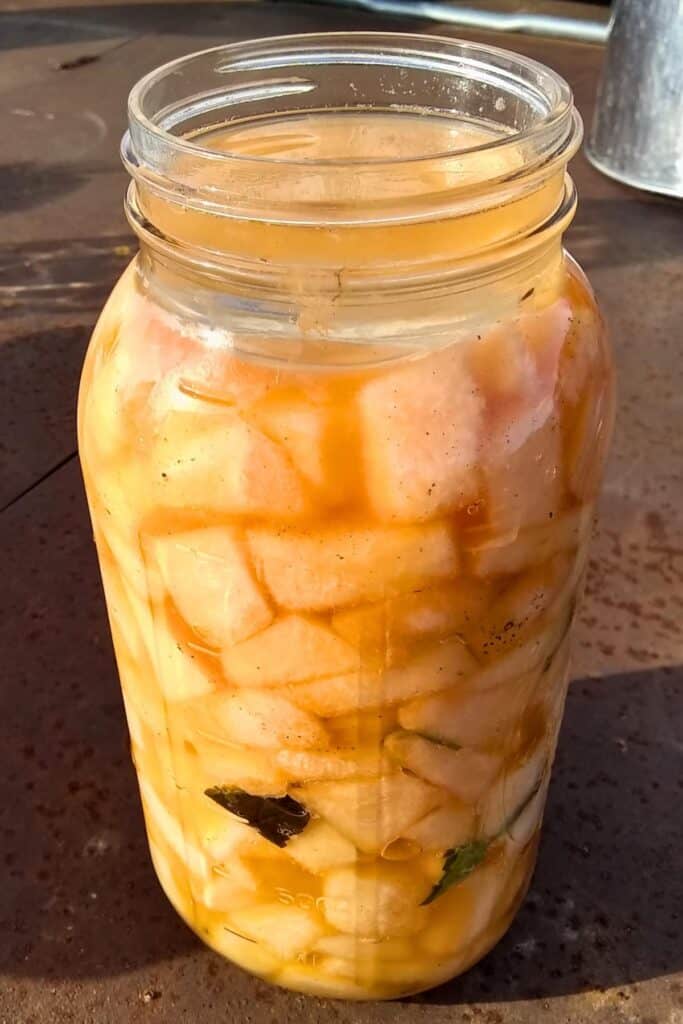
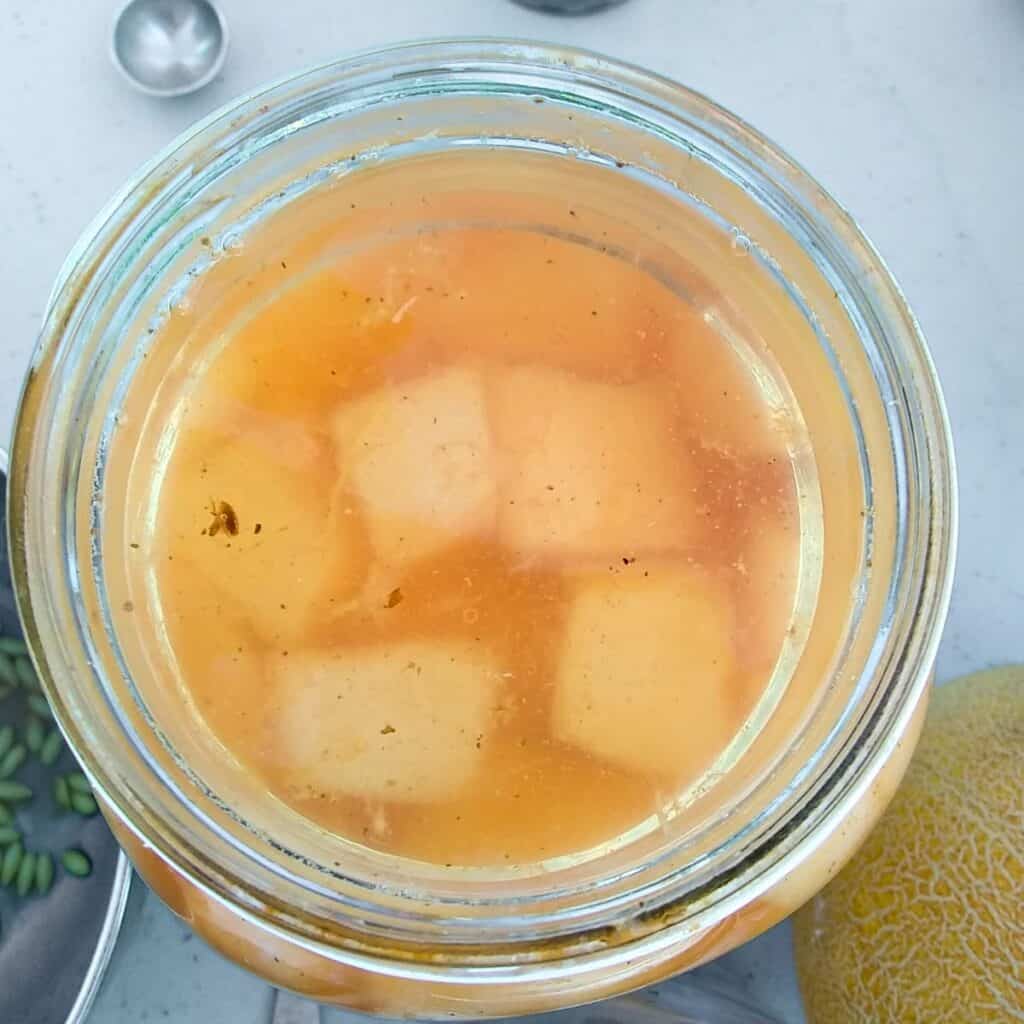
After 2-3 days, your fermentation should start to look active. You should see bubbles forming, maybe a bit of overflow, and a cloudy brine.
If you are impatient, you can smell and taste them now and use them if you like a very light fermentation, but if it doesn’t taste tangy yet, leave it to ferment a bit longer.
For a full fermentation, leave it alone for 2-3 weeks. The melon pieces will get more acidic and have increased probiotic microbes. That means more beneficial probiotics for your gut. However, if your ambient temperature is very high, you might want to cut that a little short to prevent the cantaloupe from turning soft.
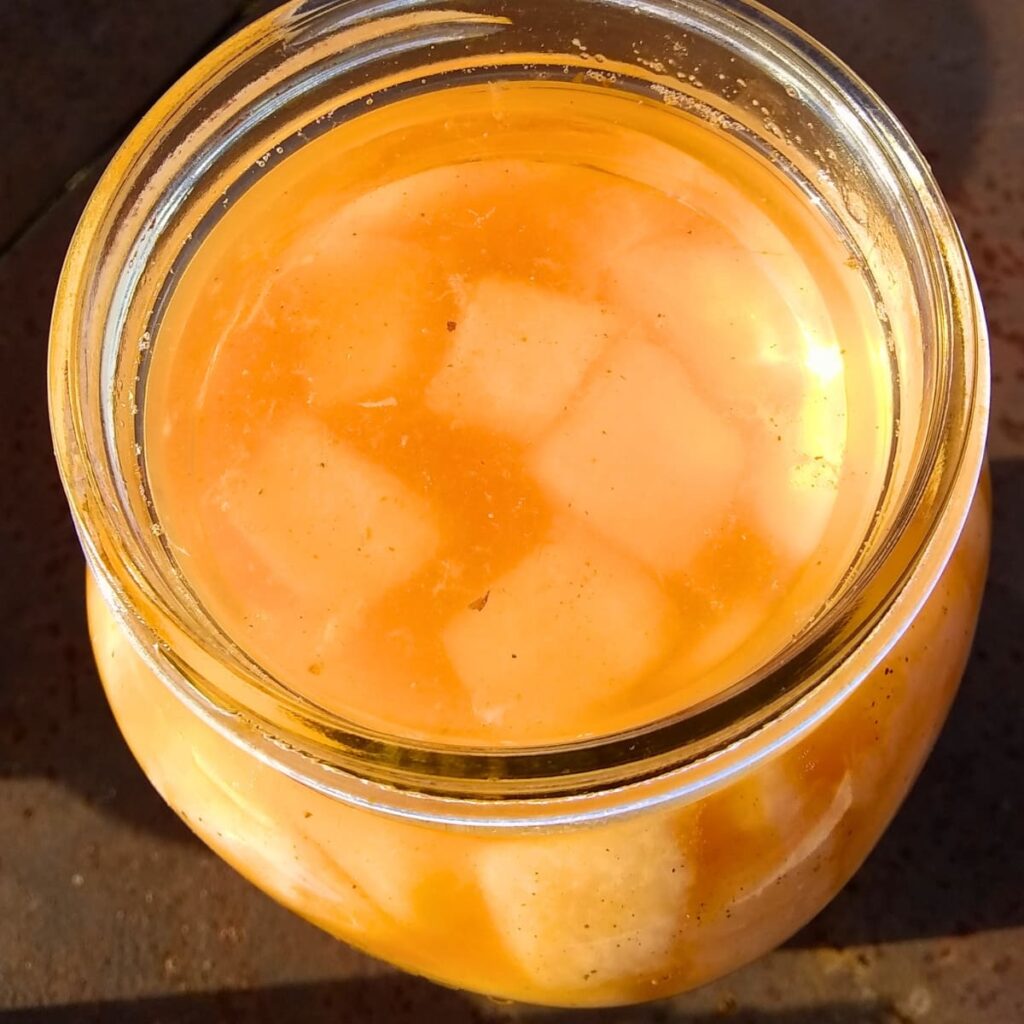
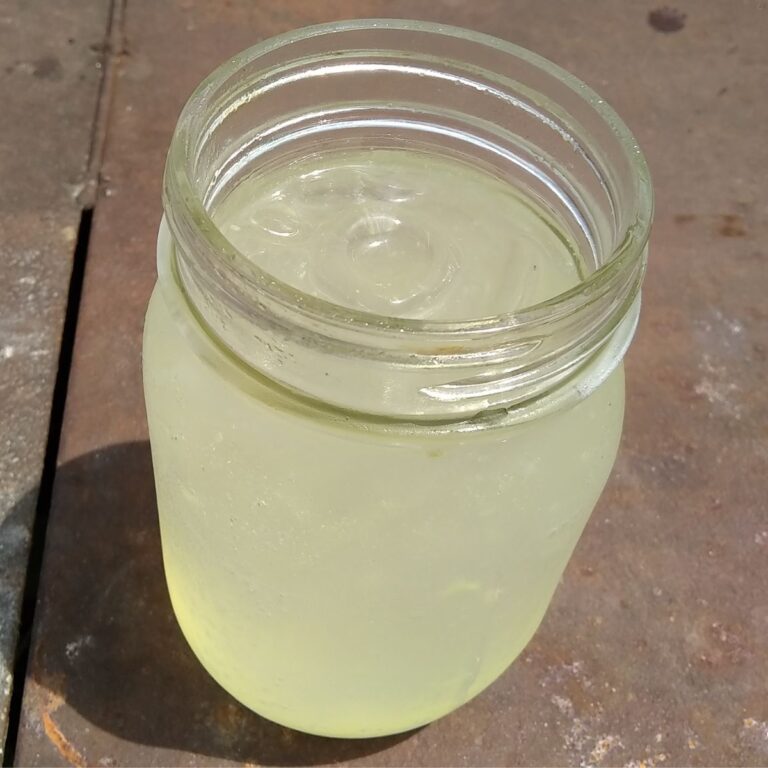
After 3 weeks, it should go into cold storage, but before you put your jar away, open it and smell the melon. It should have a pleasant tangy scent. Now taste them. If they are nicely tangy and firm and you like them that way, you can take out the glass weight, place a sealing lid on the jar and refrigerate them at this point.
Fermenting them for two to three weeks for a full fermentation yields the highest health benefits.
How To Tell If This Fermented Melon Is Safe To Eat
Fermenting is very safe, but as with anything, there is a chance that something might go wrong. If for some reason your ferment has mold on it, smells putrid or seems slimy or mushy, you don’t want to taste it. Something went awry. But it will still make great food for your compost. If it looks, feels, and smells good, it’s fine to taste and eat. You’ll know if it’s bad.
In any case, it’s very unlikely that anything will go wrong if you followed the instructions and used clean equipment. But when you’re dealing with food, stuff can happen. Maybe your room temperature was too low or too high or your melon or other ingredients had been treated with pesticides. There might have been mold or undesirable bacteria on your food that multiplied before your fermentation’s good bacteria could get strong enough to combat it. It’s always a bummer, but remember, while it can happen, it is not the norm. Don’t be discouraged and do try again.
Storage
Replace your fermentation lid with a regular lid and place the jar into the refrigerator or your root cellar. Keep it somewhere where it’s fairly cool, or it will keep fermenting actively and eventually turn soft and not very appetizing. And after many months of active fermentation at warm temperatures, your melon can indeed become inedible. Fermentation is actually the breaking down of food, and while it’s great for us at first, once the sugars are repleted and the microbes run out of food, they will die and so will the food.
So if you don’t plan to eat your fermented melons soon, it’s best to keep them cool, under 60 degrees. This will put the microbes almost to sleep and they won’t be eating much at all. This way your melon should be good to use for at least a year or more. Use as needed.
How to Use Fermented Melons
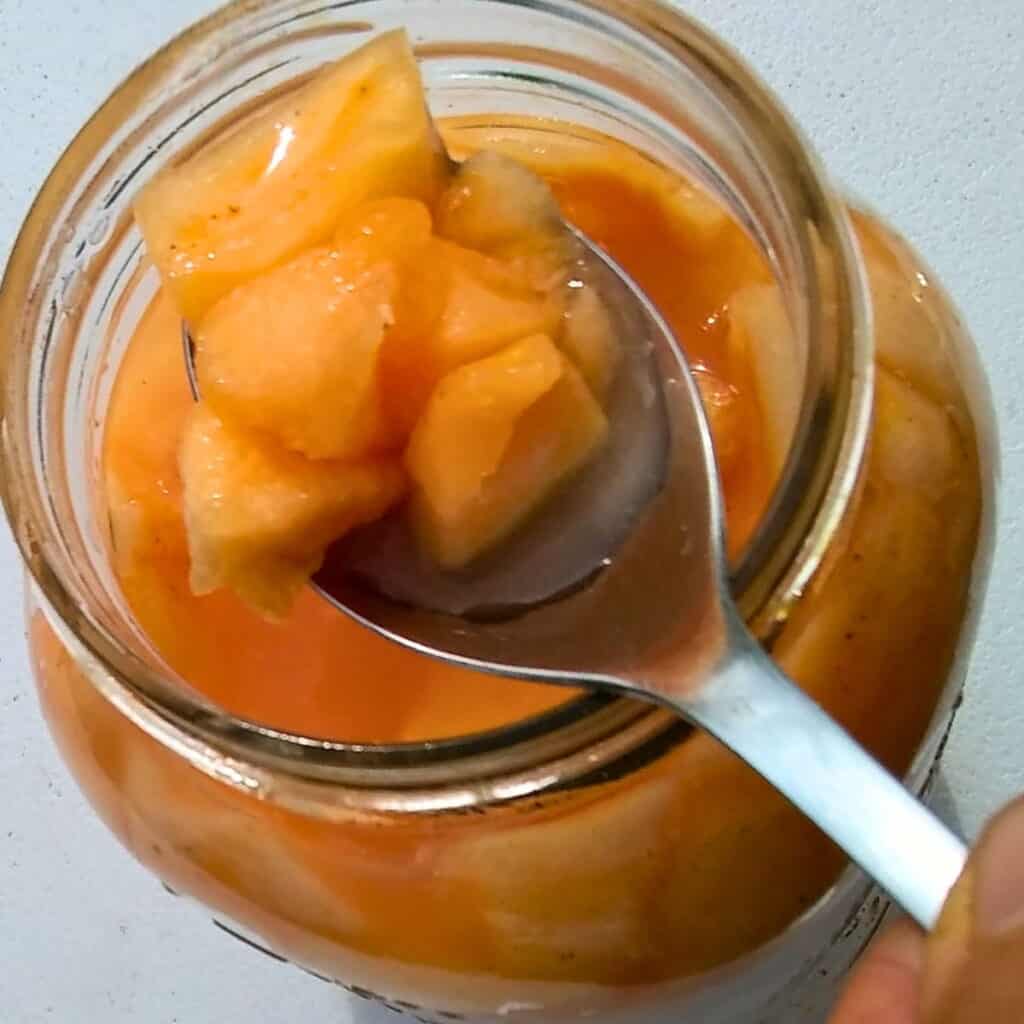
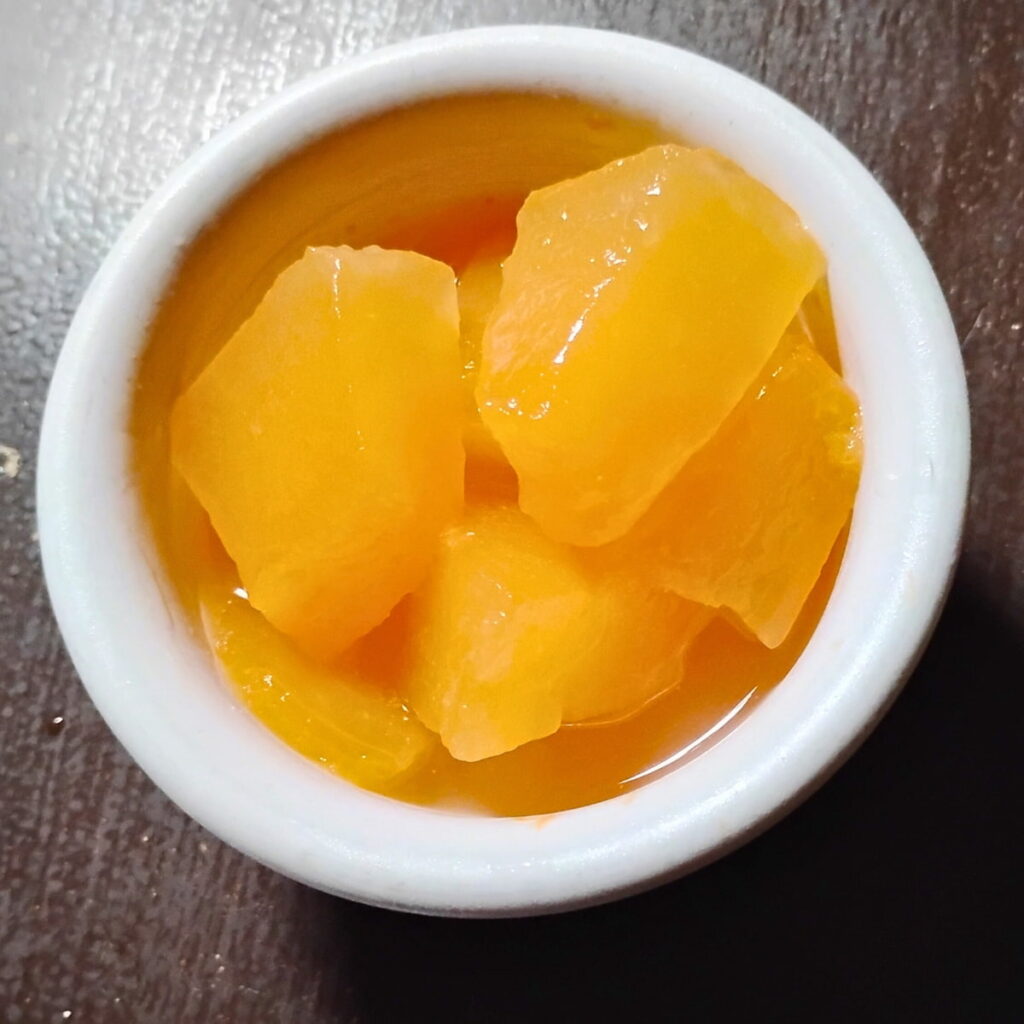
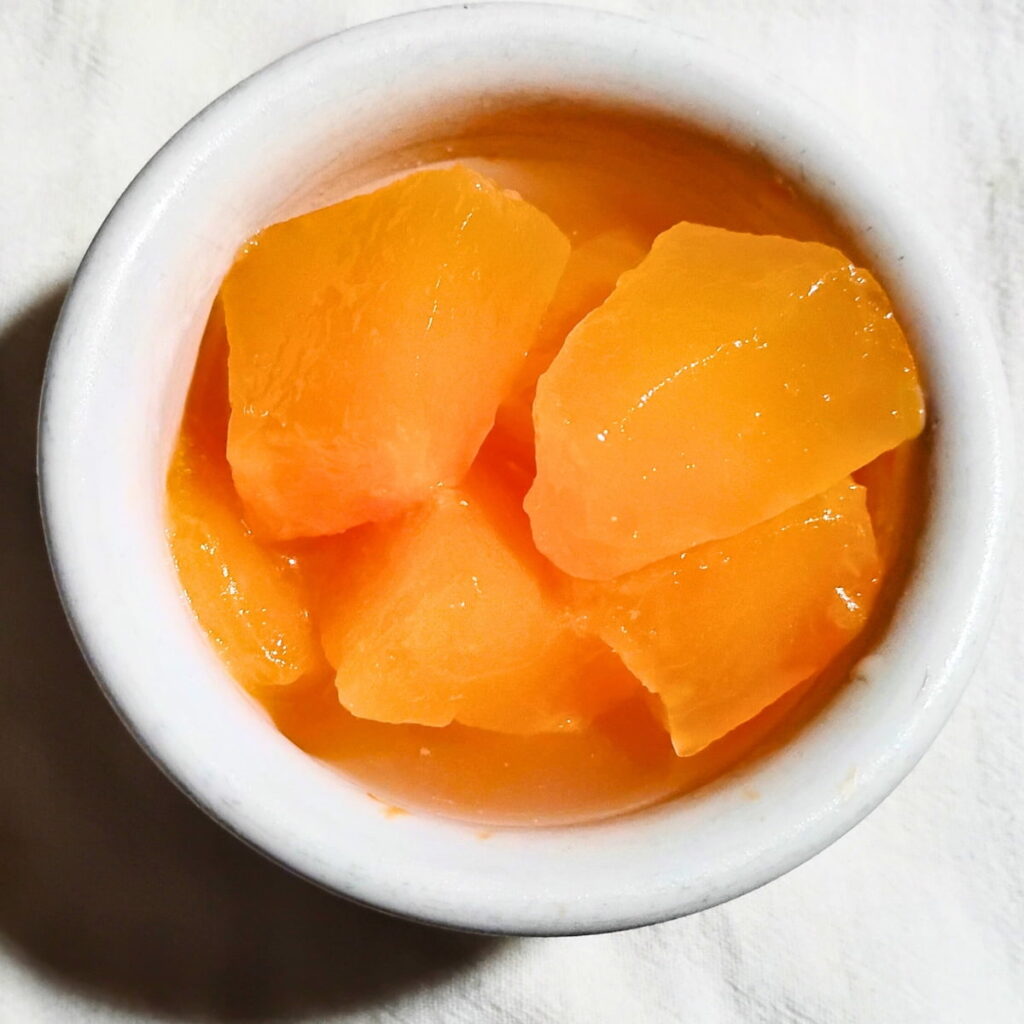
Use them as you would any pickled foods. They can be added to sandwiches, salads, or served as a side by themselves.
Be sure to save the brine. It’s a delicious tonic full of beneficial microbes for gut-health. You can also use it as a marinade, to make salad dressing, to brighten the flavor of a soup.
Fermented foods, when served with your meals, will help with the digestion of foods that are harder for your body to break down, such as cooked meats.
You can also use the brine as a starter for a new batch of fermented vegetables. It is great too for fermenting cooked vegetables or other foods. For example you could use it as a starter culture for making fermented eggs, since boiled eggs don’t have any live lactobacilli on them.
As always, when you introduce a new food to your diet, be sure to start slow. Let your body adjust to fermented foods over a few weeks before you increase the quantity. Watch for allergic reactions. And check with your health provider, if you are pregnant, nursing or are taking medication.
Enjoy your Delicious Fermented Melon!
As you can see, fermenting foods is such a perfect way to preserve them. Not only do you get the benefits of the fresh melons, preserved at their vine-ripened best, but fermenting increases the nutrients and their impact in our body and it adds probiotics. The melon will stay nice and firm for a year in the fridge or cellar and will be a great treat for you while waiting for next year’s harvest. Give your gut a healthy dose of probiotics, and maintain a healthy digestion and better health over all.
I’d love to know about your favorite cantaloupe recipes and how you deal with excess melons below in the comments. And please don’t hesitate to ask if you have questions! I would totally appreciate a ⭐⭐⭐⭐⭐ rating if you like this fermented cantaloupe recipe or this article!
Join the Food For Life Garden Community for more great recipes and homestead tips and ideas. I’m always adding new content. Don’t miss any new posts and learn more about my off-grid farm life.
Other recipes you might like
Fermented Hot Sauce With Cantaloupe – How to make a delicious fermented hot sauce that is great with meat, fish, eggs and on sandwiches. What a great way to use some cantaloupe and spicy peppers.
Fermented Salsa – Delicious zesty salsa. Preserve fresh produce at the height of the season to enjoy during the garden down times. It’ll bring back memories of summer and tastes of fresh vegetables, while brimming with all the stored vitamins, nutrients and probiotics!
Fermented Salsa Verde – Try this bright and fresh tasting green salsa. It’s so good on your grilled meats, with baked potatoes, as a dip or condiment, as part of a salad dressing, and with any Mexican dishes!
Fermented Jalapenos – Make these for convenient taco, sandwich and burger toppers. Chop into potato salad for some zest or make a spicy creamy cheese spread.
Fermented Garlic – Lacto-fermented garlic paste is kind of a special food. It’s the ultimate convenience food and health supplement. But besides that, it gets better as it ages. Just like a fine wine.
Fermented Garlic and Honey – A powerful combination of two all-star infection and sickness fighters. Make this easy remedy today and be ready for cold and flu season!
Lacto fermented sauerkraut – Famously healthy and so tasty! Make your own from scratch.

Fermented Cantaloupe Recipe
Equipment
- A quart size mason jar
- Fermentation weight – To keep the ingredients submerged in the brine and avoid floaters.
- Fermentation Lid – Or regular mason jar lid. To keep oxygen and bacteria out and vent the gasses inside.
- Chopping board and knife
- Pickle packer (optional but very helpful) – Optional.
- Scale – Optional. To measure the salt ratio.
- Wide mouth funnel – Optional
Ingredients
- Cantaloupe – Organic if possible.
- 1½ tbsp Sea salt – Avoid additives. Table salt and even some brands of sea salt and kosher salt can contain additives.
- Filtered water – If necessary.
- 2 tsp Spices – Optional – Pumpkin pie spice mix, about two teaspoons per quart. Or fresh ginger, a cinnamon stick, a pinch of cardamom, or cloves.
- handfull Basil – Optional – Basil pairs well with cantaloupe.
- 1 Cayenne pepper – Optional
Instructions
Prepare the Melon
- First, wash your melon. Then cut the melon in half and remove the guts. Be sure to save the pulp and seeds. Three reasons: A) seeds for planting next year B) seeds for roasting, and C) to put all scraps and skins in a jar and ferment into vinegar if you like. This is a separate process and not required.
- Slice the melon, remove the skin.
- Cut the flesh into chunks and place them into a zeroed out bowl on your scale. (Put the bowl on the scale and turn it on so it reads 0 with the bowl on the scale.
Salt The Melon
- Weigh your melon on a scale using the grams setting. Calculate 2% of that weight for your salt ratio. If you have 500 grams, 2% is 10 grams of salt. Alternatively add 2 tablespoons per quart jar. Mix it all well and let it sit for 10 minutes or so to start drawing juices.
Fill your jar
- If you’re using spices, it’s best to add them first to keep them from floating up. I often forget and add them later. So far no problem.
- Pack the pieces into your mason jar. I like to use a pickle packer to pack everything well. The jar should be near full, to about an inch below the rim. This will compress a bit more once you add your weight.
- If you don't have plenty of brine to cover your cantaloupe pieces, after packing them down, add a little water. It will change the salt ratio slightly, but not enough to hurt anything.
Weigh down your Ingredients
- Place a glass fermentation weight on your ingredients. If you don’t have one, you can use a boiled, clean rock, a baggie filled with marbles or brine, or some other food-save, non-corrosive item you have on hand.
Cover your jar
- If you are using a mason jar, I highly recommend a fermentation lid or airlock. They are self venting and are so easy to use. No maintenance necessary. If you don’t have one, you can use a 2-piece mason jar lid. However, you’ll need to remember to burp the jar once a day.
- Or you can try to screw the band on loose, so it can self vent. Without a fermentation lid, be sure to keep an eye on the fermentation to see if a yeast layer forms on top, which is harmless, but should be skimmed off or it can give your fermentation an off-flavor.
Fermentation
- Place your jar our of direct light with a bowl or plate under it, at about 70-85 ℉. This temperature should be maintained over the course of the next 3 weeks. Some fluctuation is fine, but avoid prolonged lower or higher temperatures. For more details on fermenting and why this is important, visit my lacto-fermented vegetables page, a beginner course on fermenting.
Check Your Fermentation
- After 2-3 days, your fermentation should start to look active. You should see bubbles forming, maybe a bit of overflow, and a cloudy brine.
- If you are impatient, you can smell and taste them now and use them if you like a very light fermentation, but if it doesn’t taste tangy yet, leave it to ferment a bit longer.
- For a full fermentation, leave it alone for 3 weeks. The melon pieces will get more acidic and have increased probiotic activity. That means more beneficial probiotics for your gut. However, if your ambient temperature is very high, you might want to cut that a little short to prevent the cantaloupe from turning soft.
- After 3 weeks, it should go into cold storage, but before you put your jar away, open it and smell the melon. It should have a pleasant tangy scent. Now taste a piece. If they are nicely tangy and firm and you like them that way, you can take out the glass weight, place a sealing lid on the jar and refrigerate or cellar them.
- Fermenting them for three weeks for a full fermentation yields the highest health benefits.
Notes
How To Tell If Fermented Melon Is Safe To Eat
Fermenting is very safe, but as with anything, there is a chance that something might go wrong. If for some reason your ferment has mold on it, smells putrid or seems slimy or mushy, you don’t want to taste it. Something went awry. But it will still make great food for your compost. If it looks, feels, and smells good, it’s fine to taste and eat. You’ll know if it’s bad. It’s very unlikely that anything will go wrong if you followed the instructions and used clean equipment. But when you’re dealing with food, stuff can happen. Maybe your room temperature was too low or too high or your melon or other ingredients had been treated with pesticides. There might have been mold or undesirable bacteria on your food that multiplied before your fermentation could get strong enough to combat it. It’s always a bummer, but remember, while it can happen, it is not the norm. Don’t be discouraged and do try again.Storage
Replace your fermentation lid with a sealing lid and place the jar into the refrigerator or your root cellar. Keep it somewhere where it’s fairly cool, or it will keep fermenting actively and eventually turn soft and not very appetizing. And after several months of active fermentation at warm temperatures, your melon can indeed become inedible. Fermentation is actually the breaking down of food, and while it’s great for us at first, once the sugars are replete and the microbes run out of food, they will die and so will the food. So if you don’t plan to eat your fermented melons soon, it’s best to keep them cool, under 60 degrees. This way your melon should be good to use for at least a year or more. Use as needed.How to Use Fermented Melons
Use them as you would any pickled foods. They can be added to sandwiches, salads, or served as a side by themselves. Fermented foods, when served with your meals, will help with the digestion of foods that are harder for your body to break down, such as cooked meats. You can use the brine as a starter for a new batch of fermented vegetables. It is great too for fermenting cooked vegetables or other foods. For example you could use it as a starter to ferment eggs. Because boiled eggs don’t have any live lactobacilli on them, they will need some help from a starter culture. As always, when you introduce a new food to your diet, be sure to start slow. Let your body adjust to fermented foods over a few weeks before you increase the quantity. Watch for allergic reactions. And check with your health provider, if you are pregnant, nursing or are taking medication.Enjoy your Delicious Fermented Melon!
As you can see, fermenting foods is such a perfect way to preserve them. Not only do you get the benefits of the fresh melons, preserved at their vine-ripened best, but fermenting increases the nutrients and their impact in our body and it adds probiotics. The melon will stay nice and firm for a year in the fridge or cellar and will be a great treat for you while waiting for next year’s harvest. Give your gut a healthy dose of probiotics, and it will support a healthy digestion and better health over all.Pin This Recipe For Later
Shop This Post
Berkey water filter
Wide mouth funnel
Scale
Fermentation tops
Airlocks with metal lids
Airlocks with plastic lids
Redmond’s Real Salt
Himalayan pink salt
Celtic sea salt
Bormioli Fido Jar
Glass weights
Ceramic weights
Acacia wood tamper
Azure Standard – get organic ingredients here
Wow, this is so interesting! I was just wondering yesterday if you could ferment fruit, I need to try, never had fermented fruit before. This cantaloupe sounds delicious 🙂 I also love that you’re not wasting any parts! I’ll drop you a question: do you know if you could ferment fruit keeping it sweet? Like maybe add whey instead of salt? Curious about your thoughts 🙂
Hey Marta, thank you so much for your comment, and good question! Yes you can ferment fruits. However, they will not stay sweet. I’m fermenting with salt here, and you’ll end up with basically a pickled food. There will be some sweetness at first, but eventually, as the microbes eat the sugars, it will turn mostly tart. Even if you ferment with sugar to make wine, it will become less sweet over time. So the only way that I know to preserve the fruit and keep it sweet is by freezing or canning, which inactivates or kills the microbes.
That’s what I thought, thank you so much for your explanation, Heidi!! 😊
You’re welcome! Glad it helped! 😊
I haven’t ever heard of fermented cantaloupe but I really miss eating melons in the winter. The time that we can enjoy fresh produce feels so short. It’s worth a try! 🙂
Hey Alisha! Thank you for commenting. I love having fermented, preserved foods to eat in winter. It will not be like fresh melon, but it will be like a refreshing, delicious pickle with melon’s many health benefits.
Who knew?! I had no idea you could ferment cantaloupe (or salsa!). This sounds delicious and extra good for the gut. Your instructions are perfectly detailed… even I (a newbie) could figure out how to make this by following them. Thank you for sharing!
You’re welcome, Kelly, I’m glad you found my instructions helpful, that is my hope. 😊
Hi I’m confused. Am I supposed to make the vinegar to use as a brine? Or are the juices that the melon releases after adding salt is that the brine?
Hey Becky! Thanks you so much for visiting my page here! And I’m sorry if you found this confusing, let me try to make sense of it for you. Yes, the juices from the melon after salting are the brine. You should not need anything else, except if you don’t get enough juice to cover the melon pieces. In that case, top it off with a small amount of water. The vinegar is a separate thing. I make vinegar from the melon scraps, the discarded parts like the skin, seeds and pulp. All that goes into a separate jar for making vinegar, just to get more use out of that melon. I hope that I could clear it up for you, and please let me know if I didn’t.
Oh, you have no idea how comforting it was to me to hear someone talk about how different the first year of gardening is from Western Washington State to Missouri (actually we just moved to NW Arkansas, but it’s very similar to where you moved.) This will be our first garden here, and I am a bit concerned to be sure.
Hey Ruthy, thank you so much for sharing and yes, it is not the same at all. Some things grow so much better, but other things are getting eaten by all the crazy bugs they have out here. I hope you’ll have a great garden this first year and that you’ll love it, and welcome to the south!