Fermented Cantaloupe Recipe
As you can see, cantaloupe is loaded with good-for-you properties. And so is fermenting. So let's put both together and make delicious fermented cantaloupe.
Equipment
- A quart size mason jar
- Fermentation weight - To keep the ingredients submerged in the brine and avoid floaters.
- Fermentation Lid - Or regular mason jar lid. To keep oxygen and bacteria out and vent the gasses inside.
- Chopping board and knife
- Pickle packer (optional but very helpful) – Optional.
- Scale - Optional. To measure the salt ratio.
- Wide mouth funnel - Optional
Ingredients
- Cantaloupe - Organic if possible.
- 1½ tbsp Sea salt - Avoid additives. Table salt and even some brands of sea salt and kosher salt can contain additives.
- Filtered water - If necessary.
- 2 tsp Spices - Optional - Pumpkin pie spice mix, about two teaspoons per quart. Or fresh ginger, a cinnamon stick, a pinch of cardamom, or cloves.
- handfull Basil - Optional - Basil pairs well with cantaloupe.
- 1 Cayenne pepper - Optional
Instructions
Prepare the Melon
- First, wash your melon. Then cut the melon in half and remove the guts. Be sure to save the pulp and seeds. Three reasons: A) seeds for planting next year B) seeds for roasting, and C) to put all scraps and skins in a jar and ferment into vinegar if you like. This is a separate process and not required.
- Slice the melon, remove the skin.
- Cut the flesh into chunks and place them into a zeroed out bowl on your scale. (Put the bowl on the scale and turn it on so it reads 0 with the bowl on the scale.
Salt The Melon
- Weigh your melon on a scale using the grams setting. Calculate 2% of that weight for your salt ratio. If you have 500 grams, 2% is 10 grams of salt. Alternatively add 2 tablespoons per quart jar. Mix it all well and let it sit for 10 minutes or so to start drawing juices.
Fill your jar
- If you're using spices, it's best to add them first to keep them from floating up. I often forget and add them later. So far no problem.
- Pack the pieces into your mason jar. I like to use a pickle packer to pack everything well. The jar should be near full, to about an inch below the rim. This will compress a bit more once you add your weight.
- If you don't have plenty of brine to cover your cantaloupe pieces, after packing them down, add a little water. It will change the salt ratio slightly, but not enough to hurt anything.
Weigh down your Ingredients
- Place a glass fermentation weight on your ingredients. If you don't have one, you can use a boiled, clean rock, a baggie filled with marbles or brine, or some other food-save, non-corrosive item you have on hand.
Cover your jar
- If you are using a mason jar, I highly recommend a fermentation lid or airlock. They are self venting and are so easy to use. No maintenance necessary. If you don't have one, you can use a 2-piece mason jar lid. However, you'll need to remember to burp the jar once a day.
- Or you can try to screw the band on loose, so it can self vent. Without a fermentation lid, be sure to keep an eye on the fermentation to see if a yeast layer forms on top, which is harmless, but should be skimmed off or it can give your fermentation an off-flavor.
Fermentation
- Place your jar our of direct light with a bowl or plate under it, at about 70-85 ℉. This temperature should be maintained over the course of the next 3 weeks. Some fluctuation is fine, but avoid prolonged lower or higher temperatures. For more details on fermenting and why this is important, visit my lacto-fermented vegetables page, a beginner course on fermenting.
Check Your Fermentation
- After 2-3 days, your fermentation should start to look active. You should see bubbles forming, maybe a bit of overflow, and a cloudy brine.
- If you are impatient, you can smell and taste them now and use them if you like a very light fermentation, but if it doesn't taste tangy yet, leave it to ferment a bit longer.
- For a full fermentation, leave it alone for 3 weeks. The melon pieces will get more acidic and have increased probiotic activity. That means more beneficial probiotics for your gut. However, if your ambient temperature is very high, you might want to cut that a little short to prevent the cantaloupe from turning soft.
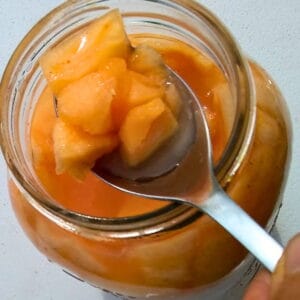
- After 3 weeks, it should go into cold storage, but before you put your jar away, open it and smell the melon. It should have a pleasant tangy scent. Now taste a piece. If they are nicely tangy and firm and you like them that way, you can take out the glass weight, place a sealing lid on the jar and refrigerate or cellar them.
- Fermenting them for three weeks for a full fermentation yields the highest health benefits.