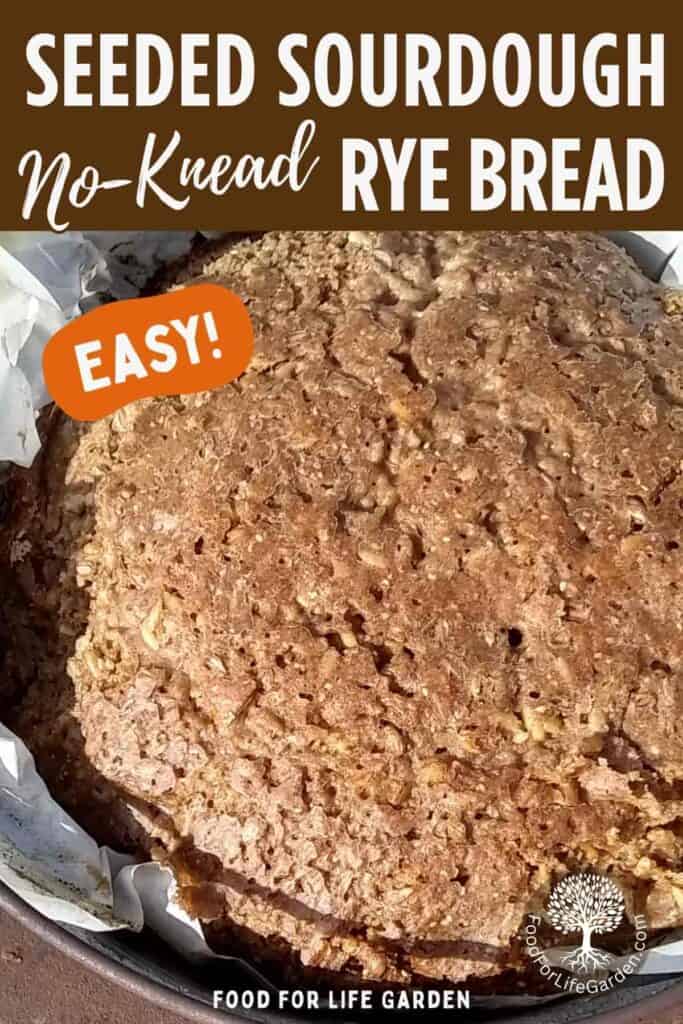
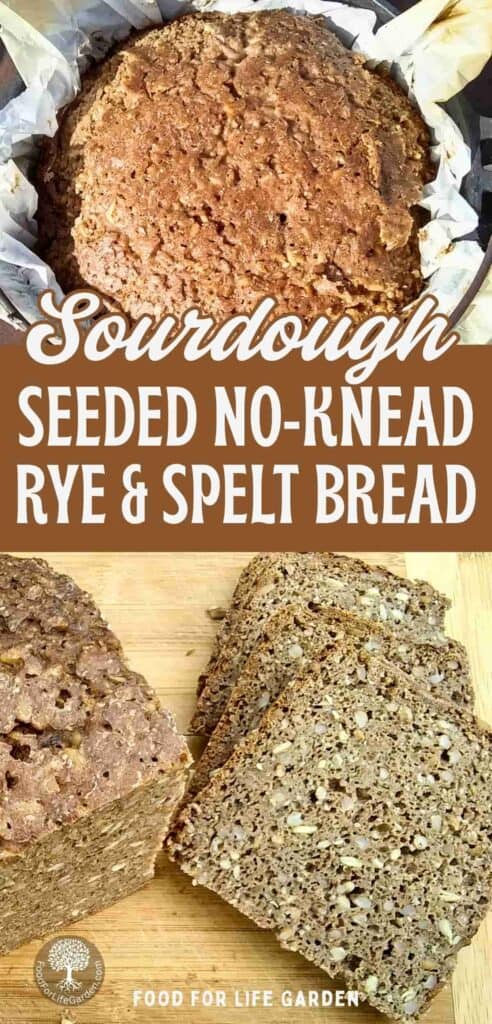
No-knead German style dark seeded rye bread that’s loaded with whole grains, seeds, and nutrition. Chewy, dense, moist, awesome with cheese.
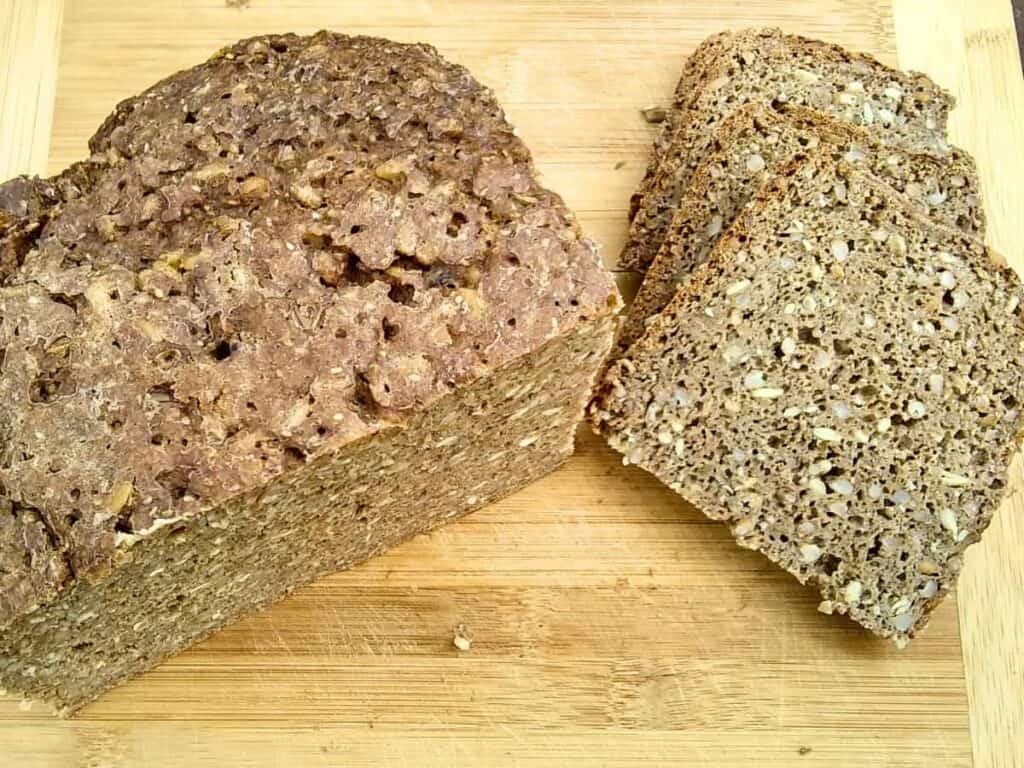
This recipe makes a dark seeded rye bread with spelt, similar to a German Vollkornbrot, a Danish rugbrød, and other Nordic seeded breads. It’s dense and chewy and super satisfying. The best bread to go with cheese! It’s a little lighter than the all rye ‘Schwarzbrot’ (black bread) as it has only 50% rye flour. It keeps well in the fridge and freezer and tastes amazing when toasted.
My recipe is a no-knead lazy way recipe that’s super simple and easy. It doesn’t have a fancy artisan look, but if you’re a busy person and want a delicious bread with just a few minutes of hands-on time, this fits the bill. I bake it straight from the bulk ferment in a hot Dutch oven. The result is an amazing homestead bread that looks rustic and tastes awesome.
Here is how to make your own Sourdough Starter Culture from scratch! And do check out my Kamut and Einkorn Sourdough Bread for a milder, less dense bread. Or my Sourdough Rye Bread without seeds, an easy, lazy method, every day bread. If you love sourdough recipes, try making Sourdough Pumpkin Cake With Apple Streusel and Sourdough Pumpkin and Apple Muffins.
- No-Knead Fresh-Milled sourdough Seeded Rye Bread With Spelt
- Why You’ll Love This No-Knead Fresh-Milled Seeded Rye Bread With Spelt
- Tips To Make The Best No-Knead Seeded Rye Bread
- How To Make No-Knead Seeded Rye Bread With Sourdough
- Your Questions Answered
- Enjoy Your Delicious No-Knead Fresh-Milled Sourdough Seeded Rye Bread With Spelt
- Other Recipes You Might Like
- Pin This Recipe For Later
- Shop this post
This post contains affiliate links. As an Amazon affiliate, I make a small commission at no extra cost to you if you make a qualifying purchase. See my full disclosure here.
No-Knead Fresh-Milled sourdough Seeded Rye Bread With Spelt
My bread making style evolved and adapted to life’s changes over the past several decades. And with my need for an easier bread that didn’t require counter space for kneading, or an expensive stand mixer, I have been mostly making no-knead breads. While I was concerned that this method won’t work for a heavy country loaf made with sourdough, my mind has been put to ease after countless loafs, made with the no-knead method. Many types of bread require kneading or stretch and folds, but a rustic sourdough loaf like this doesn’t.
I started making this loaf about 30 years ago and it was a well-kneaded bread back then. I sold some breads at a farmer’s market and this bread sold quicker than my plain breads. Selling bread at the market was an adventure since I only had a home baking oven and had to make about a dozen or more loaves in it. It meant laboring for 2 days making dough, kneading by hand, cold-proofing for a day or two, and getting up at 2 am to start baking on market days. 4 loaves at a time in my normal sized oven.
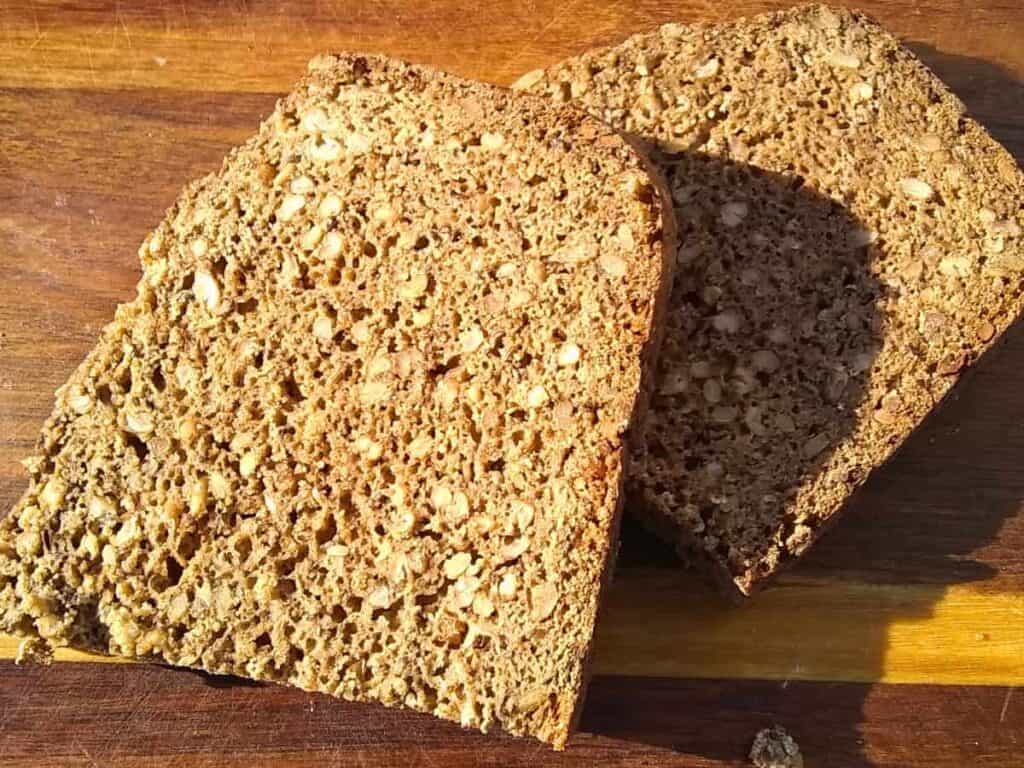
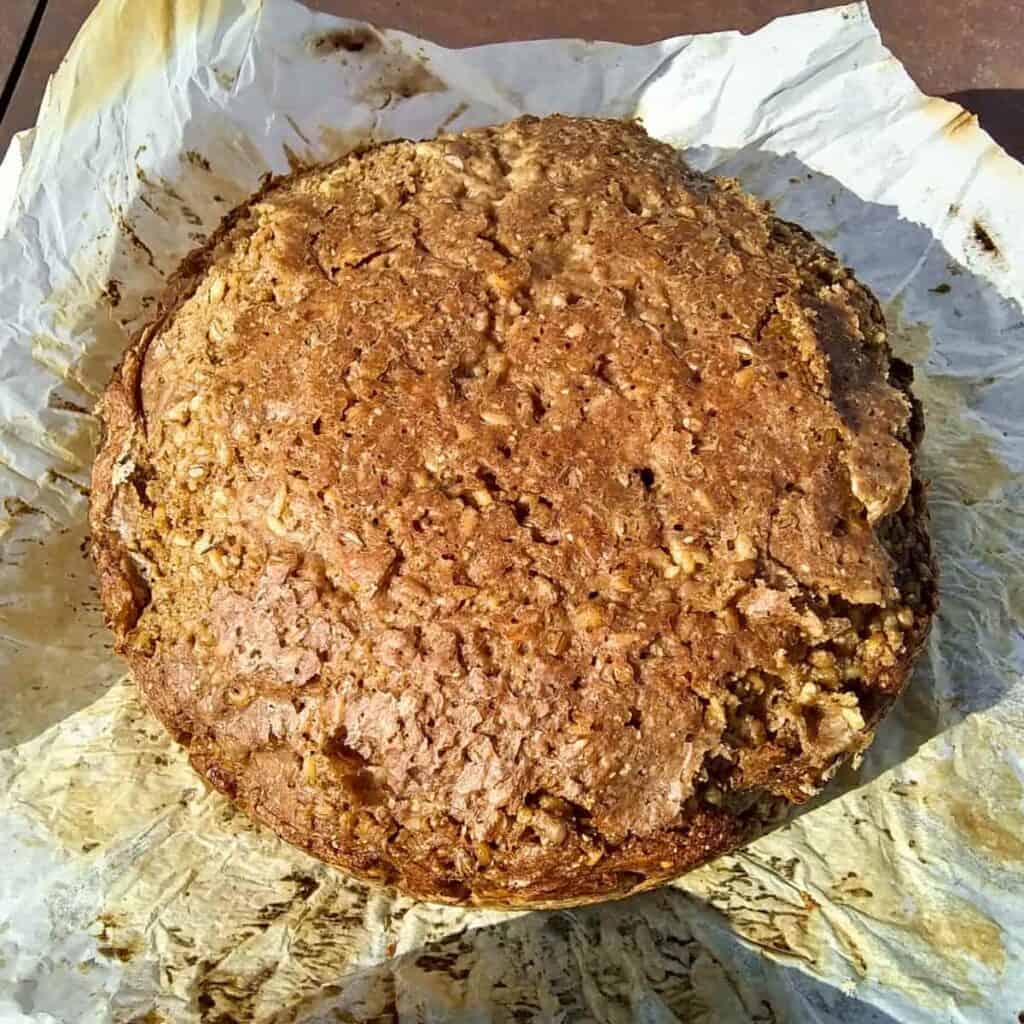
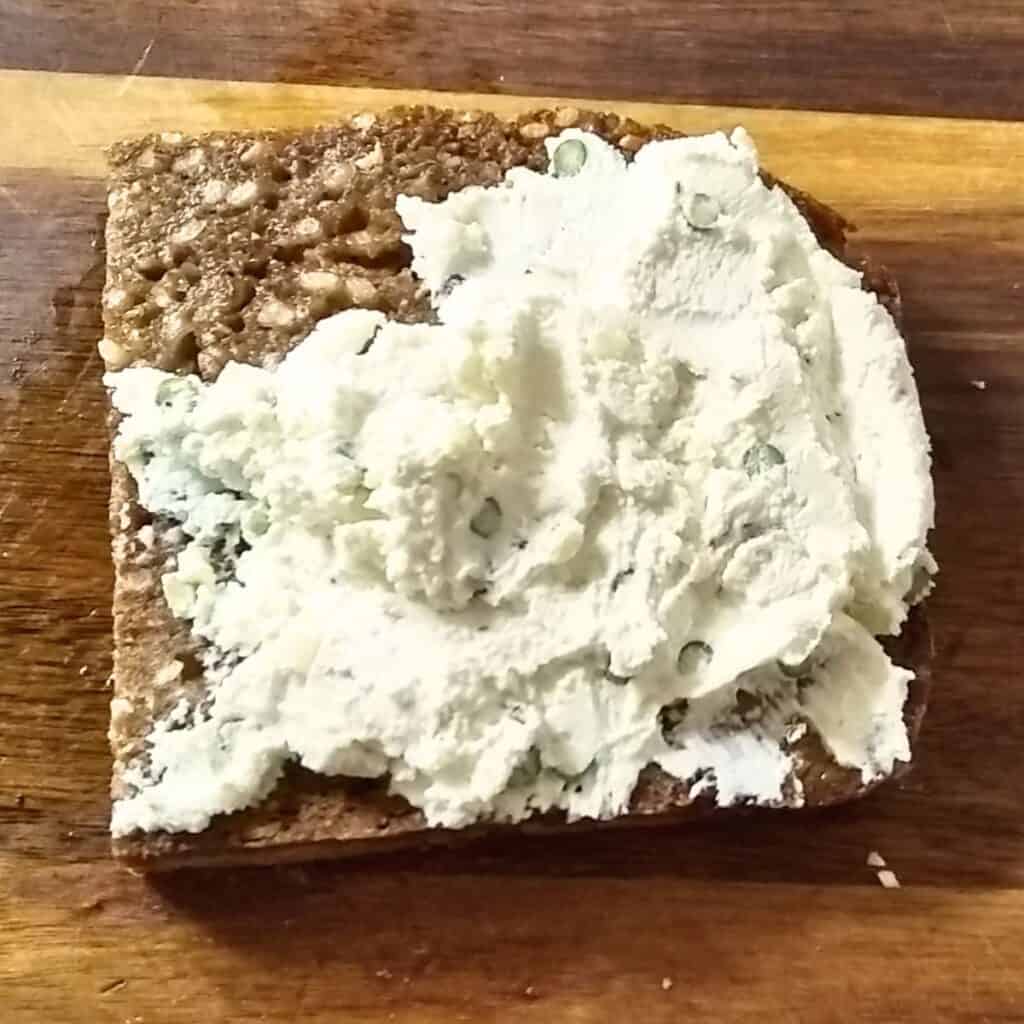
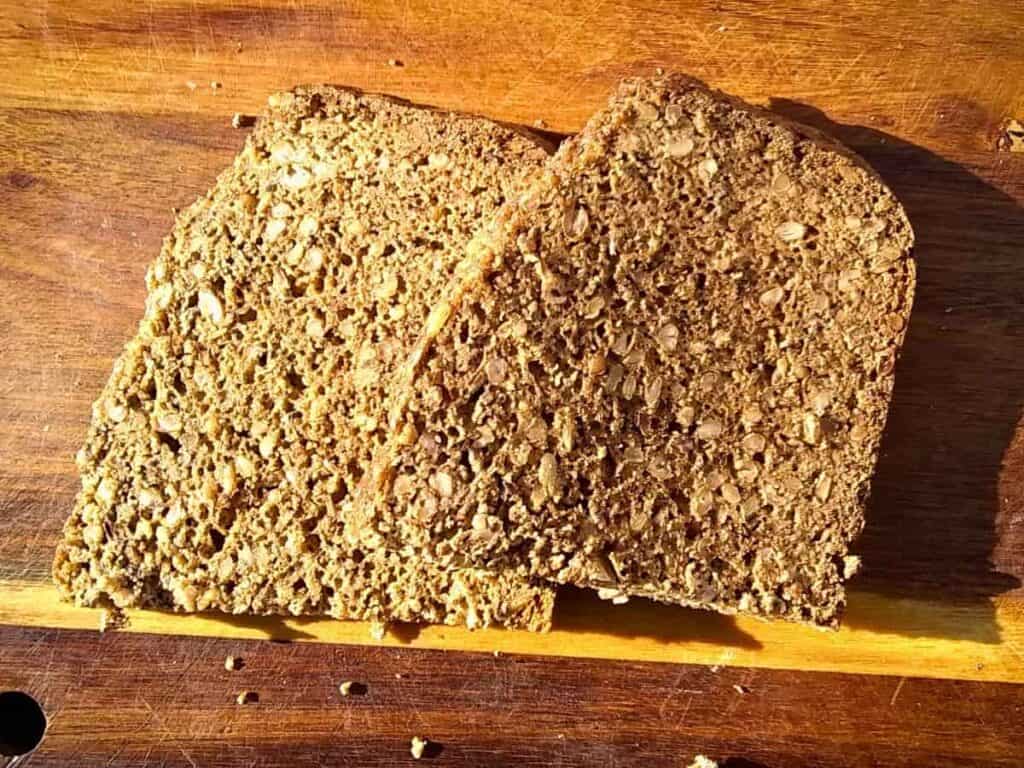
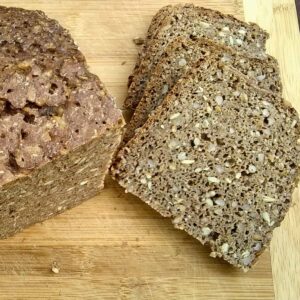
This seeded rye bread was my favorite back then, and it still is. It is so delicious and healthy, and the chewy texture is so good with a slice of aged cheddar cheese or a spread of herb-seasoned quark cheese. It stays moist because of the whole rye and spelt berries and it tastes wonderfully nutty with the fresh-milled flour and seeds.
I think it is the best for plain eating with a thick layer of butter and it’s perfect with a slice of cheese, or a soft cheese spread. But it is really special with some quark cheese and cold-smoked or cured salmon (lox) or cold-smoked German raw ham such as Black forest ham or Italian prosciutto. Yumm!
Why You’ll Love This No-Knead Fresh-Milled Seeded Rye Bread With Spelt
- This seeded rye bread tastes awesome!
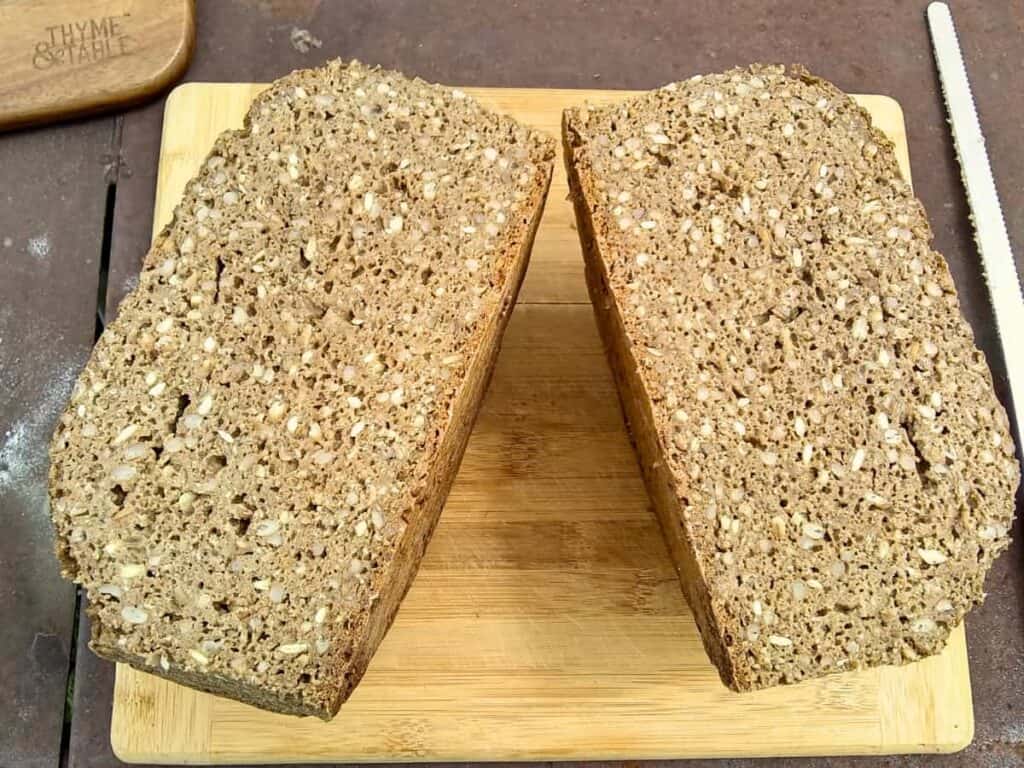
- The texture is rustic, dense, chewy, hearty. A Northern European style bread texture. Not related to the rectangular white fluff that you find in plastic bags on grocery shelves with the word ‘bread’ printed on it.
- This bread uses a long ferment with cold retardation to develop a rich, tangy sourdough flavor that complements the bold flavors of the rye flour so well. Don’t skip the chill period. It is important for flavor development, improved nutrition, and to yield a great tasting bread.
- Long fermentation further aids in the absorbability of the nutrients by breaking down and neutralizing phytic acid, a protective compound in all grains and seeds that prevent the release of nutrients into the body. Long fermentation unlocks those nutrients, lowers the gluten content, and changes a hard to digest bread into a gut-healthy food that’s easier on the digestive system.
- Whole grains that are freshly milled have better flavor and retain all the nutrients of the grain. This includes the powerhouse nutrients and oils of the germ and endosperm. As well as important fiber for better digestion. These nutrients are missing even from most whole wheat flour that is sold in stores. They remove it for better shelf life of the flour. Whole grains have all the ingredients that our body needs to properly use it and break it down for better absorption of the nutrients. And milling your own assures that you actually benefit from all that.
- Spelt is an ancient grain that has better digestibility than modern wheat and is often tolerated by people with wheat or gluten sensitivities. The same is true for Rye. The gluten structure of spelt is different from that of modern wheat, which is better recognized by our body systems and can be digested more readily.
If you use part or all whey, it adds additional important nutrients and adds a bit of creaminess to the mouthfeel and the flavor.
The whole grain we use adds more delicious chewy bits and flavor. The seeds do so as well, and they add important proteins. A whole grain bread with seeds supplies a complete protein for maximum nutrition, that sustains even without adding anything else.
Spelt is a good source of fiber, protein, and essential nutrients like magnesium, iron, and B vitamins. It is supportive of digestive health, muscle and nerve function, and produces energy. And it might lower cholesterol and improve heart health, control blood sugar and support the immune system.
- Rye is a nutrient-dense grain. It is rich in fiber, B vitamins, minerals like manganese, phosphorus, and selenium. It can improve digestion, control blood sugar, promote gut health and heart health. It’s rich in antioxidants to fight chronic disease.
- Seeds add more nutrition, a pleasant nuttiness and a bit of extra texture. Seeds complete the protein content in the bread. Choose your favorite seeds, I’ve listed mine below, but this is flexible.
Tips To Make The Best No-Knead Seeded Rye Bread
- If you don’t have a sourdough already, I’ve got you covered. It’s easy to make from scratch. It will take about a week to get a sourdough going, but it can be kept alive indefinitely once you get it going. Head over to how sourdough starter works and start making your own!
- I bake this seeded rye bread straight from the bulk ferment. It works well. However, the dough needs to be fully proofed at this point, and not over-proofed. To achieve this, I let it ferment to about double in volume at room temperature, then I give it a cold treatment for at least another 24 hours.
My favorite is 2-3 days in the fridge. It can stay there up to a week, but I find that it gets to be very tart and strong at that point and while it’s still good, it isn’t my preference. 2-3 days is my magic cold fermentation time. The flavor is rich and pleasantly tangy, a good amount of the sugars have been eaten, and the structure is just the way I like it. If I’m in a hurry, I’ll bake it after a night in the fridge, but I normally plan ahead to include the longer fermentation.
- Don’t forget time to soak the grains. It is important for better digestion and for reducing phytic acid before cooking them, to unlock the nutrients. Soaking also softens them.
- I have used the soaked grains in the past without cooking them first. It is ok, but they are very chewy then. If that is something you like, you can surely omit the simmer process. But I recommend simmering the grains till they are soft. It also adds extra moisture retention in the bread. I add the grain cooking water to the bread dough and add more water or whey if needed.
- This should be a pretty moist dough. You’ll need the extra moisture in this bread dough to end up with the best seeded rye bread.
- This is not a quick bread. However, hands-on time is minimal. Most of the work is done for you during soaking, culturing, baking and curing.
Sample Timeline With Rising Times:
Day 1:
9am: soak the whole grains in warm water. Take the sourdough out of the refrigerator and feed it.
9pm: Feed the sourdough again
Day 2:
9am: drain the grains (I just drain them with the lid on the pot, cracked open a bit to let the soaking water drain out). Then cook the grains in fresh water for an hour or so till al-dente. Set aside for another hour to cool. Place the pot with the grains in a bowl with cold water if necessary to cool it quicker.
11 am: mix the dough ingredients with a dough whisk or sturdy wooden spoon. Add the flour last. Cover and set it aside at warm room temperature for about 5-6 hours (or till about double).
4-5 pm: Put the dough with a lid on into the refrigerator or a cool root cellar for a couple of days.
Day 4
9 am: heat the oven with the Dutch oven in it.
9:20: Take the dough out of the fridge, loosen it from the sides carefully and dump it on a piece of parchment. Put it in the hot pot, close the oven door and let it bake for 20 minutes at 400℉.
9:40: reduce heat to 325℉ and bake for 2 more hours.
11:40: check for doneness, Temperature in the middle should be at least 205 degrees.
Remove from the oven and wrap in a damp or dry towel to soften the crust and to cure it for 24 hours
Day 5
Noon: Time to cut the bread and taste some!
Is it worth it? Ya betcha!
This seeded rye bread is worth the time it takes. I actually find it less laborious than some artisan breads I have made in the past. There is little to do, other than prepping the soaker and mixing the dough, just a lot of waiting. Patience is the biggest skill you need for making this bread.
How To Make No-Knead Seeded Rye Bread With Sourdough
Check the resources at the end of this post for links to equipment and ingredients. You’ll find my favorite flour sources there as well as amazon links.
Equipment
3 Quart Pot – for soaking and cooking the whole grain berries.
Large 5-6 quart container – for mixing the dough and fermenting it. Use a plastic, glass, or stainless steel container.
Danish dough whisk – or a sturdy wooden spoon
Dutch oven with lid – for baking the bread
Ingredients
I recommend using only organic ingredients when possible. Conventional ingredients are most often loaded with herbicides. Grains are treated with herbicides at the time of harvest to dry them faster. And most often they are grown on depleted soil, resulting in much less nutrition. Organic means no-GMO and no toxic chemicals. And even better if it is from regeneratively managed operations. This will increase the nutritional value and nutrient density of food.
For the Soaker
The soaker can be many things. I love using whole grains, any mix is great and so are cracked cereal or steel cut oats, etc. I’ll provide my favorite mix, but use what you like or have. I love using Kamut, einkorn or emmer berries, and sometimes I use cracked grains such as steel cut oats or cracked wheat. You can also use a cracked 7-grain cereal for the soaker if you don’t want whole grains.
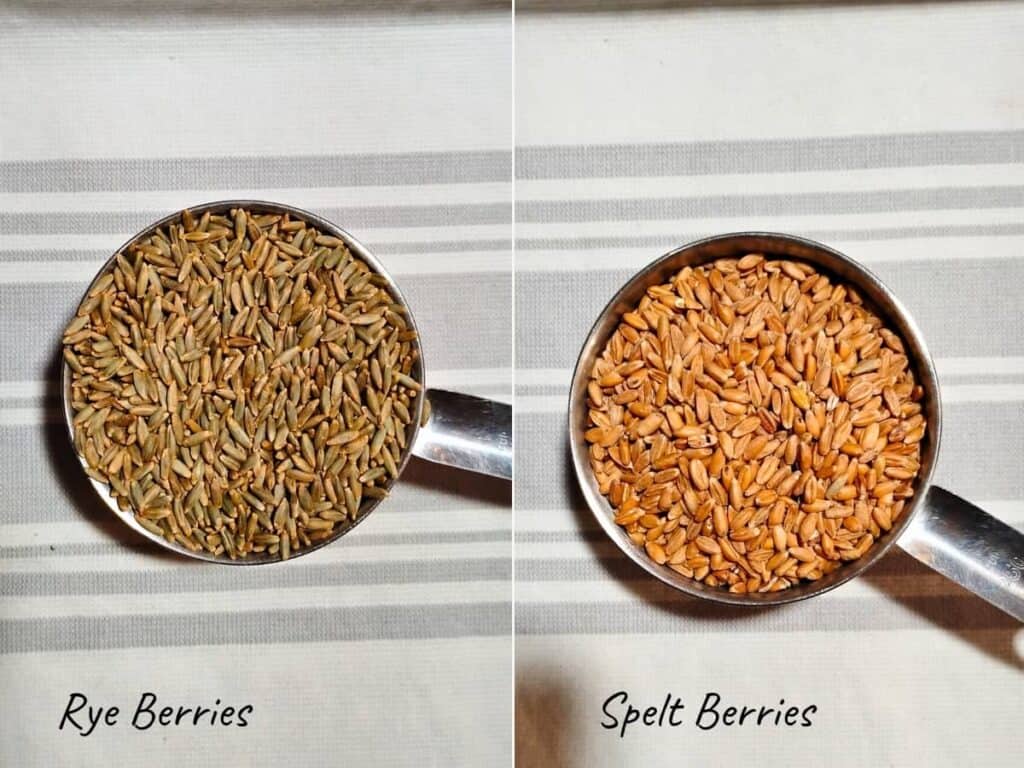
Organic Rye berries – Feel free to substitute with your favorite whole grains.
Organic Spelt berries – you can substitute with any whole grains.
Water – soak the grains in 6 cups of water. Optional: drain and cook them in 4 cups of water. You can omit this step and just add the grains to the dough soaked, but they will be very chewy that way. Cooking them also yields a wonderfully moist bread that I prefer.
Vinegar – sourdough, or lemon juice helps to neutralize the phytic acid during soaking, by creating an acidic environment that activates the natural enzyme phytase, which breaks down the phytic acid, making minerals and other nutrients more available and improving digestion.
Bread Dough Ingredients
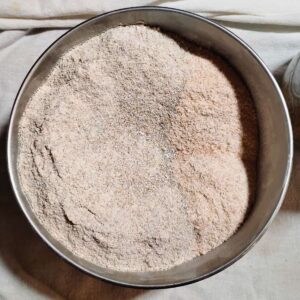
Fresh milled Rye flour – I use 50% Rye flour in this recipe. Traditional German Vollkorn- (Wholegrain) and Schwarzbrote (Black breads), often use 100% rye flour. I like both, but using 50% rye makes this bread a little lighter and gives it more rise and great flavor. Substitute dark rye flour for the fresh milled (use the weight measurement).
Fresh milled Spelt flour – I’ve used Kamut flour, einkorn or emmer in place of spelt and love them all. In Germany, we have a traditional ‘Dinkelbrot’, which translates to Spelt bread. It is much like this bread but doesn’t include the rye. I like this hybrid version that uses half spelt and half rye. Spelt flour is considered an ancient grain that has not been modernized or genetically altered. Spelt is a naturally hybridized grain, which has less gluten and is easier to digest than modern grains. If you are wheat sensitive, it’s best to choose Emmer, Einkorn, or Kamut (Khorasan) wheat instead, which are all generally much better tolerated than modern grains and even spelt, since they lack the D-chromosome that can cause problems. Substitute whole spelt flour, khorasan flour, einkorn flour, or regular bread flour.
Sourdough – This bread is best made with fed, active sourdough.
Soaker grains – see instructions for the soaked, cooked grains above.

Sunflower seeds – use raw, hulled sunflower seeds.
Chia seeds – I never used chia seeds until a few years ago, but they are so nutritious that I always add them now.
Flax seeds – Flax seeds don’t do very much if they are eaten whole. For this reason I grind them fresh when I make the dough. They do not store once ground, as they get rancid quickly. Grinding flax helps to make the nutrients in the flax seeds available to the body. If you love whole flax seeds in your bread, by all means, add another quarter cup to half cup of whole flax seeds. I would still add the ground ones too for the nutrition they add.
Optional – Use any other seeds you love, such as poppy seeds, pumpkin seeds, hemp seeds, and sesame seeds. German breads often use millet in the mix too.
Caraway seeds – (optional) ground or whole, whichever you prefer. I like to grind them, so the whole loaf has a nice caraway flavor, not just when I happen to bite on a seed.
Sea salt – salt is necessary for the texture and flavor of the bread. Try to avoid any salt with additives. I like Redmond’s Real Salt, Celtic sea salt, or Himalayan pink salt.
Water or whey – This will hydrate the dough and whey adds extra nutrients and a nice flavor and creaminess to the dough. This bread dough is a bit on the pasty side. It’s going to be sticky and more moist than a traditional wheat loaf.
Optional Topping:
I often don’t add a topping to keep things simple, but it looks really much nicer with a topping of mixed seeds, coarse salt, and some rolled oats.
A drizzle of olive oil
Seeds of your choice. I like sunflower seeds and flax seeds, pumpkin seeds, caraway seeds and chia seeds. Sesame seeds and poppy seeds are great too and flaky or coarse salt. You can also use flaked grains such as rolled oats, wheat, or barley. Even an everything bagel topping works really well, but it probably won’t be such a good idea if you are planning to serve jam with this bread. Prepare about half a cup full of a seed mix and have it ready to sprinkle on right when you put the dough into the Dutch oven.
Coarse salt or salt flakes – A sprinkle of coarse salt over the top tastes great and adds extra texture.

Step-By-Step Instructions For making no-knead Sourdough Seeded Rye Bread
Day 1: Soaking The Grain Berries And Feeding The Sourdough In The Morning

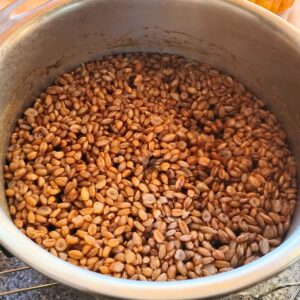
Place the rye and spelt berries in a 2 quart pot.
Add the 6 cups of water and the vinegar, sourdough, or lemon juice. Stir, cover, and let it sit overnight, 12-24 hours.

At the same time, take your sourdough starter out of the fridge and give it a feeding. Let it sit for 8-12 hours, then feed it again in the evening.
Day 2: Cooking the grain and mixing the dough
In the morning on day 2, drain the grains, then add 4 cups of water and cook them for an hour or till ‘al dente’.
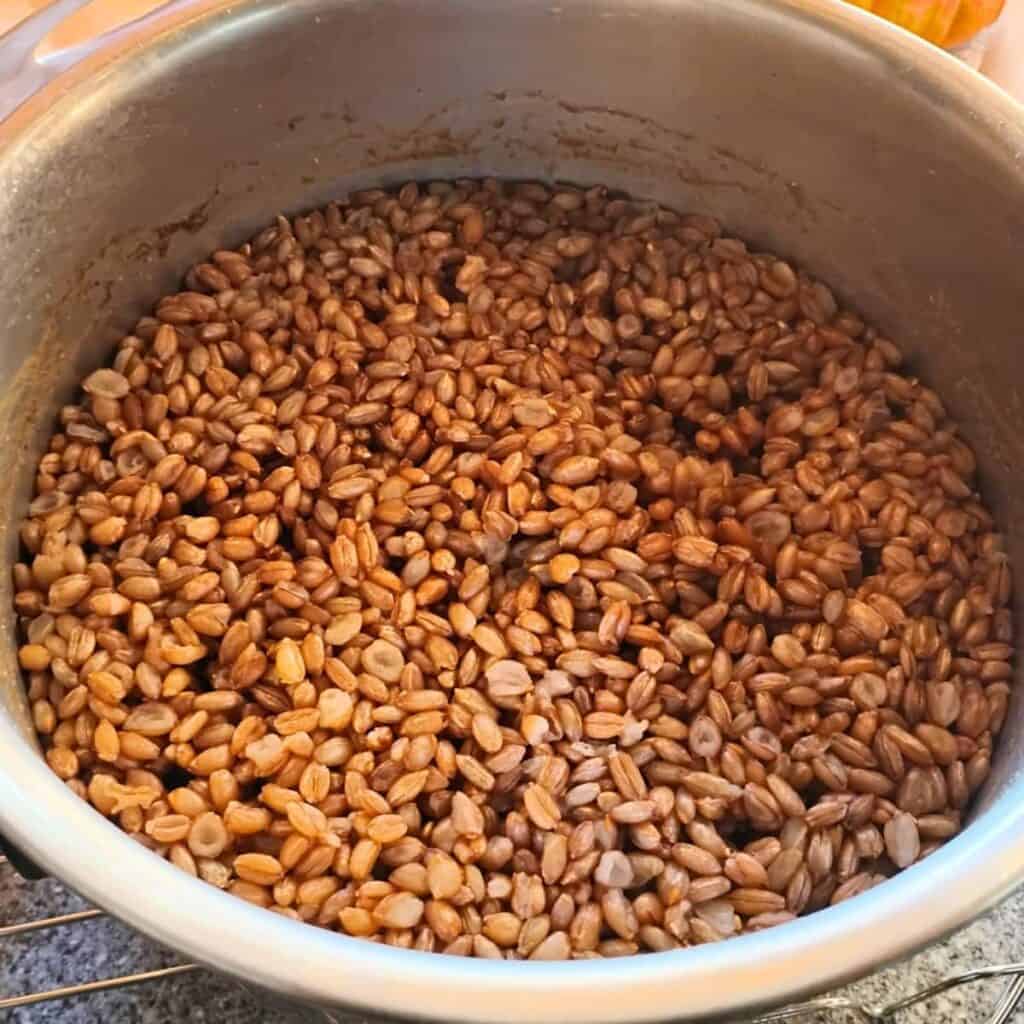
Let them cool on the counter or place the pot with the cooked grains into a bath of cold water for an hour or two.
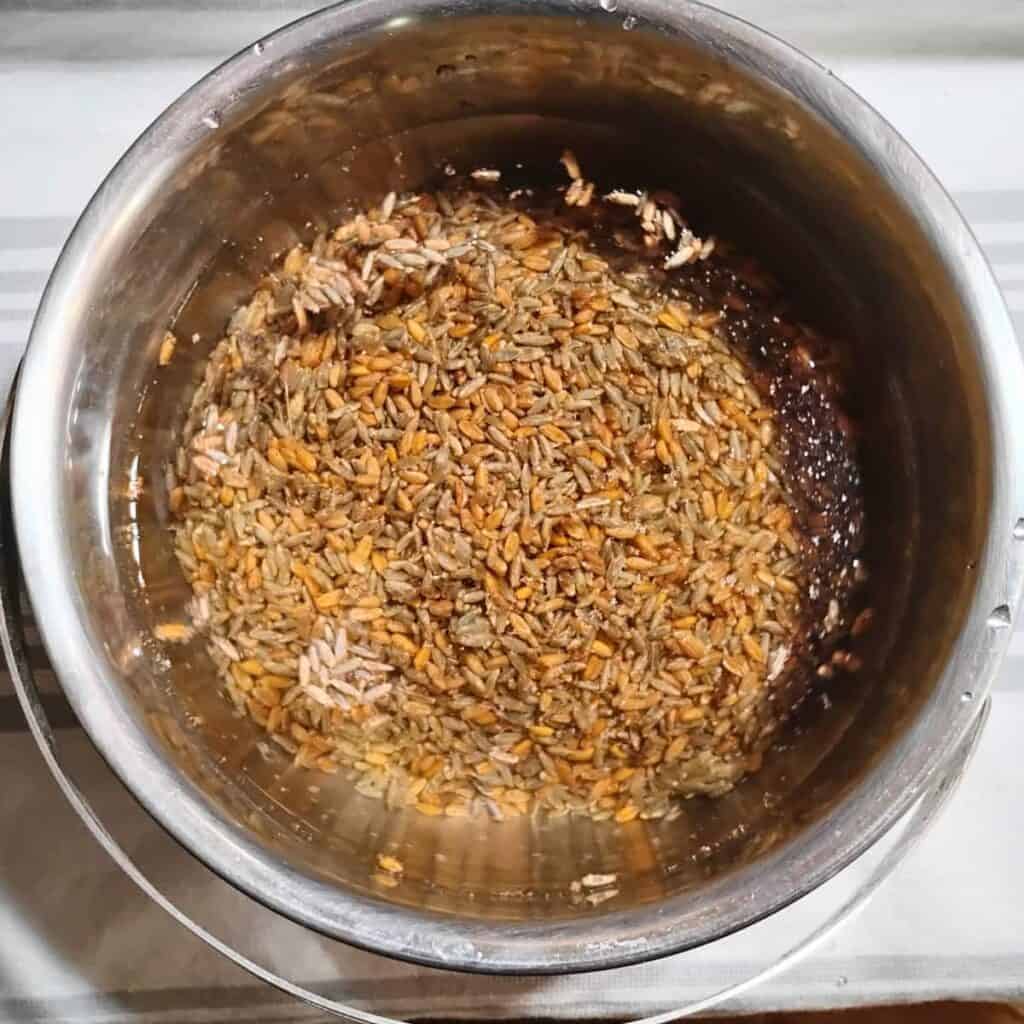
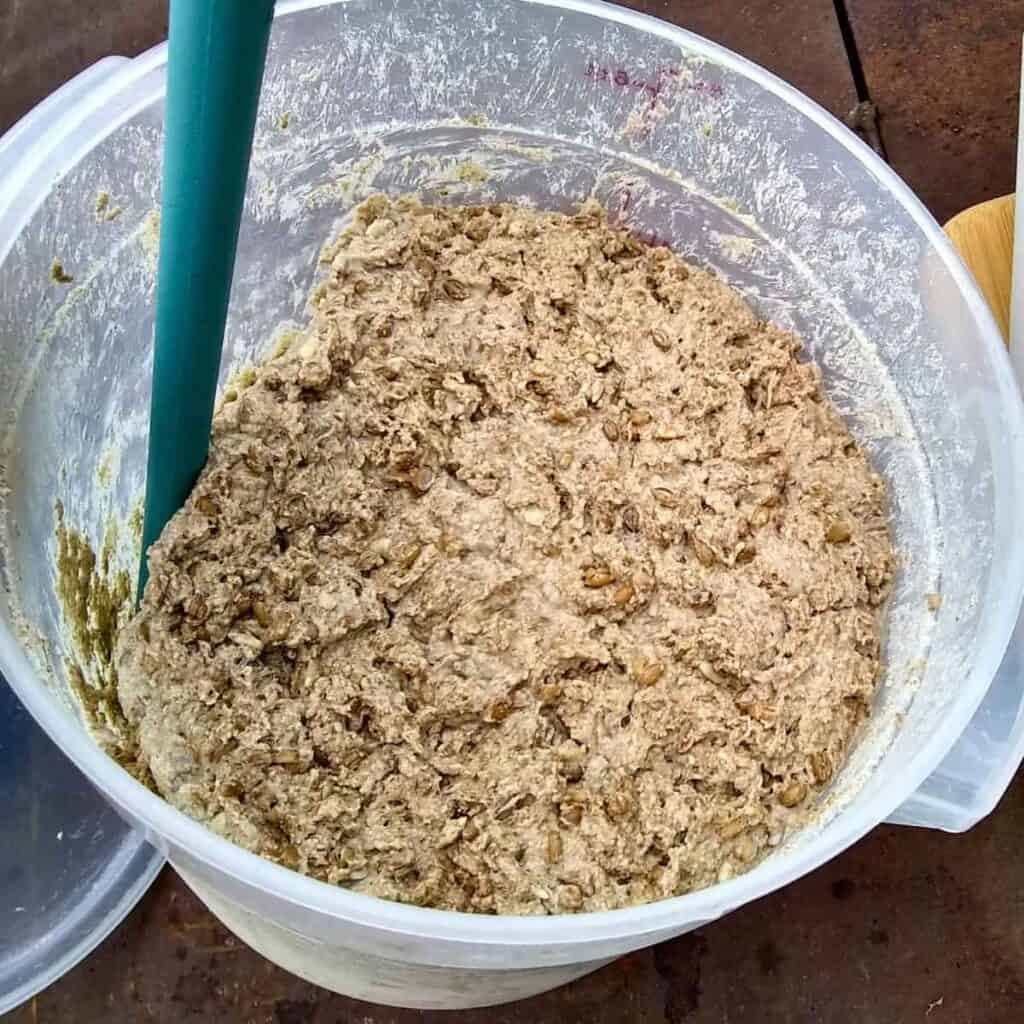
Once the grains are cooled, start mixing your dough.
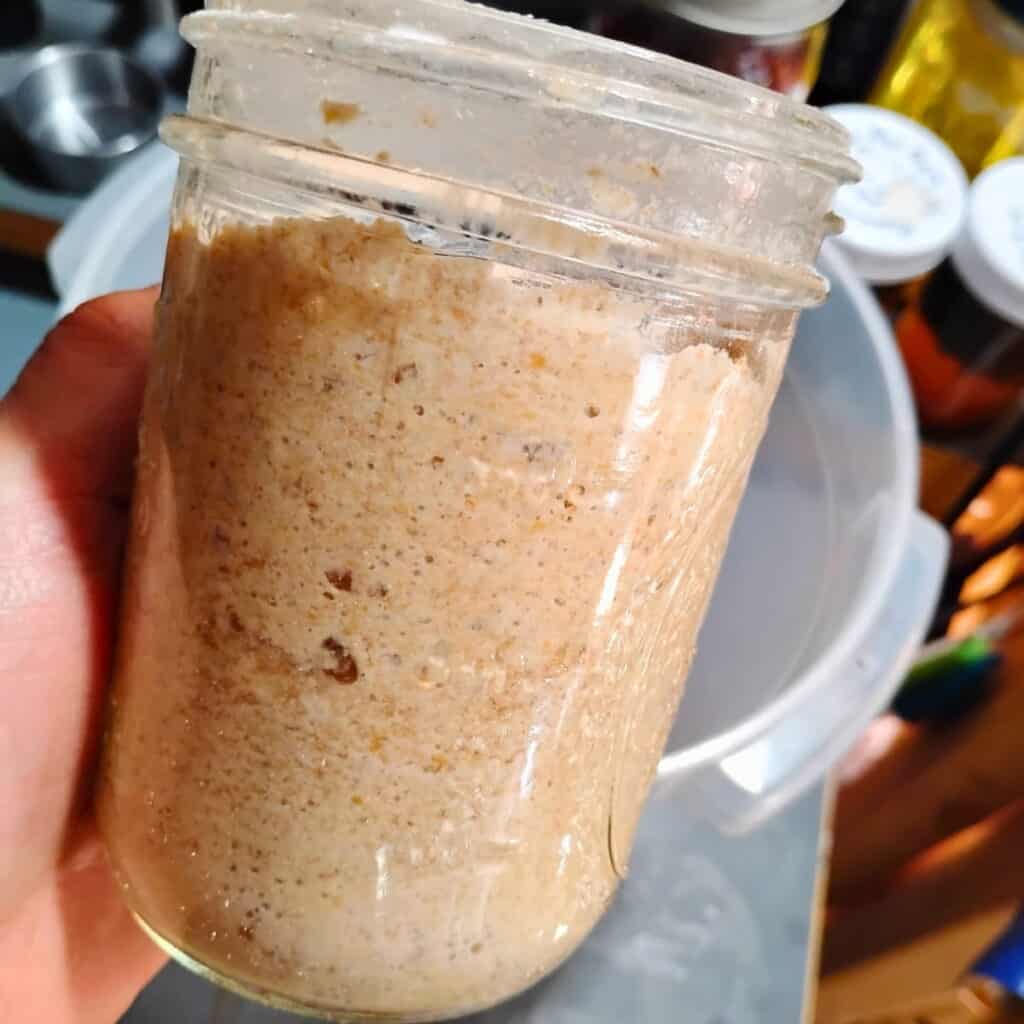
Place the sourdough into the mixing container.
Add 1 cup of whey or water and mix well.
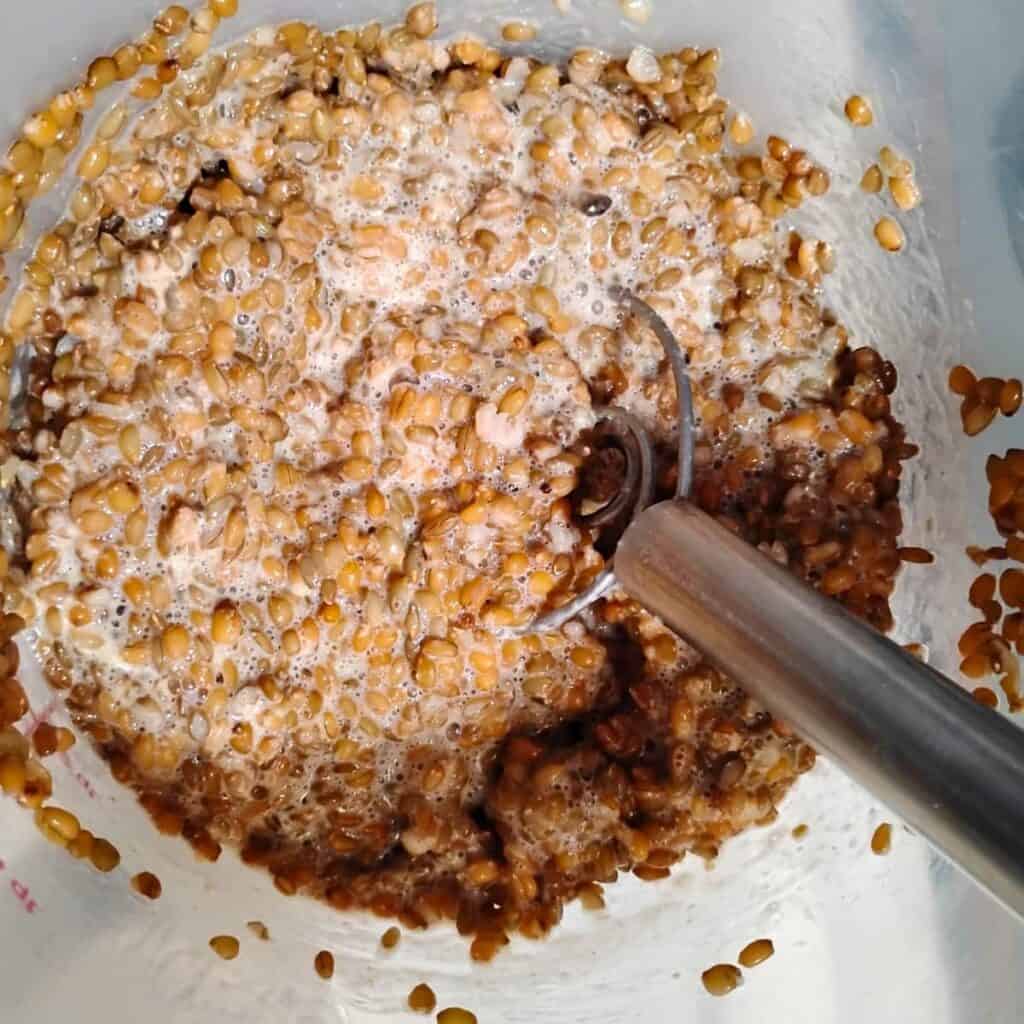
Add the cooled grains and stir everything.
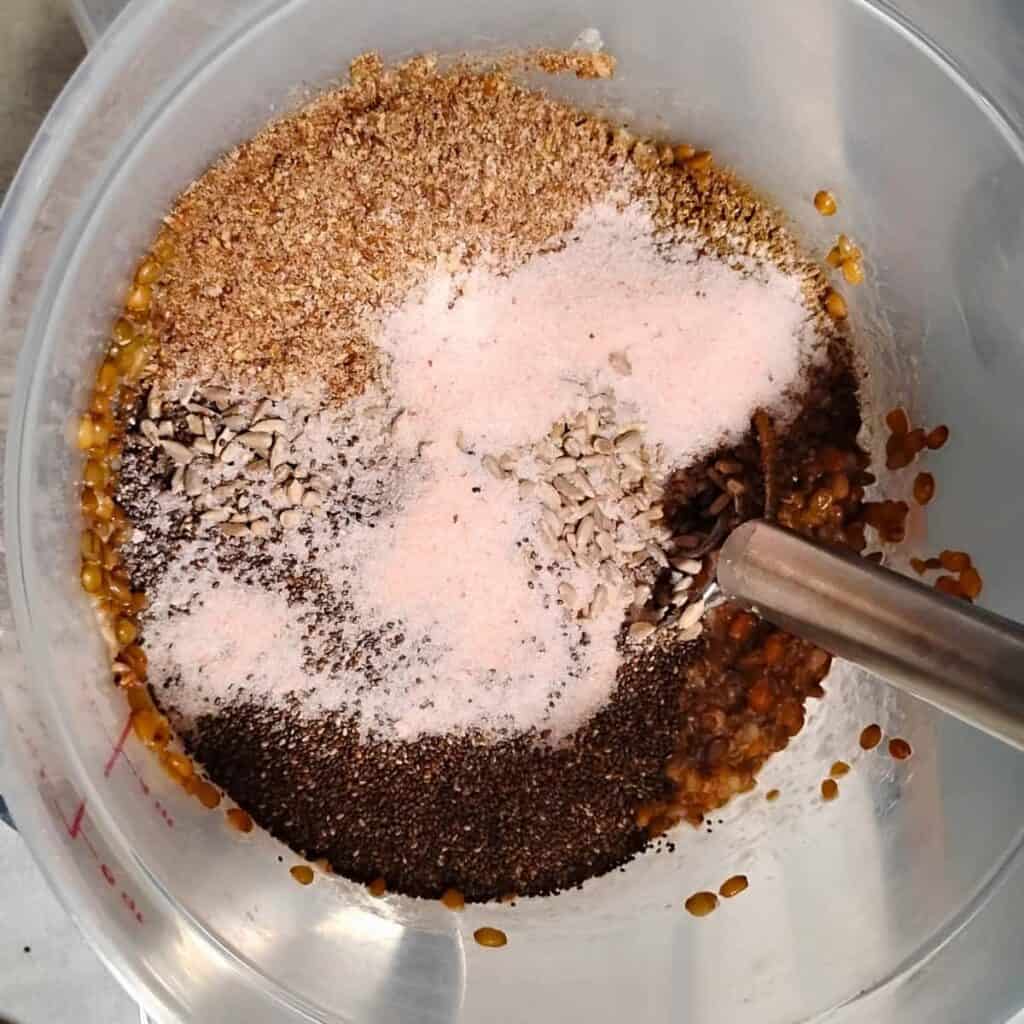
Pour all the seeds, caraway, and the salt over the grains.
Mix well with the dough whisk or a large wooden spoon.
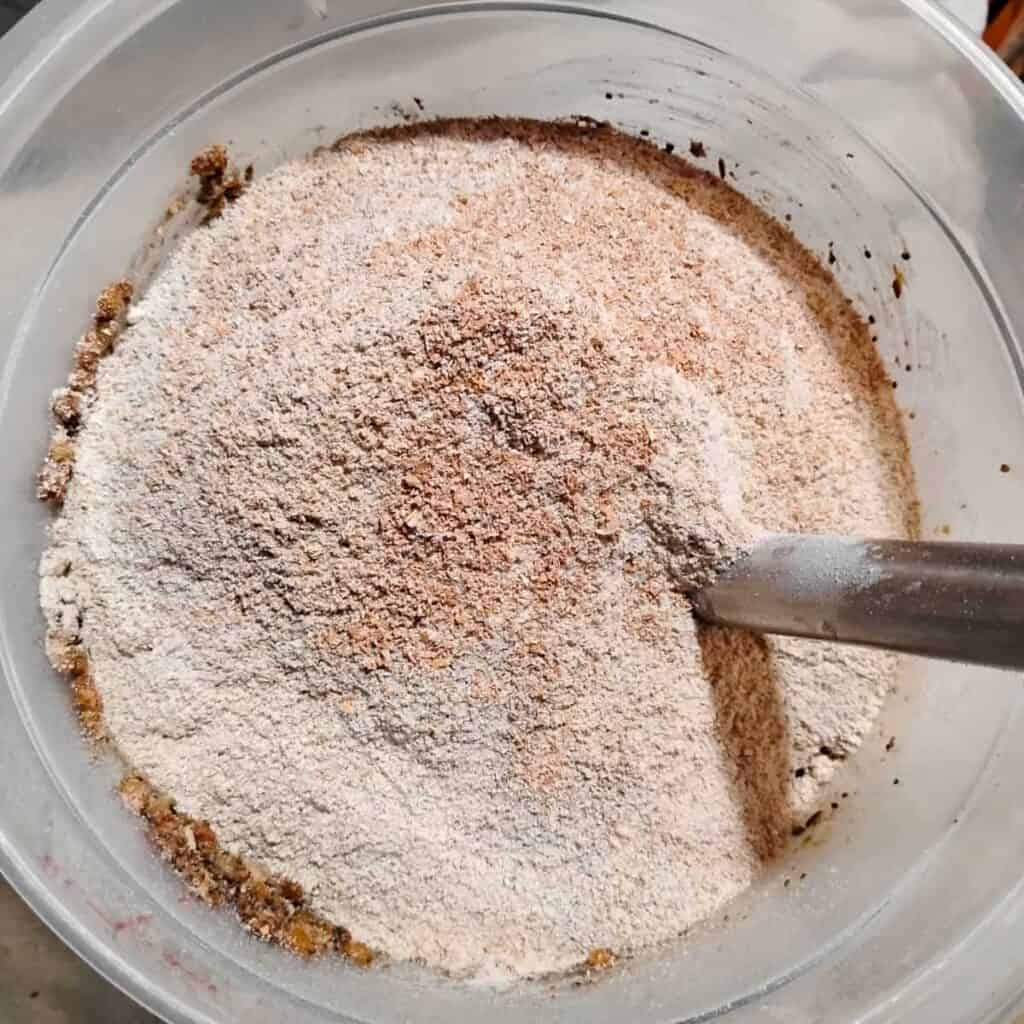
Add the flours.
Add another cup of whey or water.
Mix everything really well with the dough whisk.
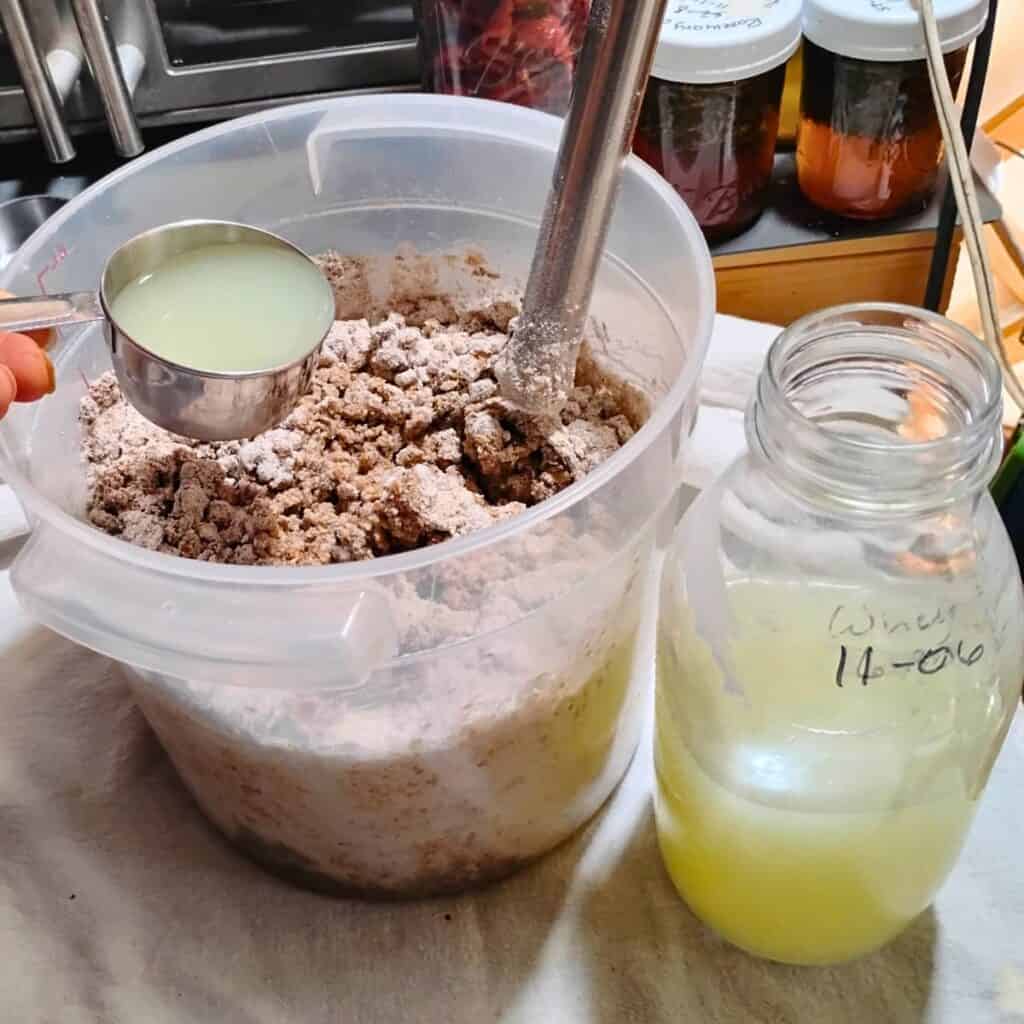
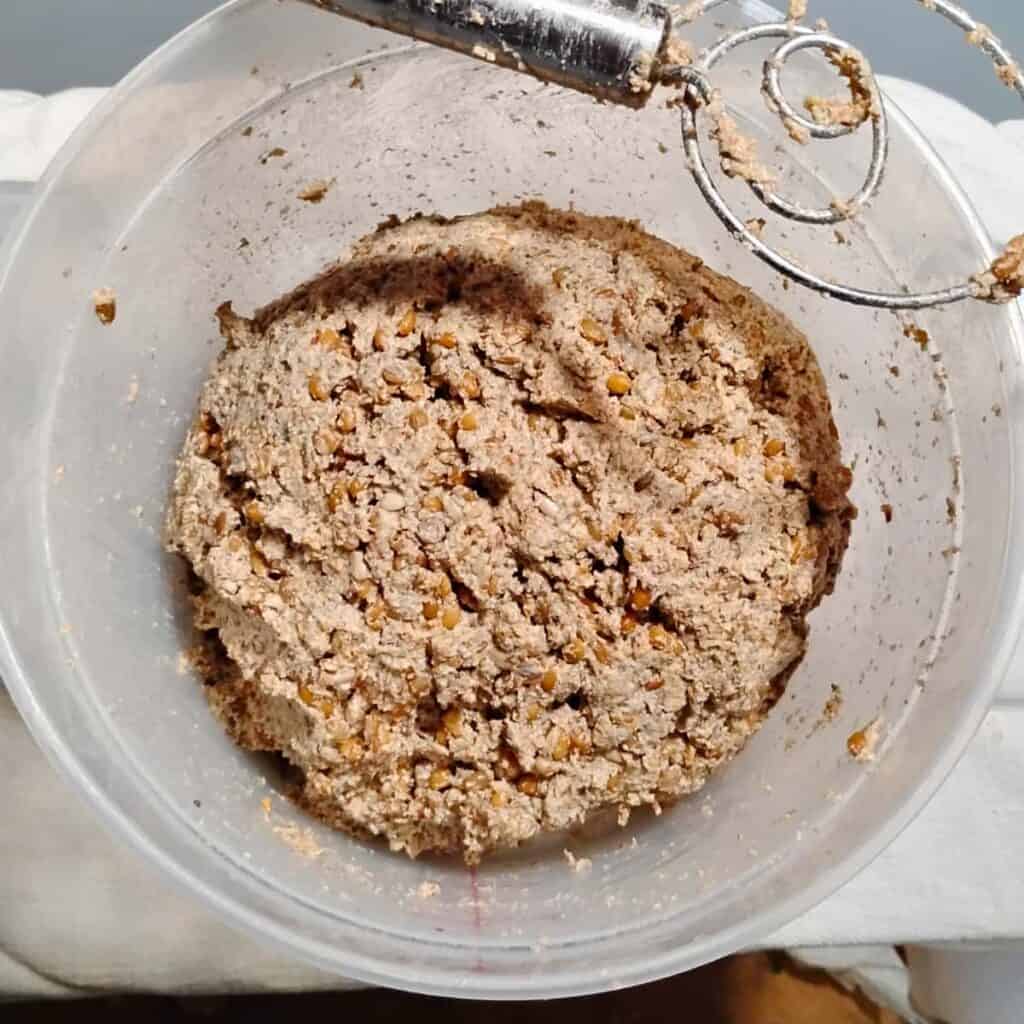
Add more water or whey if needed so you get a dough that will be on the sticky and pasty side. You don’t have to knead it, just mix it really well with the Danish dough whisk till all the ingredients are incorporated and mixed through.
Place a damp towel over it or a lid.
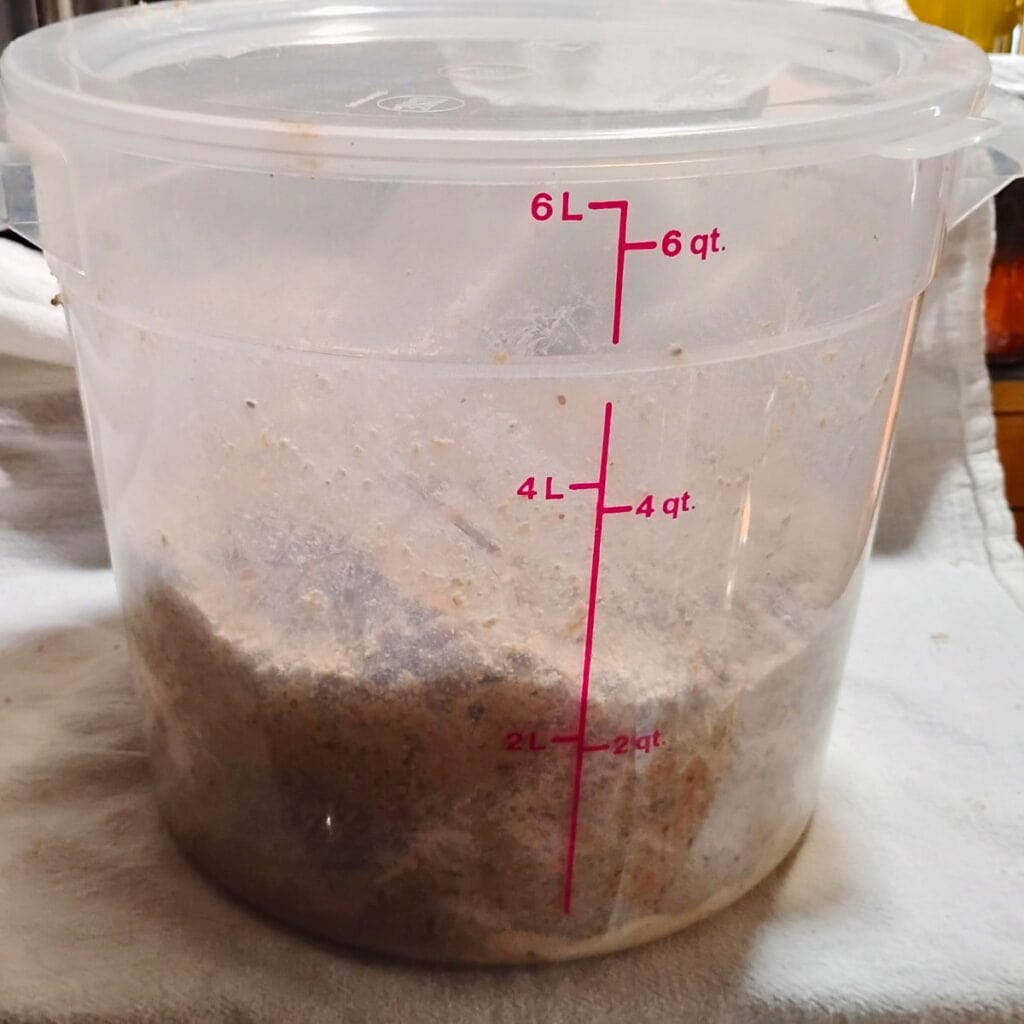
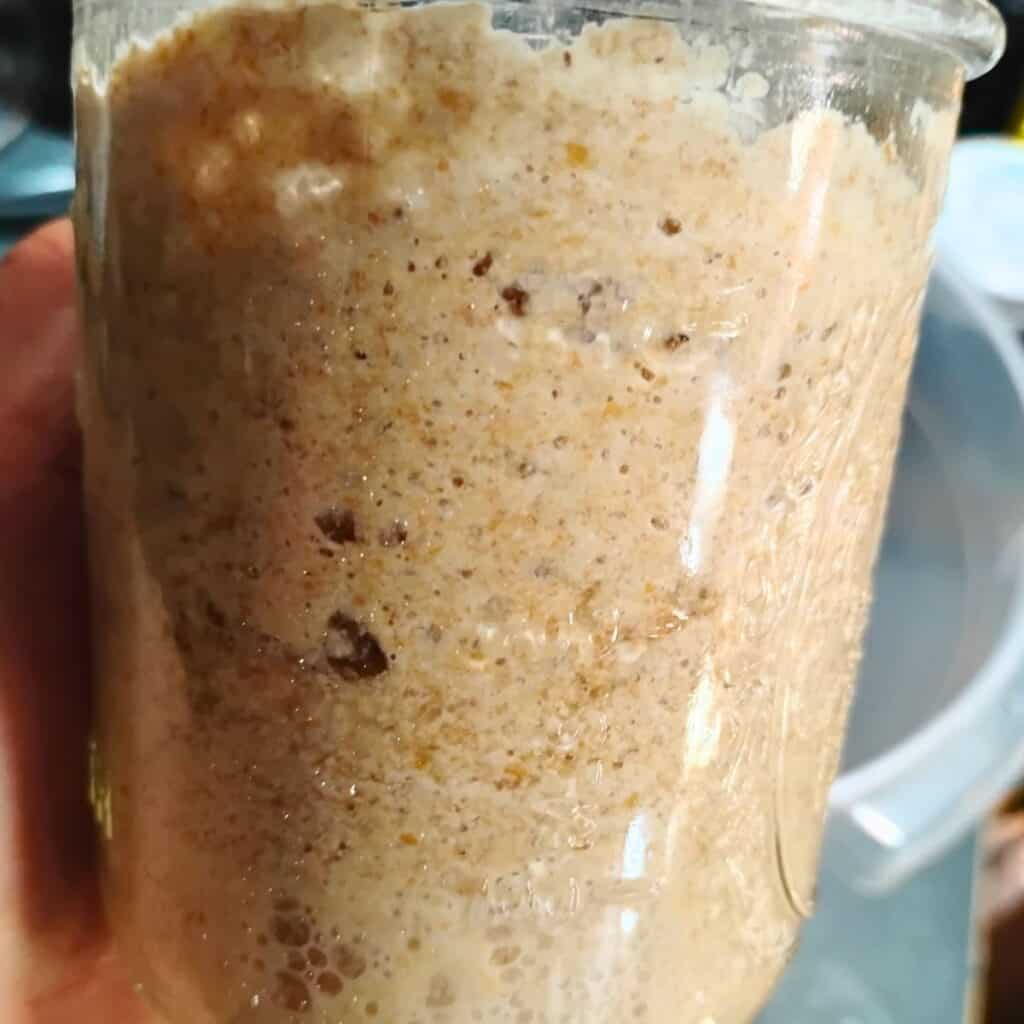
Let it bulk ferment on the counter in a warm room until almost doubled.
Seal up the container and place it into the refrigerator or a cool root cellar, preferably for two days.
It can remain in cold storage up to 7 days, but it will get quite tart and develop a very strong sourdough taste if you leave it that long. My favorite chill time is 2-3 days. This will develop a good sourdough flavor that’s not too tart.
Day 4 or 5: Baking the bread
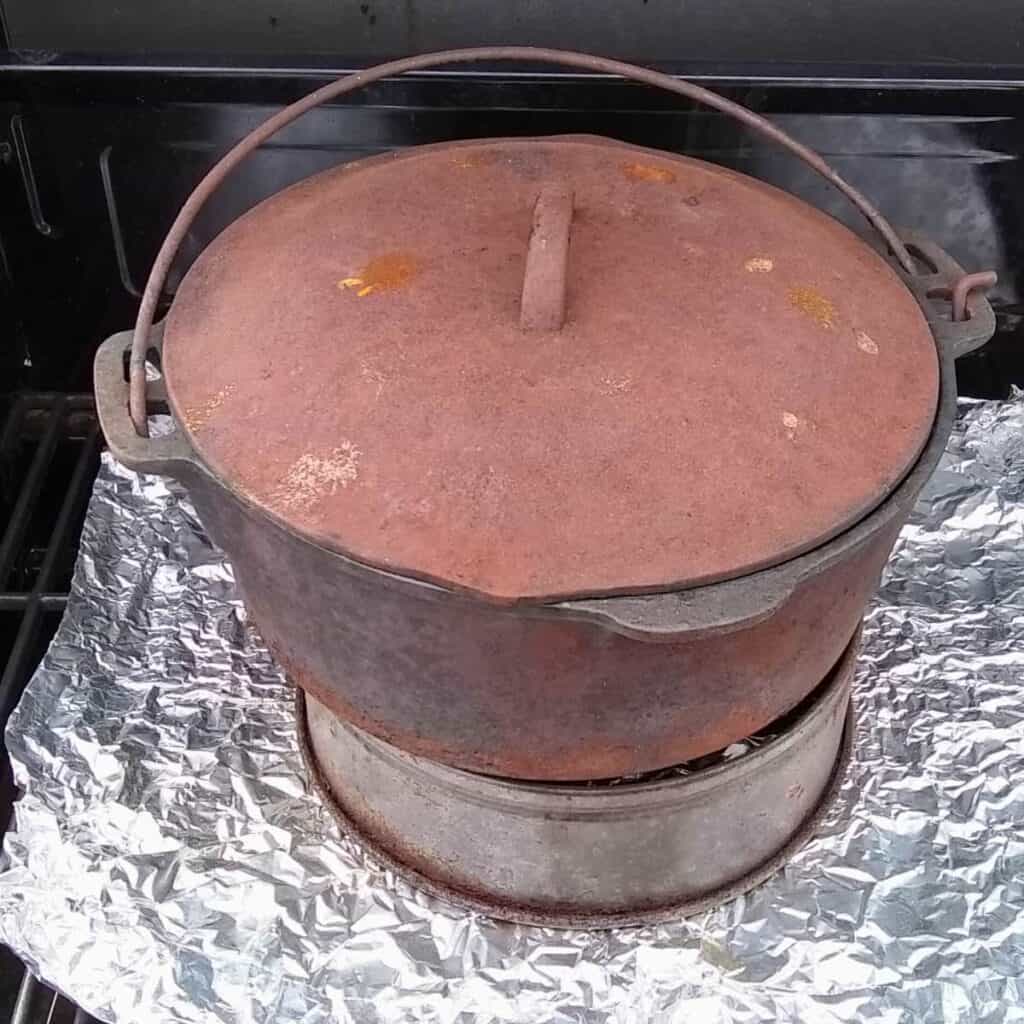
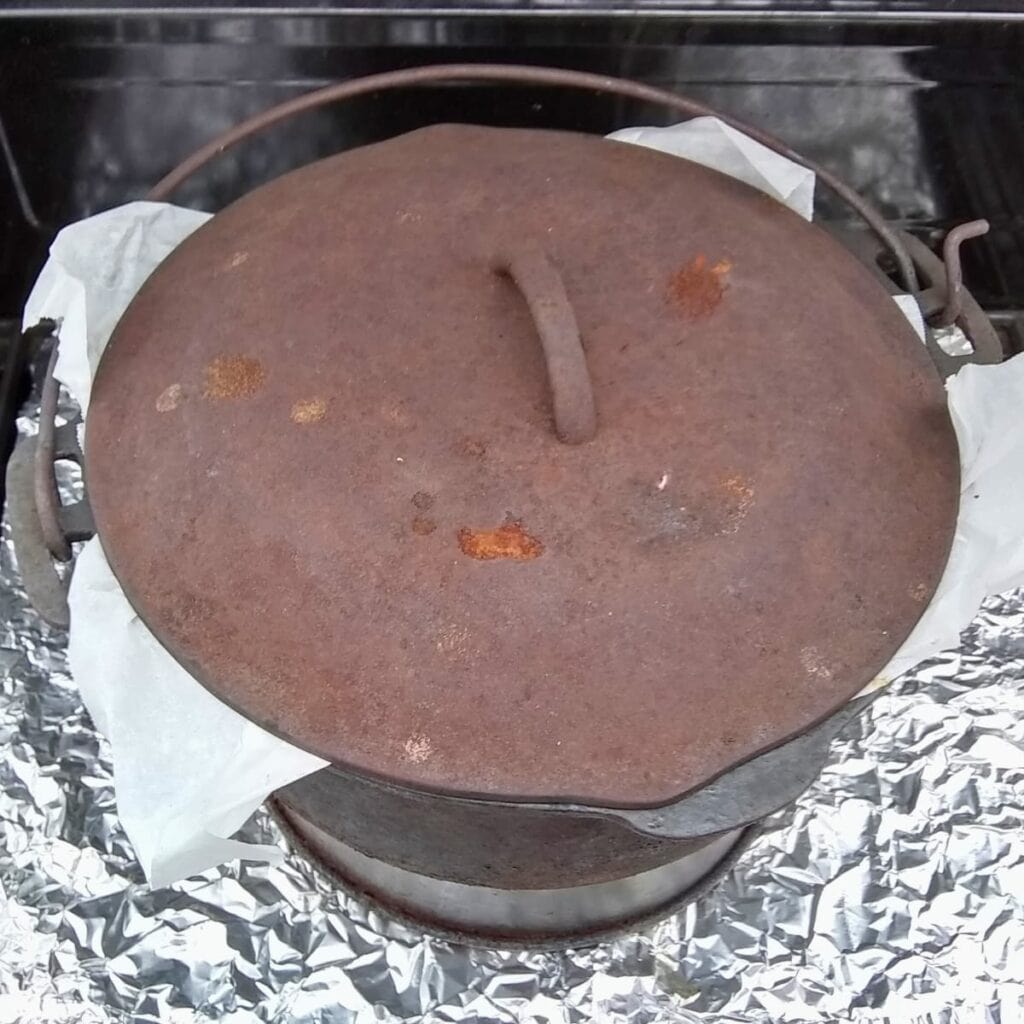
Heat the oven or BBQ grill to 400 degrees with the dutch oven in it and heat it through for 20-30 minutes.
Prepare a square piece of parchment on the counter next to your oven.
After about 20 minutes, take the dough out of the fridge and, using a spatula or your wet hand, loosen the dough from the sides of your container, reaching all the way to the bottom of the container. I lay my container down to do this.

Go around once and then dump the dough onto the parchment, careful not to deflate it.
Take the Dutch oven out of the oven with oven mitts on and place it on the stove top.
Take the lid off with hands protected. Place it on a heat-proof surface.
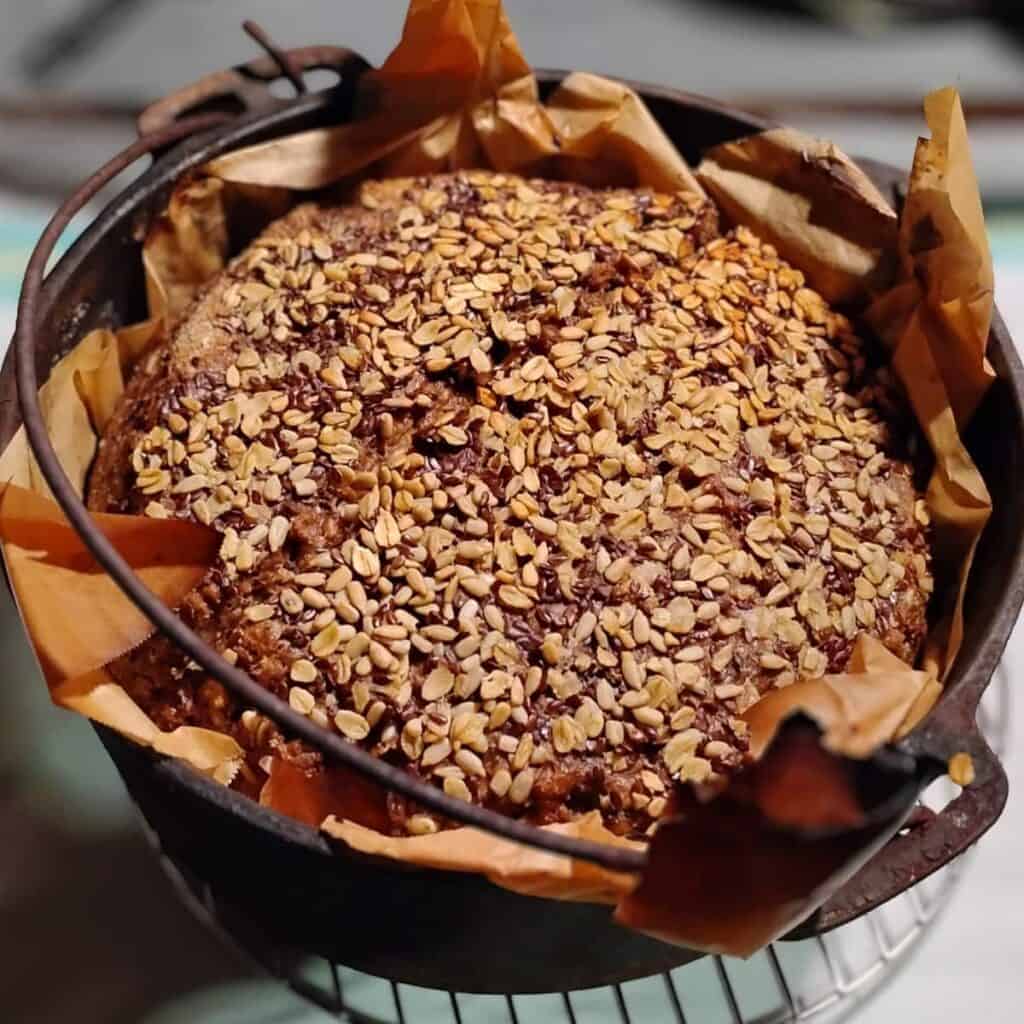
Grab the parchment by the 4 corners and carefully place it into the Dutch oven.
If you are going to use a topping, drizzle some olive oil over it and sprinkle with your choice of topping. Lightly press it in.
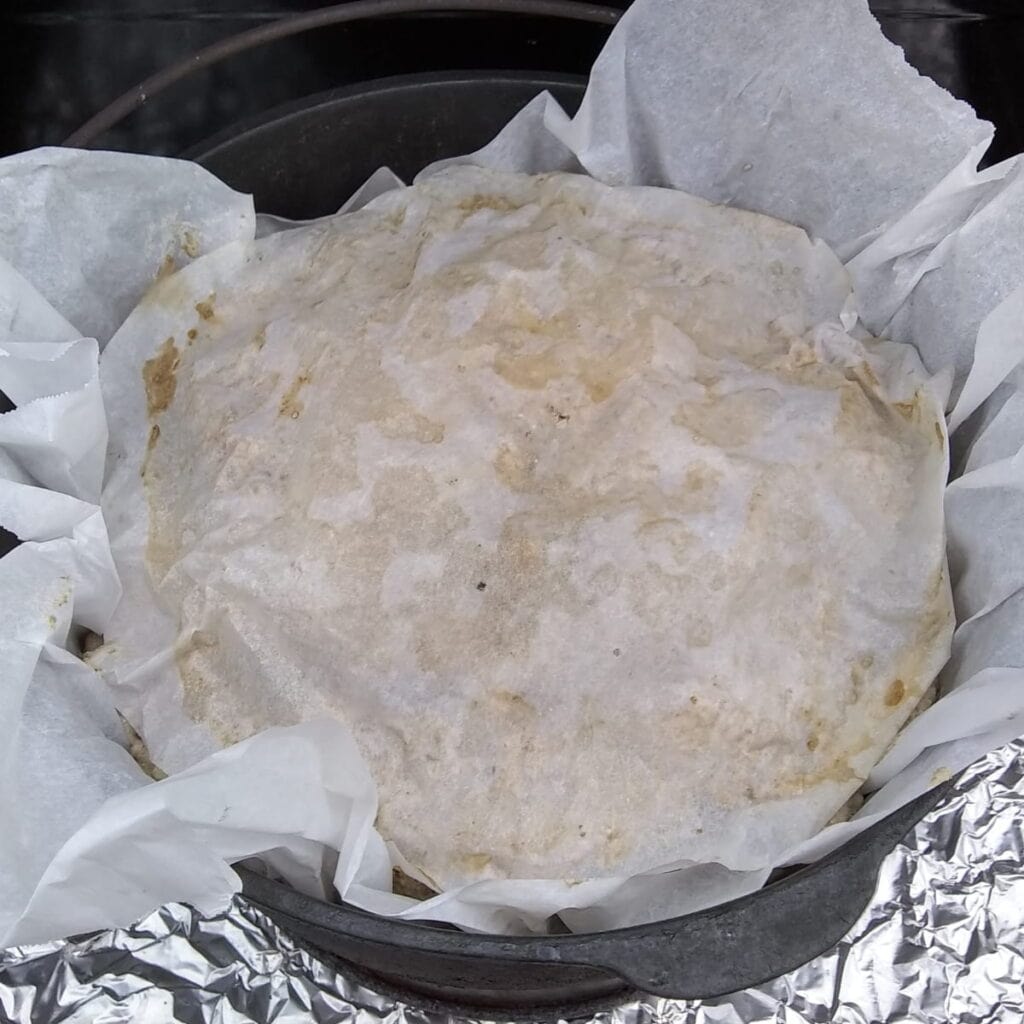
For a softer crust, I wouldn’t add a topping. Instead, cover the top with a round, cut to fit, piece of parchment.
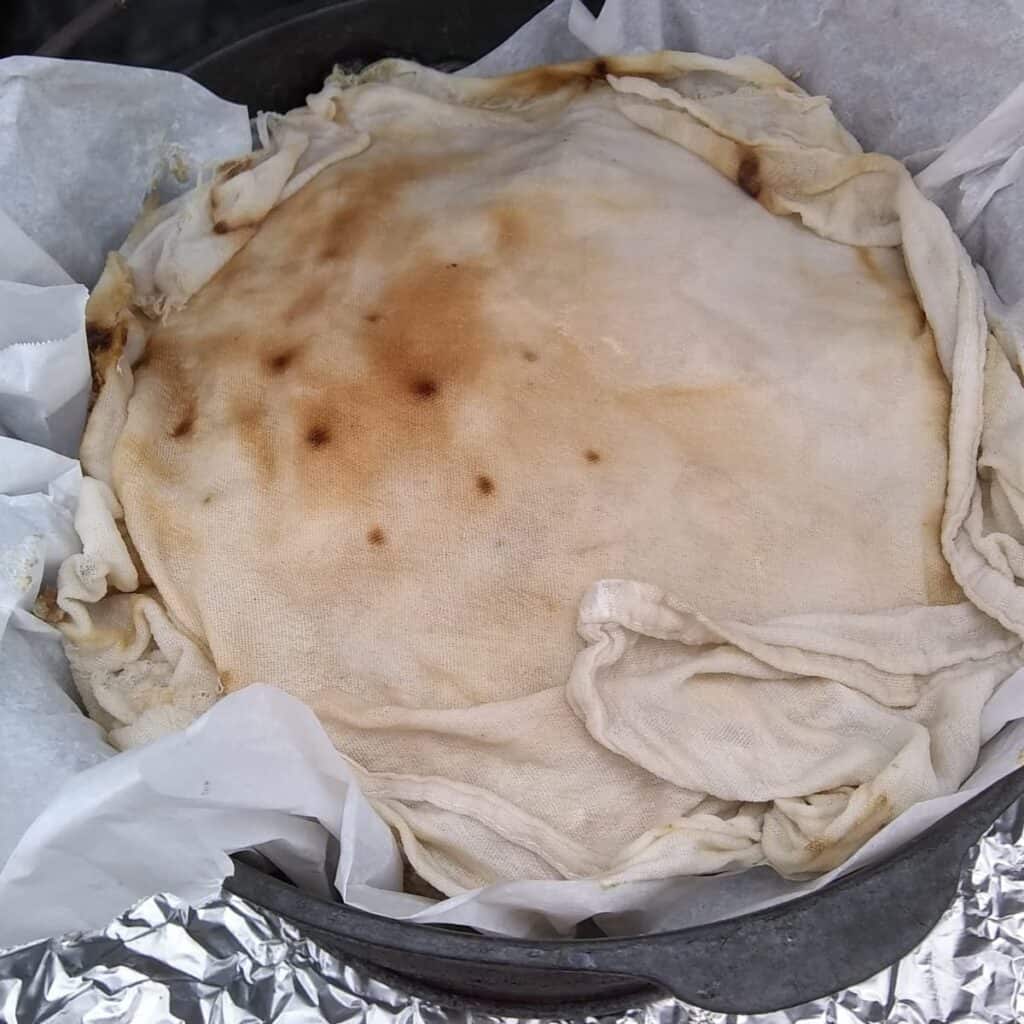
Cover with a piece of wet cloth.
Place the lid on the pot, put it into the oven, and bake for 20 minutes at 400 degrees.
Turn the heat down to 325 degrees and slowly bake it for about 2 more hours. After about 1 more hour, pour a little more water onto the cloth to keep it humid in the pot. Put the lid back.
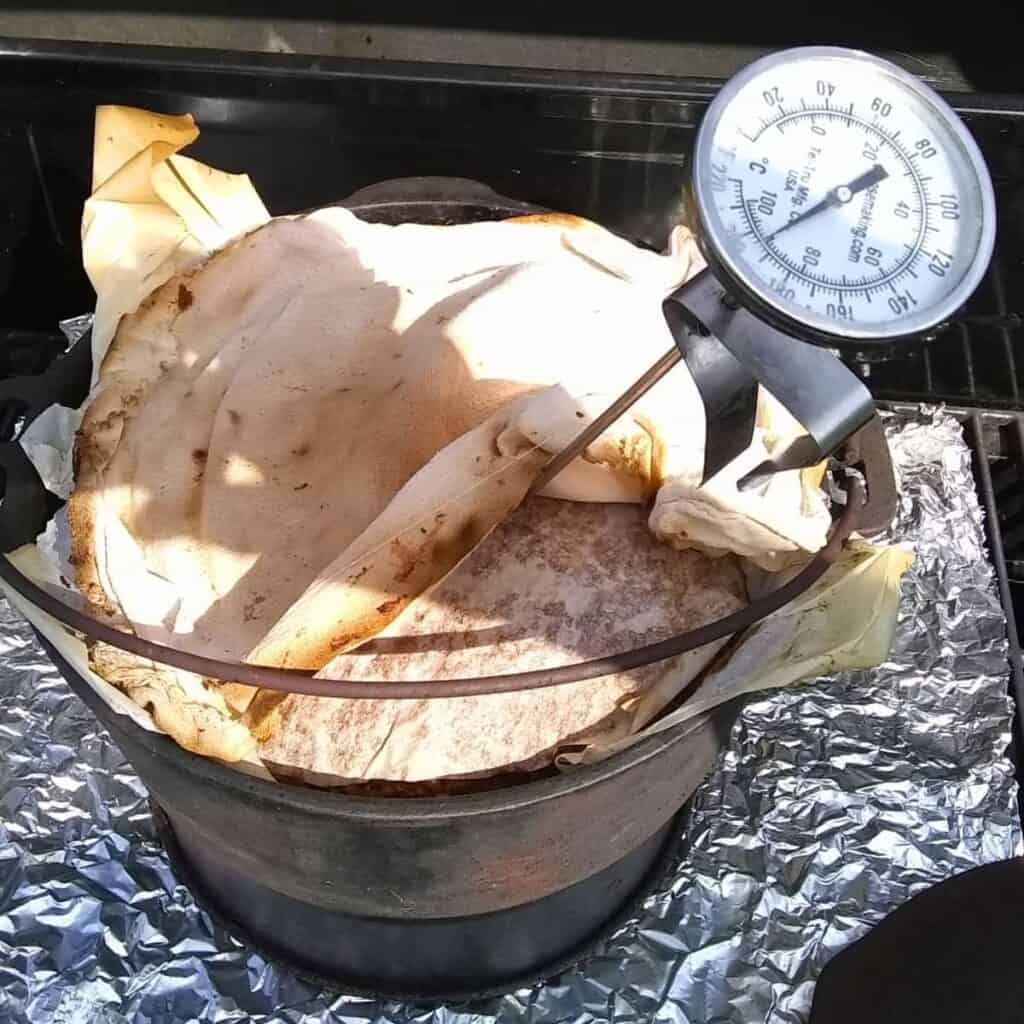
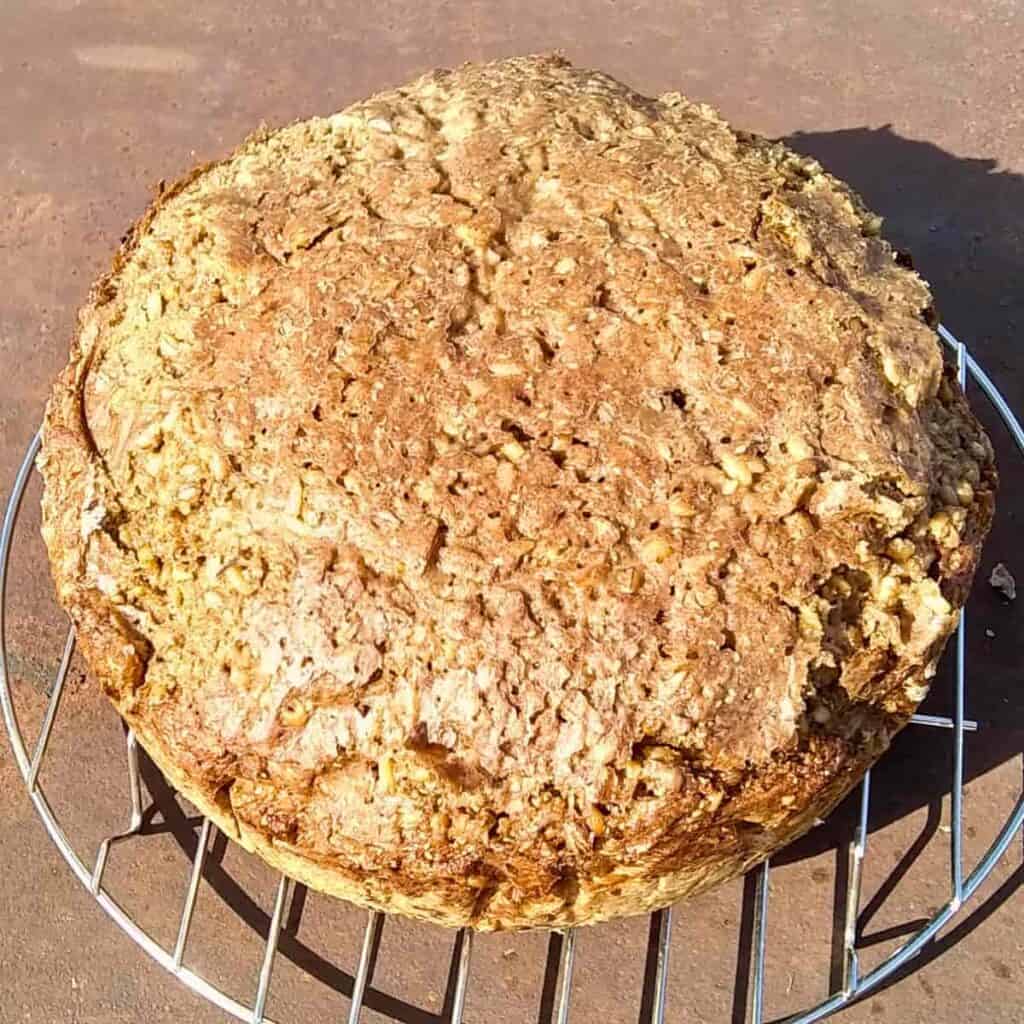
Check the internal bread temperature, it should read at least 205℉ – 210℉. You can also tap the loaf to hear if it sounds hollow. This loaf is dense, and it won’t sound like an ordinary bread, but it should return a slightly hollow response.
If you added a topping, remove the lid and let the topping toast for another 15 minutes. You can just use your top burners for this if you have that option.
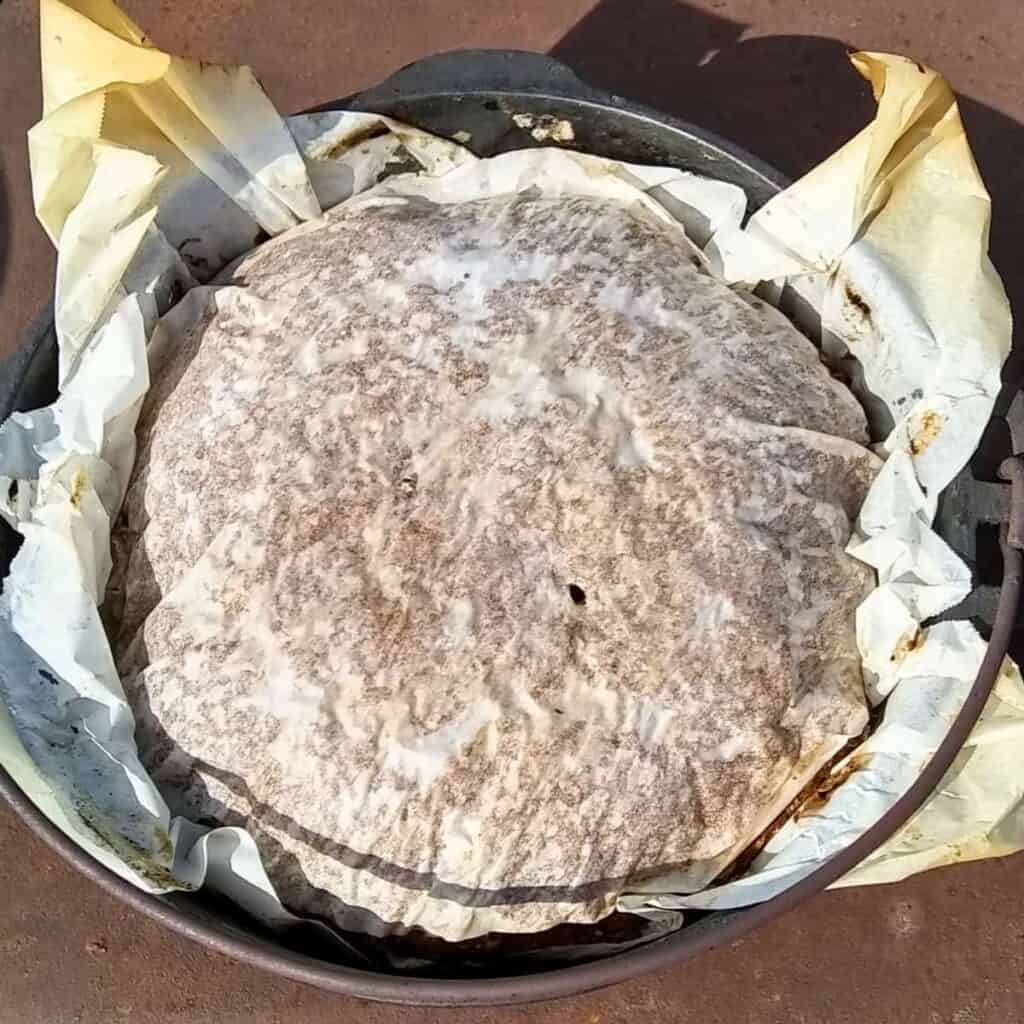
When done, take the loaf out of the Dutch oven by grabbing the parchment corners.
Place it on a rack and take off the parchment.
Let it rest!
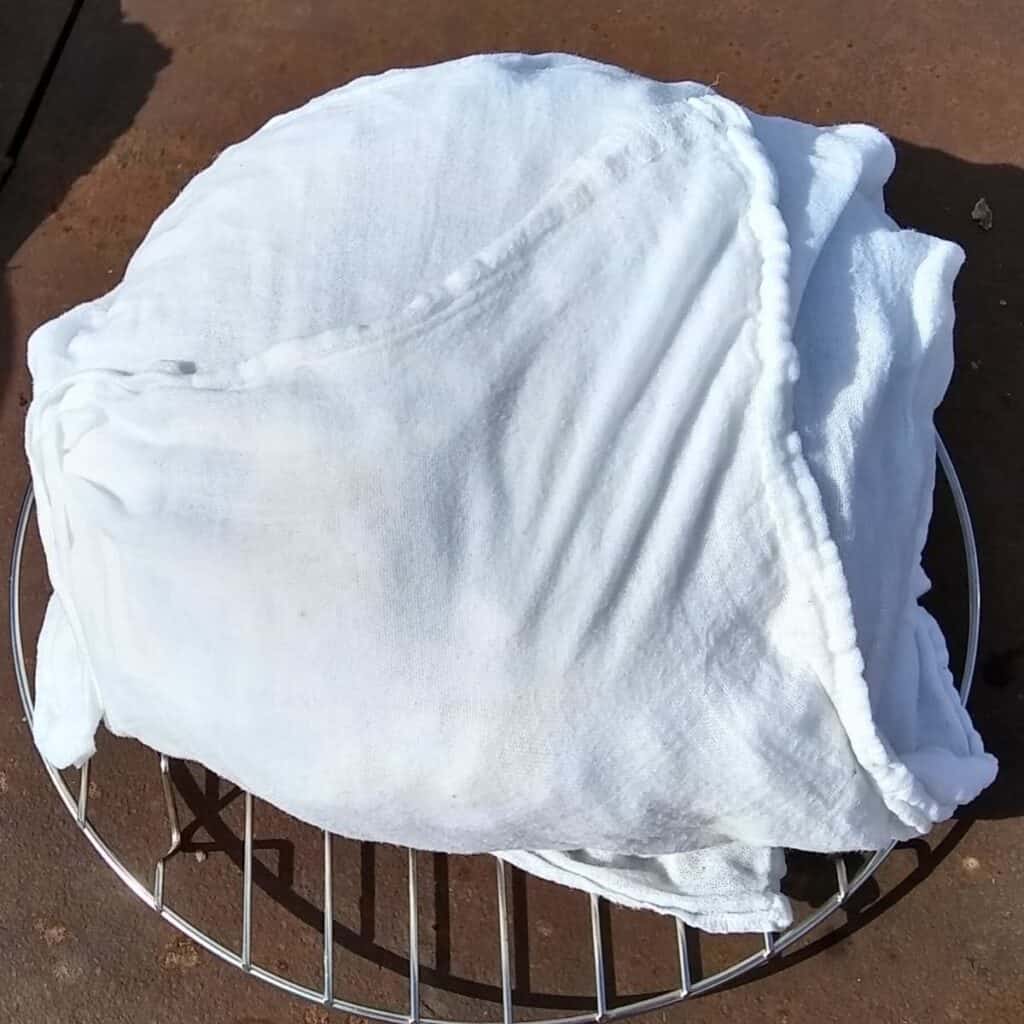
Wrap with a dry or damp towel and let it ‘cure’ for about 24 hours. (A damp towel will help make the crust softer, a dry towel will help too, but not as good. It will however keep any flies off).
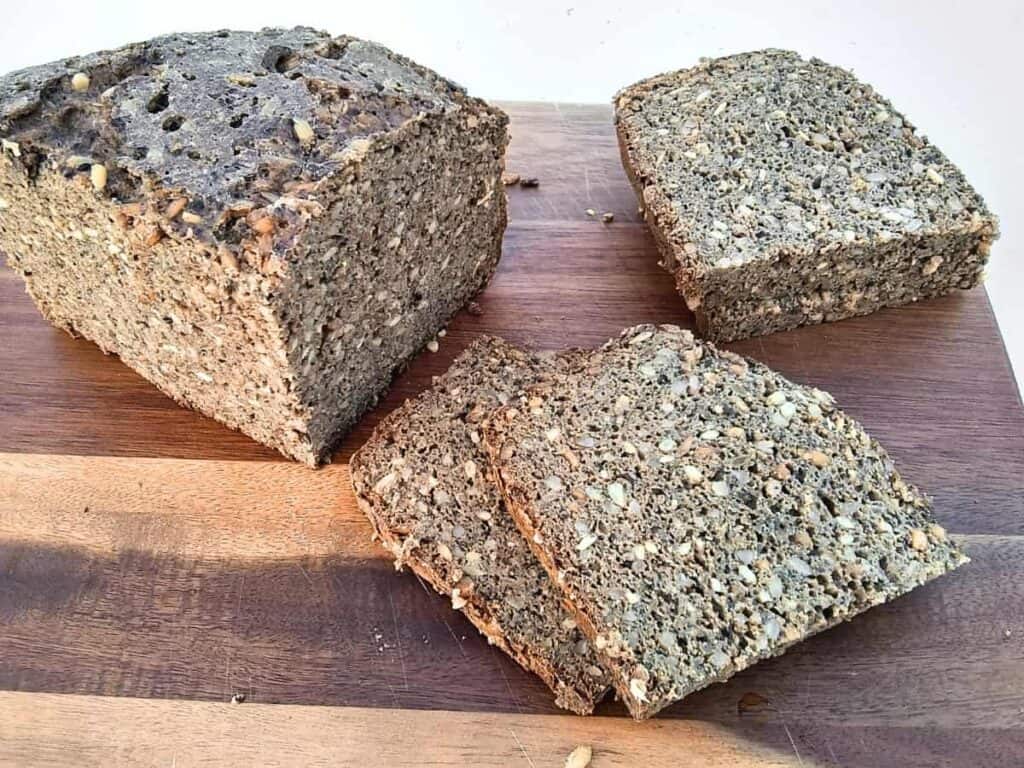
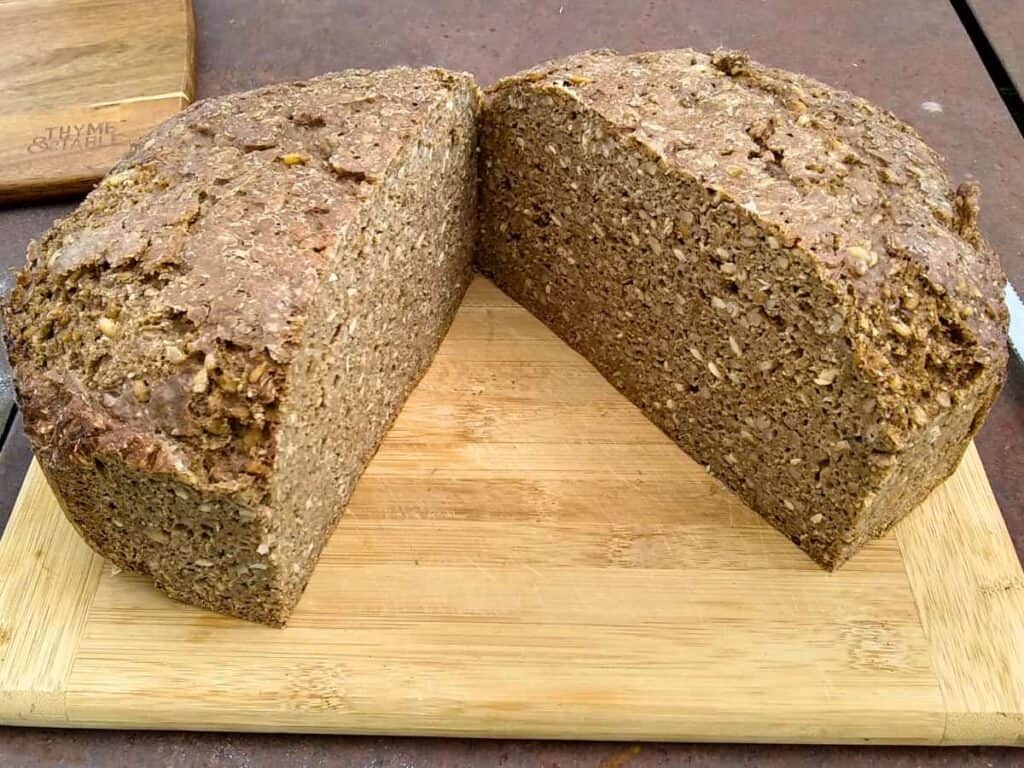
Next day cut off a slice and taste it. It should be dense and chewy, but not doughy.
I like to cut the loaf in half, place one of the halves on the cutting board with the cut side down. Then I slice it so I get half slices. This is so much easier than trying to get whole slices and whole slices are really huge.
Storage And Freezing
Store the bread in a plastic bag or container in the fridge and slice as you need it, or slice all of it and freeze the slices. That is my preference. I usually keep a few slices in the fridge and replace those from the bread in the freezer when needed.
Serving Suggestions
I like to toast it before eating it with most toppings!
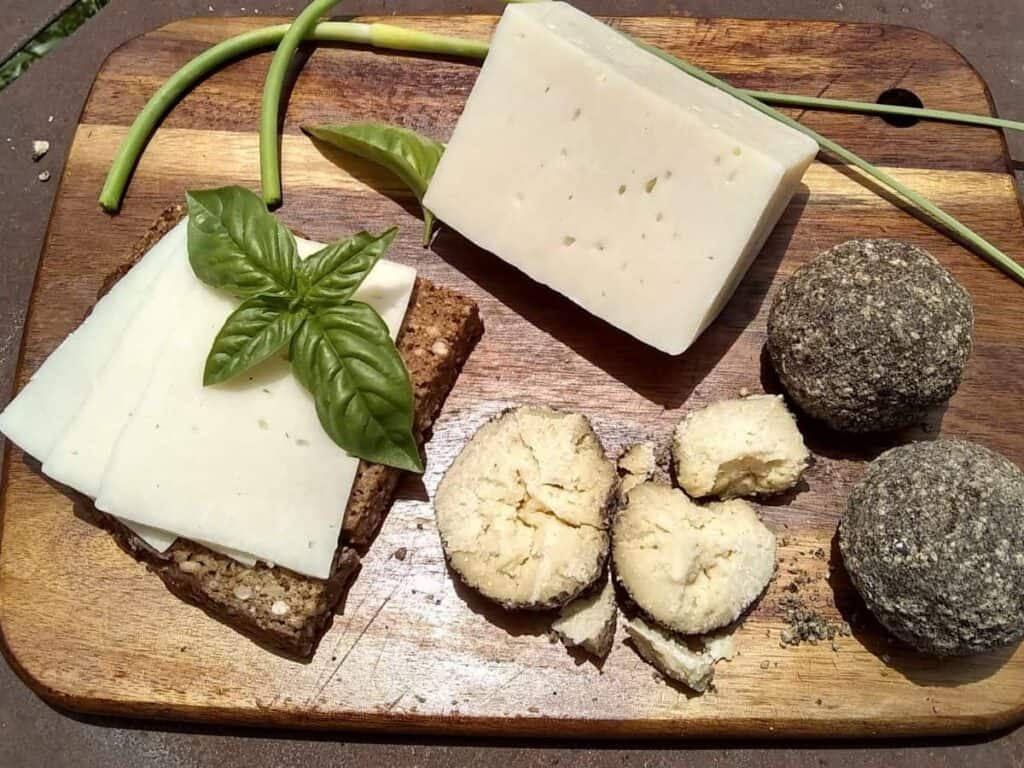
Sourdough seeded rye bread is a perfect partner with cheese anything. I love a slice of bel paese or cheddar cheese on it as much as a layer of quark or chevre with some garlic and herbs. It is great too with brie and blue cheese.
Awesome with butter, salted schmaltz (goose grease), or salted lard and cracklings.
Great with quark cheese or clabber cheese and smoked raw ham like real black forest ham, prosciutto, or nordic style cured salmon such as nova lox.
I love it with cheeseballs marinated in spiced olive oil or with canned sardines in oil.
Serve some sliced with your charcuterie board!
Really delicious slathered with nut butter (my favorite is raw almond butter) and applebutter, or honey.
Your Questions Answered
Is seeded rye bread healthy?
Yes it can be. When you use whole grains and seeds and a long fermentation it is healthy indeed.
It’s full of vitamins, minerals, antioxidants, fiber, healthy proteins and oils. It has a low glycemic index due to the high fiber content and the whole food ingredients. The sugars in the ingredients are being consumed by microbes and so the natural sugar content is pretty low by the time you eat it.
Also, it is lower in gluten than most breads and if you use ancient grains along with the rye, it can be tolerated by many who are gluten sensitive. Add to it that the phytic acid is neutralized by the fermentation process, and you’ll have a much higher nutrient content and bioavailability of nutrients than you would in a yeast-leavened bread.
So to get the healthiest rye bread, choose one that has been long-fermented and uses all whole ingredients.
What kind of seeds are in seeded rye bread
Most rye breads use caraway seeds as a seasoning and to help with digestion of the high fiber content. But many seeded breads also add other seeds to increase nutrition and flavor, such as sunflower seeds, whole grains, flax seeds, poppy seeds, chia seeds, sesame seeds, pumpkin seeds and others.
Can you freeze seeded rye bread?
Yes, it freezes very nicely. It needs to be cured before you cut into it or it will get pasty. But once it’s cooled and cured, it can be frozen whole or sliced and it stays fresh the longest if vaccuum sealed, or with the air squeezed out. It can stay fresh for up to 3 months in the freezer. If kept whole, it will stay the freshest.
Why does rye bread have caraway seeds in it?
Caraway seeds are a traditional flavoring that pairs well with the earthy rye flavor. But it is also used to make the high fiber content in a dark whole grain rye bread easier to digest. It can be added ground or whole.
Enjoy Your Delicious No-Knead Fresh-Milled Sourdough Seeded Rye Bread With Spelt
This sourdough seeded rye bread is easy to make, but requires some patience. It is so worth it though. This bread is unlike any that you are accustomed to if you live in the United States.
Enjoy it plain, just topped with butter, salted goose grease or cracklings and lard. This bread is excellent toasted and topped with nut butter and applebutter. But it is especially good with cheese in any form. I think this bread and cheese are a match made in heaven. They go together like milk and cookies, boots and laces, and Santa and reindeer. Perfect companions. If you are a cheese fan, you’ll have to give this bread a try to go with your favorite hard cheese, soft cheese or cheese spread. So delicious!
Have you made this recipe? I’d love to get your feedback and your ⭐⭐⭐⭐⭐ rating! And I’d love to hear what your favorite bread is. And please don’t hesitate to ask in the comments if you have any questions!
Join the Food For Life Garden Community for more great recipes and homestead tips and ideas. I’m always adding new content. Don’t miss any new posts and learn more about my off-grid farm life.
Other Recipes You Might Like
Make Sourdough Starter Culture From Scratch using just flour and water. Learn how sourdough works and how you can use it to bake delicious breads without yeast!
Kamut & Einkorn Sourdough Bread Recipe Make your own delicious ancient grain sourdough bread. Tolerated by most, even many people with wheat sensitivity. Incredibly good!
The Best Sourdough Rye Bread – Easy, lazy method that makes super delicious, moist, chewy rye bread to partner with your favorite cheese.
Awesome Uses For Whey – Save the whey! And use it in dozens of ways. You’ll find something to do with whey for every single drop. It’s nutritious, versatile, healthy, and makes great fizzy sodas!
No-fail Homemade Mayonnaise – Make mayonnaise from scratch with this easy recipe, which includes a fermenting option to preserve it for long-term storage.
Tabouli Salad – a delicious cold salad or meal, made gluten-free with quinoa and packed with nutrition and health benefits.
Zwiebelkuchen a German onion pie – Delicious German fall tradition. Make some today, you won’t regret it!
Einkorn Zucchini Bread – Make this delicious zucchini bread that is moist, healthy, and doesn’t skimp on flavor! Delicious!
Make your own chevre cheese from scratch How to make super versatile creamy, spreadable cheese that can be used as a dip, or spread, for baking, for savory or sweet shakes, fresh or aged. Replace store bought cream cheese with this healthy version!
Natural cheese making Process Make your own mesophilic and thermophilic cheese starter and use it to make cheese the natural way. Make yogurt from scratch with your own homemade starter too.
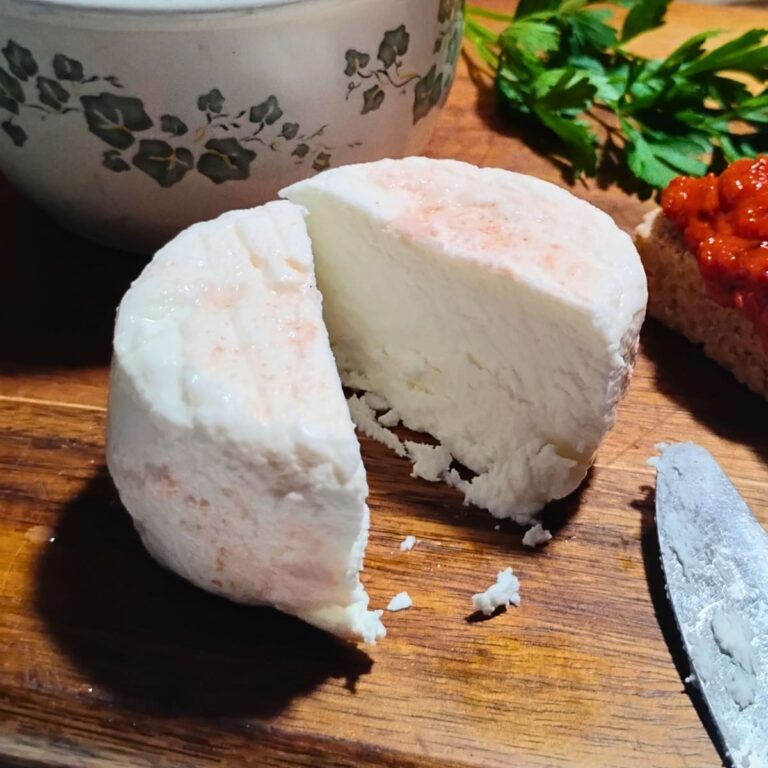
Make German Quark cheese – Make authentic German Quark, also called Topfen. A versatile fresh, soft cheese that is a staple in German cooking.
Bonnyclabber – What is clabber milk and its uses Learn to make bonnyclabber, the original cheese. Nature’s way of preserving milk. A tasty, creamy cheese that makes a really good frosting for einkorn zucchini bread.
Pin This Recipe For Later
Shop this post
Sources for whole grain or flour and seeds:
- Bulk organic spelt grain or spelt flour at Azure Standard*
- Bulk organic einkorn berries or einkorn flour at Azure Standard*
- Bulk organic khorasan berries or khorasan flour at Azure Standard*
- Bulk organic rye berries or rye flour at Azure Standard*
- Bulk 25 lb organic Kamut® berries at amazon
- 10 lb organic Kamut® berries or Kamut® flour at amazon
- 10 lb organic einkorn berries or einkorn whole grain flour at amazon
- 25 lb organic rye berries or 3 lb rye flour at amazon
- 5 lb organic spelt grain or 20 oz spelt flour at amazon
Whole caraway seeds
Organic sunflower seeds
Organic chia seeds
Organic flax seeds
Equipment
6 qt Cambro Bread dough proofing bucket
3 qt Saucepot
Danish dough whisk
Nutrimill Harvest Electric grain mill
Mockmill Electric grain mill
Country Living grain mill Manual grain mill
Sourdough baking kit
Cast iron dutch oven
Enameled dutch oven
Flour sack towels
Organic flour sack towels
Parchment paper
Cooling rack
Redmond’s real salt
Himalayan pink salt
Celtic sea salt
*A note about Azure Standard: This is a buyers club that sells clean foods with no GMO and much of it organic. I love shopping there. However, be aware that you’ll need to join a food drop in your area and pick up your groceries at the drop at the prescribed time for your location. It is fun though and you’ll get to meet friendly, like-minded people who prefer to buy clean, organic foods for their families.
No-Knead Seeded Rye And Spelt Bread With Fresh-milled Flour
Equipment
- 3 quart pot – for soaking and cooking the whole grain berries.
- Large 6 quart container with lid – for mixing the dough and fermenting it. Use a plastic, glass, or stainless steel container. A stock pot works.
- Danish dough whisk – or a sturdy wooden spoon
- Dutch Oven with lid – for baking the bread
Ingredients
Ingredients For The Soaker Grains
- 1 cup organic Rye berries – or whole grain of your choice
- 1 cup organic Spelt berries – or whole grain of your choice, or cracked grains
- 10 cups water, divided – soak the grains in 6 cups of water and cook them in the 4 cups of water.
- 1-2 tbsp Vinegar – or lemon juice or sourdough helps to neutralize the phytic acid in the grains and softens them.
Ingredients For The Bread Dough
- 400 g fresh milled Rye flour (2 cups of whole berries)
- 400 g fresh milled Spelt flour (2 cups of whole berries)
- 230 g Sourdough, fed and active – about 1 cup after stirring.
- Cooked soaker grains
- 1 cup Sunflower seeds
- ½ cup Chia seeds
- ¼ cup Caraway seeds – ground or whole
- ¼ cup Flax seeds – fresh ground – plus optional ¼ – ½ cup whole flax seeds
- 2 tbsp Sea salt – must be additive free
- 2 cups Water or whey – or more if needed (I ended up using 2 ¼ cups, but the exact amount will depend on your dough consistency and can vary)
Optional
- ½-1 cup misc additional seeds – add to your bread dough if you want more seeds. Some ideas: any other seeds you love, such as poppy seeds, pumpkin seeds, hemp seeds, and sesame seeds. German breads often use millet in the mix too.
- ½ cup misc seeds – sprinkle on as a topping if you like
- drizzle olive oil – used for the top of the loaf, if you add seeds as a topping.
Instructions
Day 1: Soaking The Grain Berries And Feeding The Sourdough In The Morning
- Place the rye and spelt berries in a 2 quart pot.
- Add the 6 cups of water and the vinegar, sourdough, or lemon juice, stir, cover, and let it sit overnight.
- Take your sourdough starter out of the fridge and give it a feeding. Let it sit for 8-12 hours, then feed it again.
Day 2: Cooking the grain and mixing the dough
- In the morning on day 2, drain the grains, then add 4 cups of water and cook them for an hour or till soft.
- Let them cool on the counter or in a bath of cold water for an hour or two.
- Once the grains are cooled, start mixing your dough.
- Place the sourdough into the mixing container.
- Add 1 cup of whey or water and mix well.
- Add the cooled grains and stir everything.
- Pour all the seeds, caraway, and the salt over the grains.
- Mix well with the dough whisk or a large wooden spoon.
- Add the flours.
- Add another cup of whey or water.
- Mix everything really well with the dough whisk.
- Add more water or whey if needed so you get a dough that will be sticky and pasty, but should be kneadable. You don’t have to knead it though. Just mix it really well with the Danish dough whisk.
- Place a damp towel over it or a lid.
- Let it bulk ferment on the counter in a warm room until doubled.
- Seal up the container and place it into the refrigerator or a cool root cellar, preferably for two days.
- There it can remain up to 7 days, but it will get quite tart and get a strong sourdough taste if you leave it that long. My favorite chill time is 2-3 days. This will develop a good sourdough flavor.
Day 4 or 5: Baking the bread
- Heat the oven to 400 degrees with the dutch oven in it and heat it through for 20-30 minutes.
- Prepare a square piece of parchment on the counter next to your oven.
- After about 20 minutes, get the dough out of the fridge and, using a spatula or your wet hand, loosen the dough from the sides of your container, reaching all the way to the bottom of the container. I lay my container down to do this. Go around once and then dump the dough onto the parchment, careful not to deflate it.
- Take the Dutch oven out of the oven with oven mitts on and place it on the stove top.
- Take the lid off with hands protected. Place it on a heat-proof surface.
- Grab the parchment by the 4 corners and carefully place it into the Dutch oven.
- If you are going to use a topping, drizzle some olive oil over it and sprinkle with your choice of topping. Lightly press it in.
- For a softer crust, I wouldn’t add a topping. Instead, cover the top with a round, cut to fit, piece of parchment and a piece of wet cloth. Place the lid on the pot, put it into the oven, and bake for 20 minutes.
- Turn the heat down to 325 degrees and slowly bake it for about 2 more hours. After about 1 more hour, pour a little more water onto the cloth to keep it humid in the pot. Put the lid back.
- Check the internal bread temperature, it should read at least 205℉ – 210℉. You can also tap the loaf to hear if it sounds hollow. This loaf is dense, and it won’t sound like an ordinary bread, but it should return a slightly hollow response.
- If you added a topping, remove the lid and let the topping toast for another 15 minutes. You can just use your top burners for this if you have that option.
- When done, take the loaf out of the Dutch oven by grabbing the parchment corners. Place it on a rack and take off the parchment.
Let it rest!
- Wrap with a dry or damp towel and let it ‘cure’ for about 24 hours. (A damp towel will help make the crust softer).
- Next day cut off a slice and taste it. It should be dense and chewy, but not doughy.
- I like to cut the loaf in half, place one of the halves on the cutting board with the cut side down. Then I slice it so I get half slices. This is so much easier than trying to get whole slices and whole slices are really huge.
Storage And Freezing
- Store the bread in a plastic bag or container in the fridge and slice as you need it, or freeze the whole loaf or slices. I prefer to slice all of it and freeze the slices. I usually keep a few slices in the fridge and replace those from the bread in the freezer when needed.
Notes
Tips To Make The Best No-Knead Fresh-Milled Seeded Rye Bread With Spelt
- I bake straight from the bulk ferment. It works well. However, the dough needs to be fully proofed at this point, and not overproofed. To achieve this, I let it ferment to about double in volume at room temperature, then I give it a cold treatment for at least another 24 hours. My favorite is 2-3 days in the fridge. It can go up to a week, but I find that it gets to be very tart and strong at that point and while it’s still good, it isn’t my preference. 2-3 days is my magic cold fermentation time. The flavor is rich and pleasantly tangy, a good amount of the sugars have been eaten, and the structure is just the way I like it. If I’m in a hurry, I’ll bake it after a night in the fridge, but I normally plan ahead to include the longer fermentation.
- Don’t forget time to soak the grains. It is important for better digestion and for reducing phytic acid before cooking them, to unlock the nutrients.
- I have used the soaked grains in the past without cooking them first. It is ok, but they are very chewy that. If that is something you like, you can surely omit the simmer process. But I recommend simmering the grains till they are soft. It also adds extra moisture retention to the bread. I use the grain cooking water in the bread dough and add more water if needed. If I have whey, I add some whey if more liquid is needed.
- This should be a pretty moist dough. You’ll need the extra moisture in this bread dough to get the final texture I prefer.
- This is not a quick bread. However, hands-on time is minimal. Most of the work is done for you during soaking, culturing, baking and curing.
Sample Timeline With Rising Times:
Day 1:
9am: soak the whole grains in warm water. Take the sourdough out of the refrigerator and feed it.
9pm: Feed the sourdough again
Day 2:
9am: drain the grains (I just drain them with the lid on the pot, cracked open a bit to let the soaking water drain out). Then cook the grains in fresh water for an hour or so till al-dente. Set aside for another hour to cool. Place the pot with the grains in a bowl with cold water if necessary to cool it quicker.
11 am: mix the dough ingredients with a dough whisk or sturdy wooden spoon. Add the flour last. Cover and set it aside at warm room temperature for about 5-6 hours (or till about double).
4-5 pm: Put the dough with a lid on into the refrigerator or a cool root cellar for a couple of days.
Day 4
9 am: heat the oven with the Dutch oven in it.
9:20: Take the dough out of the fridge, loosen it from the sides carefully and dump it on a piece of parchment. Put it in the hot pot, close the oven door and let it bake for 20 minutes at 400℉.
9:40: reduce heat to 325℉ and bake for 2 more hours.
11:40: check for doneness, Temperature in the middle should be at least 205 degrees.
Remove from the oven and wrap in a damp or dry towel to soften the crust and to cure it for 24 hours
Day 5
Noon: Time to cut the bread and taste some!
Is it worth it? Ya betcha!
This bread is worth the time it takes. I actually find it less laborious than some artisan breads I have made in the past. There is little to do, other than prepping the soaker and mixing the dough, just a lot of waiting. Patience is the biggest skill you need for making this bread.
Enjoy Your Delicious No-Knead Fresh-Milled Seeded Rye Bread With Spelt
This is so easy to make, but requires some patience. It is so worth it though. This bread is unlike any that you are accustomed to if you live in the United States. Enjoy it plain, just topped with butter, salted goose grease or cracklings and lard. This bread is excellent toasted and topped with nut butter and apple butter. But it is especially good with cheese. I think this bread and cheese are a match made in heaven. They go together like milk and cookies. Perfect companions. If you are a cheese fan, you’ll have to give this bread a try to go with your favorite hard cheese, soft cheese or cheese spread. So delicious! Sources of grain or flour and seeds:- Bulk organic spelt grain or spelt flour at Azure Standard*
- Bulk organic einkorn berries or einkorn flour at Azure Standard*
- Bulk organic khorasan berries or khorasan flour at Azure Standard*
- Bulk organic rye berries or rye flour at Azure Standard*
- Bulk 25 lb organic Kamut® berries at amazon
- 10 lb organic Kamut® berries or Kamut® flour at amazon
- 10 lb organic einkorn berries or einkorn whole grain flour at amazon
- 25 lb organic rye berries or 3 lb rye flour at amazon
- 5 lb organic spelt grain or 20 oz spelt flour at amazon
- 6 qt Cambro Bread dough proofing bucket
- 3 qt Saucepot
- Danish dough whisk
- Mockmill Electric grain mill
- Country Living grain mill Manual grain mill
- Sourdough baking kit
- Cast iron dutch oven
- Enameled dutch oven
- Flour sack towels
- Organic flour sack towels
- Parchment paper
- Cooling rack
- Redmond’s real salt
- Himalayan pink salt
- Celtic sea salt


A delicious, dense northern European style ‘Vollkornbrot’ (whole grain bread) with fresh-milled rye and spelt flour and loaded with seeds! So easy and the best partner for your favorite cheese! Leave your comments or questions here and I’ll answer as soon as I can.
Yum, I love rye bread and breads with seeds, and this recipe looks fantastic and easy to make. I bet it tastes absolutely delicious with a nice slice of cheese. Thanks for sharing 🙂
Hey Marta! Thank you! And sure I love this bread. I love many other breads, but this one has been my favorite for as long as I have made since decades ago.
I love a hearty, seedy rye bread. So much texture and flavor!
Hey Laura, thank you for commenting! This seedy rye bread is so delicious!
Wow!! What a great recipe & guide! Bookmarking this for sure!
Thank you, Penny!
This is wonderful! I love the long fermentation, so worth it! Thank you for creating and sharing this!
You’re so welcome!
I have just started milling flour. This bread is SO nutritious and tastes good too. Thank you for the easy instructions!
You’re welcome, thank you so much for the feedback, I’m glad you like it!
Another recipe added to my list to make! I love this so much! I love that you use Rye! Can’t wait to make it!
Thank you Mara, I’m glad you like this recipe and I hope you get to try it and love it!
I need to start milling my own flour! This looks amazing! Thanks for adding the timestamps and images- you make it super easy to follow. I love rye bread- we grew up eating the store-bought version so I’m ecited to be able to make a healthier version at home.
Hey Kelly! I hope you get to try it and that you’ll love it. It’s a lot different from store bought unless you had some of those dense German rye breads.
This looks great! I love dark seeded breads! They have so much texture and flavor. I will definitely be making this! And all of your links are so helpful. 🙂
Thank you Jennifer! I appreciate your feedback!
So much great information and easy to follow. I just live whole grain seeded bread! I’ve got to give this one a try.
Thank you Cheryl! I hope you’ll be as happy eating it as I am! It’s my favorite!
Can’t wait to try this recipe, it looks amazing!!
Thank you Ash, hope you’ll love it!