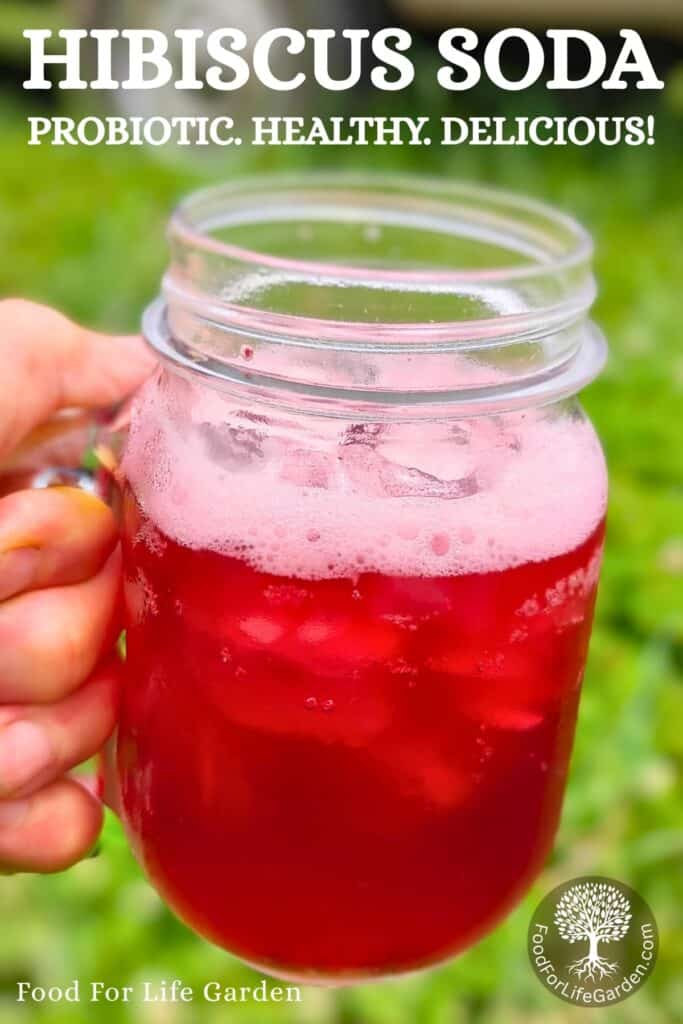
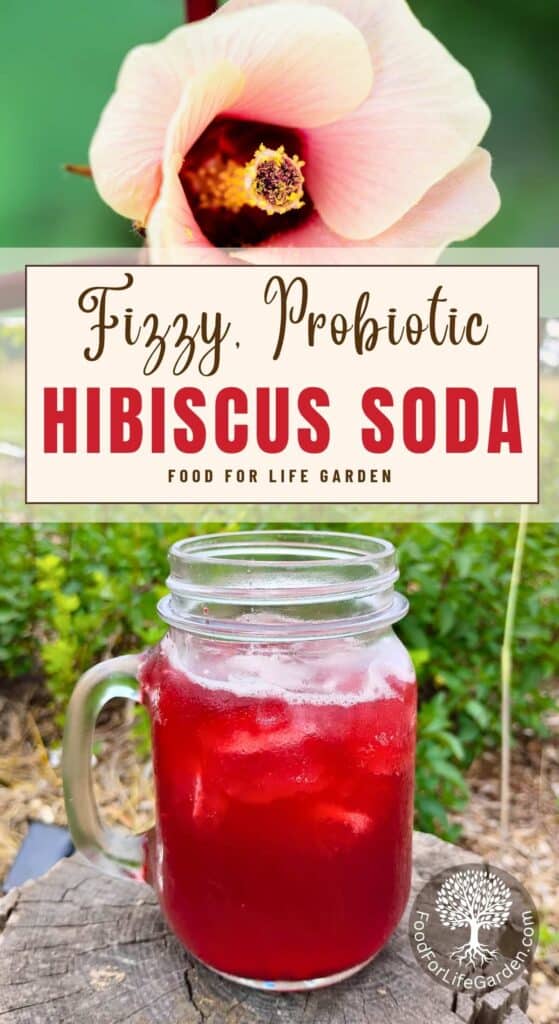
Homemade Fermented hibiscus soda is a delicious, refreshing, tangy, healthy summer drink that’s naturally carbonated and full of probiotics.

This post contains affiliate links. As an Amazon affiliate, I make a small commission at no extra cost to you if you make a qualifying purchase. See my full disclosure here.
Naturally fermented hibiscus soda is a beautiful, fizzy summer drink that is easy to make, tastes phenomenal and has great health benefits too! Use your choice of four starter cultures to make this exciting soda from scratch at home. The starter culture will create carbonation, enhance the nutrients in the hibiscus tea and add probiotics for a gut-healthy bonus. Hey, this is so awesome, you’ll just love it! So let’s go make some fantastic probiotic hibiscus soda!
If you love homemade fermented beverages, learn how to make a ginger bug, or dandelion bug to create probiotic, fizzy sodas from scratch. Then you can use it to make ginger beer and probiotic, fizzy lemonade soda. And if you would like to make your own homemade summer sports and hydration drink, learn how to make switchel.
Make Fermented Hibiscus Soda
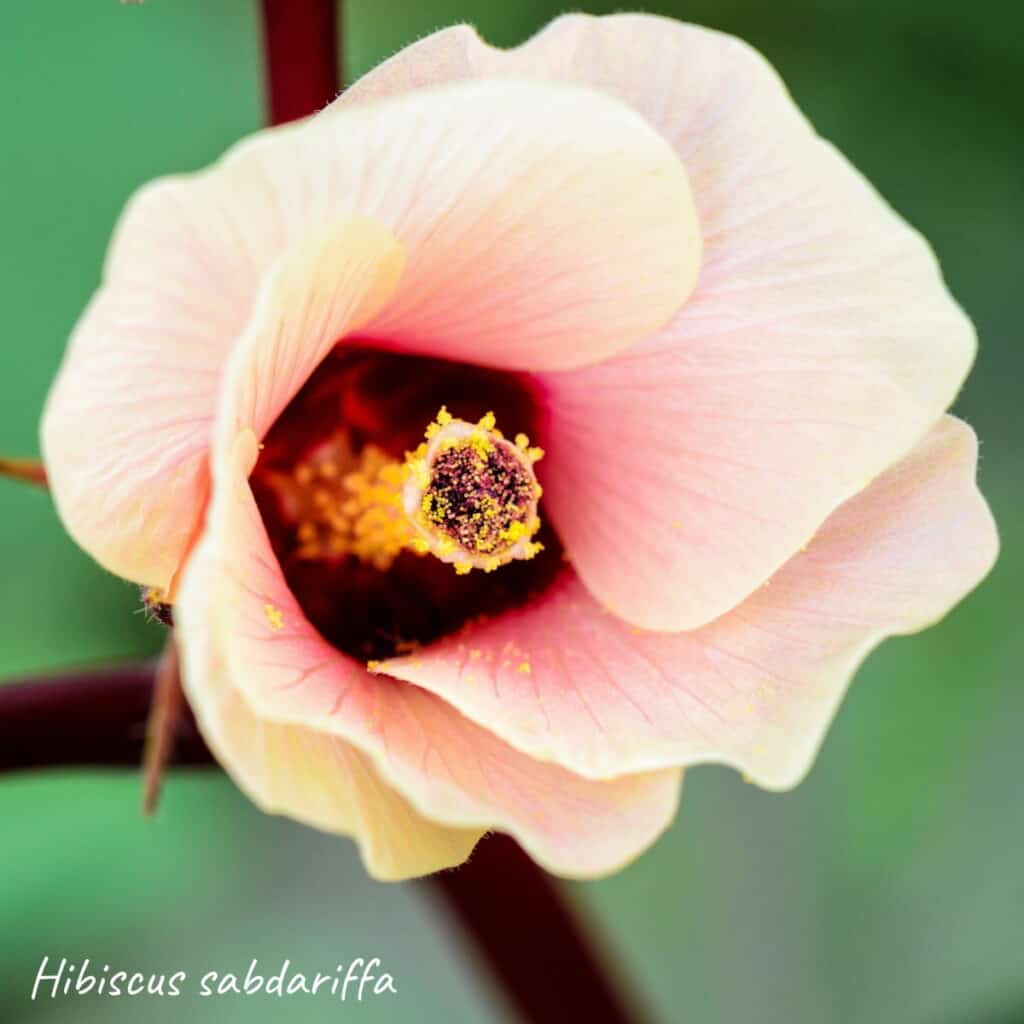
Hibiscus comes originally from Africa. Now it is grown in tropical climates around the world. Hibiscus is related to the okra plant and the variety that is usually used for making tea is Hibiscus sabdariffa. Do not substitute this with ornamental hibiscus varieties, which are not edible!
The hibiscus sabdariffa plant is also often called Roselle. Other names are Florida cranberry, Jamaican tea, Indian sorrel, Red sorrel, October hibiscus, or Maple-leaf hibiscus. The leaves are edible as well and are much like a spicy spinach. The stems contain tough fibers that can be used to make sacks, twine, or cordage.
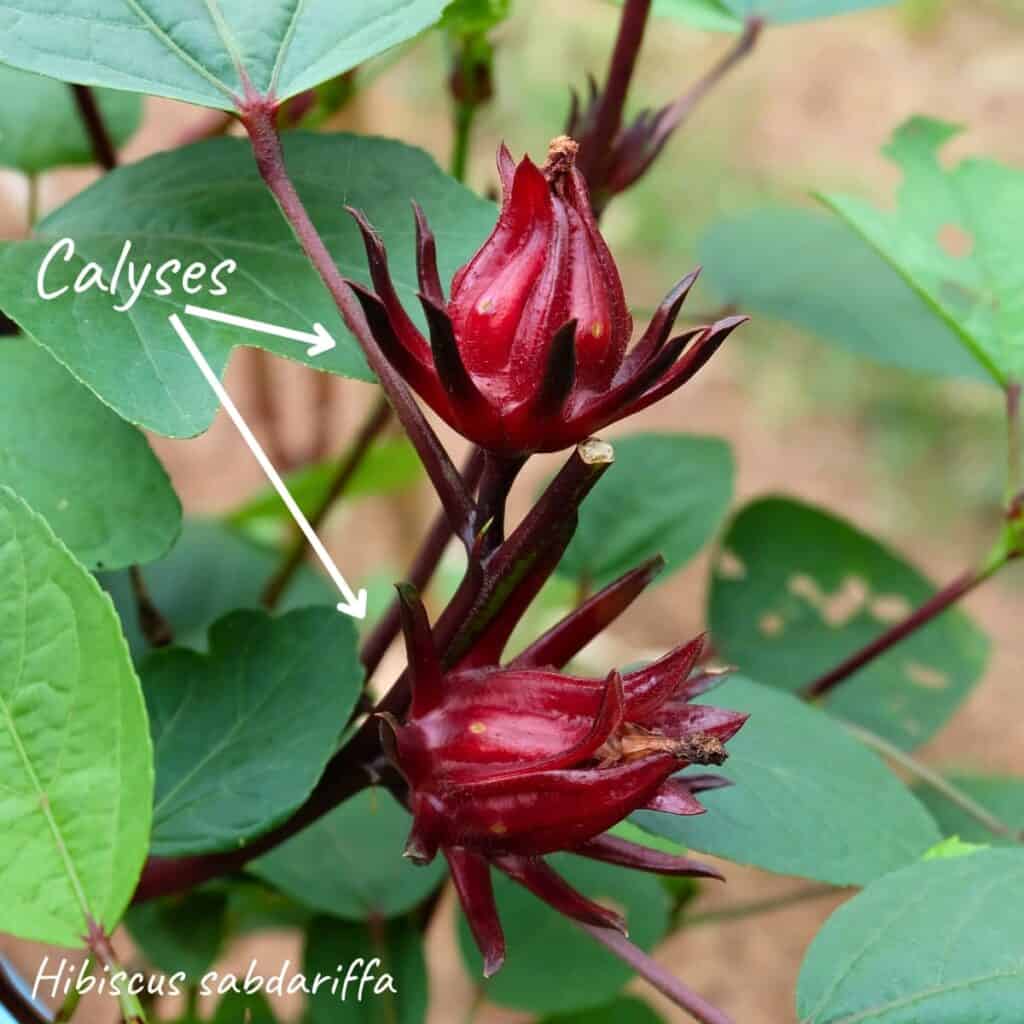
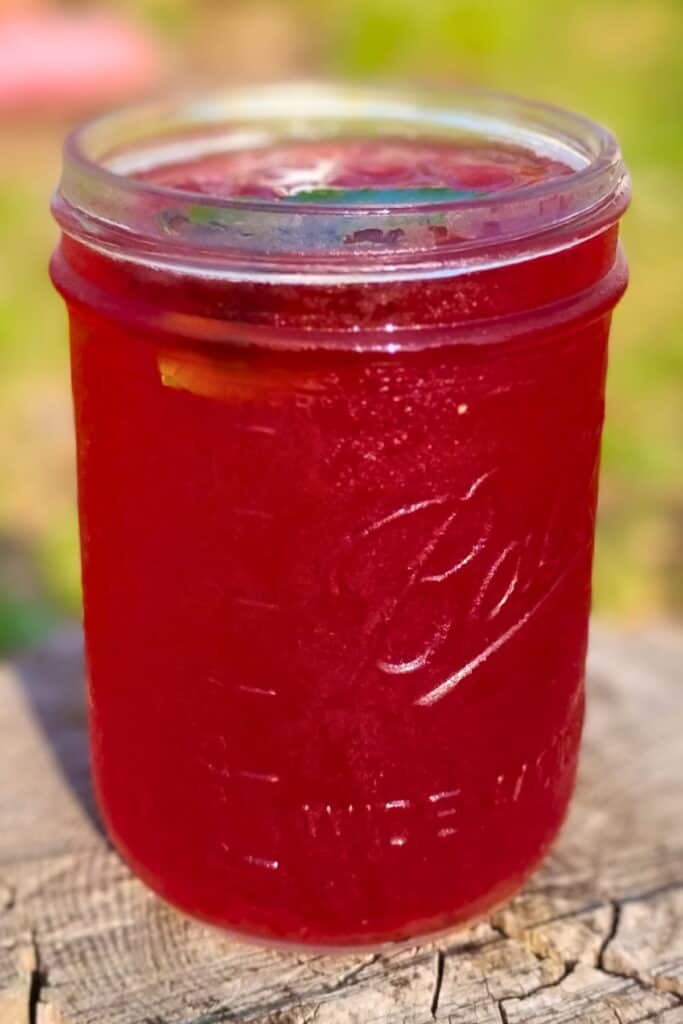
The parts used for hibiscus tea are the flowers and fleshy calyces that enclose the flower buds. They have a tart, cranberry-like flavor. Hibiscus makes a beautiful, deep red colored tea.
Roselle is a hardy perennial in zones 8 or higher. But can be grown as an annual in zones 3-7. It blooms in late October and can be harvested in November to December. This is because it is a short-day plant and flowers during the short days of the year.
The flowering occurs too late for my region. But I am thinking of growing it as a spinach substitute here for a summer green, since regular spinach bolts so very early in the hot spring weather we get. It’s on my list to try for next year.
You can read more about Hibiscus sabdariffa at the NC Extension and they also have a great growing guide if you’d like to grow hibiscus. The seeds are offered at True Leaf Seeds.
Why You’ll Love Naturally Fermented Hibiscus Soda
There is lots to love about this soda, and here are some reasons why I love it so much and why you’ll love it too!
Naturally carbonated by fermentation, using a wild fermented starter culture, water kefir, or whey.
Hibiscus flowers produce a tangy tea that is so delicious when mulled and served hot with some spices and honey, but it’s also very delicious and popular as a chilled summer drink. You don’t even need lemons to get that tangy, lemony flavor.
Hibiscus has many health benefits that fermentation will actually improve and increase. It is rich in antioxidants which can help prevent cellular damage with its high amounts of anthocyanins and vitamin C.
Heart-healthy: Hibiscus tea might help lower blood pressure and lower the bad cholesterol and triglycerides, while increasing the good cholesterol.
It can support liver health with enzymes that can detoxify and reduce liver damage.
Hibiscus tea has been used in weight loss management, where it can reduce body weight, body fat and body mass index.
Hibiscus can help regulate blood sugar levels.
The strong estrogenic activity in hibiscus might help with breast cancer and to keep it from recurring after treatment. It was shown to be effective in hard to treat breast cancers as well, inducing apoptosis of cancer cells, while selectively preserving healthy cells. It has also shown promise in treating other cancers, such as lung cancer.
Hibiscus is being researched for menopause and hormone imbalances. Hibiscus tea contains phytoestrogens, which are chemicals that act like estrogen in the body.
The anti-inflammatory properties of his flower can also help reduce inflammation due to compounds such as anthocyanins, flavonoids, and phenolic acids
Hibiscus has been used to promote calmness and relaxation as well as reduce stress.
Fermentation adds probiotics to hibiscus tea while increasing its health benefits by making nutrients more bioavailable in the body and increasing the nutrients such as vitamin C.
And fermentation adds that desirable fizz to your drink, which is so very refreshing.
Carbonation doesn’t die like in store sodas. If your soda loses its fizz after you open the bottle, you can just seal it and leave it out at room temperature for a day and those live bacteria will get it to fizz up again.
Sources: Healthline, Cleveland Clinic, WebMD, MedicalNewsToday, TheLocalHealer, National Library of Medicine
Disclaimer:
As always, when you introduce a new food to your diet, be sure to start slow. Let your body adjust to fermented foods over a few weeks before you increase the quantity. Watch for allergic reactions. And check with your health provider, if you are pregnant, nursing or are taking medication. Hibiscus may be contraindicated in pregnancy due to its emmenagogue properties.
I am not a doctor or claim to be qualified in any way to give medical advice. This article provides some nutritional and health benefits information that I found in my research. It is only for informational purposes and reflects just my personal opinions, experiences with herbs and spices, and what I’ve learned from research and years of studying herbalism, herbs and their uses. Any health references are meant as an entertaining source for ideas and information, and to encourage interest in herbalism and natural healing. It is my hope to help you get to know and appreciate herbs and their traditional uses. Please always do your own research before using foods as medicine, and do not use any of this information to replace professional advice!
How To Make Naturally Fermented Hibiscus Soda
There are several ways you can make this soda. And I’ll mention some variations, but below you’ll find instructions for my favorite way to make this. We’ll be using your choice starter culture and this recipe for the second fermentation.
Making the culture is the first fermentation and you’ll need to make your culture first if you don’t have one yet. Once you make it, you can use this culture any time and keep alive for years. It’s much like a sourdough starter.
So it’s totally worth having this starter culture and it’s super easy with very little hands-on time. It takes a little patience in the beginning, but after you make the starter culture, it is ready to brew lots of sodas for you every day if you like.
Variations:
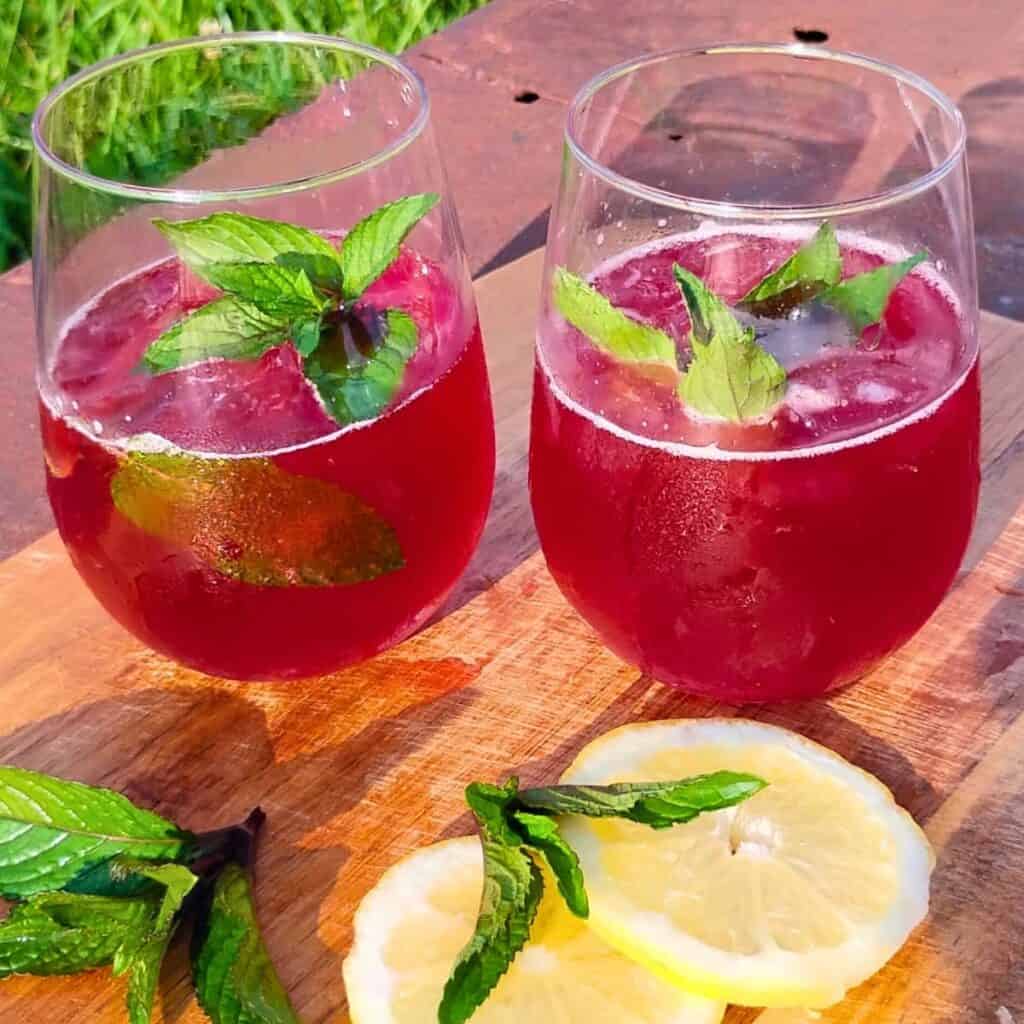
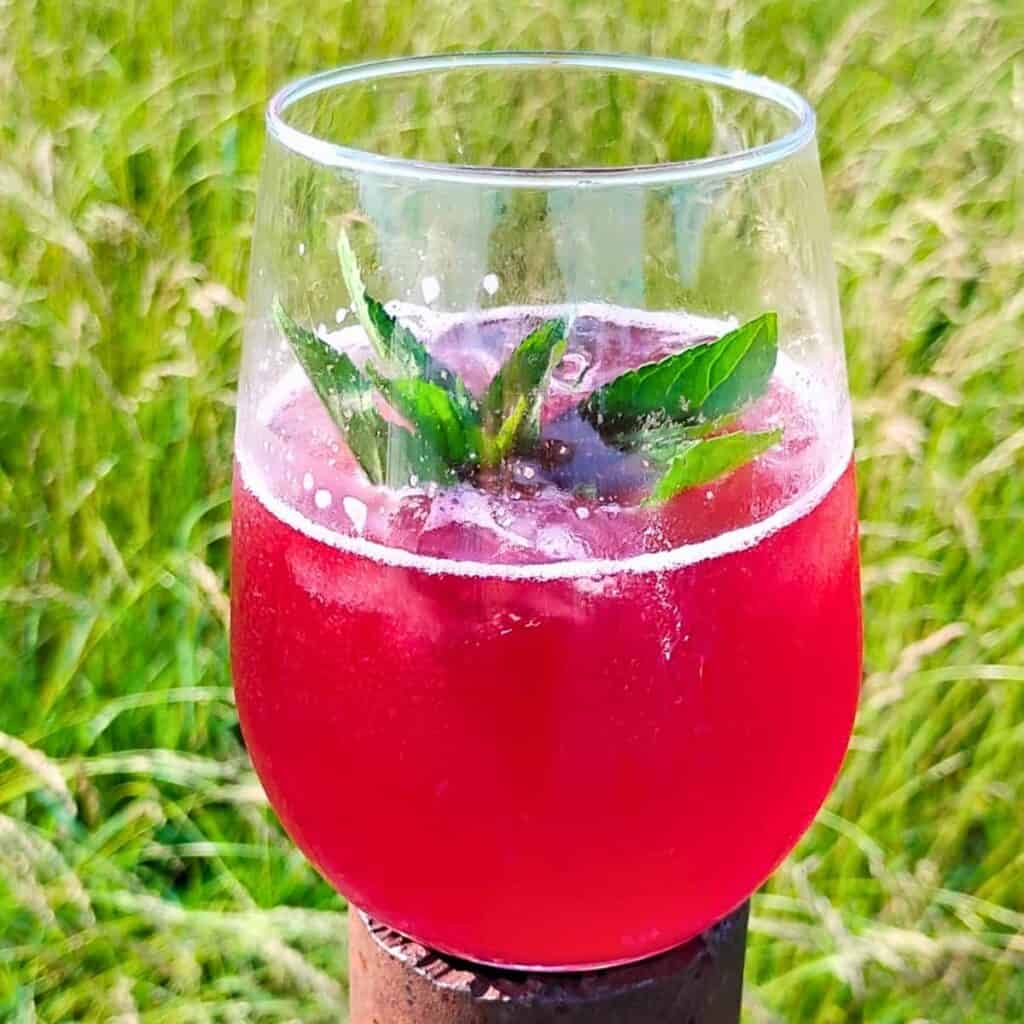
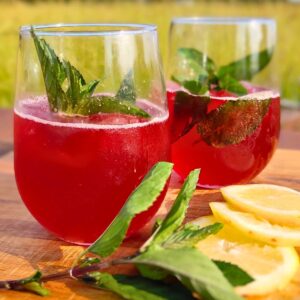
I love fermented hibiscus soda just plain with nothing added, except a few fresh mint leaves in my serving glass. It adds a subtle, cool, minty flavor to your serving. That is my perfect drink!
Here are some more flavors you can try:
Peppermint or other mint tea – Add some peppermint leaves together with the hibiscus calyces for a cooling minty flavor, apple mint or spearmint for a sweeter mint option.
Lemon balm tea – Add a sprig or two of lemon balm at the same time you add the hibiscus for a calming soda.
Ginger and/or Turmeric – Add to the cold water before heating it and simmer for 5 minutes before adding the hibiscus. Be sure to add some black or white pepper corn as well, for better absorption of the turmeric. This will increase your anti-inflammatory benefits.
Berries – Add berries of your choice at the same time that you’re adding the hibiscus, or after the brew cools to retain more of the vitamin C in the berries. In that case, refrigerate for 24 hours to extract the berry flavor before making the soda. Frozen berries would work fine. You can also add some fresh berries at serving time for a nice display. I think raspberries would look awesome.
Orange zest – Add to the cold water before heating it. If you want to include the juice too, add it during bottling. I think orange makes a perfect flavor companion to hibiscus.
Lemon – If using zest, add to the cold water before heating. If you want to add some lemon juice, add it after the brew has cooled or at bottling. I tried it with 2 tablespoons of lemon juice in a pint, and thought it was too tangy. The hibiscus adds plenty of tang on its own, but the lemon flavor from the zest and maybe a tiny squirt of the juice is a nice, refreshing companion.
Another way to make this soda is by brewing all ingredients in cold water, which is like a cold brew tea. Heat the water to boiling, add the sugar, cool it down to room temperature and add your berries. Downside is that you won’t be able to extract as much flavor from your ingredients and you’ll have to leave the tea to infuse for 24 to 48 hours before using it for your second fermentation.
My preference is the hot brewing method, which is what I provide in this recipe.
Tip: If you have access to Sumac berries, you can make sumac lemonade this exact same way, except use a couple of large Sumac drupes added to the boiling water instead of hibiscus. Crush and let it steep for a few hours and strain through a coffee filter or tightly woven cloth to strain out the fine hairs. I’d love to make this and post it here, but I don’t have a sumac tree.
Equipment
Pot for heating water – Use a saucepan that’s large enough to comfortably accomodate not only the water, but also the herbs and sugar you’ll add later.
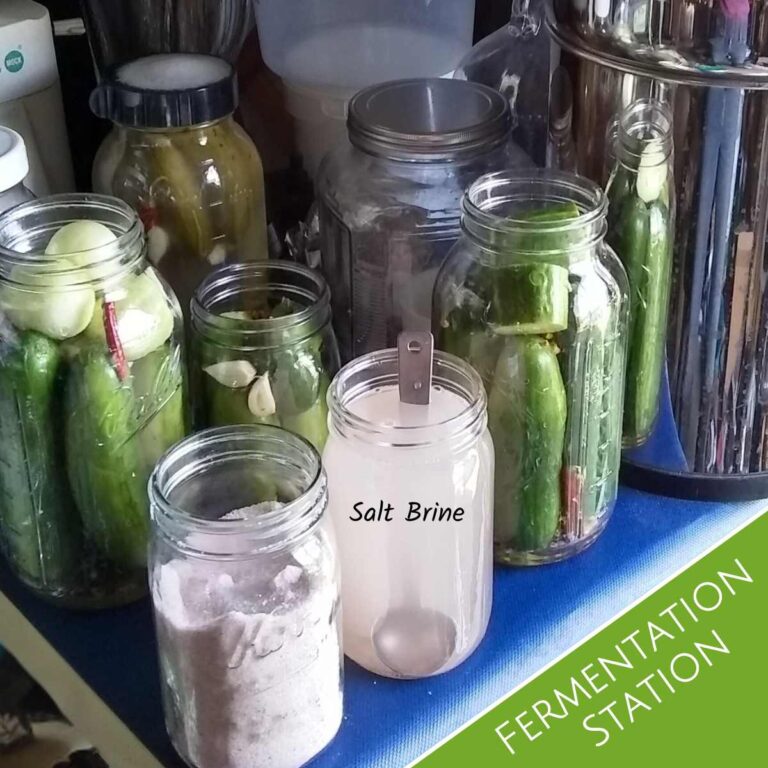
Fermentation bottles – Hands down the best bottles I’ve used for fermenting, are those grolsch style beer bottles. They are best for keeping the fizzies in and they are made to withstand the pressure from within.
Second best are reused kombucha or water kefir drink bottles from the health food store refrigerator. I used mine over and over for years. They are not pretty, I can’t get that label off, but they work really well if you screw the lid on very tight.
Canning jars are not recommended since they are not built for that kind of pressure from within and I find that they tend to slightly leak when pressurized.
This recipe makes 3 pints.
Measuring cups – You can use a tablespoon measure or a 1/8 cup measure and a one cup measure.
Funnel – This is a must for those grolsch style bottles with their tiny opening, but the kombucha bottles often have a larger opening and you can get by without a funnel on those. But it makes things easier.
Strainer – You’ll need that to strain your cultures. It’s not needed for whey.
Bottle Brush – This is not required, but it is hard to clean those beer bottles without a good long bottle brush that is skinny enough. If you get the grolsch bottles, I highly recommend getting a brush with it!
Cultures
You will need a culture to make this recipe. Since we are using a hot brewed tea, there won’t be any bacteria to create its own fizz. The starter culture is much more reliable for getting your sodas going in the right direction. Choose the one that works best for you!
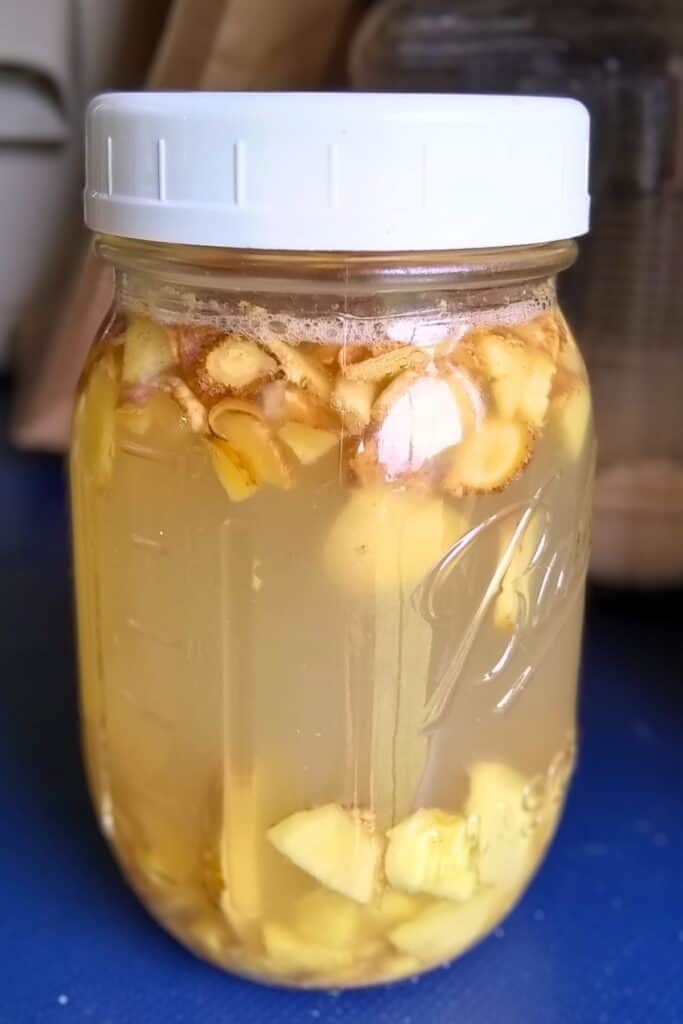
Ginger Bug – I love my ginger bug. This culture is very easy to make and maintain. You can even keep it in the fridge and only feed it once every few weeks to keep it going. And she loves to make fizzy sodas!
Dandelion Bug – My newest fermentation critter, has been bubbling away happily for a month now and made several nice sodas since. I love the dandelion bug, because I don’t have to buy any ingredients except the sugar for this one. I’ll just do some weeding and a little cleaning and I’ve got my material for this bug.
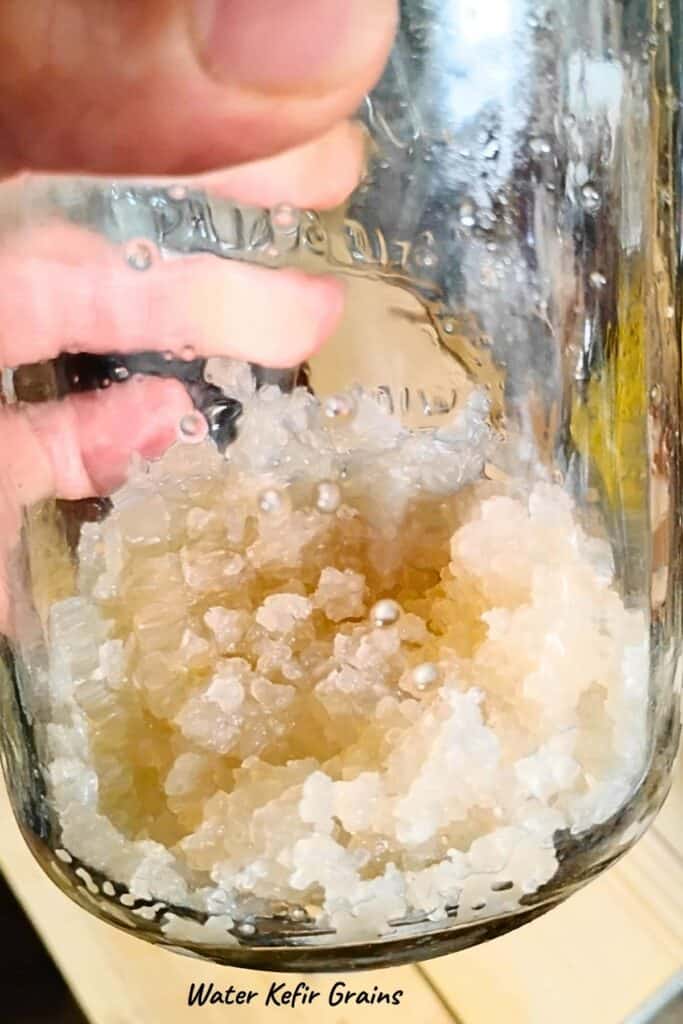
Water Kefir – Water kefir is really an awesome creature. Those little grains are easy to maintain and it’s ready to make sodas when you are. Water kefir has the most diverse probiotic makeup of all these cultures here. So it is a great one to use for making your sodas. You have to buy water kefir grains for this starter, but once you have them, you can keep it going indefinitely. If you want to make your own, I recommend you get live Water Kefir Grains to start your own water kefir. The instructions on how to start it and keep it going will be included.
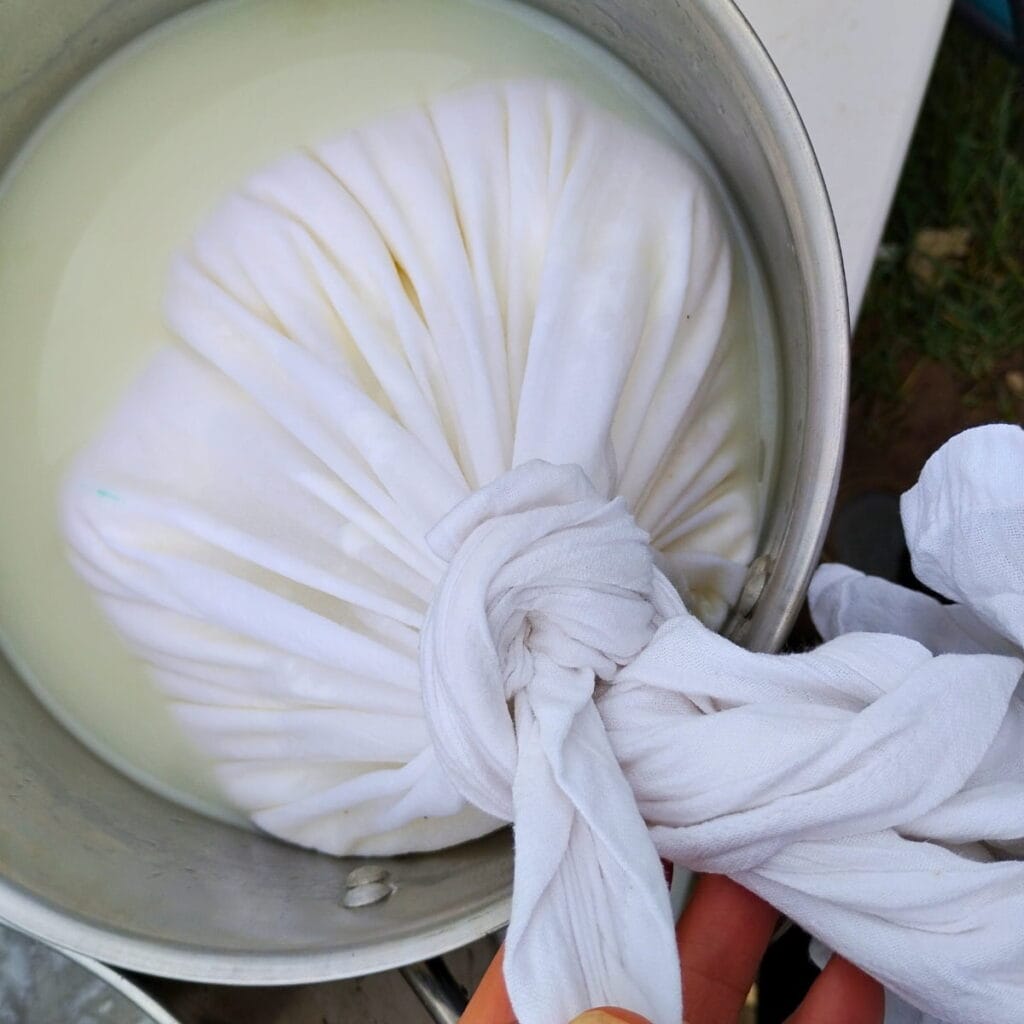
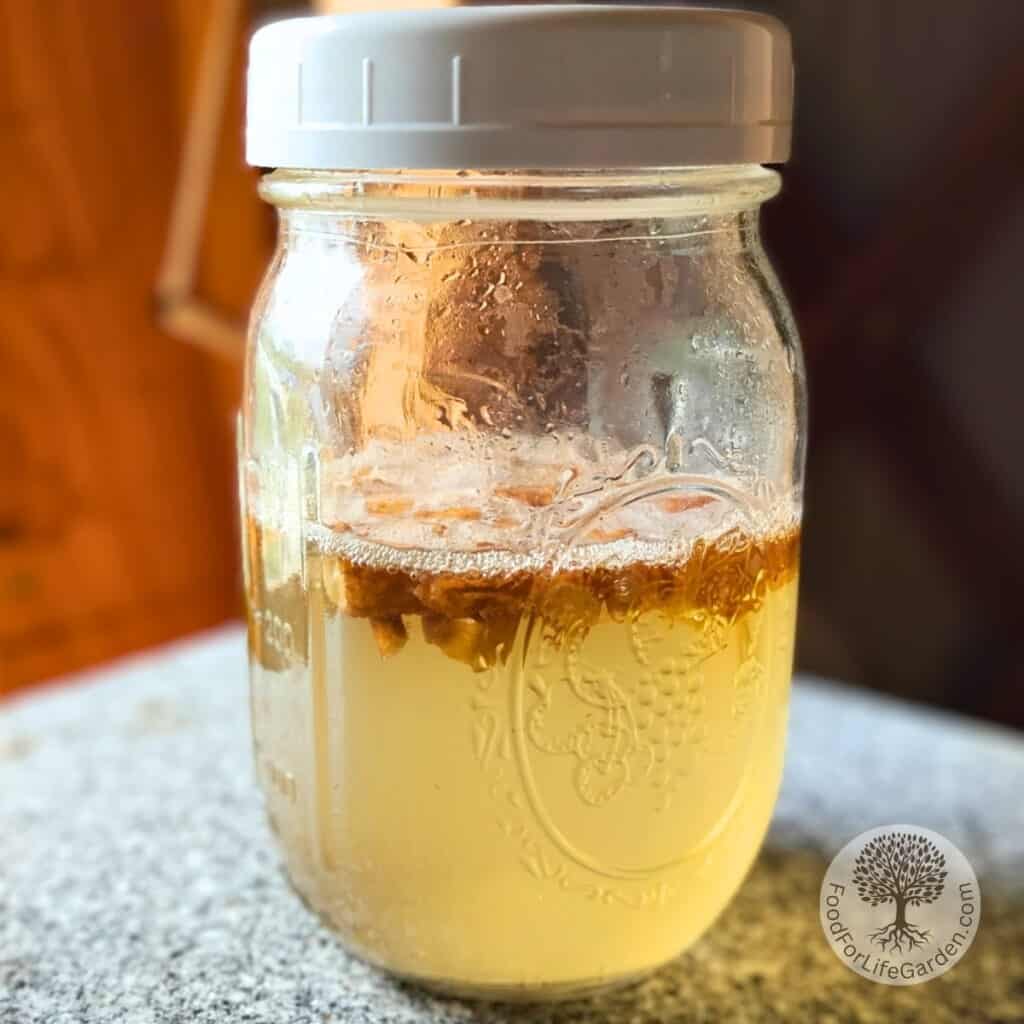
Whey – If you do your own dairy and make cultured dairy products like chevre, quark, clabber cheese, yogurt, or hard cheeses, or if you’re straining purchased yogurt with live bacteria, you will end up with this precious clear liquid called whey. As long as it has live bacteria in it, you can use it for making this soda. Avoid whey from cooked cheeses or pasteurized yogurts. We need the live bacteria in it to make the fizz.
Ingredients
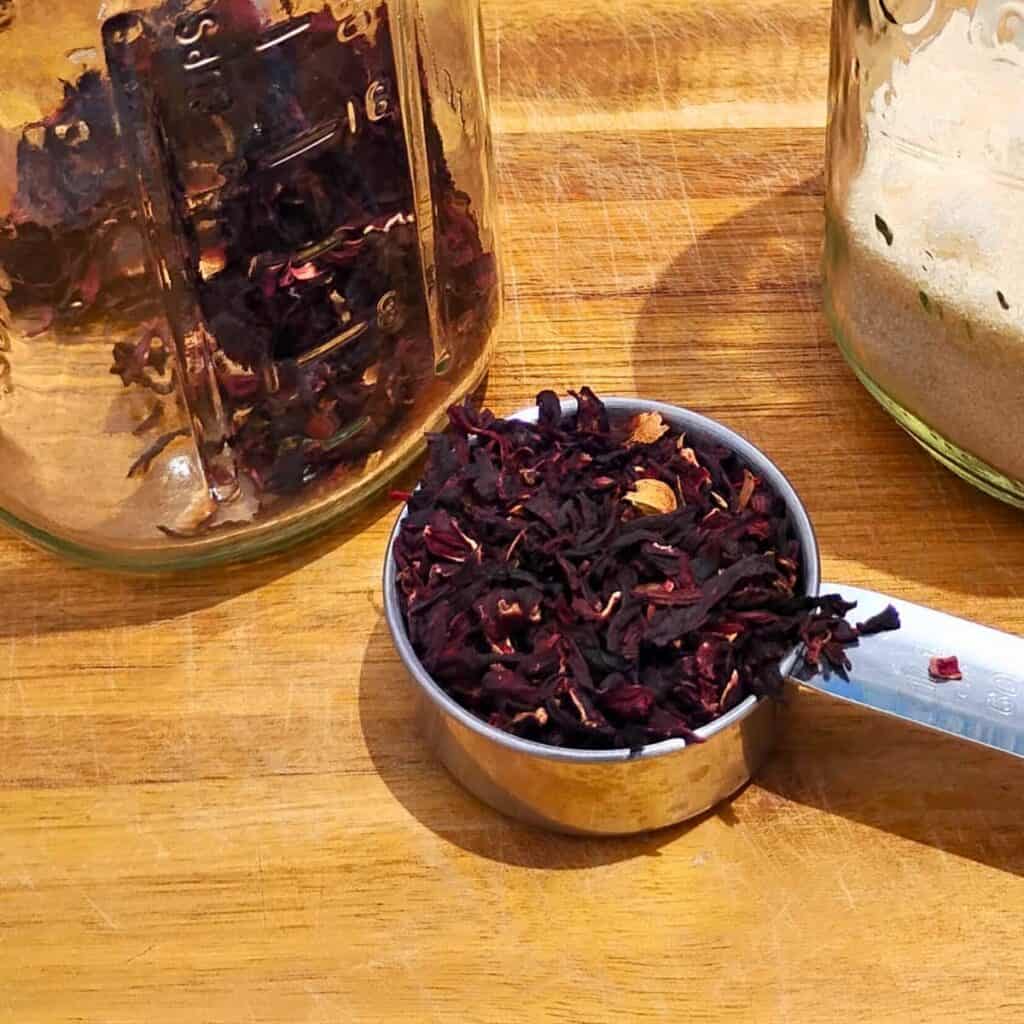
Hibiscus flowers and calyces – I much prefer the cut and sifted, dried Hibiscus, usually called Hybiscus flowers, over the powdered teabags. Whenever a herb is powdered, it starts to lose its quality.
Cane Sugar – I use evaporated cane juice for sodas most of the time. You can also use panela sugar (same as sucanat, or jaggery) , which have a much stronger molasses flavor. I like it in some drinks but it’s a bit overpowering in others. Coconut sugar will work, and Honey or Maple syrup too. Honey might slow down fermentation, because it tends to inhibit bacterial growth, which is what we’re trying to achieve.
Starter culture – Choose one of the four cultures mentioned above, water kefir, whey, ginger bug or dandelion bug.
Filtered water – Avoid chlorinated water such as tap water. Chlorine is meant to kill bacteria and we need those! Bottled water will work too. I like to filter my trucked-in well water or rain water with my Royal Berkey filter unit.
Optional:
Mint leaves – I love to just drop a few mint leaves into my serving cup when I drink it. It gives a subtle cooling and minty hint to the drink, which I find very appealing. If you would like a stronger mint flavor, just add some when you brew your tea, right along with the hibiscus. Remember that this tea will be concentrated and mixed with half other liquids later, so add enough to suit your preference. I like peppermint tea in this recipe, but you could experiment with other mints as well, such as apple mint or spearmint.
Lemon balm – This will add a nice hint of lemon flavor without the extra tang. And it will support the calming and stress relieving qualities of the hibiscus for a calming and relaxing drink.
Orange zest and/or juice – I think orange pairs very well with hibiscus. Use the zest of an orange and the juice too if you like. Follow the variation instructions on how to best add it.
Lemon zest and/or juice – See my notes in variations on when to add the zest and juice of lemons. I think the juice is not necessary since the hibiscus flowers are tangy on their own, but a small splash of it will help highlight the refreshing nature of this soda.
Ginger and/or Turmeric – I love adding the anti-inflammatory properties of ginger and turmeric to my teas or sodas. So this is one of my favorite add-ins. It is best to simmer roots for a few minutes to extract the most benefits. And add some black or white pepper for better absorbance. You can get organic fresh ginger or turmeric root at Azure Standard. Or you might like Organic bottled ginger juice for convenience. I like Starwest for dried ginger. They don’t offer the turmeric granules I prefer over powder, but you can try this dried turmeric.
Berries – Your favorite fresh or frozen berries will work great. Either add them during tea brewing for quicker results or after the tea has cooled for a cold-brew. However you’ll need to let it infuse for about 24 hours in this case.
Dried berries should be simmered for 10-15 minutes to soften them, then mash.
If you’re using elderberries, fresh or dried, they should be simmered for about 10-15 minutes. Then crush them to help release all the flavor and benefits.
Instructions For Making Naturally Fermented Hibiscus Soda
Brew The Hibiscus Tea
If you’re adding ginger, turmeric, lemon or orange zest, dried berries or elder berries, add it to the cold water, bring the water to a boil, and let it simmer for 10-15 minutes before proceeding.
Otherwise, just heat the plain water to boiling.
Add the sugar, stir to dissolve
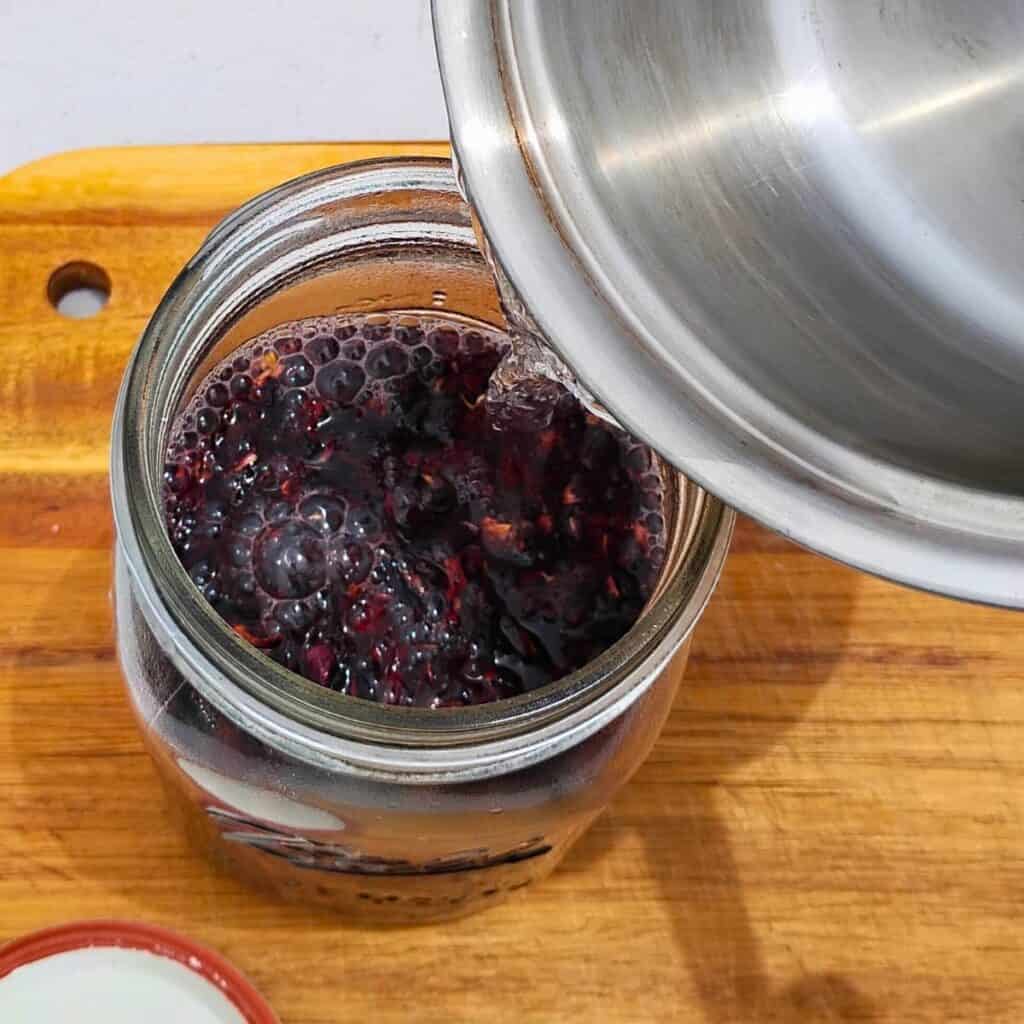
Add the hibiscus calyces and, if using, mint or fresh berries. Turn off the heat. Cover the pot and let it steep for at least 10 minutes, or, if you want it stronger and more sour, let it steep longer.
Let it cool to below 90 degrees so you don’t kill your starter culture bacteria before proceeding.
You can also put it in the refrigerator overnight to extract more flavor. If you want to add fresh berries after the brew has cooled, refrigerate it all for 24 hours, then proceed.
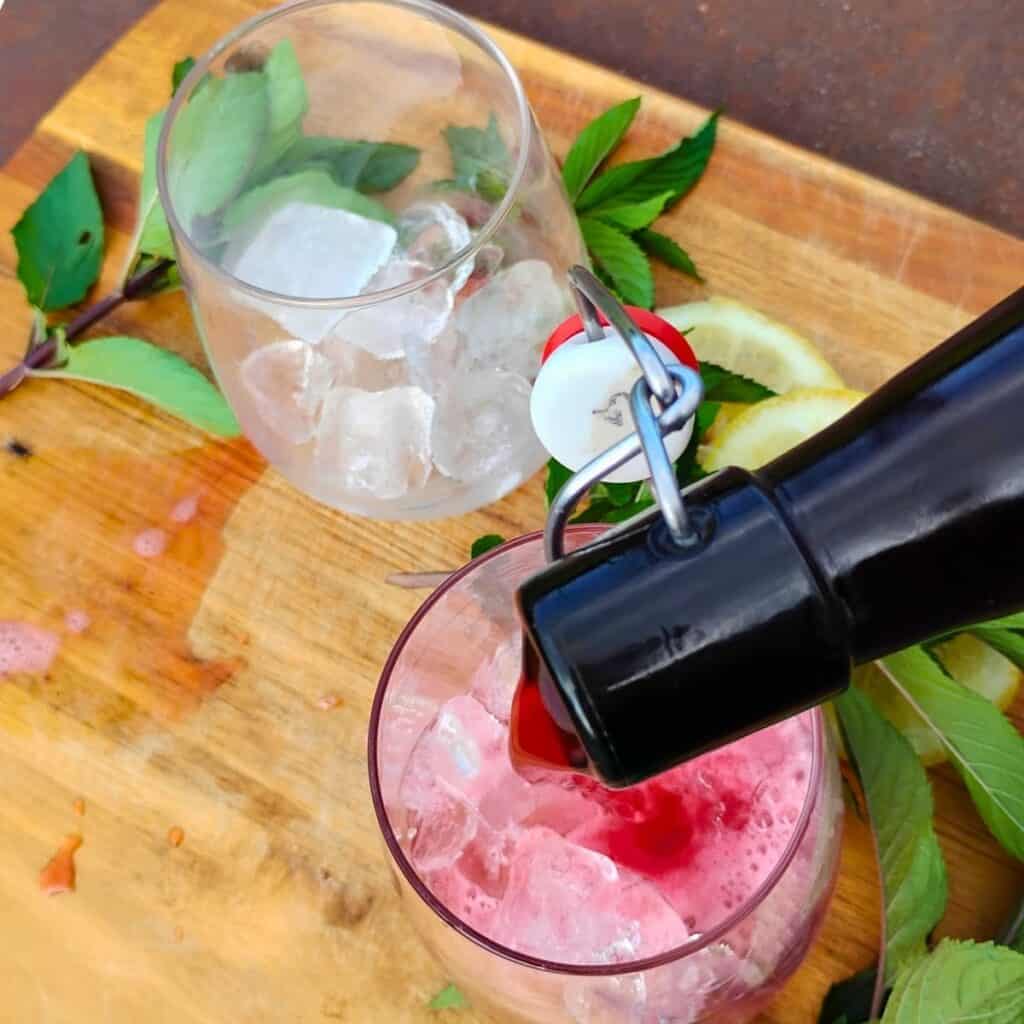
Add The Starter Culture
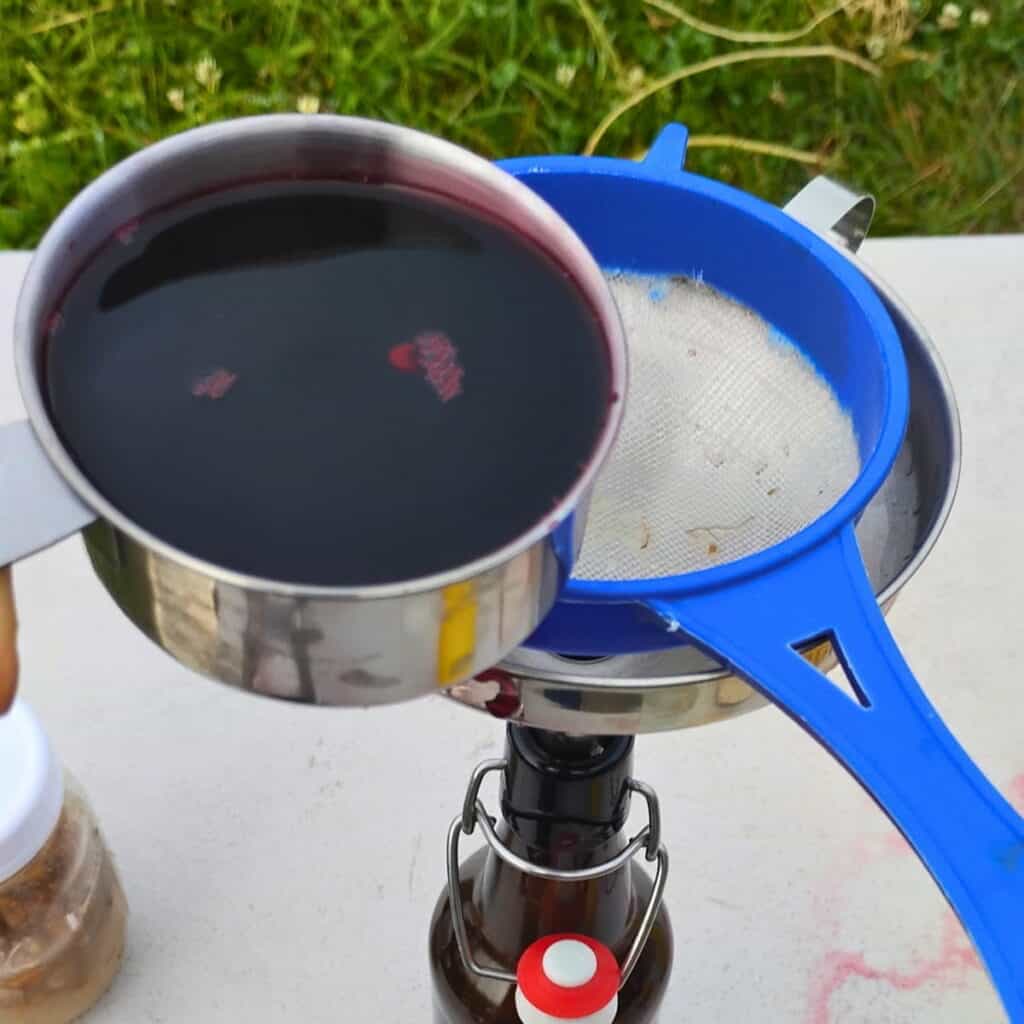
Using a strainer measure out one cup of the brewed Hibiscus syrup per bottle and, using a funnel, add it to each pint bottle.
Add lemon or orange juice to the bottles if you choose to do so now.
Use your choice of starter culture and follow these specific instructions:
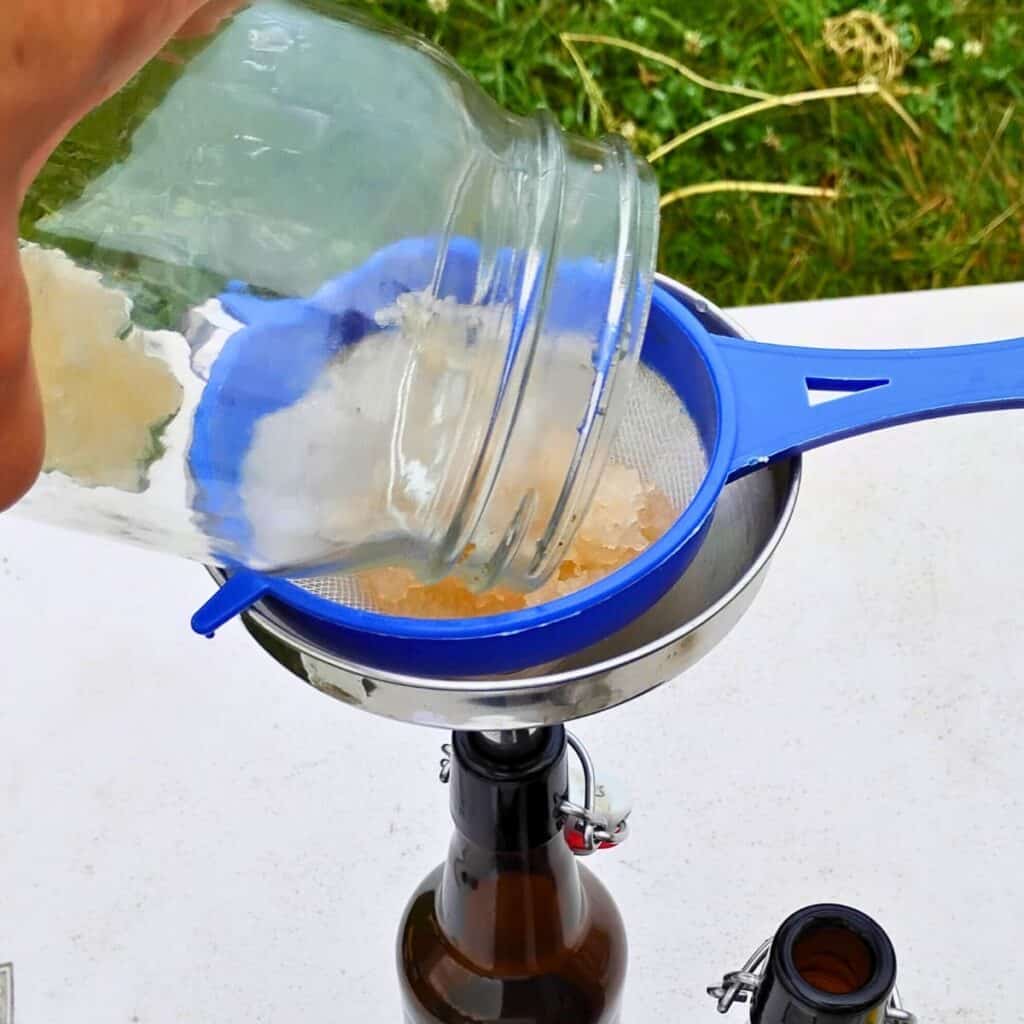
Water kefir: Using a funnel and strainer, add enough Water kefir to fill the bottles to within 2 inches of the top.
Whey: Using a funnel, add ¼ cup of whey. Fill the bottles to within 2 inches of the top with filtered water.
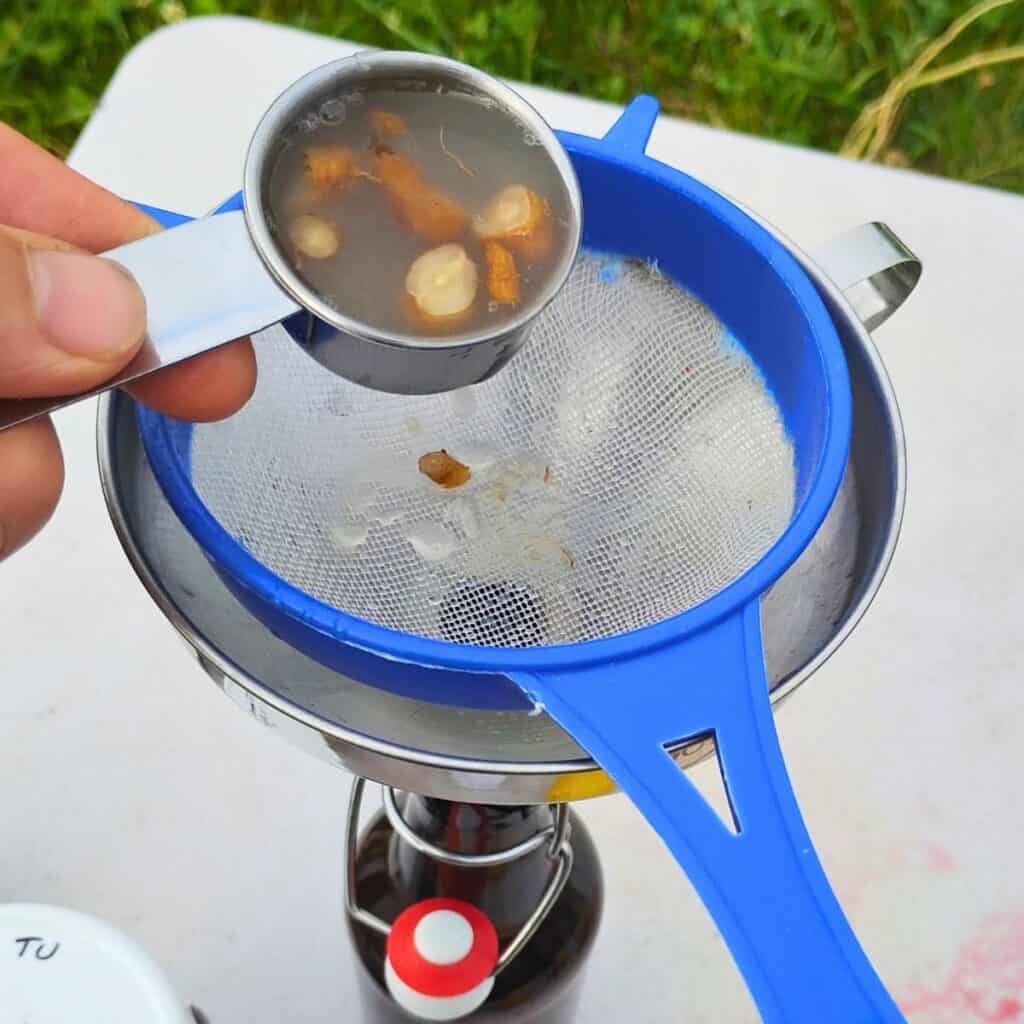
Ginger bug or dandelion bug: Measure out ¼ cup of either starter culture. Add the starter to the bottles, using a strainer and funnel. Now add filtered water to fill the bottles to within 2 inches of the top.
Now is a good time to feed your culture and replace the water. Refrigerate or leave out for the next batch.
Cap and Ferment
Cap your bottles tightly! You’ll want to ferment them until they get fizzy. If you want a less sweet soda, let it ferment an extra day or two. I like to ferment them for 2-3 days to lower the sugar content. Be sure to burp the bottles once or twice a day after the first 24 hours.
If you don’t get much fizz after 24 hours, just keep fermenting it a little longer, till you get a good amount of fizz when you burp your bottle.
Depending on your room temperature, the strength and type of your starter, and even the ingredients you use, fermentation times can greatly vary. I find that whey takes a bit longer than the bugs or waterkefir. Adding fruit or sweet juice can accelerate fermentation.
The best temperature for fermenting is approximately 72 to 85 degrees.
Refrigerate
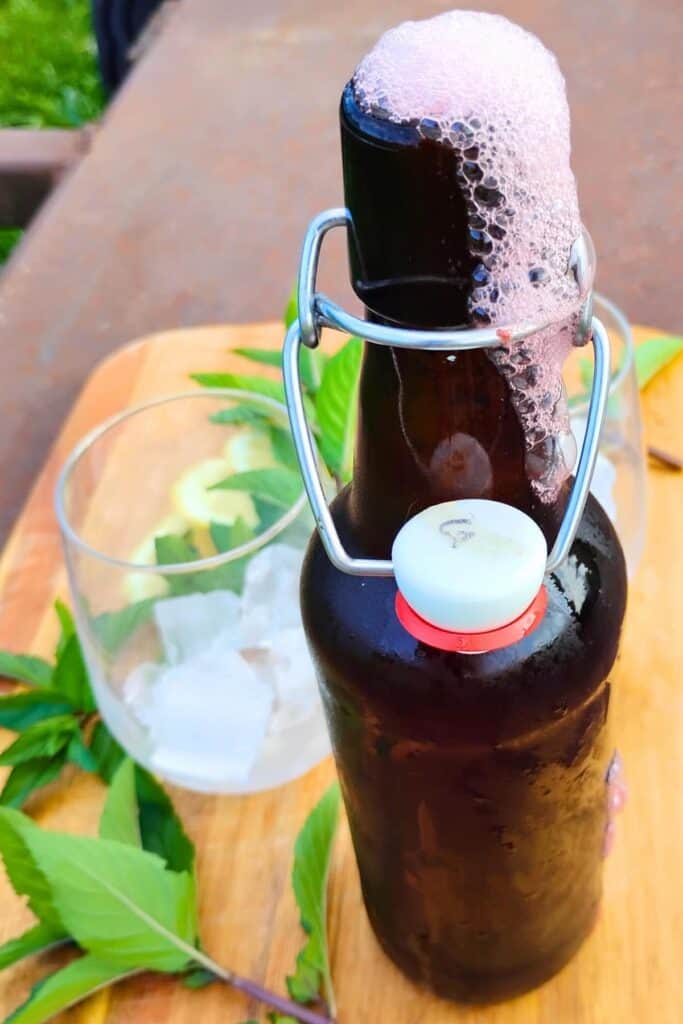
Refrigerate before you drink it. If you don’t, you’ll get a mouthful of warm foam, and your soda may spray out when you open it warm. You might lose much of your wonderful soda this way. Chilling calms it down a bit and it tastes better in my opinion. It can still climb out of the bottle after chilling, so be prepared.
Then enjoy your awesome, fizzy hibiscus soda!
Storing
Store in the refrigerator. Since the soda will continue fermenting, but very slowly, it may get less sweet over time. You’ll also want to burp it occasionally if you don’t consume it within a few days. I’d use it within 6 months, but it should be ok to drink for longer, however, it will turn a bit more tart and less sweet.
If your soda loses its fizz after opening, you can just leave it out, tightly sealed, in a warm area for a day to get some fizz back.
Your Questions answered
Enjoy Your Incredibly Delicious Fermented, Probiotic Hibiscus Soda
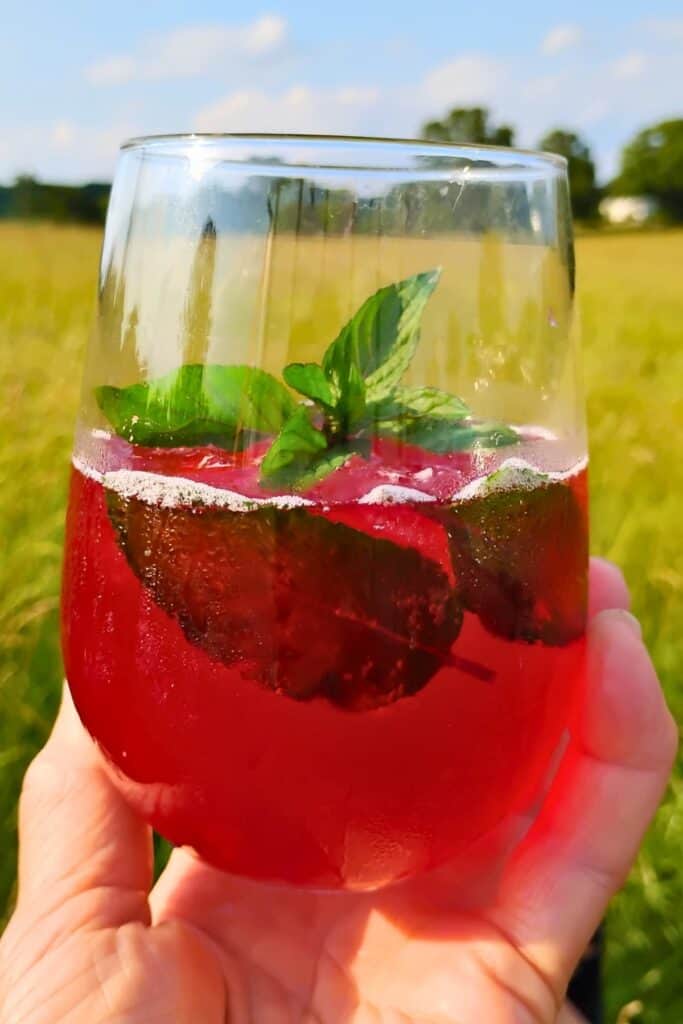
If you like hibiscus tea, you’ll love this fantastic hibiscus soda. If you’ve never tasted hibiscus, you’re in for a treat! This plant has so many great health benefits and gives this soda that awesome tang we love! And it adds a fabulous color to your fermented drinks. Making homemade probiotic beverages is so easy and so much healthier than store-bought sodas, and you’ll get all those probiotic gut-healing benefits! What’s not to love?
I’d love to hear about your favorite homemade sodas. Leave me a comment and tell me about it. And I welcome any suggestions for more soda recipes you’d like to see on this blog. Don’t hesitate to ask if you have questions! And I would totally appreciate a ⭐⭐⭐⭐⭐ rating if you like this hibiscus soda recipe or the information in this article!
Join my community for more great recipes and homestead tips and ideas. I’m always adding new content. Don’t miss any new posts and learn more about my off-grid farm life.
More Content Like This
Ginger bug recipe Meet the ginger bug and learn how to get one started for yourself. It’s the vital ingredient to making an old fashioned home brewed probiotic soda that will rock your socks off!
Dandelion Bug recipe An alternative to ginger bug if you’d rather use a local, foraged source for your soda starter culture. Dandelion root works fantastic for making healthy homemade sodas!
Awesome Uses For Whey – Save the whey! And use it in dozens of ways. You’ll find something to do with whey for every single drop. It’s nutritious, versatile, healthy, and makes great fizzy sodas!
Probiotic Fermented Lemonade Soda -A refreshing fizzy soda that will cool you down on hot days and support your gut health!
Best ginger beer recipe: fizzy, delicious, healthy! Create your own ginger beer soft drink from scratch, using ginger bug.
Health benefits of ginger beer Learn all about the awesomeness of ginger.
Switchel Recipe – A refreshing electrolyte drink for hydration during summer activities.
Healthy Ginger Ale Recipe for a quick refreshing pick-me-up!
Preserved Lemon Confit – Preserving lemons is not just a great way to add storage life to citrus, and it transforms the humble lemon into a delicacy. Great for flavoring beverages too!
How To Grow Ginger At Home – All about growing ginger from start to harvest. Grow it in the garden, greenhouse, or in pots. Plus how to store or preserve ginger, and how to use it.
Pin This Recipe For Later
Shop This Post
Berkey filter
Funnel
Grolsch type bottles
Bottle Brush
Strainer
Measuring cups
Organic fresh ginger root
Organic bottled lemon juice
Organic bottled ginger juice
Organic dried ginger
Organic dried turmeric
Water Kefir Grains
Hibiscus Flowers
Evaporated cane juice
Panela, sucanat
Coconut sugar
Honey
Maple syrup
Hibiscus sabdariffa Seeds for planting
How To Make Naturally Carbonated Hibiscus Soda
Equipment
- Pot for heating water
- 3 pint fermentation bottles
- Measuring cups
- A funnel
- A strainer
Ingredients
Cultures
- 6 Tbsp Ginger Bug
- 6 Tbsp Dandelion Bug
- ¾ cup Water Kefir
- ¼ cup Whey
Other Ingredients – Choose organic if at all possible for best results!
- ½ cup Hibiscus calyces – Loose hibiscus tea or several teabags
- 3 cups Filtered water – Avoid chlorinated water.
- ¾ cups Cane Sugar
Optional (see Notes for variations):
- 2 sprigs Mint leaves – Fresh when adding it to the serving glass, in the tea, fresh or dried.
- 2 sprigs Lemon balm -Use fresh in the serving glass, but for the infusion, fresh or dried is fine.
- 1 Orange zest and/or juice – fresh, frozen or dried zest, and bottled, frozen, or fresh juice.
- 1 Lemon zest and/or juice – fresh, frozen or dried zest, bottled, frozen, or fresh juice.
- 2 inches Ginger and/or Turmeric – fresh or dried.
- ½ cup Berries – fresh, dried or frozen. If you use dried berries, heat them with the water, and simmer for a few minutes to soften.
Instructions
Brew The Hibiscus Tea
- If you're adding ginger, turmeric, lemon or orange zest, dried berries, or elderberries, add it to the cold water, bring the water to a boil, and let it simmer for 10-15 minutes before proceeding.
- Otherwise, just heat the plain water to boiling.
- Add the sugar, stir to dissolve
- Add the hibiscus calyces, and, if using, mint or fresh berries. Turn off the heat. Cover the pot and let it steep for at least 10 minutes, or, if you want it stronger or more sour, let it steep longer.
- Let it cool to below 90 degrees so you don’t kill your starter culture bacteria before proceeding.
- You can also put it in the refrigerator overnight to extract more flavor. If you want to add the berries after the brew has cooled, refrigerate it all for 24 hours, then proceed.
Add The Starter Culture (See Notes)
- Measure out one cup of Hibiscus syrup and, using a strainer and funnel, add it to each pint bottle.
- Add lemon or orange juice to the bottle if you choose to do so now.
- Use your choice of starter culture and follow these specific instructions:
- Water kefir: Using a funnel and strainer, add enough Water kefir to fill the bottle to within 2 inches of the top.
- Whey: Using a funnel, add ¼ cup of whey. Fill the bottle to within 2 inches of the top with filtered water.
- Ginger bug or dandelion bug: Measure out ¼ cup of either starter culture. Using a strainer and funnel, add the starter to the bottle. Now add filtered water to fill the bottle to within 2 inches of the top.
Cap and Ferment
- Cap your bottles tightly! You'll want to ferment them until they get fizzy. If you want a less sweet soda, let it ferment an extra day or two. I like to ferment them for 2-3 days to lower the sugar content. Be sure to burp the bottles once or twice a day after the first 24 hours.If you don't get much fizz after 24 hours, just keep fermenting it a little longer, till you get a good amount of fizz when you burp your bottle. Depending on your room temperature, the strength and type of your starter, and even the ingredients you use, fermentation times can greatly vary. I find that whey takes a bit longer than the bugs or waterkefir. Adding fruit or sweet juice can accelerate fermentation. The best temperature for fermenting is approximately 72 to 85 degrees.
Refrigerate
- Refrigerate before you drink it. If you don't, you'll get a mouthful of warm foam, and your soda may spray out when you open it warm. You might lose much of your wonderful soda this way. Chilling calms it down a bit and it tastes better in my opinion. It can still climb out of the bottle after chilling, so be prepared.
Storing
- Store in the refrigerator. Since the soda will continue fermenting, but very slowly, it may get less sweet over time. You'll also want to burp it occasionally if you don't consume it within a few days. I'd use it within 6 months, but it should be ok to drink for longer, however, it will turn a bit more tart and less sweet.If your soda loses its fizz after opening, you can just leave it out, tightly sealed, in a warm area for a day to get some fizz back.
This is such a refreshing drink on a hot day. If you love soda drinks but hate the unhealthy ingredients in commercial sodas, give this a try. It’s delicious and so much healthier! You can ask me any questions here in the comments, I’ll answer as soon as I’m able.
All these benefits, plus a beautiful color! I love all these fermenting ideas and how versatile the recipe is. Definitely on my list to try soon.
That’s great Rachel! I hope you love it as much as I do! And yes, it is a beautiful color!
Wow! I didn’t know how beneficial Hibiscus is for us. I am making quark today and I’ll use the whey for more cheesemaking and for the culture for this recipe. Thanks, Heidi! I’m looking forward to trying this. Who knew hibiscus can be beneficial for breast health? Love this!
Right?! I love that too. God blessed us with wonderful plants to keep us healthy!
Love this! Sound delicious- we love anything Hibiscus flavored- and healthy too! Win-win!
Hey Kelly, that is just what I love too. Glad you like this!
Wow! What a beautiful and healthy summer refreshment!
Thanks so much for commenting, Kirsten!
This sounds so refreshing. Love that it has beneficial ingredients!
Hey Alisha! It’s always great when something is delicious and healthy! That’s what I like to go for!
This recipe is perfect for summer! Naturally carbonated probiotic hibiscus soda seems like a cousin to kombucha which is really neat.
Hello Jenni! It is similar to kombucha. And it tastes amazing!
This sounds delicious! I love hibiscus! And the health benefits sound limitless especially with all the possible variations of adding different herbs! I do not have all I need to make this yet, so pinned for later!
That’s awesome, Priscilla, thanks for your kind comment and I do hope you get to try it. It’s wonderful!
This looks so refreshing and nourishing! I love that it’s naturally carbonated and full of probiotics—such a fun way to enjoy the benefits of hibiscus. Can’t wait to try this at home!
Thanks so much for your comment, Emily! Let me know what you think if you get to try it! I think you’ll love it!
Such a delicious drink! Thanks for sharing!
You’re welcome, Alysa! Thanks so much for reading!
This is such a wonderful drink! I love the health benefits. It’s sounds so refreshing for these hot summer days!
Hey Kimberley! Thanks so much for your comment. It is super refreshing and delicious!
I am horrible at making fizzy sodas & ginger bugs. They always get away from me but this one sounds so good (& you really do make it seem possible) that I have to try again!
Oh no, I hope you will succeed with it this time. It’s so worth it, you’ll see. Best of luck!
This looks so refreshing. Definitely want to try this for all of the benefits!
It’s a great plant with so much going for it. I hope you get to try it, let us know how it turns out!
Wow, I can’t wait to try this and share it with my girlfriend who has a hibiscus plant! Thank you for sharing.
Oh, how awesome, and you’re welcome! I’d love to get a hibiscus plant, it’s on my list, but in my climate I won’t be able to see it flower most likely. But I think it would be super cool to grow it!
This looks so good and perfect for summer! I would love to try making this!
Hi Rachel, thanks so much for your comment! I hope you get to make it, I am sure that you’ll love this!
This looks absolutely incredible! Can’t wait to give it a go! 💕
Thanks so much for visiting, Jessica! I hope you get to try it, and I think you’ll love this!
This looks fantastic!! I love hibiscus tea and with the added bubbles and probiotics sounds even better, such a great idea for a healthy, refreshing summer drink! 🙂
Hey Marta, I think you’d love this fizzy version if you love hibiscus tea. It’s so delicious!
We tried this, and it as delicious! Also tried with fresh mint, which was great, and I have a batch with some raspberry juice going now. Definitely recommend!
That’s great, thanks so much for sharing, and I’m glad you liked it!