Go Back
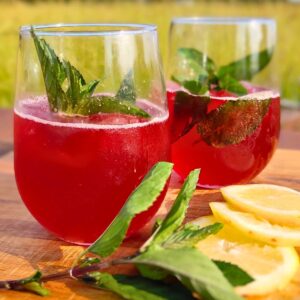
two glasses filled with fermented hibiscus soda, ice cubes and mint leaves. there are more mint leaves and lemon slices in the foreground.

How To Make Naturally Carbonated Hibiscus Soda

Naturally fermented hibiscus soda is a delicious, refreshing, tangy summer drink made with a soda starter for natural carbonation and probiotics.
5 from 6 votes
Prep Time 15 minutes
Fermenting time 2 days
Total Time 2 days 15 minutes
Course Drinks
Servings 3 pints

Equipment

  • Pot for heating water
  • 3 pint fermentation bottles
  • Measuring cups
  • A funnel
  • A strainer

Ingredients
  

Cultures

  • 6 Tbsp Ginger Bug
  • 6 Tbsp Dandelion Bug
  • ¾ cup Water Kefir
  • ¼ cup Whey

Other Ingredients - Choose organic if at all possible for best results!

  • ½ cup Hibiscus calyces - Loose hibiscus tea or several teabags
  • 3 cups Filtered water - Avoid chlorinated water.
  • ¾ cups Cane Sugar

Optional (see Notes for variations):

  • 2 sprigs Mint leaves - Fresh when adding it to the serving glass, in the tea, fresh or dried.
  • 2 sprigs Lemon balm -Use fresh in the serving glass, but for the infusion, fresh or dried is fine.
  • 1 Orange zest and/or juice - fresh, frozen or dried zest, and bottled, frozen, or fresh juice.
  • 1 Lemon zest and/or juice - fresh, frozen or dried zest, bottled, frozen, or fresh juice.
  • 2 inches Ginger and/or Turmeric - fresh or dried.
  • ½ cup Berries - fresh, dried or frozen. If you use dried berries, heat them with the water, and simmer for a few minutes to soften.

Instructions
 

Brew The Hibiscus Tea

  • If you're adding ginger, turmeric, lemon or orange zest, dried berries, or elderberries, add it to the cold water, bring the water to a boil, and let it simmer for 10-15 minutes before proceeding.
  • Otherwise, just heat the plain water to boiling.
  • Add the sugar, stir to dissolve
  • Add the hibiscus calyces, and, if using, mint or fresh berries. Turn off the heat. Cover the pot and let it steep for at least 10 minutes, or, if you want it stronger or more sour, let it steep longer.
  • Let it cool to below 90 degrees so you don't kill your starter culture bacteria before proceeding.
  • You can also put it in the refrigerator overnight to extract more flavor. If you want to add the berries after the brew has cooled, refrigerate it all for 24 hours, then proceed.

Add The Starter Culture (See Notes)

  • Measure out one cup of Hibiscus syrup and, using a strainer and funnel, add it to each pint bottle.
  • Add lemon or orange juice to the bottle if you choose to do so now.
  • Use your choice of starter culture and follow these specific instructions:
  • Water kefir: Using a funnel and strainer, add enough Water kefir to fill the bottle to within 2 inches of the top.
  • Whey: Using a funnel, add ¼ cup of whey. Fill the bottle to within 2 inches of the top with filtered water.
  • Ginger bug or dandelion bug: Measure out ¼ cup of either starter culture. Using a strainer and funnel, add the starter to the bottle. Now add filtered water to fill the bottle to within 2 inches of the top.

Cap and Ferment

  • Cap your bottles tightly! You'll want to ferment them until they get fizzy. If you want a less sweet soda, let it ferment an extra day or two. I like to ferment them for 2-3 days to lower the sugar content. Be sure to burp the bottles once or twice a day after the first 24 hours.
    If you don't get much fizz after 24 hours, just keep fermenting it a little longer, till you get a good amount of fizz when you burp your bottle.
    Depending on your room temperature, the strength and type of your starter, and even the ingredients you use, fermentation times can greatly vary. I find that whey takes a bit longer than the bugs or waterkefir. Adding fruit or sweet juice can accelerate fermentation.
    The best temperature for fermenting is approximately 72 to 85 degrees.

Refrigerate

  • Refrigerate before you drink it. If you don't, you'll get a mouthful of warm foam, and your soda may spray out when you open it warm. You might lose much of your wonderful soda this way. Chilling calms it down a bit and it tastes better in my opinion. It can still climb out of the bottle after chilling, so be prepared.

Storing

  • Store in the refrigerator. Since the soda will continue fermenting, but very slowly, it may get less sweet over time. You'll also want to burp it occasionally if you don't consume it within a few days. I'd use it within 6 months, but it should be ok to drink for longer, however, it will turn a bit more tart and less sweet.
    If your soda loses its fizz after opening, you can just leave it out, tightly sealed, in a warm area for a day to get some fizz back. 

Notes

Cultures

You will need a culture to make this recipe. Since we are using a hot brewed tea, there won't be any bacteria to create its own fizz. The starter culture is much more reliable for getting your sodas going in the right direction. Choose the one that works best for you!

Ginger Bug - I love my ginger bug. This culture is very easy to make and maintain. You can even keep it in the fridge and only feed it once every few weeks to keep it going. And she loves to make fizzy sodas!

Dandelion Bug - My newest fermentation critter, has been bubbling away happily for a month now and made several nice sodas since. I love the dandelion bug, because I don't have to buy any ingredients except the sugar for this one. I'll just do some weeding and a little cleaning and I've got my material for this bug.
Water Kefir - Water kefir is really an awesome creature. Those little grains are easy to maintain and it's ready to make sodas when you are. Water kefir has the most diverse probiotic makeup of all these cultures here. So it is a great one to use for making your sodas. You have to buy water kefir grains for this starter, but once you have them, you can keep it going indefinitely. If you want to make your own, I recommend you get live Water Kefir Grains to start your own water kefir. The instructions on how to start it and keep it going will be included. 
Whey - If you do your own dairy and make cultured dairy products like chevre, quark, clabber cheese, yogurt, or hard cheeses, or if you're straining purchased yogurt with live bacteria, you will end up with this precious clear liquid called whey. As long as it has live bacteria in it, you can use it for making this soda. Avoid whey from cooked cheeses or pasteurized yogurts. We need the live bacteria in it to make the fizz.

Variations:

I love fermented hibiscus soda just plain with nothing added, except a few fresh mint leaves in my serving glass. It adds a subtle, cool, minty flavor to your serving. That is my perfect drink!
Here are some more flavors you can try:
Peppermint or other mint tea - Add some peppermint leaves together with the hibiscus calyces for a cooling minty flavor, apple mint or spearmint for a sweeter mint option. 
Lemon balm tea - Add a sprig or two of lemon balm at the same time you add the hibiscus for a calming soda.
Ginger and/or Turmeric - Add to the cold water before heating it and simmer for 5 minutes before adding the hibiscus. Be sure to add some black or white pepper corn as well, for better absorption of the turmeric. This will increase your anti-inflammatory benefits.
Berries - Add berries of your choice at the same time that you're adding the hibiscus, or after the brew cools to retain more of the vitamin C in the berries. In that case, refrigerate for 24 hours to extract the berry flavor before making the soda. Frozen berries would work fine. You can also add some fresh berries at serving time for a nice display. I think raspberries would look awesome.
Orange zest - Add to the cold water before heating it. If you want to include the juice too, add it during bottling. I think orange makes a perfect flavor companion to hibiscus. 
Lemon - If using zest, add to the cold water before heating. If you want to add some lemon juice, add it after the brew has cooled or at bottling. I tried it with 2 tablespoons of lemon juice in a pint, and thought it was too tangy. The hibiscus adds plenty of tang on its own, but the lemon flavor from the zest and maybe a tiny squirt of the juice is a nice, refreshing companion. 
Another way to make this soda is by brewing all ingredients in cold water, which is like a cold brew tea. Heat the water to boiling, add the sugar, cool it down to room temperature and add your berries. Downside is that you won't be able to extract as much flavor from your ingredients and you'll have to leave the tea to infuse for 24 to 48 hours before using it for your second fermentation.
My preference is the hot brewing method, which is what I provide in this recipe.

Enjoy Your Incredibly Delicious Fermented, Probiotic Hibiscus Soda

If you like hibiscus tea, you'll love this fantastic hibiscus soda. If you've never tasted hibiscus, you're in for a treat! This plant has so many great health benefits and gives this soda that awesome tang we love! And it adds a fabulous color to your fermented drinks. Making homemade probiotic beverages is so easy and so much healthier than store-bought sodas, and you'll get all those probiotic gut-healing benefits! What's not to love?
Keyword dandelion bug, fermented drinks, fermented foods, ginger bug, homemade beverages, homemade soda, made from scratch sodas, naturally carbonated, probiotic beverages, summer drinks, water kefir, whey soda, wild fermentation