Fermented Onions are instant burger boosters and improve any salads or sandwiches. If you have extra onions, ferment them!

This post contains affiliate links, which means I make a small commission at no extra cost to you if you click through and make a purchase. See my full disclosure here.
Do you have some extra onions that you’d like to preserve without taking up freezer space? Maybe they aren’t the storage kind that keep in a basket for months. Here is your solution: Ferment your onions!
They will keep in the fridge or root cellar for a year or more and provide an instant upgrade to any sandwich or burger. They make a delicious salad or meat topping and they will boost your immune system just as a side benefit. How awesome is that?
May I suggest other fermented recipes? For all the basics of fermenting, visit my article Fermented vegetables, an introduction. You will adore this fantastic, zesty Fermented Tomato Salsa, it’s summer in a jar! Another delicious fermented fruit recipe is Fermented Cantaloupe. And you will love Lacto fermented sauerkraut, famously healthy and so tasty and Fermented Coleslaw, a cabbage and roots medley with fabulous coloring and awesome flavor! Make your own probiotics from scratch.
Why you’ll love fermented onions
- They are great on burgers, sandwiches, salads, baked potatoes, tacos, …
- They improve your digestion and help balance your gut bacteria.
- They support the immune system.
- They are great medicine for cold and flu season.
- Fermented onions make all your meals more delicious.
- Fermented onions are a convenient condiment, ready to use whenever you need them.
- They keep for a year or more.
- You can make your non-storage onions store for a long time by fermenting them.
How to make fermented onions

I’ve got several jars of onions fermenting on my fermentation station counter right now. They are bubbling away and I can’t wait to put some on my roasted pork next time I make some. But they are delicious just on their own!
Fermenting onions is a great way to capture the health benefits of onions and even improve them by adding probiotic live bacteria. What a way to boost your health during the times when you’ll need it most. And not only that, but they taste so good too.
Equipment
Quart size mason jar or Flip-top jar – A regular quart size canning jar works great for fermenting. However, I’ve been impressed lately with the Bormioli Fido jars. They are self venting and keep oxygen out without a special lid. They come in a lot of sizes too. Plus they look so cool and when you’re done with fermenting, they make great storage containers.
A weight – A glass fermentation weight works great and it is easy to clean. Alternatively, you can use a clean, boiled rock, a small jelly jar or a zip-lock baggie filled with brine.

A fermentation lid – I prefer to use a fermentation top or airlock. After years of fermenting, I decided that these kinds of tools are just worth their cost because they make fermenting so much easier and it rarely happens that a fermentation goes bad when using these.
But you can totally use a regular 2-piece mason jar lid. Just keep an eye on your ferment and burp the jar once a day to release pressure.
Knife and Cutting board – Unless you’re processing several quarts worth of onions, a knife will do a quick enough job. You could use a mandolin for nice, even slices and to make it go quicker.
Tamper – Optional. I love using this acacia wood tamper for pressing my fermentation ingredients into the jar.
Ingredients

2 -3 medium white, yellow or red onions, sweet or regular – Use any onions you like. This method is especially useful when you have a lot of non-storage onions that will need to be used quickly.
They could, of course, be frozen too, but frozen onions don’t taste so good on a sandwich! If you’re buying your onions, try to find organic onions for fermenting.
They are so much better for your health and they don’t contain any inhibitors or pesticides that could ruin your fermentation.

Salt – You’ll be making a brine and for a quart size jar, use 1 tablespoon of salt per 1 pint of water. I prefer to use Redmond’s Real Salt, Himalayan pink salt, Celtic sea salt, or any unrefined, additive-free sea salt.
These salts are superior to canning salt because they add valuable minerals to your fermentations. Do not use common table salt or any other salt that has additives. Even kosher salt or sea salt can have additives, so be sure to check the package label.
Filtered water – you’ll likely use about a pint of water to make enough brine for a quart size jar. Use filtered water if you can. Bottled spring water is ok too, but be sure that it has no chlorine in it. Do not use tap water if you’re on a municipal water line.
However, if that is all you have, you can boil it and let it cool without a lid, to get rid of the chlorine. Or let it sit 24 hours at room temperature without a lid on. Chlorinated water must be avoided for fermenting, because it kills the micro organisms that we need to make fermenting possible.
Optionals:

Starter culture – You can use the juice from a previously fermented vegetable or whey to give your onions a quick start at fermenting and to cut down on the salt if you prefer that. I rarely add starter culture, but this time, I did that with two of my onion batches and I left one of them plain with just salt and water.

A lime – I like a few slices of a lime mixed into the onions, but I only use those if I happen to have some organic limes and I keep the skin on, which makes the onions slightly bitter. If you don’t want your onions to get a bitter flavor, use only the juice of the limes or omit. But the lime skin is great if you use this as a remedy.
Caraway seed – I love caraway seed for fermented onions. If you love caraway seeds, add about a tablespoon.
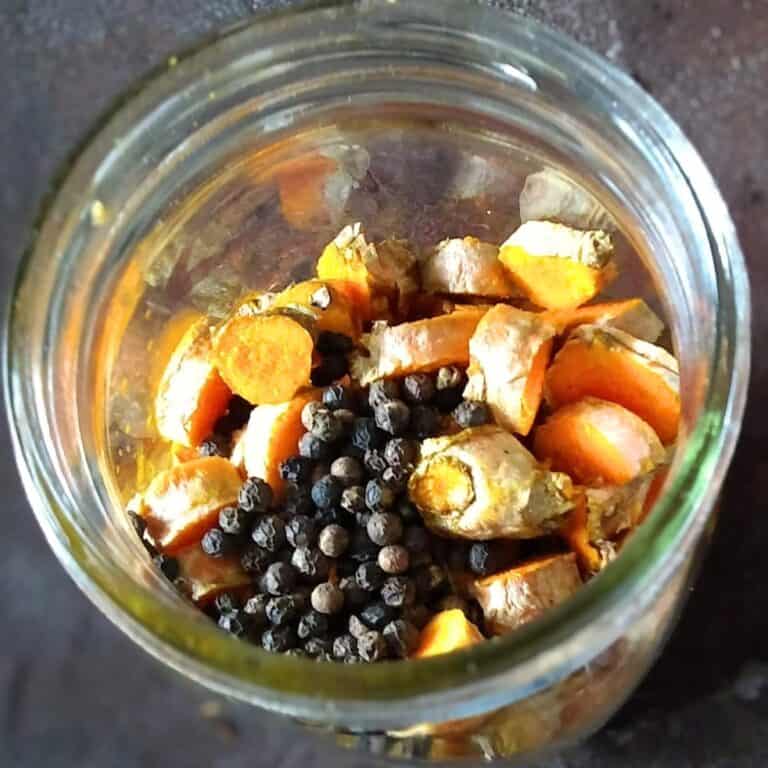
Black peppercorn – Black peppercorn gives your fermented onions a peppery note. Worth adding and a must if you’re also adding turmeric for its health benefits.

Turmeric – This is so good for your health and if you’re using your fermented onions medicinally, turmeric would be a great companion, along with black pepper, to increase bioavailability of the healthy constituents that live in the turmeric.
Ginger – I added some sliced fresh ginger for both flavor and health benefits.
Pickling spice – If you have a favorite pickling spice mix, you can totally add that to your fermented onions.
Cayenne pepper – If you’re like me, you’ll add a few spicy peppers to your fermented onions. Make zesty fermented onions. Valuable too, if you’re making these onions for a cold and flu remedy.
Instructions

01. Cut the onions in half and slice to your desired thickness. Reserve a large piece of the outer layer for later.

02. Place the spices you like into the mason jar.

03. Add the onion slices, layered with lime slices if you use them – or add lime juice at the end. Keep adding onions and pack them into the jar tightly to within one and a half inches from the rim.

Tamp or press down the onions as you go.
Then cover with the reserved piece of onion skin if you remembered to hang onto one. This will help keep floaters down.

05. Place a weight on the onions.

06. Optional Step: Add some starter culture from a previously fermented vegetable. This will give your fermentation a jump start and help steer it into a certain direction. You can cut your salt down by a teaspoon, if you do this.
07. Make your brine. Mix 1 pint of water with 1 tablespoon of salt. Pour over the onions and be sure to cover them with brine. Make more brine if necessary. They should be submerged in the brine and the brine should cover all of your onions so none of them are exposed to the oxygen.

08. Cover your jar with a fermentation lid or if you use a hinged lid jar, just close the lid with seal in place. If you use a regular mason jar lid, you will need to burp it once a day to release the pressure during fermentation.
09. Place your container in a darkish corner. Put a bowl under it to catch any overflow that might ooze out. This will be its home for the next 1 to 3 weeks . Try to find a place where the temperature stays above 70 and below 80℉. This will be your best fermentation temperature, especially for the first few days. But fluctuations are ok and a little higher or lower is fine, and no big deal for short periods.
10. Check it occasionally. You might need to burp it once a day if you’re using a sealing lid. Just quickly loosen the lid enough to let the pressure escape, and tighten it right up again. Don’t remove the lid unless you have an issue to deal with. We don’t want to introduce oxygen into the jar.
You don’t usually have to do anything if you use a fermentation lid, just check to make sure it’s fermenting. You’ll see the brine get cloudy, bubbles start forming, and the liquid expanding, possibly oozing out of the jar.
11. Let is ferment at least 5-7 days. If you’re impatient, you can give it a taste now. When you open the lid, smell it. You should smell that distinct fermentation smell. It should smell pleasant. Check the onions, are they firm? Does everything look good? Taste a piece of onion. It should taste salty and tangy. If you love it at this point, you can place it into cold storage. Replace the fermentation lid with a regular sealing lid for storage.
The onions are not really done fermenting for another 2-3 weeks, but some people like the half fermented stage best. If you prefer the long-fermented method, keep it out at room temperature for another 2 weeks.
12. After 3 weeks, place your onions into cold storage for long-term keeping. Replace the fermentation lid with a regular mason jar lid for storing. I like to use the flat metal piece and instead of the metal rim, I use a plastic lid on top such as what you can get at walmart. These won’t rust and leave a nasty metallic smell on your hands and jar.
Cold storage will slow the fermentation way down and make your onions keep for a very long time. At least a year. If you have a cool corner in your home, that is under 70 degrees, you can also leave it at room temperature. But it won’t keep as long as in cold storage. However, it will stay delicious for several months at least.
Let the smell and taste be your guide as to whether it’s still good to eat. Most likely you’ll have eaten it well before it declines. If it smells bad or you find that it is turning mushy and unappetizing, it’s probably time to feed it to the compost, where it will be useful as an effective composting accelerator.
And How Awesome To Have Some Fermented Onions To Enjoy!

Now you’ve got some delicious fermented onions that are going to be a great addition to your burgers, sandwiches, salads, meats, or as a side for any meal. Try some plain on a sandwich with homemade mayonnaise! Yumm!
It’s so good for your gut health to include a small serving of fermented foods with your hard to digest meals. They will greatly aid with digestion and you’ll get a nice dose of vitamins and other nutrients.
Fermenting preserves all the good nutrition that comes with your fresh picked vegetables and magnifies it, then it adds probiotics that can keep your gut flora balanced, which is important for overall health and a responsive immune system. Fermented onions are great too for colds or when you have the flu. Keep some on hand for snacking and as medicine.
Let us all know in the comments if you get to make this recipe! What are your favorite ways to use fermented onions?
Find out more about the health benefits of fermented foods and get master recipes for fermenting any vegetables at Lacto-Fermented Vegetables.
Sign up for my newsletter, so you never miss a new recipe or gardening post and to get homesteading tips and ideas.
Common Questions
How long does it take to ferment onions?
At the least they should ferment for 5-7 days at a temperature of 70 to 80 degrees. It is most beneficial and you will get more probiotics, when you ferment them for about 3 weeks. But some people like them best less tangy. So it is largely a matter of preference.
Are fermented onions good for you?
They sure are! Fermented onions are full of all the vitamins, minerals, and health benefits that you find in fresh onions. In fact, fermenting increases some of these, and it also adds live probiotic bacteria, which will benefit your gut health, balance your gut bacteria, increase microbial diversity and all this will improve your immune system. Fermented vegetables also can decrease inflammation.
Onions are also famous as cold and flu fighters and are a decongestant. Keep some fermented onions handy for those moments where you might need a smidgen of their medicinal benefits. Check out lacto-fermented vegetables for more details on the health benefits of fermented foods and find master recipes to ferment any vegetables.
Do fermented onions taste like pickled onions?
Not at all. While both are salty and tangy, its only those words that make the two similar. Once tasted, the similarities end. The flavors are quite different for each.
Fermentation imparts a depth of flavor that is not found in vinegar-based pickled onions. Unlike the vinegary tang, fermented tang has a different note, that is less harsh and more complex. I find the fermented flavor much more pleasant and less acrid.
While pickled onions can certainly taste delicious too, you’ll find a lot more healthy benefits in the fermented version. Fermented onions are not heated and so the vitamins and nutrients that come from the fresh vegetable will be retained and enhanced. Probiotic live bacteria are added and at this point there is really no comparison.
More Great Recipes
Fermented Salsa – Delicious zesty tomato salsa. It’s summer in a jar!
Fermented Cantaloupe – Have you tried lacto-fermenting fruit? It’s a great way to preserve your extra melons this summer!
Creamy Cucumber Salad – This is a super delicious summer salad. A must for cucumber season, but it’s great any time if you can get cucumbers! Add a little fermentation brine and cultured sour cream or cheese for probiotic benefits.
Lacto fermented sauerkraut – Famously healthy and so tasty! Make your own from scratch.
Fermented Salsa Verde – Try this bright and fresh tasting green salsa. It’s so good on your grilled meats, with baked potatoes, as a dip or condiment, as part of a salad dressing, and with any Mexican dishes!
Fermented Chili Paste – Here is a great way to preserve your end-of-the season harvest of green peppers. This paste will last all year in your refrigerator to use as a condiment, seasoning, or topping.
Fermented Coleslaw – A cabbage and roots medley with fabulous coloring and awesome flavor. Packs nutritious punch and probiotic diversity.
Fermented No-Fail Homemade Mayonnaise – Make mayonnaise from scratch with this easy recipe, which includes a fermenting option to preserve it for long-term storage.
Fermented Hot Sauce With Cantaloupe – How to make a delicious fermented hot sauce that is great with meat, fish, eggs and on sandwiches. What a great way to use some cantaloupe and spicy peppers.
Fermented Cucumber Pickles – How to ferment your excess of cucumbers to enjoy all year long and with the added benefit of improving your gut health with probiotics.
Fermented vegetables – How to ferment your summer’s bounty to enjoy it all year long and with the added benefit of improving your gut health with probiotics. Learn the basic skill of fermenting any kinds of vegetables and get the science behind it too.
How to grow onions from seed – Learn all about growing onions from seed to harvest and how to prepare them for long term storage. Plus how to choose the right varieties!
Recipes for Garlic Scapes and Bolted Onion Greens – There is much you can do with garlic scapes and bolted onions or green onions. I’m sharing my favorite ways to use them and how to make a delicious pesto sauce.
Fermented Eggs – A probiotic, nutritious, delicious snack that you can keep in your refrigerator for several weeks. It’s there, ready to satisfy that food craving with something that’s good for you. And you’lI love eggs with salsa, or salsa with eggs!
Fermented Basil Paste – Keep a jar of this in your refrigerator all year, to season your dishes. Preserve not only the herb, but also its aroma and pungent basil flavor. It’s one of my favorite ways to preserve basil for the long term.
Pin This Fermented Onion Recipe

Fermented Onion Recipe
Equipment
- Quart size mason jar – a standard canning jar works great or my favorite, a Bormioli Rocco Fido jar
- A weight – I recommend a glass fermentation weight
- A fermentation lid – if you use a mason jar, seal it with a fermentation top or airlock if you can, otherwise use a standard canning jar lid.
- Knife and Cutting board
- Tamper – I highly recommend a pickle packer type wood tamper
Ingredients
- 2-3 medium white, yellow, or red onions, sweet or regular.
- 1 tablespoon salt
- 1 pint of filtered water
Optional ingredients
- 1/4 cup starter culture – the juice from a previously fermented vegetable
- 1/2 lime – use with skin on if you're making a remedy, but it will make the onions bitter. Use just lime juice to avoid bitterness.
- 1 tbsp caraway seed
- 1 tsp black peppercorn
- 1 tsp turmeric, dried or a few fresh slices
- 1-2 tbsp pickling spices, use your favorite
- 1-2 hot chili peppers
- ginger, a few thin fresh slices or dried
Instructions
- Cut the onions in half and slice to your desired thickness. Reserve a large piece of the outer skin.
- Place the spices you like into the jar.
- Add the onion slices, layered with lime slices if you use them (see note*). Keep adding onions and pack them into the jar tightly to within one and a half inches from the rim. Use a pickle packer tamper if you have one or your fist.Cover with the reserved large piece of onion skin to keep floaters down.
- Make your brine. Mix 1 pint of water with 1 tablespoon of salt. If you're using the optional previously fermented vegetable brine as a starter culture, add about a quarter cup of it now. You can cut your salt use in half if you prefer, when using the starter culture.Pour the salt brine over the onions and be sure to cover them with brine. Make more brine if necessary.
- Place a weight on the onions. They should be submerged in the brine and the brine should cover all of your onions so none of them are exposed to the oxygen.
- Seal your jar with a fermentation lid or just close your hinged top with seal in place. (Note: If you use a regular mason jar lid, you will need to burp it once a day to release the pressure during fermentation).
- Place your container in a darkish corner. Put a bowl under it to catch any overflow that might ooze out. This will be its home for the next 1 to 3 weeks . Try to find a place where the temperature stays above 70 and below 80℉. This will be your best fermentation temperature, especially for the first few days. But fluctuations are ok and a little higher or lower is fine, and no big deal for short periods.
- Check it occasionally. You might need to burp it once a day if you're using a sealing lid. Just quickly loosen the lid enough to let the pressure escape, and tighten it right up again. Don't remove the lid unless you have an issue to deal with. We don't want to introduce oxygen into the jar. You don't usually have to do anything if you use a fermentation lid, just check to make sure it's fermenting. You'll see the brine get cloudy, bubbles start forming, and the liquid expanding, possibly oozing out of the jar.
- Let it ferment at least 5-7 days, but ideally 3 weeks. If you're impatient, you can give it a taste after a week. When you open the lid, smell it. You should smell that distinct fermentation smell. It should smell pleasant and tangy. Check the onions, are they firm? Does everything look good? Taste a piece of onion. It should have a salty and tangy flavor. If you love it at this point, you can place it into cold storage. The onions are not really done fermenting for another 2-3 weeks, but some people like the half fermented stage best. If you prefer the long-fermented method, keep it out at room temperature for another 2 weeks and give it another taste.
- You can now place it into cold storage for long-term keeping. Cold storage will slow the fermentation down and make your onions keep for a very long time. At least a year. If you have a cool corner in your home, that is under 70 degrees, you can also keep it at room temperature for quite a while longer. But it won't keep as long as in cold storage. However, it will stay delicious for several months at least. Let the smell and taste be your guide as to whether it's still good. Most likely you'll have eaten it well before it declines. If it smells bad or you find that it is turning mushy and unappetizing, it's probably time to feed it to the compost, where it will be useful as an effective composting accelerator.
Notes
Pin for later

Shop This Post
Mandolin
Bormioli Fido jars
Fermentation tops
Airlocks
Redmond’s Real Salt
Himalayan pink salt
Celtic sea salt
Glass weights
Acacia wood tamper




You must try these fermented onions. They are so delicious on sandwiches and burgers, but my favorite way to eat them is straight out of the jar. Yum! Let me know if you have any questions right here in the comments!
These are so good! I love them on tacos in particular. I only made them plain, though, so excited to try with lime and maybe some of these other ideas to add in for additional flavor and benefits.
Thank you so much for sharing, Rachel! I think fermented onions are great just on their own too. I made several different versions last year and loved them all.
These fermented onions look like a must-try! Tangy, crunchy, and packed with flavor, I can’t wait to make them!
Hey Emily! They are so delicious and good for you. I hope you get to try making them!
Love this! We always keep a jar in the fridge but haven’t tried them fermented! Perfect new fermented recipe!🤩
They are so awesome, I think you’ll love the onions fermented! I hope you get to try making them!
Yum! I’ve been making fermented onions too a lot lately and we love them! They’re delicious on their own, and I love them on scrambled eggs and burgers. I like the combination of herbs and spices you’ve used, I’ll try that next batch 🙂 I also have a question: do you ever have issues with kahm yeast when you re-use the brine? It happened to me last time I tried that.
Hey Marta! Thanks so much for sharing, I’m glad you love fermented onions! I didn’t have an issue with kahm yeast on any of mine. Maybe you had kahm on that brine you reused in the first place? Then you’d be adding the bacteria for it. I have had kahm in the past sometimes when I didn’t use a fermentation lid, rarely with a fermentation lid. And most often when I covered with a cloth instead of a lid.
These are such great instructions. I just harvested onions so now I need to buy some fermenting tools!
Hey Megan! That’s awesome! I’m glad you want to try fermenting onions! I hope you’ll love them as much as I do!
I love all of your gut-friendly recipes and will definitely be making this! I need your advice on how to grow onions. Mine never get very big… I feel like I leave them in the ground “forever”! Help!
Hey Kelly! Thank you so much or your comment and I hope you’ll get to try fermented onions! You can read about growing onions in my article about growing onions from seed. If you tried growing onions from sets in the past, that could be your problem. I find that onions from seeds grow bigger and healthier, and they rarely bolt prematurely. I hope this helps! I find too that I need to start them really early so they can go into the ground while it’s still cool outside, even before the last frost. They seem to take off better in cool weather. So try starting them about 12 weeks before your last frost date.
Thank you for this recipe and thank you for covering the awesome health benefits! It’s awesome how something so simple can be so good for our bodies.
Yes, right?! I find it awesome that we are given simple natural ways to preserve food and keep us healthy!
I’m fermenting everything right now, so I’ll definitely be giving these fermented onions a try!
Thats awesome, Michelle! If you like fermented foods, I think you’ll love these onions!😊
Yum! Thanks for sharing!
You’re so welcome! And thank you for your comment!
I have pickled red onion before, but never tried to ferment our red onions. This sounds delicious and a great way to incorporate fermented foods for gut health.
Thanks for sharing, Jenni! These fermented onions are really awesome and healthy and they are so easy to use for a bit of a probiotic boost!
Oh boy, I love onions! I use them on a daily basis, I really should buy that mandolin you recommend. You’ve inspired me to make the stuff I use on a regular basis more gut healthy + beneficial. Thanks for sharing, Heidi! 🙂
You’re so welcome, Alisha, and I’m glad if my articles are helpful for you! That’s always my hope! Thanks so much for your kind comment!
Reading this makes me think I need to just invest once for all in the right tools to ferment. Do you have an article with links to the basic items necessary for fermenting most things?
Hey Ophelie, I’m so glad you visited here and thank you for commenting. I have not put together a resources page yet, but I sure have been meaning to. Hope to do that real soon as it would probably be helpful. I did leave links in the equipment list you can use for now.