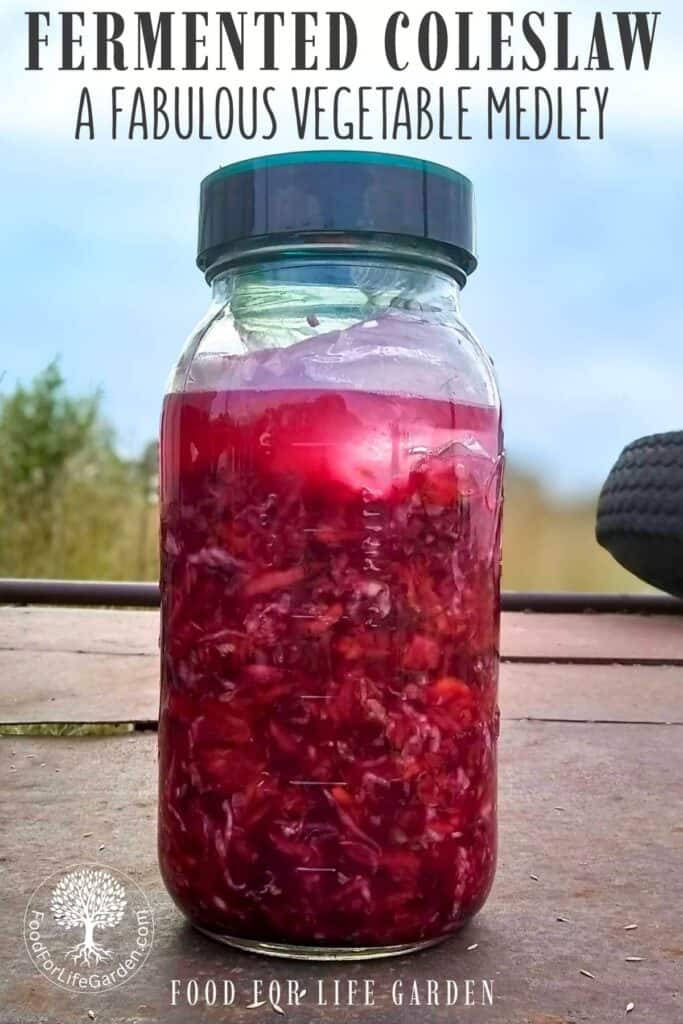
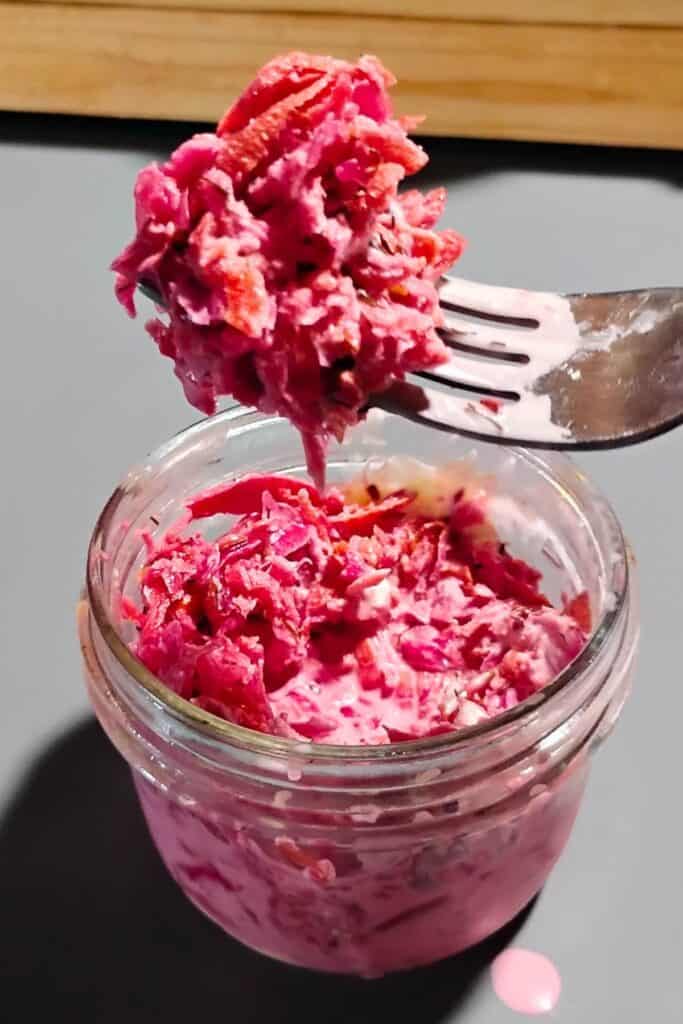
This Fermented Coleslaw is super tasty and extra nutritious with added root vegetables. Preserve your garden goodness with increased health benefits!

This post contains affiliate links. As an Amazon affiliate, I make a small commission at no extra cost to you if you make a qualifying purchase. See my full disclosure here.
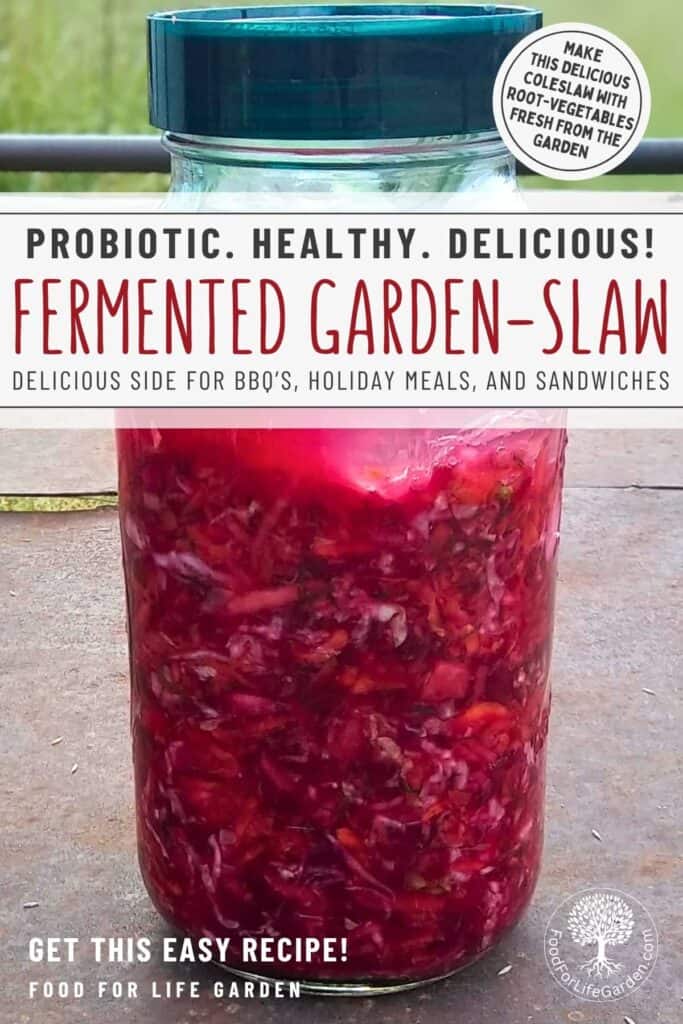
If you love sauerkraut, give this dramatically pigmented kraut with root vegetables a try. I call it garden-slaw at home, but out in the world, coleslaw is certainly the more recognizable word for this delicious probiotic recipe with a roots upgrade.
This slaw is wonderfully tangy and it’s loaded with prebiotics, probiotics, dietary fiber and extra nutrients, and fermenting makes your slaw easier to digest and helps your body absorb more of the nutrients. A big win for fermenting coleslaw! It’s worth rooting for 🤣! So let’s start fermenting, yes?!
If you like this fermented vegetable recipe, do try some of my other fermented recipes. Here are a few of my favorites, my popular lacto-fermented salsa, famously healthy sauerkraut, delicious flavor-burst fermented cherry tomatoes, and super tasty, spicy fermented cantaloupe hot sauce. Here is how to make homemade mayo to mix with your fermented coleslaw to make a delicious, creamy side-salad. You nust try this fermented tabouli salad, packed with nutrition and health benefits.
Root For Fermented Coleslaw!
I love my plain homemade sauerkraut, it’s just incredibly awesome! However, I had a bunch of roots in the garden that needed to be harvested and so I decided to make a garden-slaw with the extras.
What a great flash of genius it was that struck my brain at that moment. As soon as the idea was conceived, I knew it was going to be awesome. And sure enough, after waiting 3 weeks for this grated concoction to fully ferment, I was rewarded with a wonderful flavor experience that I’ll want to keep repeating over again.
So join me in making this delicious spin-off from traditional sauerkraut and get creative with the ingredients if you’re so inclined. I also include some serving suggestions below and you’ll find a list of root veggies that can be substituted or added.
Why You’ll Love Fermented Coleslaw With Root Vegetables
- It tastes incredibly delicious!
- Fermented coleslaw with root vegetables is full of nutrition that our bodies need, not only from the vegetables themselves, but also from the process of fermenting them.
Nutrient-Rich Veggies + Fermenting = Nutritious, Health-Boosting Powerfood!
- Carrots supply alpha- and beta-carotene, biotin, vitamins B6, C, and K1, plus potassium. They also contain antioxidants such as Lutein (important for eye-health), and polyacetylenes, which may help protect against leukemia and other cancers. Red and purple carrots also contain lycopene and anthocyanins. Do save the carrot tops! You could use them chopped up in the slaw, save them for making soup, add to stir-fries, or try the carrot top pesto from A Hint Of Homestead or carrot top soup from Out By The Door.
- Turnips are high in vitamin C, folate, phosphorus, and calcium and the leaves are even higher in these nutrients plus they contain Vitamins A and K. My turnip greens did not look good at the time of harvest, so they went to the pigs and goats. And the ones with lots of cabbage worms on them went to the chickens. But if your turnip greens are healthy, they can also be chopped and added to the slaw. I normally like to add them to my summer stir-fries and winter soups.
- Rutabagas are a bit sweeter than turnips and larger with a yellowish-brown or pink and white coloring. They are high in beta-carotene, vitamins B6, C, Folate, Manganese, and magnesium. They contain antioxidants such as glucosinolates, which are thought to have anti-cancer properties. And they are a good source of fiber.
- Beets are famous for being nutrient-rich. They are high in vitamins A and C, folate, potassium, magnesium, and iron. They are a good source of powerful antioxidants that might reduce oxidative stress, such as betalains and they contain nitrates, which can help lower blood pressure. They can also promote digestive health due to the high amounts of fiber. The greens are a nutritional powerhouse and can certainly be chopped and included, or save them for a salad, soup or stir-fry. You could also use all these greens here and ferment them separately.
- Onions are rich in nutrients and antioxidants. They are attributed to improve gut health, boost the immune system, promote strong bones, regulate blood sugar, possibly help lower the risk of cancer and reduce inflammation. They may also support eye health and heart health.
- Fermented Garden-slaw can be kept for at least a year in the fridge or root cellar. I’ve had sauerkraut for 2 years in my root cellar and it was still great. It will get more tart as it ages, but it will be preserved for a long time.
- Fermenting increases the nutrient levels of foods, makes them more bioavailable for the body, which means more of the nutrients get absorbed vs. eating them fresh from the garden. And fermenting will add probiotics for gut-healing benefits. The more diverse your vegetables in the jar, the more diverse your probiotic microbes will be.
- This garden-slaw is a great condiment or side for your meals, as part of a buffet spread, and it’s super tasty on burgers, sandwiches and as a side for BBQs.
Nutritional content information: healthline on carrots, healthline on turnips, healthline on rutabagas, area2farms on beets, healthline on onions
Disclaimer
I am not a doctor or claim to be qualified in any way to give medical advice. I am self-taught and this article reflects just my opinions, and experiences with herbs and vegetables, and what I’ve learned from research and years of studying herbalism, herbs, nutrition, foods and their uses and medicinal value. This article is meant as an entertaining source for ideas and reference, and to encourage interest in herbalism, choosing healing foods, and natural healing. It is my hope to help you get to know and appreciate herbs, vegetables and natural foods and their benefits and traditional uses. Please do not use any of this information to replace professional advice!
How To Make Fermented Coleslaw With Root Vegetables
Equipment
Grater – Most of the time I use a box grater, but you could also use a food processor or a mandolin, and I’ve got this nifty rotary grater that I have not actually used yet, it’s still packed away in the moving trailer somewhere.
Knife – A knife is sufficient for a small quantity of cabbage. And it has the advantage that you can shred the cabbage to your liking, even very coarse. If you process larger quantities, consider a food processor or a mandolin to get the job done quicker and to make your shreds even. I love the Feemster’s famous slicer from Lehman’s (or get it at Amazon) for slicing vegetables.
Cutting board
Large bowl – You’ll be mixing and kneading your cabbage in it, so make sure that it’s spacious for working in.
Half gallon mason jar – I love using the Bormioli Fido jars. They automatically vent the gasses and keep oxygen out. And I think they look so cool! However, I use mostly mason jars for fermenting, since I have so many of them already. Here is a link to the mason jars on Amazon, but you can usually get them much cheaper at Walmart or the local hardware store in the canning supply section. You can certainly use two quart jars as well or half the recipe to make one quart.
Fermentation lid – I recommend the use of a fermentation lid or airlock. It makes fermenting so easy and maintenance free. Your chances of failure are pretty slim when using one of these or a flip-top jar. Most other covers will require regular maintenance: A 2-piece mason jar lid will need to be burped once a day and a cloth cover invites yeasts to settle on the surface of your brine, which will need to be skimmed off every day or two. These are harmless, but can taint the flavor if not kept in check.
Fermentation weight – My go-to favorite weight for mason jars is a glass fermentation weight. They are nicely heavy and easy to clean, and they fit perfectly into a wide mouth jar. You can also use a boiled rock or a plastic baggie filled with brine, which is what I used in this batch. This works especially well when you don’t have a full jar of ingredients.
Scale – If you don’t own one, here is a very inexpensive scale with great reviews. I rarely use a scale, so I don’t buy the expensive ones, but this little one comes in handy when working with herbs and fermenting. If you have a cabbage but no scale, you can also check the note below on fermenting without a scale.
Wide mouth Funnel (optional) – Not necessary, but very helpful. It helps to get your ingredients into your jar easily and without a mess (or less mess, if you’re like me).
Tamper (optional) – I like to use a pickle packer for tamping down fermentations such as this fermented coleslaw. It works great, however, a fist works pretty good too.
Ingredients
I always recommend using organic ingredients for health reasons, but when you’re fermenting,, there is another reason: The pesticides and other chemicals on fresh produce are designed to kill fungus, bacteria and other microorganisms throughout the growing stages of the vegetables, but also for transit, storage, and at the point of purchase to prolong shelf life.
So the beneficial organisms we need for fermentation have been killed off and your fermentation might not be sucessful.
To prevent failure, purchase organic if you don’t grow your own, and if that’s not an option, you can wash and scrub the produce thoroughly and soak in salt water for a little bit, rinse well and use. Add a starter culture such as whey or the brine from a previous fermentation to help get things going.
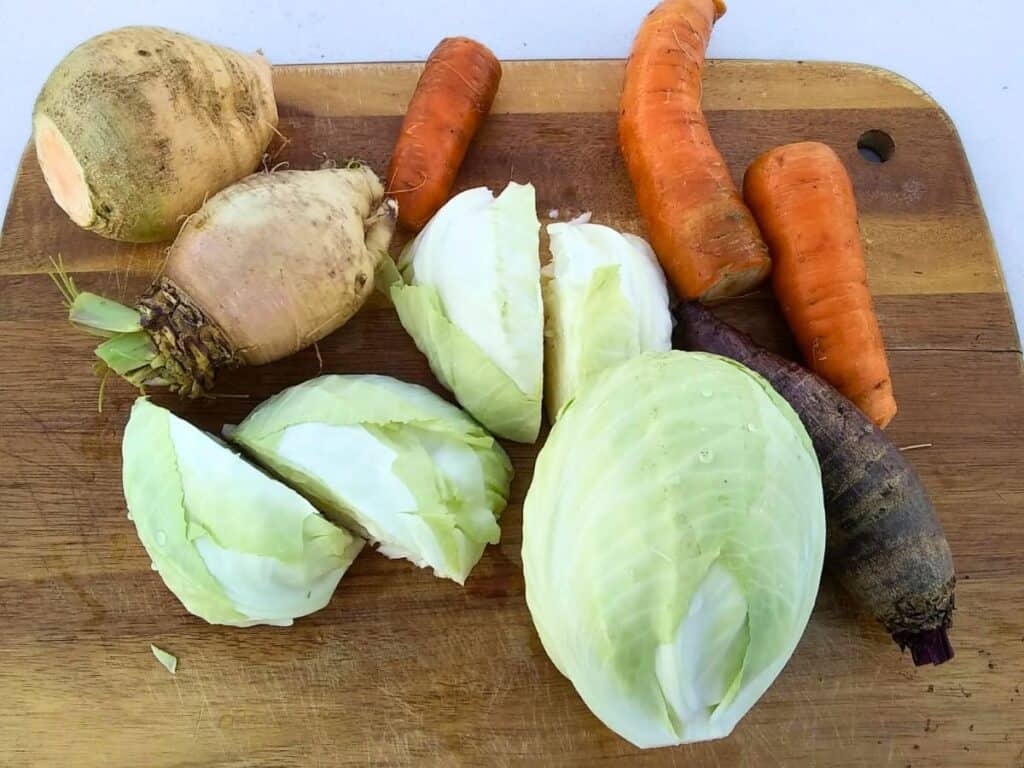
1 medium to large head of cabbage – Pick a firm, heavy cabbage for this. Green or red, or mix them up. And keep one or two of the large outer leaves to cover your slaw later and help keep the ingredients submerged in the brine.
2-3 large beets – I don’t peel mine, there are lots of nutrients in the peels. I just cut away the gnarly looking rim right around where the stems attach.
1 rutabega – I do peel the rutabaga, since it has a tough skin. If you purchased it, it likely has a. wax coating that you don’t want to eat!
2 turnips – If I have tender spring turnips, I don’t peel them, they are much like big radishes and are fine just grated. For the larger turnips I do peel them if they have thick tough skin, and definitely peel them if you purchased them and they are waxed.
3 large carrots – I usually give them a light scrubbing and cut out the deep grooves that have dirt in them or any chewed areas or other blemishes. But I don’t peel mine.
1 large onion – I love onions in my slaw. I didn’t add one here as I didn’t have any large ones in the garden yet, but they are great for flavor and health. Onions are not roots, they are actually part of the leaves where the onions store nutrients for next years seed productions.
4 cloves of garlic – Here you can be more or less generous, depending on your preference. I use garlic pretty generously because I love the flavor it imparts, and it’s so good for your health.
Bunch of Dill – I just get a handful and chop it up. You could also use a dill head with seeds growing on it, stuff it in the bottom and fish it out later
Caraway seeds – To me, caraway seeds are a must for fermented cabbage recipes. It flavors it just right, and helps reduce the dreaded gas building that cabbage is famous for. Crush them ligthly in a mortar to help get the flavors released.
Salt – I use Redmond’s Real Salt, or Himalayan pink salt. I prefer Redmond’s, but it’s more expensive, so I often just get the Himalayan. Another great salt that I use very occasionally is Celtic sea salt. All of these contain essential trace minerals that our bodies need, which I prefer as a healthier choice.
You will want to avoid any salt with additives, such as common table salt. Check the box of sea salts and kosher salt too. They often contain anti-caking agents.
Optional Spices
Use any of these to flavor your cole slaw. I don’t usually add a lot of other flavors to mine, but these are often used in traditional pickling, so use them if you like.
Pickling spice mix
Cilantro seeds
Dill seeds
Pepper corn
Mustard seeds
Cayenne pepper – dried or fresh, whole or crushed
Turmeric dried or fresh
Ginger dried or fresh
Other Root vegetables that would work Great
1-2 celery roots – I forgot to plant celery roots this year, but they would be a great addition to this coleslaw with roots. Celery roots make a super tasty kraut just on their own too!
1 horseradish root – use more or less according to your preference. Horseradish root mellows as it ferments, so you’ll sure get the flavor, but it won’t be overly pungent as it ages. Check out my fermented horseradish recipe too!
2-3 radishes
2-3 parsley roots
2-3 young salsify roots
2-3 young scorzonera roots
2-3 parsnips roots
Instructions For Making Fermented Coleslaw With Root Vegetables
Wash your vegetables. Brush them lightly only if necessary.
Weigh your bowl and zero it on the grams setting (remember the bowl weight in case your scale turns off). As you start chopping, place all prepared ingredients into this bowl.
Prepare your vegetables.
Reserve 1-2 large outer leaves of cabbage for later to cover your slaw in the jar.

I like to slice cabbage with a ‘krauthobel’, a cabbage slicer, but for a small amount I use a knife. A food processor or mandolin works great too.
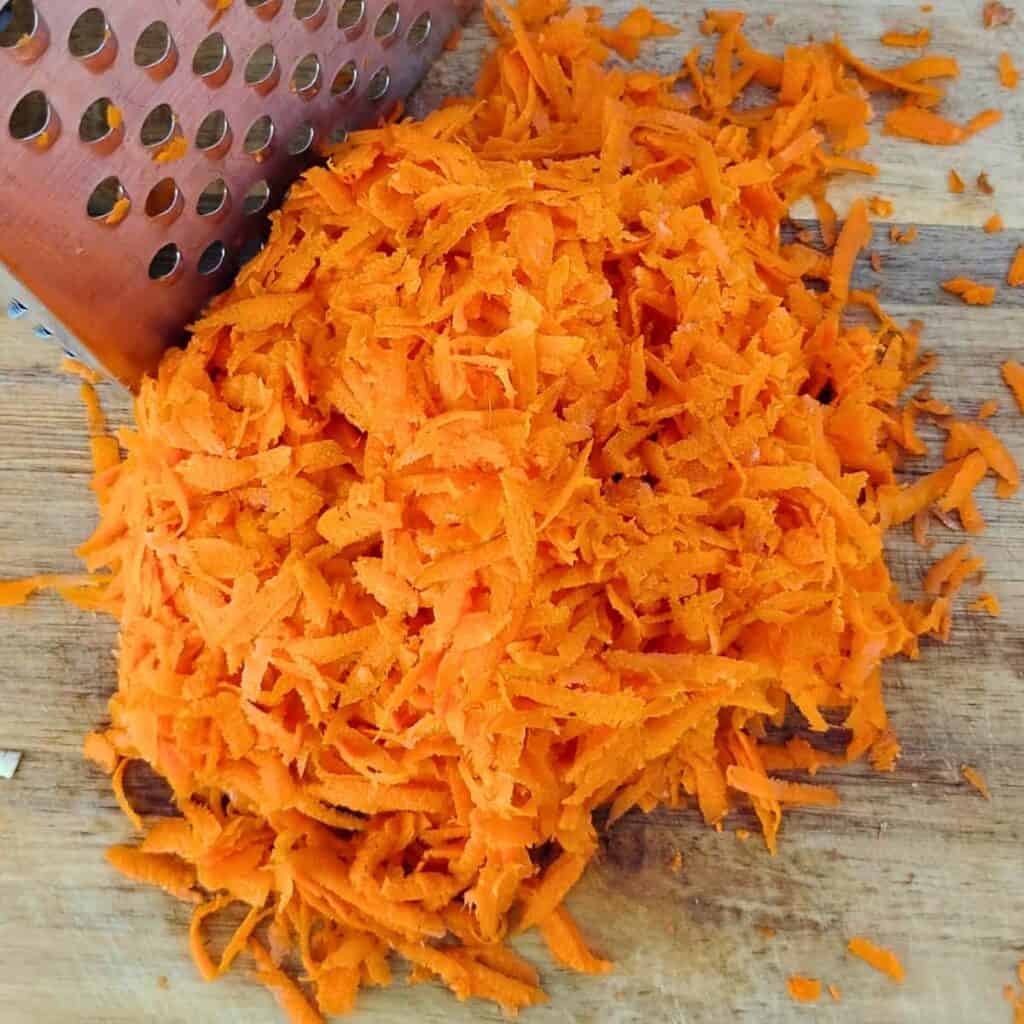
Grate or finely julienne your roots.
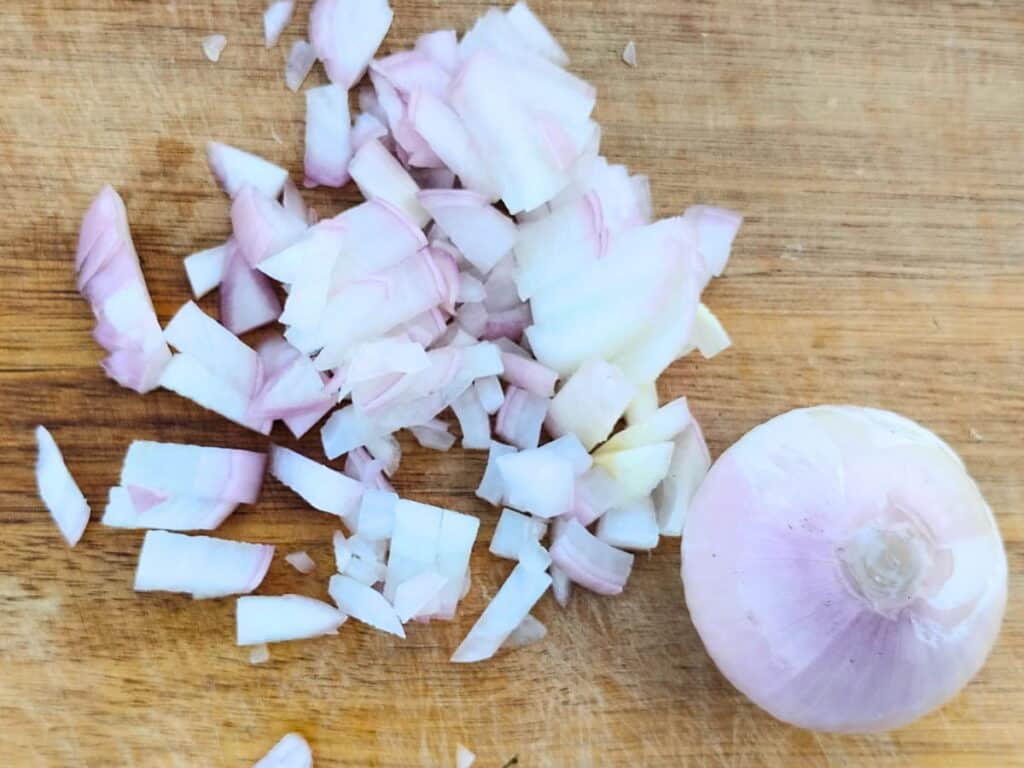
Slice or chop the onions and garlic.
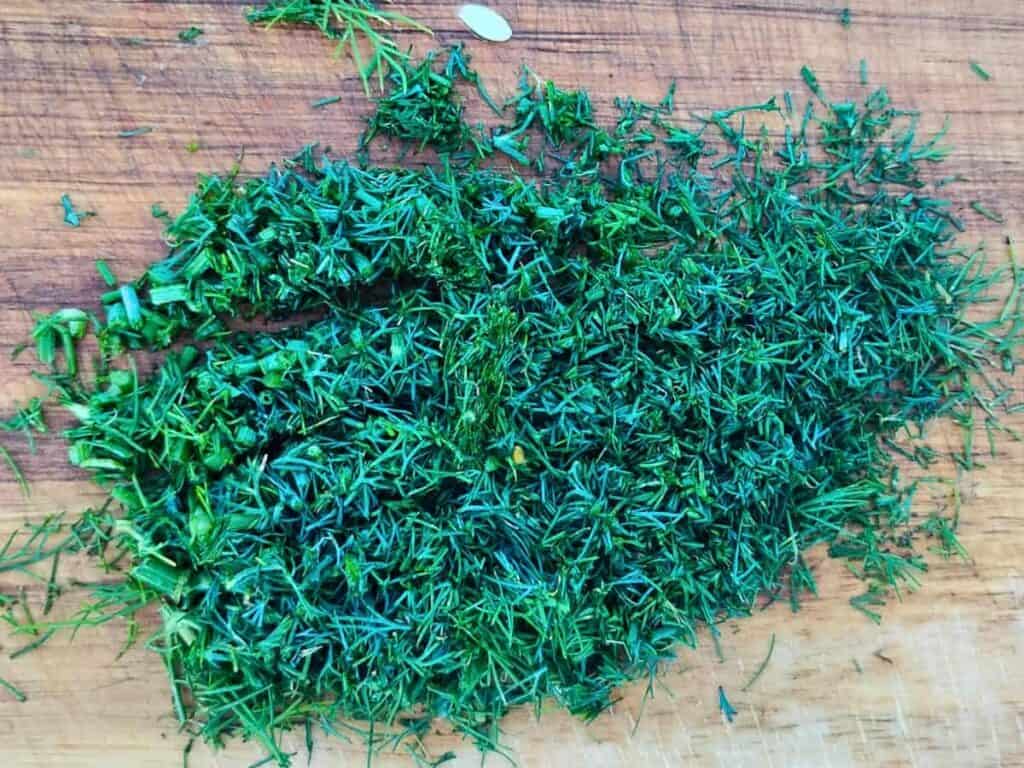
Chop the dill.
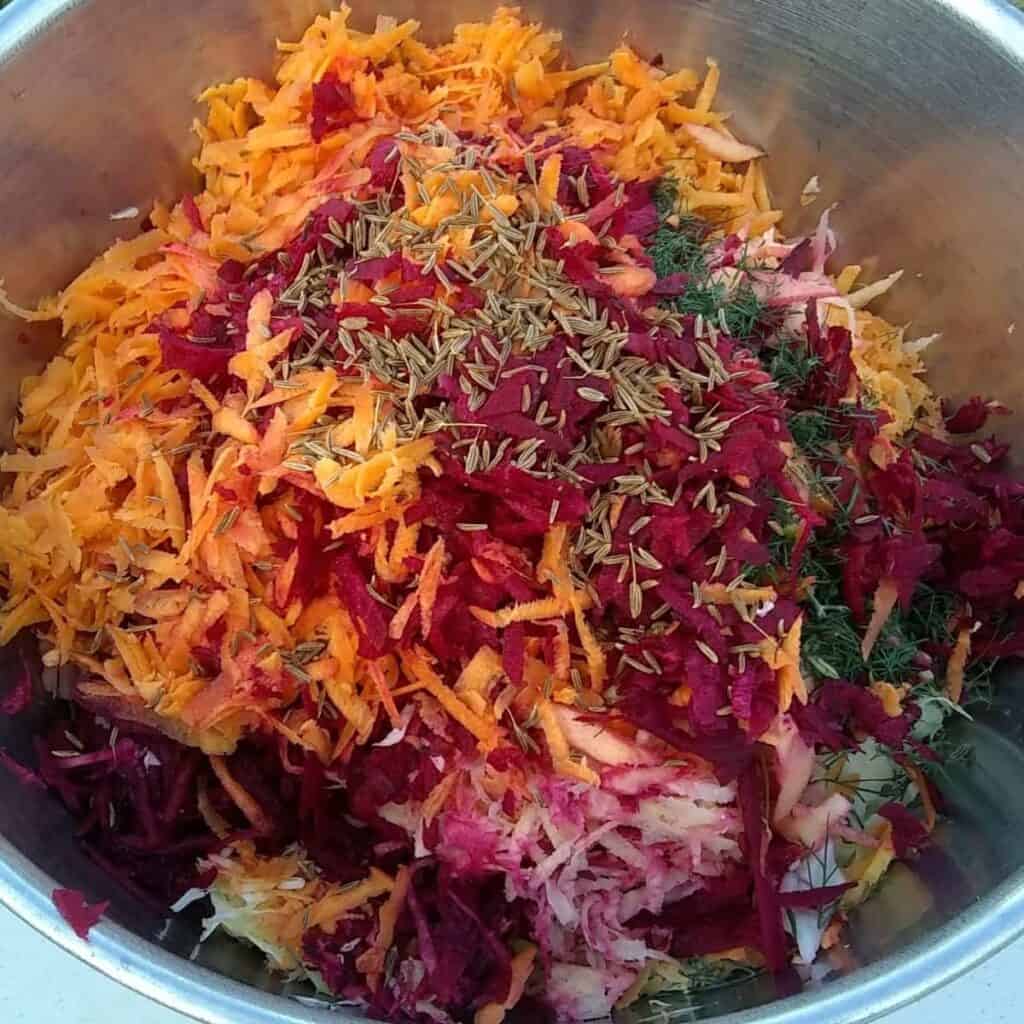
Add all ingredients to your bowl and add any spices you’ll be using, but not the salt yet. I used just cumin this time.
Check the weight of all the ingredients combined.
Salting
You’ll be adding 2% of the total ingredient weight in salt. So if your total weight is 1800 grams for example, calculate 1800 x .02 = 36 grams.
If you don’t have a scale, add about 2 tablespoons of salt to your half gallon batch of ingredients.
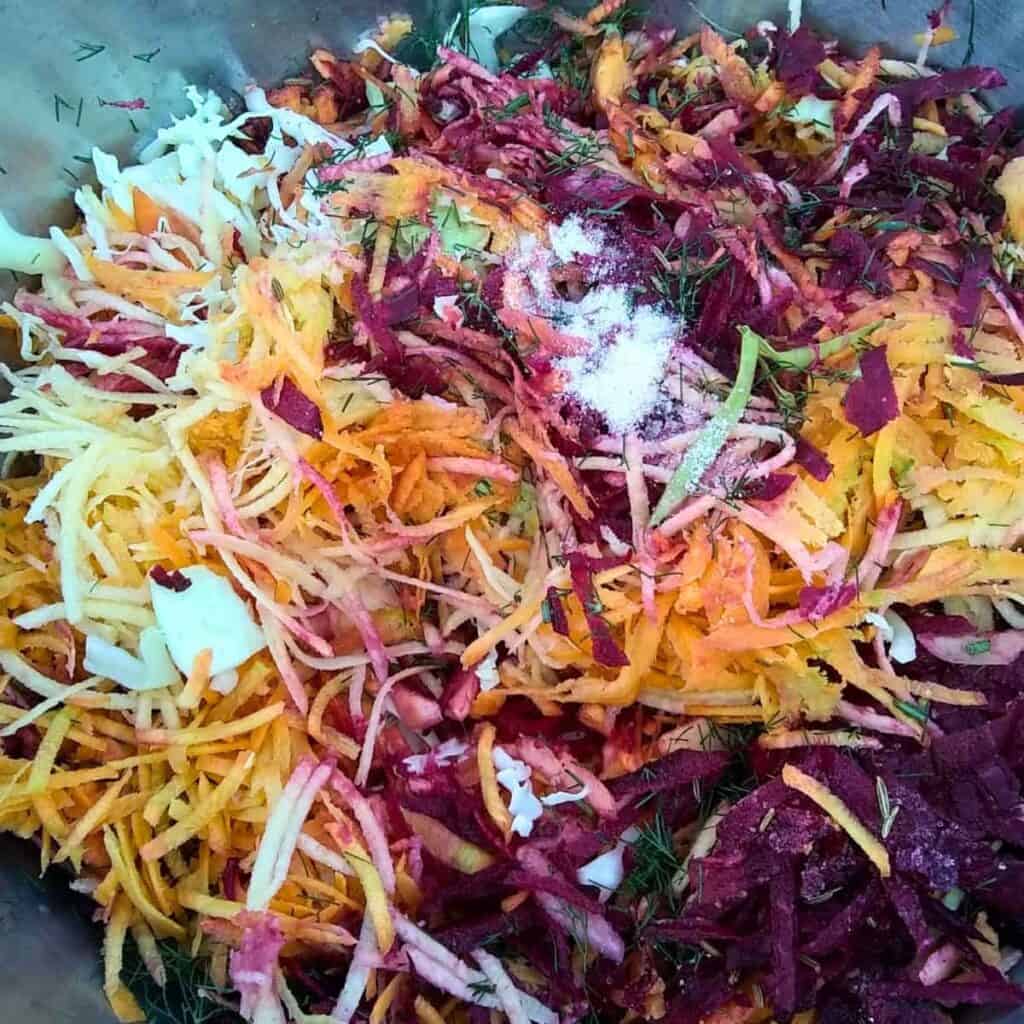
Sprinkle the correct amount of salt over your vegetables and mix it in well. Let the veggies and salt stand for about 10 minutes or so.
Work The Slaw
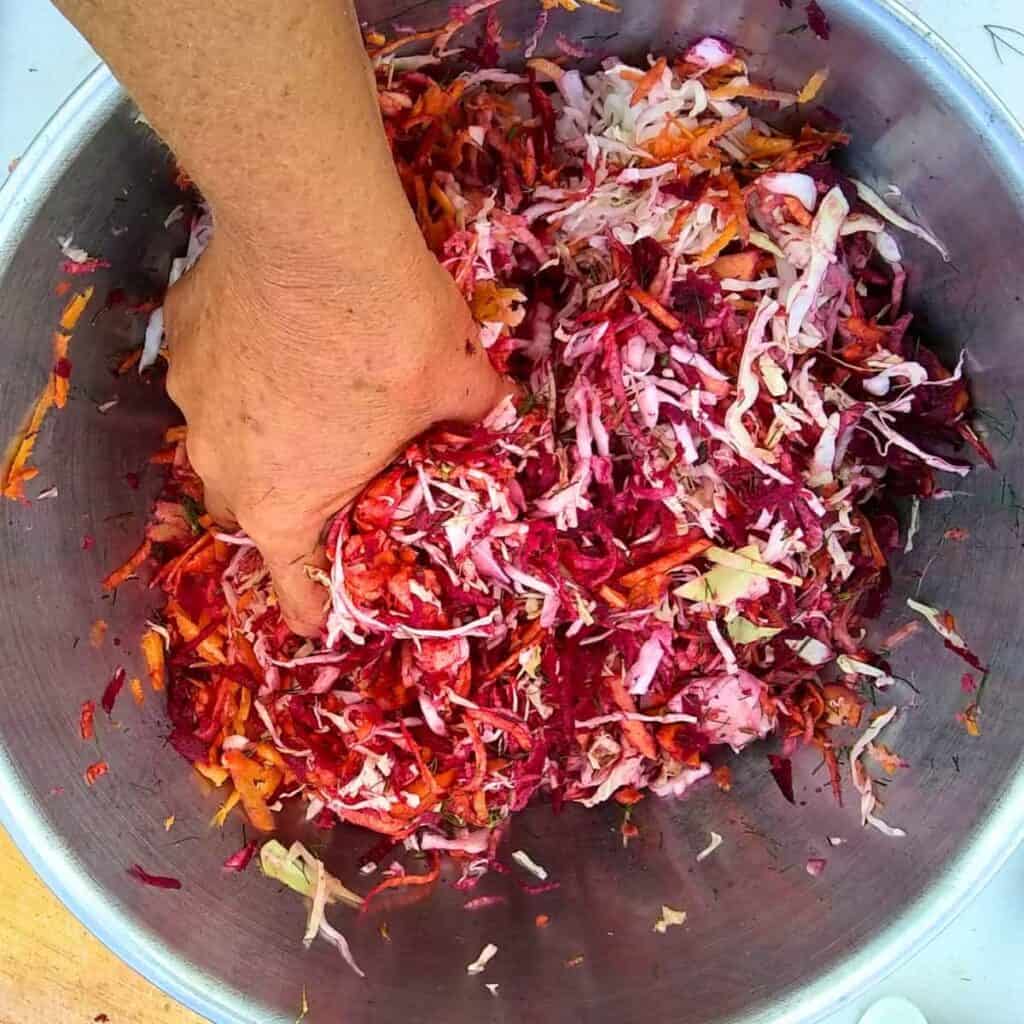
Then knead it well. You’ll get some juices separating out, which is the goal here.
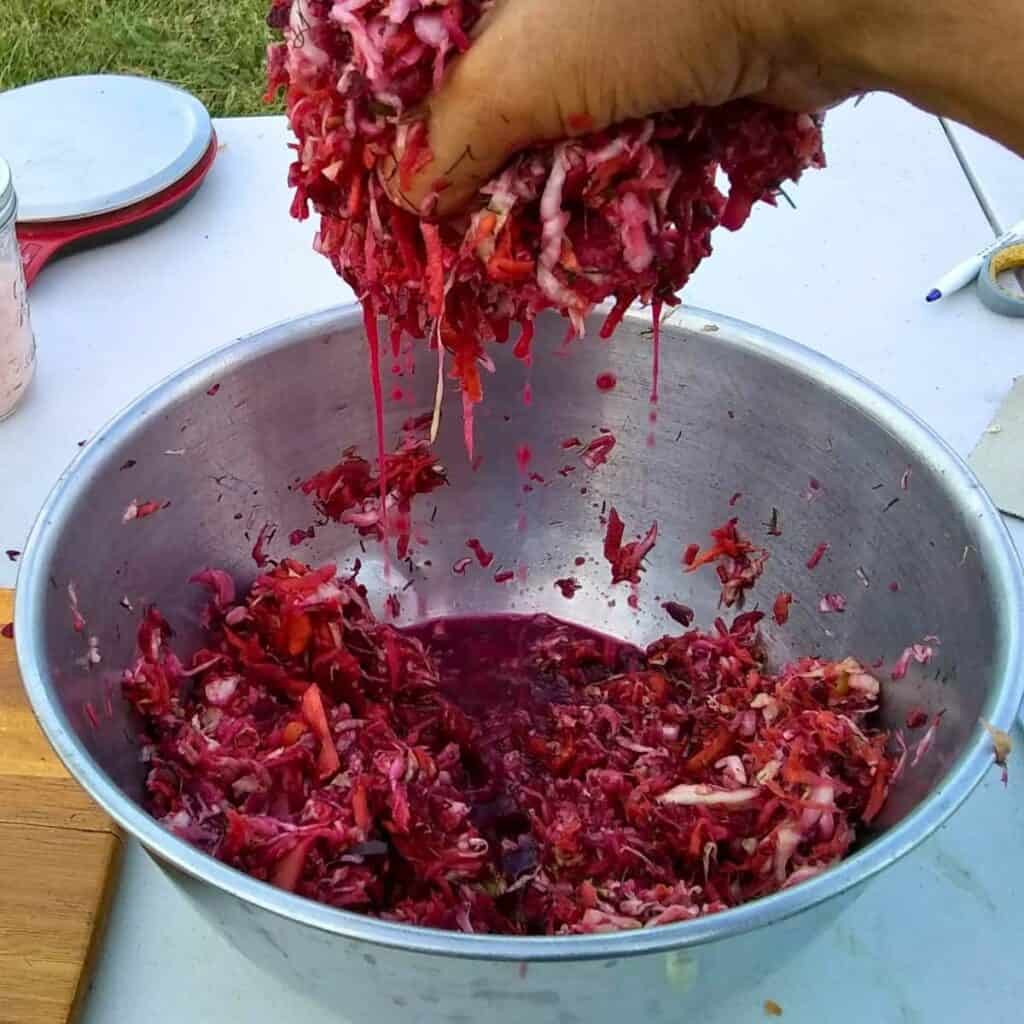
Keep kneading till you have a fair amount of juice. You can also let it sit a little longer to draw more and knead again before stuffing it into your jar.
Bottle The Slaw
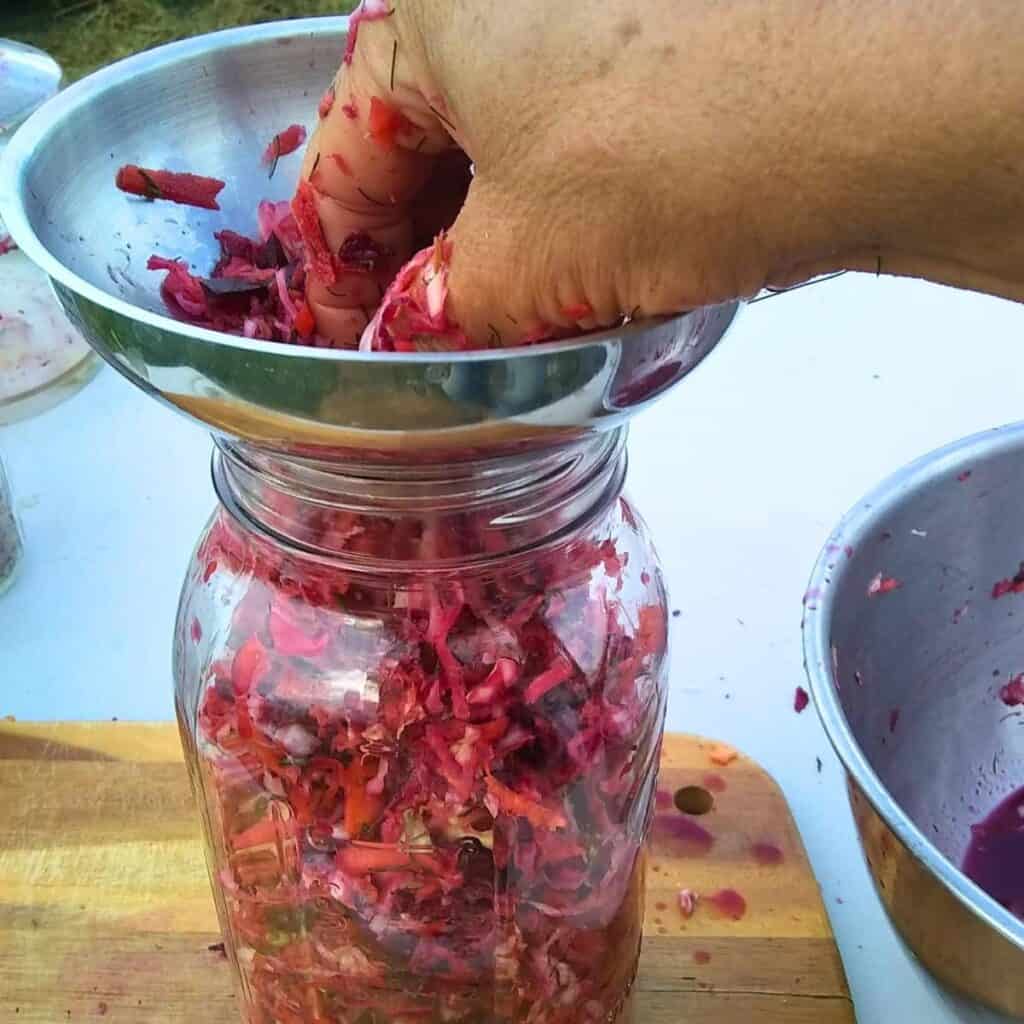
Using a funnel, stuff your cabbage and roots mix into the fermentation jar and press down on it as you go.
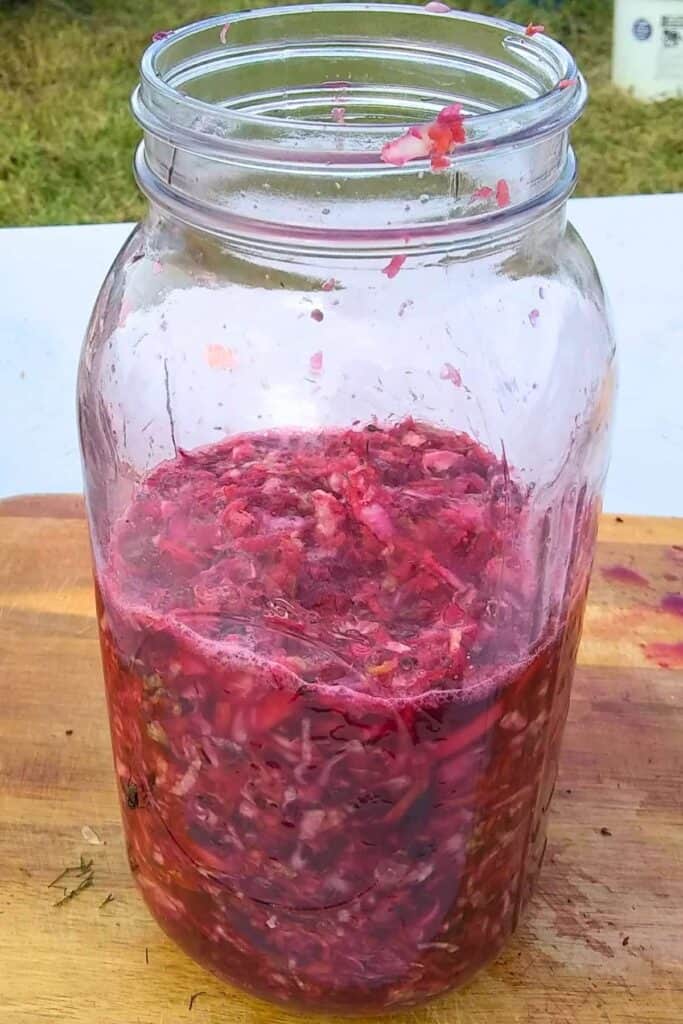
When finished, you should have a lot of juice coming up in the jar and be able to press the ingredients to be covered by the juice.

Place a cabbage leaf or two over the ingredients and push it down to cover all ingredients. Then place a glass-weight, a boiled rock, or a baggie filled with brine (1 cup of water + 1 ½ tsp salt) over this to keep the ingredients submerged. The vegetable juices should come up over the ingredients.
If you’re not getting enough juices, you can wait a day to see if there will be more. If not, just add a little bit of brine to make sure everything is covered.
You’ll need at least 1 inch head space to allow for expansion as this fermentation gets going, or you’ll end up with much of it on your counter.
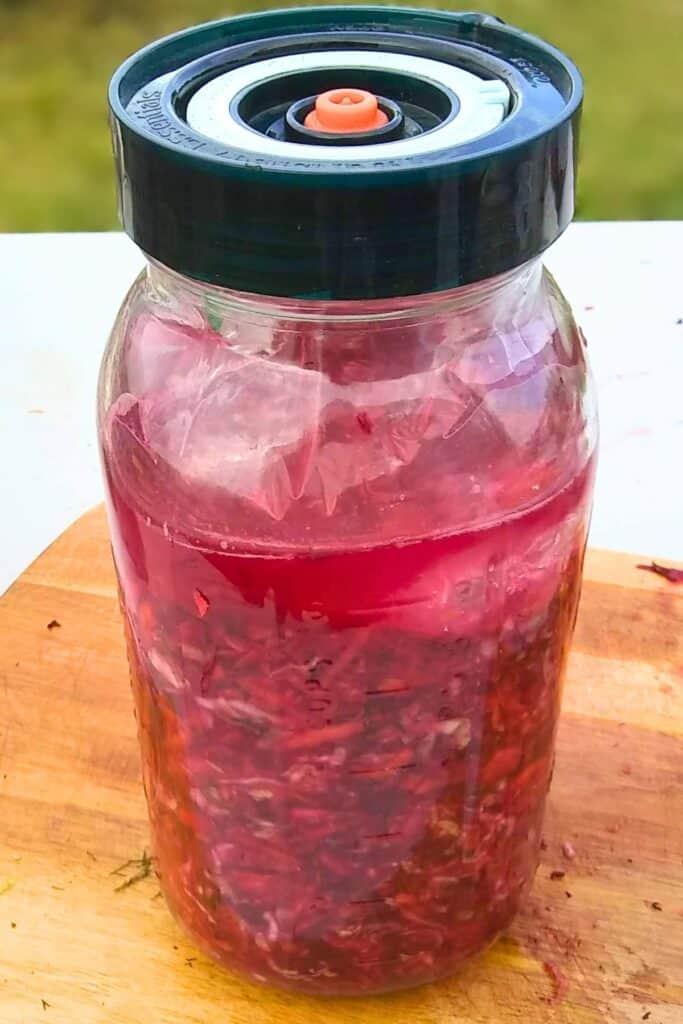
Place a fermentation lid on top or use your 2-piece mason jar lid and put a bowl underneath the container to catch any overflow should there be some. Then set it aside in a corner where you can keep an eye on it and keep it out of direct sunlight.
Fermenting and Maintenance
Now you’re done for a while. Keep an eye on the fermentation. If you used a 2-piece mason jar lid, burp it once a day. (just barely unscrew the band and let the gasses escape with a little hiss. Retighten immediately). This is not necessary if you’re using a fermentation lid.
The best temperature for fermenting is 72-85 degrees. Definitely keep it above 65 degrees during the initial fermentation period until your microbes get active and produce bubbles and cloudy the brine.
You can enjoy this gardenslaw after about a week. Open the jar and taste a little. If it tastes pleasant and you like it that way, put a permanent lid on it and place it into cold storage.
A long fermentation will yield more probiotics and a more tart garden-slaw. So if you can wait a little longer, keep it going for 2-3 weeks total and then store it away.
Storage
Store your garden-slaw in the refrigerator or root cellar. You could keep it at room temperature too, but it will continue to ferment and thus turn more sour as it does, and it might start getting soft and not as fresh and crunchy after a while.
Eventually the microbes will run out of sugars to eat and die off and so will your ferment.
Cold storage will slow down this process considerably and this will keep the microbes alive for a long time. They get very sluggish and their appetite for sugars will slow down. I have some ferments that are 3 years old and are still fresh, crunchy, and delicious.
Serving Suggestions
This Garden-slaw is great in place of sauerkraut in your meals.
Use it to top a sandwich or burger.
Eat it straight as a snack when you need a fix of fresh tasting vegetables.
Serve as a side with hard to digest foods such as roasted meat. The garden-slaw will aid with digestion.
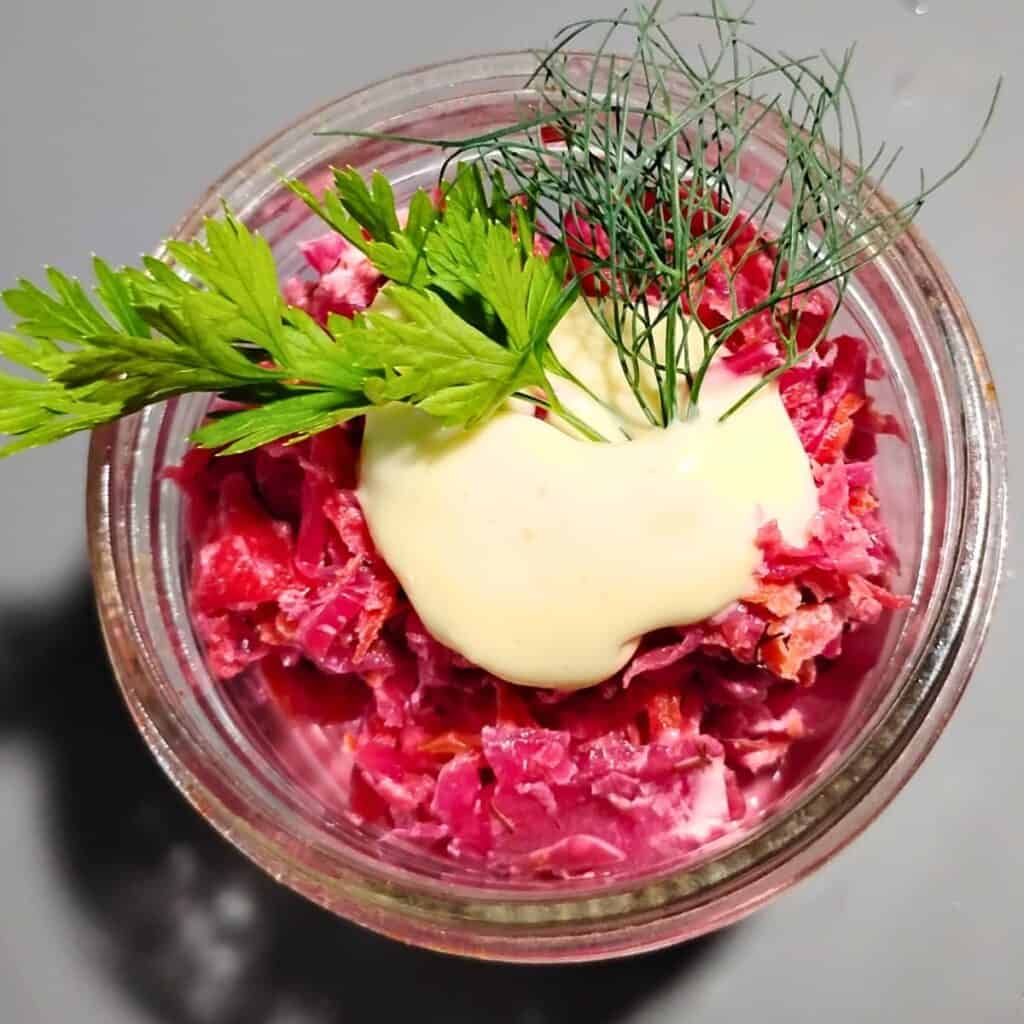
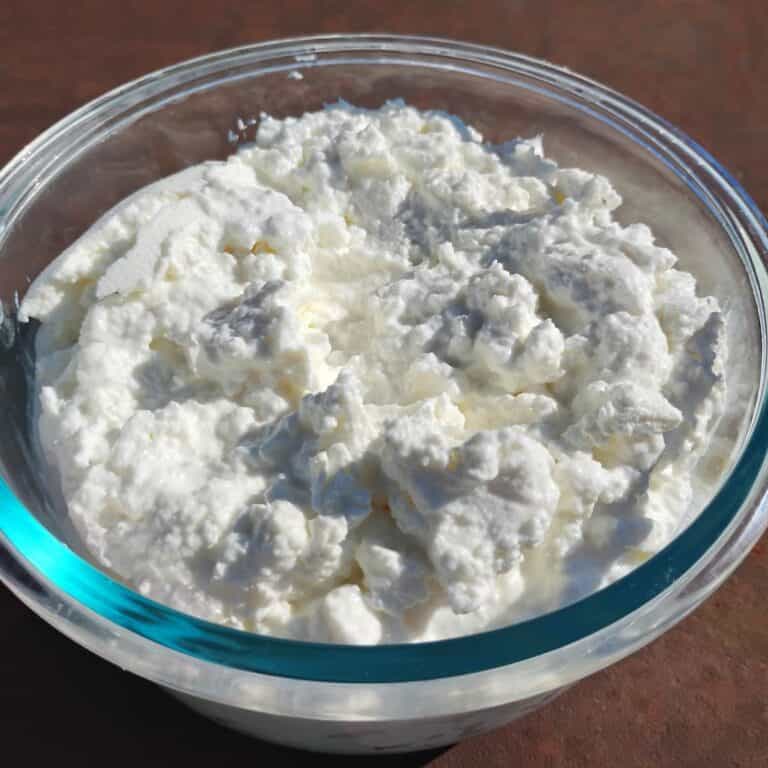
Mix it with some homemade mayonnaise or greek yogurt for a creamy side salad.
Your Questions Answered
Enjoy Your Fermented Coleslaw With Roots!
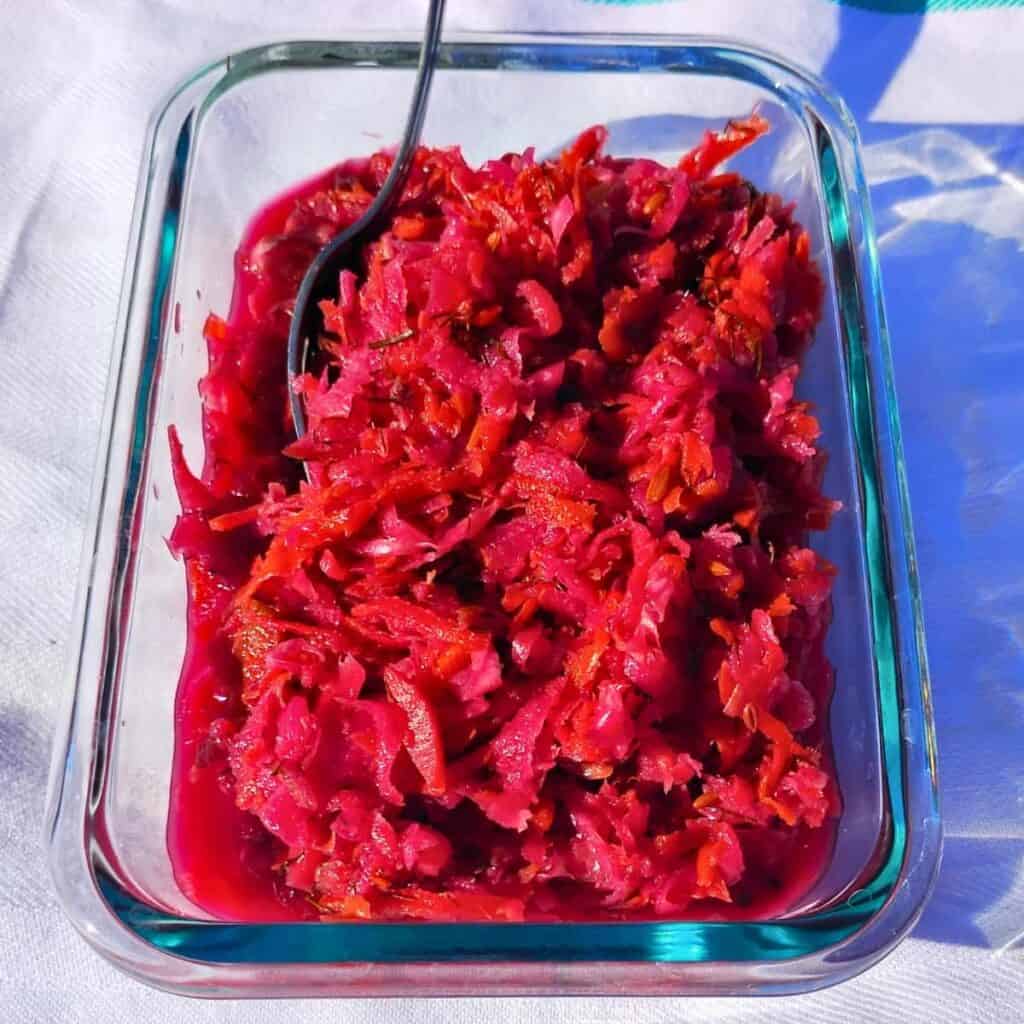
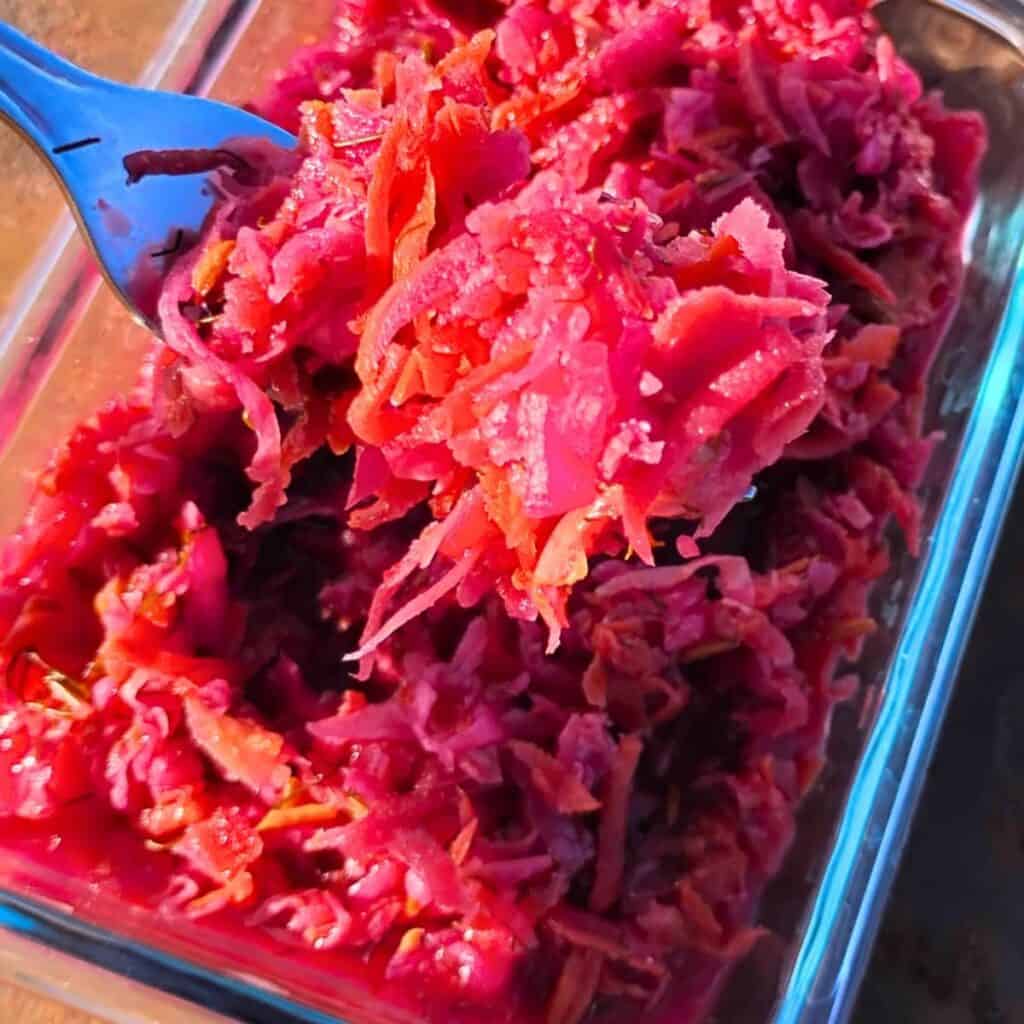
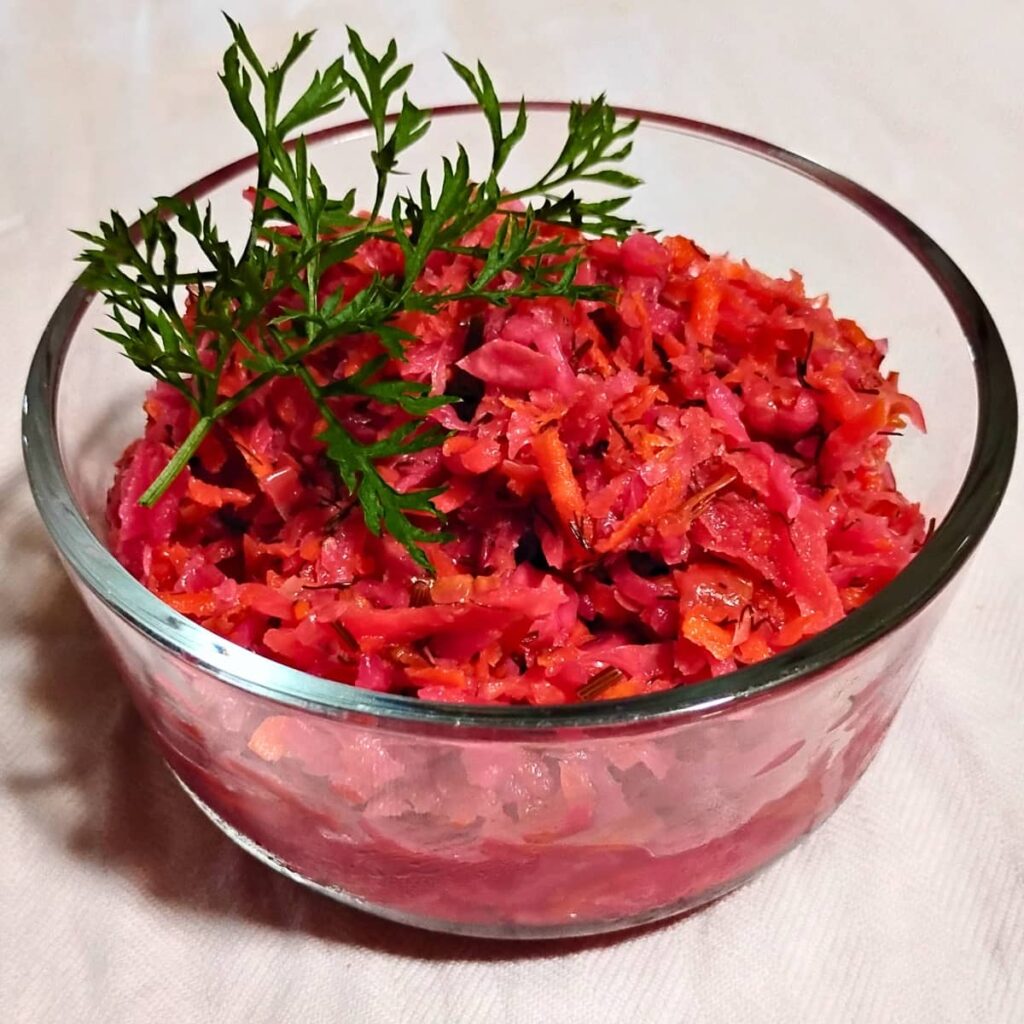
You’ll be so thrilled when you taste this Gardenslaw after it’s done fermenting and the color is just so awesome thanks to the beet roots. I love it just plain out of the jar, but it is so good too as a topping, or make a salad out of it by mixing it with homemade mayonnaise.
I hope you get to try this delicious fermented coleslaw with root vegetables. And if you do, I’d love to hear about it. I’d love to learn about your favorite use for zucchini too. And please don’t hesitate to ask in the comments if you have any questions!
Join the Food For Life Garden Community for more great recipes and homestead tips and ideas. I’m always adding new content. Don’t miss any new posts and learn more about my off-grid farm life.
Other recipes you might like
Lacto Fermented Sauerkraut – Famously healthy and so tasty! Make your own from scratch.
Fermented Tabouli Salad – a delicious cold salad or meal, made gluten-free with quinoa and packed with nutrition and health benefits.
No-fail Homemade Mayonnaise – Make mayonnaise from scratch with this easy recipe, which includes a fermenting option to preserve it for long-term storage.
Fermented Garlic Scapes – Preserve your extra garlic scapes and gain a lot of health benefits by fermenting them. They make delicious, tangy pickles with lots of uses.
Fermented Garlic – Lacto-fermented garlic paste is kind of a special food. It’s the ultimate convenience food and health supplement. But besides that, it gets better as it ages. Just like a fine wine.
Fermented Onions – Keep some onions ready to use on Sandwiches or to put on your salads. Zesty or plain, onions taste great when fermented, and you’ll get the benefits of probiotics.
How to start onions from seed – Learn all about growing onions from seed to harvest and how to prepare them for long term storage. Plus how to choose the right varieties!
How to Grow Celery From Seed To Harvest – All about the celery. If you want to grow it for bulbs, stalks, leaves or seeds. This post has you covered.
Fermented Cucumber Pickles – How to ferment your excess of cucumbers to enjoy all year long and with the added benefit of improving your gut health with probiotics.
Fermented vegetables – How to ferment your summer’s bounty to enjoy it all year long and with the added benefit of improving your gut health with probiotics. Learn the basic skill of fermenting any kinds of vegetables, learn about the benefits of fermentation and get the science behind it too.
Fermented Garlic and Honey – A powerful combination of two all-star infection and sickness fighters. Make this easy remedy today and be ready for the cold and flu season!
Fermented eggs – A probiotic, nutritious, delicious snack that you can keep in your refrigerator for several weeks. Try fermenting garlic scapes with your fermented eggs for great flavor!
Recipes for Garlic Scapes and Bolted Onion Greens – There is much you can do with garlic scapes and bolted onions. I’m sharing my favorite ways to use them and how to make a delicious pesto sauce.
Pin This Recipe For Later
Shop This Post
Box grater
Food processor
Mandolin
Rotary grater
Bormioli Fido jars
Mason jars
Fermentation lid
Airlock
Glass fermentation weight
Scale
Wide mouth Funnel
Pickle packer
Redmond’s Real Salt
Himalayan pink salt
Celtic sea salt

How To Make Fermented Coleslaw With Root Vegetables
Equipment
- Grater – Most of the time I use a box grater, but you could also use a food processor, mandolin, or a rotary grater.
- knife – or Feemster’s famous slicer from Lehman’s (or get it at Amazon) or other slicer, food processor, or mandolin for shredding the cabbage.
- cutting board
- Large bowl – You'll be mixing and kneading your cabbage in it, so make sure that it's spacious for working in.
- Half gallon mason jar
- Fermentation Lid – I recommend the use of a fermentation top or airlock. It makes fermenting so easy and maintenance free.
- Fermentation weight – My go-to favorite weight for mason jars is a glass fermentation weight. You can also use a rock or a plastic baggie filled with brine.
- Wide mouth funnel optional
- Scale optional
- Tamper optional – A pickle packer helps to pack down the slaw ingredients.
Ingredients
- 1 medium head of cabbage
- 2-3 large beets
- 1 rutabega
- 2 turnips
- 3 large carrots
- 1 large onion
- 4 cloves of garlic
- Bunch of Dill
- Caraway seeds
- Salt
Optional Spices
- 1-2 Tbsp Pickling spice mix
- Cilantro seeds
- Dill seeds
- Pepper corn
- Mustard seeds
- fresh or dried cayenne pepper, whole or crushed
- fresh or dried ginger
- fresh or dried turmeric
Other Roots
- 1-2 celery roots
- 1 horseradish root
- 2-3 radishes
- 2-3 parsley roots
- 2-3 young salsify roots
- 2-3 young scorzonera roots
- 2-3 parsnips roots
Instructions
- Wash your vegetables. Brush them lightly if necessary. No need to peel most, but do remove the tough skin around mature rutabaga or turnips, and especially if you purchased them and they are waxed.
- Weigh your bowl and zero it on the grams setting. Place all prepared ingredients into this bowl as you go.
Prepare your vegetables.
- Reserve 1-2 large outer leaves of cabbage to later cover your slaw in the jar.
- I like to slice cabbage with a 'krauthobel', a cabbage slicer, but this time I used my food processor since it was closer at hand. I don't like using it for this, but it worked ok on the cabbage, not so much on the roots.
- Grate or finely julienne your roots.
- Slice or chop the garlic.
- Chop the dill.
- Check the weight of all your ingredients combined when finished prepping them.
Salting
- You'll be adding 2% of the total ingredient weight in salt. So if your total weight is 1800 grams for example, calculate 1800 x .02 = 36 grams of salt.If you don't have a scale, use 2 tablespoons of salt for a half gallon jar of ingredients.
- Sprinkle the correct amount of salt over your vegetables and mix it in well. Let the veggies and salt stand for about 10 minutes or so.
Work The Slaw
- After a bit of rest, knead it well. You'll get some juices separating out, which is the goal here. Keep kneading till you have a fair amount of juice. You can also let it sit a little longer to draw more and knead again before stuffing it into your jar.
Bottle The Slaw
- Using a funnel, stuff your cabbage and roots mix into the fermentation jar and press down on it as you go. When finished, you should have a lot of juice coming up in the jar and be able to press the ingredients to be covered by the juice.
- Place a cabbage leaf or two over the ingredients and push it down to cover all ingredients. Then place a weight or a baggie filled with salt brine (make a brine by mixing 1 cup of water + 1 ½ tsp salt) over this to keep the ingredients submerged. Juices should come up over the ingredients. If you're not getting enough natural juices, you can wait a day to see if there will be more. If not, just add a little bit of salt brine to make sure everything is covered. You'll need at least 1 inch head space in the jar to allow for expansion as this fermentation gets going.
- Place a fermentation lid on top or your 2-piece mason jar lid and put a bowl underneath the container to catch any overflow should there be some. Then set it aside in a corner where you can keep an eye on it and keep it out of the sunlight.
Fermenting and Maintenance
- Now you're done for a while. Keep an eye on the fermentation for the next couple of days. You'll want to see bubbling, which confirms that fermentation is underway.
- If you used a 2-piece mason jar lid, burp it once a day. Just barely unscrew the band and let the gasses escape with a little hiss. Retighten immediately. Do this every day during active fermentation. This is not necessary if you're using a fermentation lid.
- The best temperature for fermenting is 72-85 degrees. Definitely keep it above 65 degrees during the initial fermentation period until your microbes get active and produce bubbles and a cloudy brine. Usually for about the first week.
- You can enjoy this gardenslaw after about a week. Open it and taste a little. If it tastes pleasant and you like it that way, put a permanent lid on it and place it into cold storage. A long fermentation will yield more probiotics and a more tart gardenslaw. So if you can wait a little longer, keep it going for 2-3 weeks total and then store it away.
Storage
- Store your garden-slaw in the refrigerator or root cellar. You could keep it at room temperature too, but it will continue to ferment and thus turn more sour as it does, and it might start getting soft and not as fresh and crunchy after a while. Eventually the microbes will run out of sugars and die off and so will your ferment. Cold storage will slow down this process considerably and this will keep the microbes alive for a long time. They get very sluggish and their appetite for sugars will slow down. I have some ferments that are 3 years old and are still fresh, crunchy, and delicious.


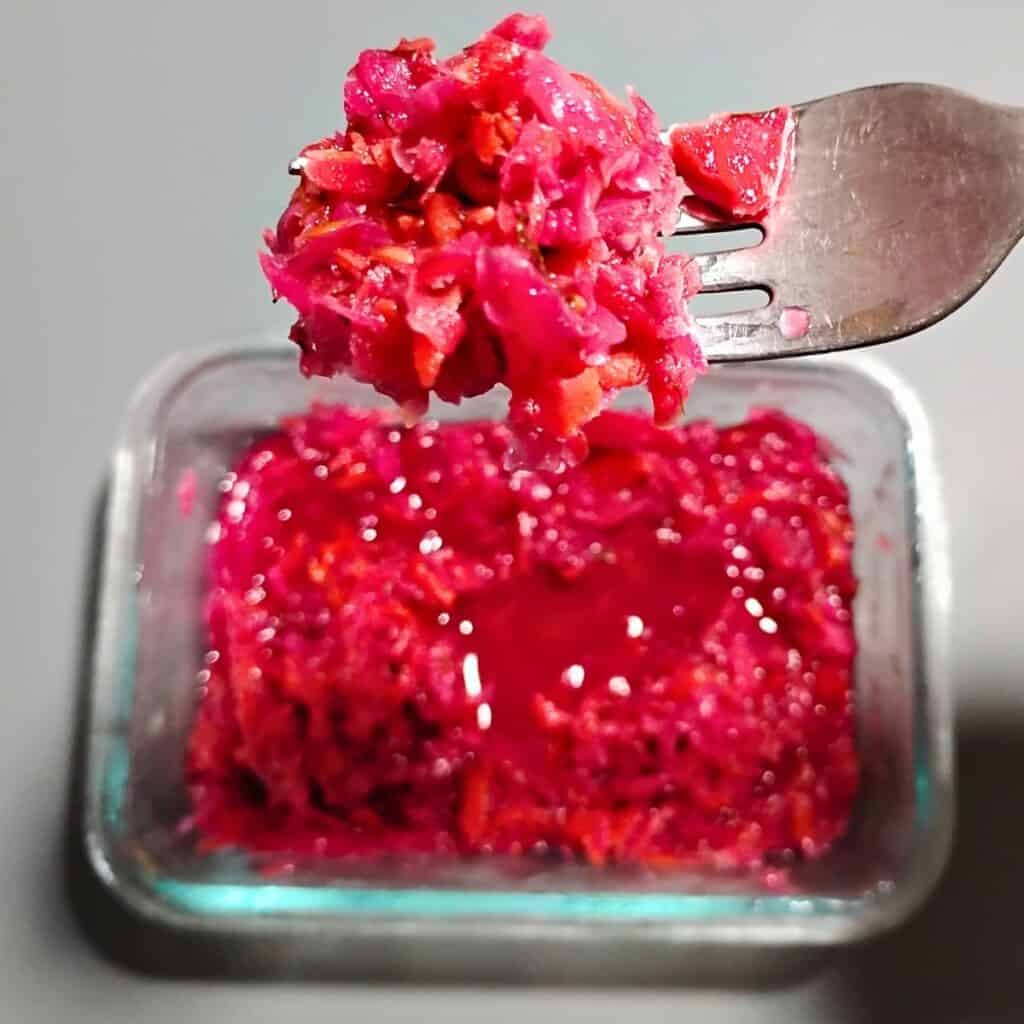
Try this recipe with whatever root vegetables you have in your garden. The color is from the beets. So if you want this gorgeous red pigmentation, don’t forget to include some beets. Besides, beets are so good for you. Let me know here in the comments if you have any questions. I’ll answer as soon as I can.
Wow, this seems like a really flavorful combination. I wouldn’t have ever though to add dill. Isn’t it crazy that this is such a healthy recipe that is quite a process to make (but worth it) and to think that this is how all of our ancestors used to eat. Everything from scratch. We have definitely become impatient with our food these days. This sounds like it would be great to have on hand during the peak of sick season. Thanks for sharing!
Hey Alisha, thank you so much for your comment! Yes, you’re so right, but the best things are worth waiting for. This would be great for sick season, you’re right. I ate almost all of mine already, because it tastes so awesome, and will have to make more for winter time.
Beautiful color. It’s a nice twist on a classic southern side dish!
Thank you, Laura!
What an excellent article!
I would definitely try that with carrots and beets!
Thank you! I do hope you get to try it. It’s delicious!
I can’t wait to try this. We’re currently re-doing our kitchen, so it’s tricky to start big cooking projects, but I might be able to do this one. So good. Thanks for sharing!
You’re welcome! Wow, sounds like you have a big project going. Good luck with your kitchen remodel and hopefully you’ll get to do some fermenting!