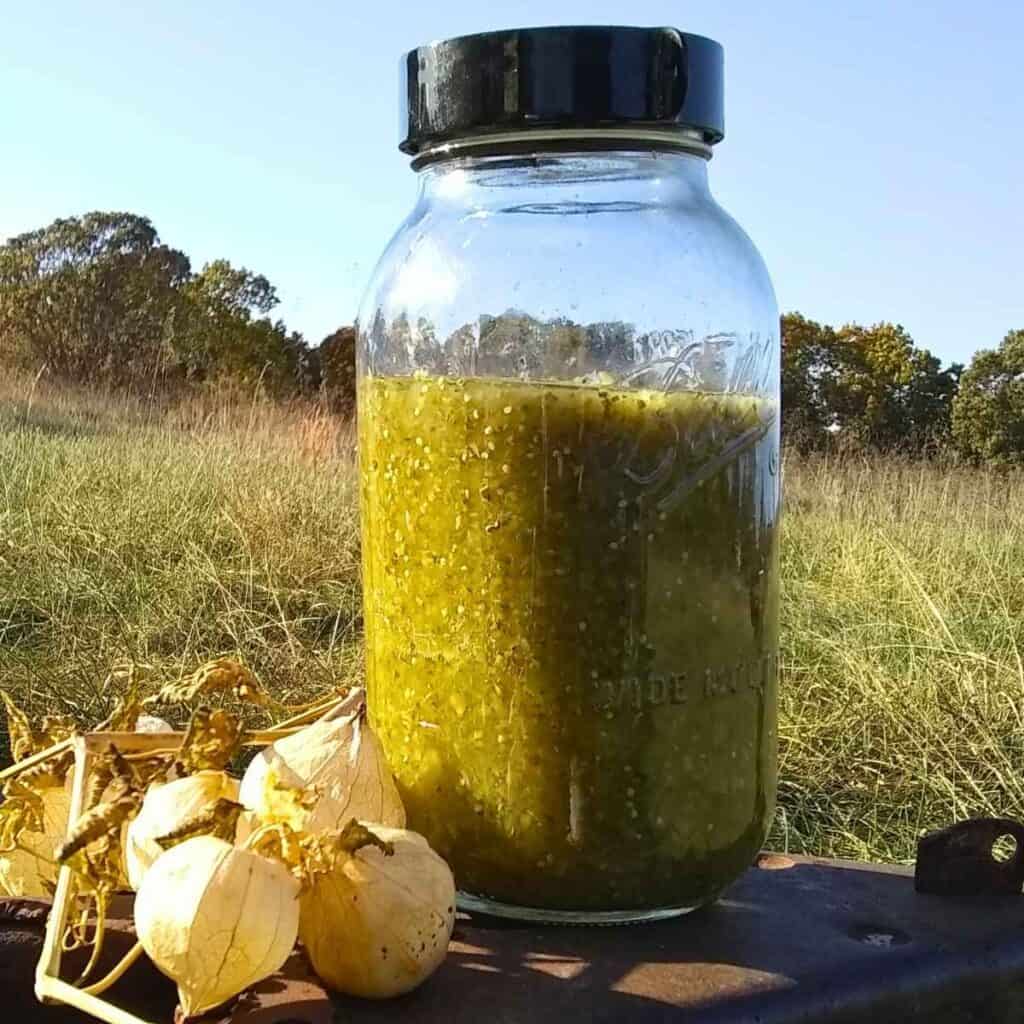
Fermented Salsa Verde, a taste of summer to be savored year-round, anytime you need a pick-me-up. It’s fresh, vibrant and alive!
This post contains affiliate links, which means I make a small commission at no extra cost to you if you click through and make a purchase. See my full disclosure here.
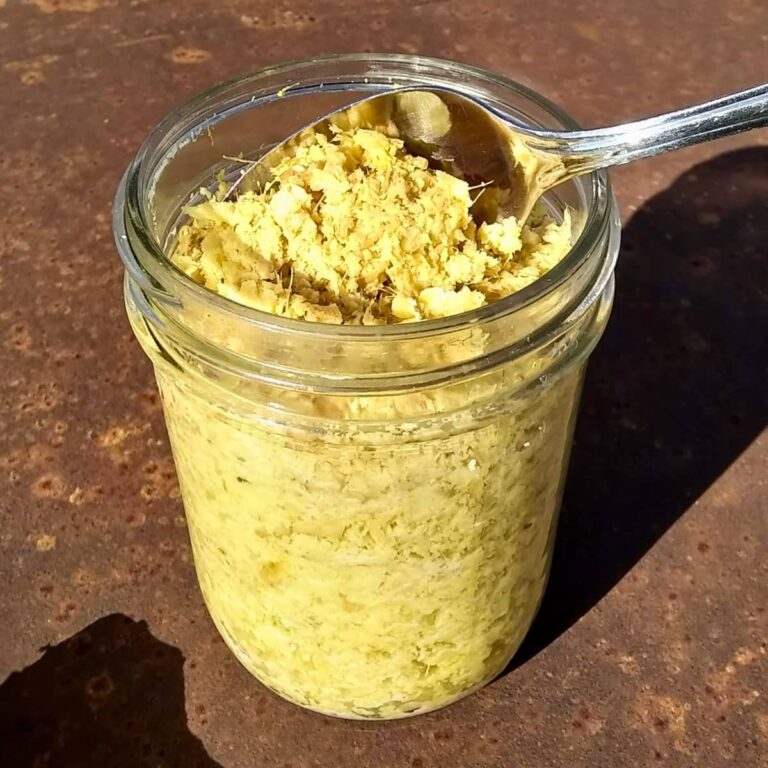
One of my favorite salsas is the vibrant, fresh tasting salsa verde. That zesty concoction of tomatillos and spicy peppers, which bursts with the flavors of summer. Its deep green color and fresh taste is a reminder of sun-drenched days and outdoor gatherings.
Salsa verde is so tasty, drizzled over grilled meats, as a dip with tortilla chips, a topping for tacos or burgers and so much more. However, there is a way to make it even better.
Enter fermented salsa verde – a tangy, probiotic-rich improvement on a classic favorite. When you ferment salsa verde, its freshness, color and flavor can be preserved and enjoyed year-round. Fermented salsa verde will remain alive and refreshing in your refrigerator and it will be a boost for your health in winter, when you need it most.
If you love spicy salsas, you must try making Fermented Chili Paste, a perfect end-of-the season use for green chilies. Have you tried lacto-fermenting fruit? Make delicious Fermented Cantaloupe with your extra melons this year! Here is another fruity recipe: Fermented Hot Sauce With Cantaloupe, it’s fantastic! And last, but not least, my fermentation darling, the incredibly delicious Lacto-Fermented Tomato Salsa! And here is a delicious cooked salsa, not fermented, but awesome and quick to make: Zucchini Ikra.
The Benefits of Fermenting Your Salsa Verde

Fermentation is more than just a preservation method; it’s a transformative process that enhances flavor and nutrition. When you ferment salsa verde, you’ll create a complex and deep flavor.
But even better, fermenting also enhances the nutrients of all your ingredients and you’ll get a salsa that is brimming with beneficial probiotics. These help support your gut health and immune system. The friendly bacteria that develop in your salsa, will contribute to a well functioning digestive system.
If you would like to get more detail about fermenting, there is a thorough discussion about lacto-fermentation and the benefits of fermented foods in my post on lacto-fermented vegetables. It will answer many of your questions and introduce you to my master method of fermenting, which can be used for any vegetables that you would like to ferment.

The main ingredient in salsa verde has many health benefits on its own: According to a chiropractor, tomatillos can improve digestion, help with mumps, colds, and flu, fight cancer, strengthen the immune system, decrease weight, reduce blood pressure, and promote heart health. They can help with asthma, ringworms, strep throat, and eye health. (source)
Then add to that the immune-supporters garlic, hot peppers, onion and fresh herbs. Then take all of it through the fermentation process, which adds probiotics and enhances all the nutrients even more. You’ll end up with not only a tasty treat, but a food that can be used as medicine.
Fermented salsa verde will preserve the flavors of fresh ingredients, picked at their peak, while they are still holding all the goodness of summer and sunshine. When tasting it, you’ll re-live those vibrant summer moments during the gloomy days of winter.
Equipment to make Fermented Salsa Verde:
Food processor – I like my salsa verde slightly textured and so I use my electric food processor, but you can also use a blender or Vitamix for a smooth salsa, or chop by hand if you want it chunky.
Large bowl – You’ll use this to mix all your ingredients before bottling.
A funnel – A wide mouth funnel is a huge help with any canning to get your ingredients into the jar with out spilling half of it. Ask me why I recommend a funnel, lol!
Quart size mason jar or Fido jar for fermenting – I love using my mason jars for fermenting, I have so many and quarts and half gallons are what I use most. But this year I started to use a couple of Fido jars as well, and I really like how well they work. They are self-venting and keep the oxygen out. I am planning to invest in more of them in the future and I do recommend them for fermenting.
Fermentation top or airlock – You’ll need a lid if you’re using a mason jar for fermenting. Salsa verde needs to have an airtight lid unlike other ferments that can be weighted down. I almost always use a fermentation top or airlock for fermenting in mason jars except when I run out. They are so fool-proof and low maintenance. I rarely ever have a problem with a fermentation when I use these. But a regular 2-piece mason jar lid works great too. Just remember to burp them once a day to let the pressure escape.
Gathering Your Ingredients

To create the best fermented salsa verde, focus on quality, fresh ingredients. Find ripe tomatillos, picked at their peak when they fill their husks or just break through it. This way they will lend a tart and slightly sweet flavor. If they start turning yellow, they are better used in other ways such as stir-fries or salads. If possible, grow them in your garden or buy them from a local farm or at the farmer’s market.
Tomatillos are easy to grow. Start them with your tomatoes and set them out at the same time, after danger of frost has passed. They love to grow big, and mine always start bearing even before the tomatoes do. They require no maintenance and escape many pests that plague tomatoes and other nightshades. It does help to provide a tomato cage to keep them from sprawling all over and to keep the fruit off the ground.
You’ll also need fresh herbs, such as cilantro, which adds a vibrant flavor, or papalo. Then you’ll need some spicy peppers to give your salsa verde a kick. A few cloves of garlic and a squeeze of lime juice will round out the flavors. Cumin or cilantro seed can be added if you like. I prefer cilantro seed in salsa verde, or no spice at all.
Ingredients:

Fresh tomatillos – about 1½ pounds, husked and rinsed, to get rid of the sticky substance. If you cannot get any tomatillos, you can substitute green tomatoes. The flavor will not be as bright and tangy, but it does make a pretty good salsa too.

Small onion – measure out between ½ -1 cup coarsely chopped.

Fresh cilantro or papalo – Half a bunch of cilantro will give a nice fresh cilantro taste. Alternatively you can use papalo, which has a very distinct, strong flavor, and you might not need as much of it. While cilantro likes cool weather, papalo likes the heat and if you grow both, you’ll have fresh salsa herbs throughout the whole growing season.

Spicy peppers – Any green hot peppers will do, but jalapeños or serranos are my favorites because they are spicy and meaty. Serranos are much spicier than jalapenos, so you can adjust your heat level by what peppers you choose. You can use just one pepper if you like a mild salsa, but if you’re like me, you’ll use about half a dozen or more. You can also choose nadapenos (a no heat jalapeno variety) in place of hot peppers.
Garlic – This too is a personal thing. 2 medium cloves of garlic are perfect for most people, and some people, like this gal, like to use at least twice that. I like bold flavors!
Lime juice – One or two teaspoons of fresh or bottled lime juice, just for a bit of flavor is enough, unless you prefer more. Don’t use it to add tang since that will come with fermentation.
Sea salt – Use about 1-2 tablespoons of salt for a quart of salsa. My favorites are Redmond’s Real Salt, Himalayan pink salt , or Celtic sea salt, or unrefined sea salt. All of these contain essential trace minerals, which I prefer as a more healthy choice. Plain canning and pickling salt will work as well, but does not add these important trace minerals to your foods. Most important: the salt must be additive free, so check the box label and avoid regular table salt.
Cumin or coriander seed – Optional. Cumin will lend an earthy flavor to your salsa while coriander seed will give it more of a bright note.
Steps To Making Fermented Salsa Verde

Prepare the Ingredients: Start by husking and rinsing the tomatillos. Chop them into quarters. Roughly chop the cilantro, garlic, onion, and the peppers and place it into your blender or processor bowl.

Process to the desired consistency. You can keep it slightly chunky or blend it smooth. I like the consistency that a food processor gives me. A blender will make it more smooth.

Pour the mix into a large bowl. Add the lime juice, salt, and spices if you use them. Mix it all well.

Pack it into a jar: Using a funnel, transfer the mixture to your mason jar and stir to eliminate any air pockets. Leave at least an inch of space at the top, since the salsa will expand as it ferments.

Seal with a fermentation top: I do not add a fermentation weight when I make blended salsas, because they sink. But it is important that your lid is air tight. A fermentation lid or airlock works best, since they are self-venting and keep oxygen out. Alternatively you can use a 2-piece mason jar lid, but be sure to burp it every day. Do not take the lid off, because you don’t want to introduce oxygen. Oxygen will ruin your salsa. To burp, just quickly loosen and retighten the band just to let pressure escape. It might vent itself on its own too.

Ferment: Place the jar in a darkish place for about 5-7 days at 72-80°F. Try to keep the temperature close to the ideal, especially to get the fermentation going. You can taste it after 5-7 days. I like to let it ferment longer, about 3 weeks. When it reaches the tanginess you like, it’s ready! You can eat it right away or store it in your refrigerator for at least a year. Seal the jar well for long term keeping. I like to fill the salsa into smaller containers for storage and use them up as I need them. You can also store the salsa in a cool cellar, or even a cool area in your home, just keep a casual eye on it, but it should be fine, while it’s fermenting very slowly at a cool room temperature.
Enjoying Your Salsa Verde: Uses and Ideas
Once your fermented salsa verde is ready, there are so many uses for it. Use it as a topping for grilled chicken, meat, or fish, or top your taco fillings for an extra burst of flavor. It also makes a fantastic dressing for pasta, grain, or bean salads. I love it on baked potatoes with sour cream or clabbered cheese and as a dip for tortilla chips.
Try drizzling it over roasted vegetables, use it as a marinade for meats, and top your Mexican dishes such as enchiladas (you can make green enchiladas using this salsa). The tangy, fermented taste makes the simplest dishes taste delicious. It’s great as a topping for crackers and cheese as well, or try it with game meat. Do note that whenever you cook this salsa, it will destroy the probiotic benefits and some vitamins, but you’ll still get a lot of nutrients from your vegetables.
When I lived in NW Washington, there was a large Mexican population and many of my coworkers were Mexicans, who made sure we all knew about authentic Mexican dishes, such as tamales, mole, posole and hominy.
One of my favorite ways to use salsa verde is in green posole. I’ll post my recipe sometime soon. With winter coming, it’ll be one of my favorite comfort stews. Subscribe to my newsletter, that way I can keep you posted when it’s available. I’ll be posting how to make your own hominy as well, which, alongside salsa verde, is an important ingredient in Posole.
Capture the Spirit of Summer
When you’re making your own fermented salsa verde, you’re not just preserving flavors. You’ll be capturing memories of sunny days and outdoor gatherings. Revisit these moments when you open up a jar of your homemade salsa verde and enjoy its spritely flavors all year round!
So let’s get started and make some delicious fermented salsa verde and don’t forget to stop back in here to tell us all how it turned out. We’d love to know your favorite way to use it. And if you were inspired to change up the ingredients, let us know your favorite variation in the comments below.
Never miss a new post! Get my Food For Life Garden News delivered straight to your inbox with new recipes and homesteading wisdom, tips, and projects.
For master recipes to ferment any vegetables and an in-depth guide about fermenting and its benefits, go to lacto-fermented vegetables.
Common Questions:
Can I use this fermented salsa verde in cooked recipes?
You most certainly can. However, cooking will destroy the probiotic organisms and some of the vitamins that are present in the raw salsa. But it does work well in cooked dishes such as soup. And you could also offer some raw salsa verde on the side for the probiotic benefits.
How long will fermented salsa verde keep?
It will keep for a year or more in the refrigerator or even in a cool root cellar. Keep a tight lid on it and check on it occasionally. If it smells good, looks good, and tastes good, it’s good to eat. It will also keep at room temperature if you can find a cool corner in your house, but depending on the temperature, it might not keep as long.
More Great Recipes And ways to preserve food
Fermented Chili Paste – Here is a great way to preserve your end-of-the season harvest of green peppers. This paste will last all year in your refrigerator to use as a condiment, seasoning, or topping.
Fermented Cantaloupe – Have you tried lacto-fermenting fruit? It’s a great way to preserve your extra melons this summer!
Pepper Uses and Benefits – Learn about all the awesome benefits and uses for sweet and hot peppers and how to use peppers to improve your health.
Fermented Jalapenos – Spicy, Easy, Tasty, Convenient. Keep a jar of sliced probiotic pickled jalapenos on hand for every day use.
Creamy Cucumber Salad – This is a super delicious summer salad. A must for cucumber season, but it’s great any time if you can get cucumbers!
Fermented Hot Sauce With Cantaloupe – How to make a delicious fermented hot sauce that is great with meat, fish, eggs and on sandwiches. What a great way to use some cantaloupe and spicy peppers.
Fermented Cucumber Pickles – How to ferment your excess of cucumbers to enjoy all year long and with the added benefit of improving your gut health with probiotics.
Fermented Onions – Keep some onions ready to use on Sandwiches or to put on your salads. Zesty or plain, onions are great fermented and a great storage option for your non-storage types.
Fermented vegetables – How to ferment your summer’s bounty to enjoy it all year long and with the added benefit of improving your gut health with probiotics. Learn the basic skill of fermenting any kinds of vegetables, learn about the benefits of fermentation and get the science behind it too.
Zucchini Ikra, A Vegetable Salad – This fantastic, versatile dish from Eastern Europe can be a delicious chunky salad, salsa, relish, topping, or creamy dip, and more. And it tastes awesome!
Try making Fermented Eggs! A probiotic, nutritious, delicious snack that you can keep in your refrigerator for several weeks. It’s there, ready to satisfy that food craving with something that’s good for you. And I’m certain that you’lI love eggs with salsa, or salsa with eggs!
Print the Fermented Salsa Verde Recipe:

Fermented Salsa Verde Recipe
Equipment
- Food processor – I prefer using my electric food processor. You can also use a blender or Vitamix
- Large bowl
- A wide mouth funnel – A wide mouth funnel is very helpful to get your salsa into the jar.
- Quart size mason jar – or a Flip top jar, such as the Bormioli Rocco Fido jar
- Fermentation Lid – you can just use a 2-piece mason jar lid, but I prefer a fermentation lid or airlock lid.
Ingredients
- 1½ lbs fresh green tomatillos – husk, rinse. Use green tomatoes if you don't have tomatillos.
- ½ cup onion, chopped
- ½ bunch Fresh cilantro or papalo
- 1-6 Spicy green peppers – my favorites are jalapenos or serranos. If you prefer low heat, use less or use mild jalapenos.
- 2-4 Garlic cloves
- 2 tsp Lime juice
- 3-6 tsp Sea salt
- ½ tsp cumin or coriander seed
Instructions
- Prepare the Ingredients: Start by husking and rinsing the tomatillos. Chop them into quarters. Roughly chop the cilantro, garlic, onion, and peppers.
- Place everything in a blender bowl.Process to the desired consistency
- Pour into a large bowl. Add the lime juice and salt, mix well. You can adjust the salt. I like to use 6 teaspoons for a quart jar, especially when the weather is very hot. But if you prefer less salt, 3 teaspoons is enough, but don't go lower
- Pack the salsa into your jar: Transfer the mixture to your clean mason jar, stir to remove air bubbles. Leave at least an inch of space at the top, as the salsa will expand as it ferments.
- Seal with a fermentation top: I do not add a fermentation weight when I make blended salsas, they sink. But it is important that your lid is sealed tight. A fermentation lid or airlock works best. Alternatively you can use a 2-piece mason jar lid, but be sure to burp it every day. Do not take the lid off, because you don't want to introduce oxygen. To burp, just quickly loosen and retighten the band just to let pressure escape.
- Ferment: Place the jar in a darkish place for about 5-7 days. The ideal temperature for fermenting is about 72-80℉. A little cooler or warmer is ok, but try to stay close to the target temperature. You can taste it after 5-7 days and if you like it, you can call it done. I like to let it ferment longer, about 3 weeks to increase the probiotic content. You can eat it right away or store it in your refrigerator for at least a year. Seal the jar well for long term keeping. I like to fill it into smaller containers, to use one and keep the rest fresh and sealed for later.
Notes
Enjoying Your Salsa Verde: Uses and Ideas
Once your fermented salsa verde is ready, there are so many uses for it. Use it as a topping for grilled chicken, meat, or fish, or top your taco fillings for an extra burst of flavor. It also makes a fantastic dressing for pasta, grain, or bean salads. I love it on baked potatoes with sour cream or clabbered cheese and as a dip for tortilla chips. Try drizzling it over roasted vegetables, use it as a marinade for meats, and top your Mexican dishes such as enchiladas (you can make green enchiladas using this salsa). The tangy, fermented taste makes the simplest dishes taste delicious. It’s great as a topping for crackers and cheese as well, or try it with game meat. Do note that whenever you cook this salsa, it will destroy the probiotic benefits and some vitamins, but you’ll still get a lot of nutrients from your vegetables. Tip: You can use green tomatoes in place of the tomatillos. One of my favorite ways to use salsa verde is in green posole. I’ll post my recipe sometime soon. With winter coming, it’ll be one of my favorite comfort stews. Subscribe to my newsletter, that way I can keep you posted when it’s available. I’ll be posting how to make your own hominy as well, which, alongside salsa verde, is an important ingredient in Posole. For more information and benefits of fermenting, check out my post on lacto-fermented vegetables.Pin This Recipe For Later

Shop This Post
Wide mouth funnel
Manual chopper
Electric food processor
Blender
Vitamix
Fermentation tops
Airlocks
Redmond’s Real Salt
Himalayan pink salt
Celtic sea salt
Bormioli Fido Jar
Lime juice


This salsa is so delicious and great for using your extra tomatillos and spicy peppers. A delicious, fresh, wild fermented salsa that keeps long term in your refrigerator or cellar. Great for a spicy topping and added to winter soups for a bright tang. If you have any questions, ask right here in the comments!
What a great way to enjoy the zingy summer flavours throughout the year
Yes, it’s great to have these fresh flavors during the winter and spring! Thank you for your comment!
This salsa sounds so refreshing! I’ve always wanted to try fermenting salsa!
Hey Molly, thank you so much for visiting! I hope you get to try making salsa sometime, it is delicious and refreshing.
This fermented salsa verde is vibrant and has so many flavorful ingredients. I had never heard of/ seen papalo. It looks very interesting. I also didn’t realize you could blend the jalapeños with the seeds! I love a good fermented food and all of the benefits that come with it. My family enjoys enchiladas, this would really be a great improvement to my recipe. Thanks for always sharing the best food preservation guides and fermented food recipes!
Thank you for your kind comment, Alisha! Papalo is a great herb that works well in salsas. The trouble with cilantro is that mine always bolts just before the tomatoes are ripe. But papalo loves the heat and thrives throughout summer. It is very strong flavored. Something to get used to maybe. But I love the bold flavor! And yes, this salsa would go really well with enchiladas. Mexican foods are often green or red based and this salsa is perfect for all the green based recipes like posole and enchiladas. But it’s great on any foods really, I hope you get to try it!
What a great idea! We love anything fermented & we definitely love EVERYTHING salsa!
Hey Penny, that’s great fermenting and salsa is the best combination in my opinion!
This looks so fresh and flavorful! I love the idea of fermenting salsa verde, such a great way to boost the benefits. Can’t wait to try this with tacos or grilled veggies!
Hey Emily, I hope you get to try it, it is so delicious and healthy!
This is great! I have never grown tomatillos, but this recipe would make it worth a try. I need to look for some soon to make this lovely recipe. Fermented salsa is weirdly addictive! But in a good way…
Hey Rachel, you are right. I love eating my fermented salsas even just straight from the jar. They taste so delicious and lively!
Very interesting recipe, Heidi!! I don’t think I ever had a tomatillo, but I’m gonna have to find some to try this! Thanks for sharing 🙂
Hey Marta, thanks for commenting! Tomatillos are so tasty. They are easy to grow too, if you find that you like them, and I hope you get to try this.
Salsa verde is perhaps my favorite and this recipe is amazing! Love the additional gut health benefits.
Thanks so much for your kind comment, Jenni! Yes salsa verde is pretty amazing!
LOVE the combo of salsa verde and probiotics ❤️
That is the best reason for fermenting, aside from the great flavor of fermented foods. 😍
Yum! Saving this to add into our rotation for taco and nacho nights 😋
That’s great, Kirsten! I hope you love it as much as I do. It’s a great salsa for tacos and nachos!
Fresh and delicious!
Thank you!😁
On day five of the ferment, my Salsa Verde developed white, fuzzy mold on top. I tossed it! I had about four inches of head space in my airlock jar, I used the minimum amount of salt called for in the recipe and I kept it under the sink (warmest part of my kitchen) which was probably not a constant 72-80 degrees. Could any/all of these factors account for the mold? All equipment was sterilized before use.
Thanks so much for any advise you can give me. I love Salsa Verde, so if I can get the gut benefits from fermenting, as well as the delicious taste of Salsa Verde, it will be an added bonus.
Hey Sue! I’m sorry that you had to toss your batch of salsa. Unfortunately stuff can happen when we work with natural, living food. Here are a few things that come to mind. First, try more salt next time. Your temperature might have been a little warmer than ideal for a low salt ferment. Or, if you’re using low salt, add a little fermentation juice from another active fermentation. Try to stay around 70 degrees next time with low salt. Did you have an active fermentation going after a couple of days, with bubbles? If not, did you use organic produce and filtered water (no chlorine)? You can try next time to move it to a cooler place after it starts to ferment actively (day 3 ish) and let it slow ferment. It will continue to ferment in the cellar or fridge even, but not as fast. Make sure that any produce you used does not have mold on it or any blemishes that could harbor mold spores. I would also reduce the air space in your jar next time, just add a little more salsa or use a smaller jar. You’ll want some headspace, but the more oxygen, the more chance for pathogens. And while I don’t like using plastic bags in my ferment, I have used brine-filled baggies, placed on the food, when I had too much headspace, to reduce the air space in the container. I think the most obvious that I can think of would be too little salt (the higher the temperature, the more salt you want to use) and maybe compromised ingredients. And yes, do not open the container once you get it set up, or you’ll introduce oxygen and possibly pathogens.
Thanks so much for your help. This is great information. I will make these tweaks and plan for success. Your suggestions are greatly appreciated!