Growing Peppers From Seeds
Growing peppers from seeds is easy and rewarding. Use this guide to start hot and sweet peppers indoors and learn how to transplant, care, and harvest your peppers.
Equipment
- Seed starting trays - Waterproof seedling trays
- Starter pots - 48-cell inserts or 3" pots, 5" pots, or all-in-one seed starting kit
- Soil blockers (pot-less system) - Ladbrooke original micro 20 soil blocker and Ladbrooke mini 4 blocker
- Plant Labels - popsicle sticks or little 4" plastic labels.
- Seed Starting Mix - seed starting mix
- Container for mixing soil and water - A cheap plastic dishpan works great or a cement mixing pan
- Grow lights (shop lights) - 4-ft LED shop lights
- Small clamp on grow light - Table mount grow lights
- Plant Food or Compost tea - fish emulsion and/or Tomato and Veg
- EM-1 - optional - EM-1
- Compost - Make your own or get a few bags of compost
- Transplanting and cultivating tools - cobra head cultivator, dibber and the hori hori knife
Materials
- Pepper Seeds - of your choice
Instructions
First, prepare your soil mix.
- It is best to use a dedicated seed starting mix for starting seeds.
- Now you'll want to pre-moisten the soil mix so it is just moist, but not wet. If you squeeze it, you should see a drop or two of water between your fingers, but not a stream of water.
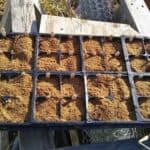
Fill your planting pots
- Grab your planting pots and fill them with the pre moistened soil mix. Now tamp them down on the table a couple of times to slightly compact the mix and top off if necessary. This will eliminate air spaces in your pots.
Sow Your Seeds
- Sow several seeds in each pot, about 8 or so in a 3 inch diameter pot. If you plant several varieties, you can just designate a separate pot for each variety and don't forget to label them immediately after sowing. I don't know how good your memory is, but chances are high that you'll forget what you planted if you don't do it right then.
- Now I like to press down lightly on the seeds so they make good soil contact.
Cover Your Seeds
- Rule of thumb in the seed starting world is to cover your seeds with twice the depth of soil as the diameter of the seed. So use your best judgement and place about ¼ in of soil over sweet pepper seeds and just a sprinkling over the smaller hot peppers.
- I like to use vermiculite to cover the seeds to let some light through. It also reduces the chances for damping off disease (where plants just fall over and die due to a fungus infection).
Moisten the soil
- I like to use a spray bottle to moisten the top of the soil. This keeps the seeds from getting washed away and keeps the soil cover in place.
- Now you can place your pots into a water proof tray that can double later as a water basin to water your plants.
Humidity Cover
- You can certainly use one of those humidity domes that are sold by seed supply companies. But they are fairly expensive and often don't fit very well.So instead, you can just drape a bit of plastic wrap over your seed pots.
Lights
- Place your seedlings under grow lights and keep them on for 16 hours, off for 8 hours.
Heat
- Unless you keep a very warm room, your peppers will want some heat under them. They germinate best at temperatures over 75 degrees and up to 95 degrees.I use a heat mat and keep my thermostat set in the upper 70s. And the grow lights add enough extra heat to raise the environmental temperature quite a bit.
Observe
- Now your task is to observe and maintain soil surface moisture until the seeds start to sprout. After that it's best to keep the surface dry. It may take up to five weeks for some of the seeds to emerge, but most will show their little green tips in about two weeks.
Transplant
- When you see the first set of true leaves appear, you can go ahead and transplant the peppers into individual pots. Start with 3" pots and up-pot again later if necessary. This time you can use regular potting soil, which normally contains enough fertility for several weeks. Water thoroughly.
- When transplanting, take care to not grab the little seedlings by their stem. It is very fragile and can be damaged very easily. Instead, grab the leaves, loosen the soil and prick the seedlings out very carefully.
- Using a dibber of some kind, make a hole in the new soil filled pot and bury the roots int the soil. Plant at about the same depth as it was in the old pot.
- You will still need to keep the plants under grow lights, and keep the lights about 2" above the plants. The heat pads are not necessary anymore, but do try to keep your room temperature above 55 degrees. Warmer is better!
Feeding
- Later on, after about 3 weeks you'll want to fertilize with a diluted fish emulsion at half strength, to supply nutrients.
Maintenance
- From now on, let the soil dry out almost completely before watering again. Water from the bottom up to prevent fungal diseases. The way you do that is by adding a half inch or so of water to your bottom tray and letting the soil soak it up. Add more water if necessary.
- Once the soil is moist throughout, keep an eye on it and again let it dry out before watering again.
- Once you see roots starting to grow out of the drainage holes at the bottom, it's time to transplant your peppers once again. This will prevent them from becoming root bound, a condition where the root starts circling inside the pot and this will stunt the plant's growth and can even choke them.
- Choose a pot about 5 inches in diameter for your next size up and that should then suffice until it's time to plant your peppers outside.
Common Problems in Seedlings
- The most common problems in young seedlings are damping off disease and spider mites. Damping off can be controlled by keeping the peppers warm (over 70 degrees) and keeping the surface of the soil dry. That is why you want to water from below.
- Damping off is super frustrating, it makes your little seedlings just keel over and you'll see a shriveled area at the bottom of the stem. If you use Vermiculite on top of the soil, it can help prevent damping off.
- Apparently spider mites hate moisture, so if you're dealing with spider mites (you'll see white webbing under the leaves), mist the plants with a fine spray of water to provide humidity, which can deter the mites.
Hardening Off
- About a week after your last frost date, start hardening off your pepper seedlings. This can be done two ways. But each involves progressive exposure to the elements.
- Method 1: This is more labor intensive and requires you to be home for part of the time during the day, but it gives you the most control.Take your seedlings outside for about an hour on the first day. Give them dappled shade and a bit of direct sun. Not too much. The plants will need to build up their sun tolerance or they might suffer leaf burn and stress.Take them back inside and the following day do the same but for a couple of hours and increase sun exposure. Keep increasing exposure on days 3-7 and after this week finally give them all day outside with at least several hours of sun.
- Method 2: The first method can be hard to maintain if you're super busy or work full time away from home. In that case, here is another way you can do this.You can observe your yard outside and choose a spot that gets shade for most of the day, especially in the afternoon, but gets a little sunshine in the morning. Choose a sheltered location for the first few days that doesn't get a lot of wind and that is protected from the rain.Set your plants out there. After a day or two, you can move them out a bit farther into the sun, progressing each day with greater exposure until the week is up.Once this week is done, I like to keep mine outside in the full elements for a few more days and up to another week before transplanting into the garden.
Transplanting Out Into The Garden
- When it's time to transplant, it's best to choose a cloudy day or do it in the late afternoon when the sun is less intense and starts to go down. This can prevent stress and wilting.
- Soak them: To reduce transplant shock, I give mine a really good soaking before I transplant them, so they have their needs met fully. I imagine that this will give them a bit of time to get used to being in different soil and environment without having to scramble to find water and food right off the bat.
- I prepare a half strength solution of kelp or fish fertilizer with water, and a tiny dash of EM-1 (Effective Microorganisms). This is a special blend of microorganisms that can inoculate the plant roots and later populate the area around the plant with a diverse mix of effective microorganisms.
- You could also use LAB (lactic acid bacteria grown in rice water) or a bit of Whey or Fermentation juice. If you have compost tea or comfrey tea, that can help too. The benefit of EM-1 is the great diversity of select microorganisms that have proved to be especially good at their job. Em-1 helps to increase bioavailability of nutrients and promotes healthy root growth.
- I pour this solution into a waterproof pan or tray and set my plants into it for an hour or so. Then I take them to my garden and transplant them.
Choose The Right Location
- Peppers need at least 6 hours of sunlight per day. They love the warm weather, however, they will suffer if it's too hot. At temperatures over 95 degrees, peppers will drop their blossoms in order to conserve their energy. They go into survival mode, not production mode.
- Therefore it's good to provide them with some shade on hot afternoons. Both to keep them cool and to prevent sunscald on the fruits, which can ruin them.
- If you can, pick a spot where you can plant sun-loving taller plants on the west side of the peppers that can serve as shade in the afternoon. Tall flowers, such as zinnias or a trellis of pole beans would work well.
- This way the peppers can get their sun requirement in the cooler, early hours of the day and have a bit of shade in the afternoon.
Preparing The Soil
- Most peppers like well draining soil that is rich in organic matter, and a bit on the acidic side (6-6.8 pH). Some compost added to the bed in fall or early spring will provide most of the nutrients that the peppers need to get started.
- If you're a northern grower, consider black plastic mulch. I promise, it makes a world of difference when your climate is too cold for big pepper harvests. I've tripled my pepper harvest in New Hampshire and Washington just by mulching with black plastic.
- I hate using plastic, but in some cases it just is hard to avoid for lack of a better alternative. And if you're careful, you can reuse a quality plastic for several years.
- Place the mulch down at least a week before planting (a great time to do this is when you start to harden off your plants). This will warm the soil for planting.
- If you plant your peppers in a row, I would lay the plastic along the side of the plants on both sides of the row so you can take it off easily when the weather gets very hot. Secure with soil, rocks or garden staples.
Planting Your Peppers
- Most growers recommend a 18" planting distance, but I like to plant them a bit closer. This achieves that the canopies of the peppers shade the roots to keep them cooler during the heat of summer and with a good leaf cover, it helps protect pepper fruits from sun scald. I usually plant mine about 12 -14 inches apart.
- Unlike tomatoes, peppers should not be planted deep. They don't form roots on their stem like tomatoes and the stems could possibly rot. Burying them up to an inch deeper is ok, but not more.
- So make a hole for your peppers and plant them up to an inch deeper than they were. Then leave a slight indent around the plants for water catchment
- Give them a good initial watering with diluted fish emulsion or a nitrogen rich fertilizer.
Staking
- Provide a tomato cage for support or some stakes that you can tie the branches to. Peppers can easily tip over on a windy day which can damage the plants and sever some roots.
- If you grow your peppers in a row, you can try a Florida weave support. However, when I tried it I didn't like it all that much.
- For one thing, your supports need to be super strong, the center can sag after a while unless you add many supports along the way. This can make the pepper bushes lean. And I found that the branches end up squished, I found it tedious to harvest the peppers that way without breaking branches.
- My preference is tomato cages or stakes.
- Set the support now while the peppers are little so you don't disturb the soil later or damage the roots when they grow larger.
- Mulch with black plastic in the North for warmth or straw, hay or leaf mulch in the South to cool the soil in hot weather.
- If you have a slug problem, leave a ring of no mulch around the plants and sprinkle a little diatomaceous earth (DE) on the exposed soil to keep slugs away (reapply after rain). DE can possibly harm beneficial earth creatures too, so apply only when and where necessary.
- Or try placing prickly briars like blackberry vines or rosa rugosa prunings around the stems to deter slugs.
To Prune Or Not To Prune
- You might hear about pruning your peppers. This is a bit controversial, some say it works some say it doesn't. I advise caution if you live in northern climates! Here is the deal: theoretically it should totally work, but in real life, it might not.
- So you prune off the very growing tip on your pepper plants, just above the first branches, once they reach a foot high.
- This will make bushier plants that are less tall, less prone to toppling over, and that put out more fruiting branches, thus yield more fruit.
- I tried it one year back in Washington. But with the short growing season we had, I couldn't make up for the loss in time that pruning caused and it didn't work.
- It took longer for the pruned plants to start producing and, while they did end up loaded with fruits eventually, they were immature and undersized at the end of the season. They never grew to full size, because there wasn't enough time to catch up before the cool, rainy weather set in.
- Living in the Southern part of the country now, with a longer growing season, I will give it another try on a few plants.
Watering
- Keep your peppers watered regularly. If you don't, you might get blossom end rot on the fruit. Just like with tomatoes, peppers can suffer a calcium deficiency, which is caused by irregular watering. It can be help to install drip irrigation and mulching will help much with moisture retention in the soil.
- If you overhead water, try to do it in the morning so the plants will be dry in the evening. Evening watering might keep the plants damp throughout the night, which can provide a breeding ground for diseases.
Fertilizing
- Fertilizer should be used sparingly, unless you have depleted soil. A good compost will supply what peppers need in general. However, when you first plant the peppers it helps to give them a boost.
- Start with an initial fertilizer that supplies some nitrogen and is low in potassium. If the plant's energy is spent on fruit production early on, it can stunt the growth of the plant itself and that can result in smaller fruits and lower production throughout the season.
- Once the pepper plants are well established and have grown about 18 -24 inches tall you need to quit the nitrogen and give a fertilizer that is higher in potassium to promote flowering and fruit set, such as Tomato and Veg every 2-3 weeks.
- Nitrogen rich fertilizers will make your pepper plants look amazing with vibrant, lush foliage, but you'll be hard pressed to find a lot of fruits under there.
- Phosphorus is king when it comes to producing fruits on pepper plants or any fruiting plants for that matter. Most soils have plenty of it, but it is not always available, unless you work on your soil health and soil life.
- Improving soil health can be a process that takes a few years of adding organic amendments such as sheet mulch, manure, compost and things like grass clippings.
- So in the meantime, the fertilizer will help. But priority should be on soil building for the long run.
Pests and Disease Control
- Watch for aphids, white flies, and leafminers. All can be controlled with neem oil if there is an infestation. Any pesticide sprays, organic or not, can harm beneficial insects as well and so it must be applied with care and only right where it is needed.
- Use a mix of 2 tsp pure neem oil, 2 tsp castile soap and 1 quart of water. Mix well and spray the affected areas.
- Small patches of aphids can be crushed between your fingers. Use companion planting to attract predator insects.
- Hornworms are easy to spot, but if you don't catch them right away, they can decimate a plant overnight. So keep your eyes open for hungry critters and deal with them promptly.
- Other common pepper diseases include bacterial, viral and fungal diseases. It is recommended that you rotate your crops to prevent them, and discard any leaves or plant parts that show signs.
- Many of these diseases can be transmitted through the seeds, so do not save seeds from diseased plants.
- But you can also help prevent disease by trying to keep water from splashing on the plants from the ground, as that can possibly introduce diseases. Mulching helps a lot, drip irrigation can help, as well as careful watering.
- Keeping good airflow around the plants, and watering in the morning when the plants have a chance to dry quickly helps too. Evening watering might keep the peppers damp through the night. And this can provide a fertile breeding ground for diseases.
Harvesting
- Peppers can be harvested as soon as they are full size. They will first be green or yellowish depending on the variety, and then transition to their final color, sometimes going through various hues before arriving there.
- If you want to pick your peppers at the fully ripe stage, then you'll need to wait till the color turns at least 80% bright red, yellow, or orange depending on the variety you planted.
- If you like green peppers, then pick them at the green stage and it will actually encourage the plant to make more peppers.
- When you wait until the fruits are mature, the pepper plant will think that it has done its job at producing viable seed. Then it might just get lazy about producing more.
- Picking continually is especially important with the abundant smaller chilies. Keep them picked at the green stage in the beginning. This way they'll keep putting out an abundance of flowers and fruits throughout the season.
- I like to pick off all the green ones, except for the cayennes, early in the season. Then I use them for cooking. And if I have a lot, I cut them into recipe sized pieces for the freezer or to dry. I also like to ferment slices or make fermented green chili paste for convenient use year round.
- Then I let the subsequent flush of peppers ripen to maturity and pick them ripe. At the end of the season, before frost comes in, I pick them all and process them for storage. For bell peppers that means freezing or drying them.
Processing
- Any hot green chilies get fermented into chili paste and salsa verde. Green or red ones go into tomato and pepper salsa, and red hot chilies into hot sauce. I also dry them to make chili flakes, chili powder, and paprika powder.
- I also store a few whole red dried chilies in jars for use in spice teas, bone broth, fire cider and various vegetable fermentations that could use a spicy kick. You could also make a pretty ristra with red hot chilies!
Seed Saving
- If you like to save your seeds (and I think you should try), wait for the peppers to mature to their ripe color. Select your best plants and collect the seeds. Peppers are self pollinating, but they can also cross pollinate.
- Here is a warning: You may end up with a cross if you grow more than one variety. And yes, peppers cross-pollinate between sweet and hot peppers too. So you might get an interesting offspring next year when you plant the seeds. They cross pollinate by wind and insect pollinators.
- It's still worth saving seeds. However, to keep your variety pure and to produce like in kind offspring, you could try to grow them far apart with a wind screen in-between (maybe a bean trellis). But that won't guarantee success.
- However, you can cover a few plants before the flowers open to keep the pollen from spreading. Then hand pollinate and keep the plants covered until fruit appears.
- Mark the selected fruits, that you know are good, with a ribbon and let them mature.
- Or you can try to grow a few peppers in a greenhouse or indoors. There you can keep out pollinators and wind.
- Then collect the seeds from fully mature fruits and dry them well before storing them in small paper envelopes.
End of Season
- Here is something cool you can do before the first frost hits. Remember that peppers are perennials? If you have room indoors, you can actually dig up the plants, cut about ⅔ of the plant back. Retain some of the trimmed bottom branches. Then shake most of the dirt off the roots.
- Place the plant into a very small pot and just keep the pepper plant near a window throughout the winter. Water only when needed.
- In the spring, pop your pepper plant back in the ground after all danger of frost has passed and keep it growing for another season. You'll get a head start on your pepper growing season.
- Well, It's done, frost came and went and your peppers are either dead or very likely just sad looking. It's time to let go untill next year. Hopefully you had an abundant harvest and saved some seeds that you can plant the next year.
Overwintering Peppers
- In mild climates, You can leave your pepper plants where they are till the spring. Prune them back to leave about one third to half of the plant and mulch, or cover with a row cover if you expect a few mild frosts.
- Peppers will not survive hard frosts. They are considered perennial in zones 9 and up. But if you have a mild microclimate in a lesser zone, it might be worth trying to over winter a few plants.
Planting In Pots
- If you don't have a garden spot, you can totally grow peppers in pots! I've done it many times, even though I had a garden, just to keep a few plants near my kitchen and also to overwinter them without having to transplant them.
- Especially the little chili pepper plants like dwarf Thai hot chilies, or the hybrid Super Chili. Super chilies are super fun to grow if you don't mind hybrids. Besides if you keep it as a perennial, you wouldn't need to save seeds. These are very suitable for smaller containers and smaller spaces. They are super ornamental too!
- Start your peppers the same way as described above. Then, instead of planting them into the garden, up-pot into a larger pot that is about a foot wide and a foot deep, or holds 3-5 gallons. Smaller pepper plants such as the Thai or Super Chili, will be ok in a 3 gallon pot. Bells should have at least 5 gallons or larger.