Lemon Balm Healing Salve Recipe
This healing salve recipe with lemon balm has fantastic benefits for the skin. Learn how Lemon Balm, or Melissa, can improve your well being! Make this salve so you have it on hand when you need some relief from sore skin conditions.
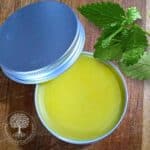
Yield: 10 ounces
Equipment
- Pint mason jar
- A small saucepan
- A pint canning jar, glass measuring cup or a small bowl
- Chopstick or other utensil for stirring. - chopsticks
- Cheesecloth, fine sieve, flour sack towel, or nut milk bag - flour sack towel, organic flour sack towel, a tightly woven cheesecloth or nut milk bag
- Small jars or tins for storing your salve 2oz glass jars - 2oz glass jars, metal tins that come in .5 oz sizes and include pretty labels. This size is perfect for lip balm. Or, for larger amounts, you can get 1 oz or 2 oz tin sizes. If you prefer to have a lip balm stick, you can get empty 5ml lip balm tubes
Materials
For the infused oil (makes one pint)
- 1 cup dried lemon balm leaves lemon balm herb
- About 2 cups Carrier oil Good choices are: sweet almond oil, avocado oil, or olive oil. I especially like jojoba oil and fractionated coconut oil
- For the salve
For the salve (makes 10 oz)
- ½ cup of the lemon balm infused oil
- ⅛ cup Beeswax pellets - beeswax pellets
Optional Ingredients (Please read the instructions in the post for specific uses and details on the optional ingredients)
- 1 tbsp Optional: Lysine - L-lysine
- 1 tsp Optional: Vitamin E oil - Vitamin E oil
Optional Essential Oils! 80 drops max of essential oils for spot treatments, 20 drops max for broad area applications!
- Lemon balm essential oil - Lemon balm essential oil
- Peppermint oil - Peppermint oil
- Clove oil - Clove bud oil
- Frankincense - Frankincense
- Tea tree oil - Tee tree oil
- Lavender - Lavender oil
- Thyme - Thyme oil
Optional Oils For Blends - Replace a portion of the lemon balm infused oil with either one of these oils.
- Chamomile - Chamomile herb (infused oil), or chamomile essential oil
- Calendula - calendula flower infused oil
Instructions
How to make Lemon Balm infused oil
- Fill your jar half full with the dried lemon balm leaves. You can crush the leaves for more surface area, but it's really not necessary with a slow infusion, which is what I recommend and what we'll use in this recipe.
- Fill the jar to the very top with your carrier oil.
- Seal tight and shake it. Place it in a warm spot such as near your woodstove, or in a warm, sunny window. I believe this solar exposure will also help to infuse the oil with more benefits and it is the traditional method.
- Shake your jar once a day or as you remember. Keep it warm and allow it to infuse for 4-8 weeks.
- Strain your herbs with a cheesecloth, several layers thick, a very fine mesh sieve, flower sack towel, or a nut milk bag.
- Now you should have a beautiful olive-green lemon balm infused oil that can be used for making a salve, to fill a roller bottle, or to use just plain as a massage oil for skin problems.
Make A Healing Salve With Lemon Balm Infused Oil
- Fill an inch or two of water into your saucepan.
- Place your saucepan on the stovetop.
- Put a cloth of some kind, or a rack on the bottom of the pot to keep your mason jar or glass measuring cup from touching the bottom of the pan. If you're using a bowl, just make sure the bowl is slightly bigger than the pot so it doesn't touch the bottom when you set it on top.
- Pour the lemon balm infused oil into your container.
- Add the beeswax pellets.
- Heat the water in the pot on your stove top or woodstove.
- Stir occasionally while it heats. Keep it from boiling. Beeswax melts at about 145 +/- degrees F.
- While this mix is melting, prepare your little jars, make sure they are ready to receive the liquid salve.
- Prepare your essential oils and the lysine if you elect to use them. Measure out the drops into a small measuring cup to have them ready.
- Once the wax is all melted, pour your lemon balm oil in it while stirring. If part of the wax solidifies again, just stir till it's melted and incorporated.
- Take the bowl or other container out of the pot carefully. Now carefully wipe any water off the outside of your bowl or jar. You don't want it running into your salve containers when you go to pour the salve. Take much care to not contaminate your oil with any water.
- If you elect to use added essential oils, you can do so now. Add your l-lysine as well at this point.Stir well for a minute. It takes a lot of stirring to truly incorporate the essential oils.
- Now don't delay. Carefully pour your oil into the prepared jars. If you use l-lysine, fill your jars only half full at first. Stir your oils before each jar to keep the lysine suspended. Then go back and fill the jars the rest of the way. This is to ensure that the l-lysine doesn't all settle to the bottom in the liquid oil.
- Let your jars cool completely before touching them. Seal the jars, label them and keep them in a cool, dark place.